Schlagwort: 3D Printer Reviews

  • Formlabs Form 2 Review – Best Resin 3D Printer of Fall 2018

    Formlabs Form 2 Review – Best Resin 3D Printer of Fall 2018

    Reading Time: 12 minutes

    The Formlabs Form 2 is our pick for the “Best Resin 3D Printer of Fall 2018”. Check out our Formlabs Form 2 review to find out why.

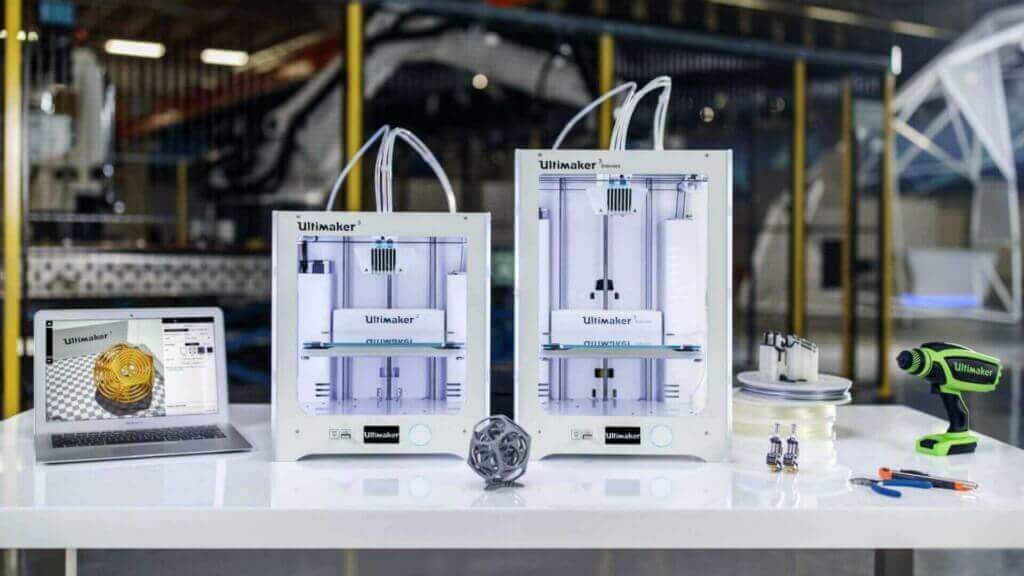
    When it comes to 3D printing, FDM printers take all the glory; Ultimakers, Prusas, and Crealitys are talked about constantly. Their machines offer makers, hobbyists, and semi-pros great creative tools. But FDM printers aren’t the only choice when it comes to 3D printing.

    If you are looking for professional printers that can deliver stunning details, stereolithography (SLA) machines are the right choice.They work with resin instead of thermoplastics. As of 2018, there are cheap SLA machines targetting hobbyist – and then there’s the category of SLA 3D printers that can be found in labs, professional fabs, universities, and engineering spaces.

    Formlabs holds the number 1 position for several years now. At $3,500 / €3,925, their flagship 3D printer Form 2 doesn’t come cheap. But it’s a fraction of the price you would pay for a 3D Systems ProJet 6000 HD.

    Don’t Miss:

    Also for a desktop machine, the Formlabs Form 2 has a quite powerful optical engine. The 250mW violet laser is guided by custom-built galvanometers, delivering prints in impressive quality. For the purposes of this Formlabs Form 2 review, we didn’t encounter a single misprint.

    Formlabs Form 2 Review: Pros

    • Print quality is brilliant
    • Easy to setup and maintain
    • Great interplay of hard- and software
    • Reliable and predictable results
    • Good software slicer
    • Great user interface
    • Relatively silent operation

    Formlabs Form 2 Review: Cons

    • No print without post-processing
    • Not faster than FFF 3D printers
    • Standard support structures are very dense
    • Changing resin is easier than with the Form 1+, but still no trivial task
    • Consumables (resin and tank) and the printer are expensive

    Formlabs Form 2 Review: The Verdict

    If you’re looking for a reliable, professional, high-quality SLA 3D printer, look no further. The Formlabs Form 2 is a workhorse that delivers stunning results.


    This high-class SLA 3D printer isn’t aimed at the regular consumer who wants to dabble in 3D printing. It’s for people who have a clear use case and a budget — so we’re talking about semi-professional and professional users.

    However, this SLA 3D printer is an excellent machine for prototyping. The Formlabs Form 2 can be a valuable addition to an engineer’s office, a dental lab or a jewelry designer — it really does turn your ideas into reality. It even can be used to manufacture (very) small batches.

    What makes this SLA 3D printer interesting is the consistent quality. While FFF printers need a constant balancing of parameters, temperatures, filaments, and extruders, the Formlabs Form 2 just delivers without you having to worry about quality. If you remember the old “Get a Mac” Apple Ads  pointing out the differences between Apple and Windows-PCs — that pretty much sums it up.

    But there are drawbacks, and they have to do with SLA technology itself. First of all, working with resin means you will have to do some post-processing. Formlabs offers a special post-production kit for the Form 2, which we found expensive but invaluable.

    Secondly, neither the printer nor the resins are a steal. For most people, the price of $150 for a liter of resin is too high, and over the longer term the cost of consumables will add up. Thirdly, the print dimensions are limited to 125 × 125 × 165 mm — if you are prototyping in bigger dimensions, you have to search for alternative solutions.

    But if you are looking for a 3D printer that just delivers with (nearly) every single print, you have found your match.

    Formlabs Form 2 Review: The Long Read

    Before we dig deeper in this Formlabs Form 2 review, here’s a short preamble on the differences between an SLA 3D printer and FFF 3D printer.

    Fused Filament Fabrication (FFF) is the most common desktop 3D printer technology. A FFF printer feeds plastic filament into a heated extruder and prints layers with the molten material. FFF 3D printers are versatile machines and can use different materials. But most of them lack predictability when it comes to results.

    Exactly this predictability is one of the strengths of SLA 3D printers like the Formlabs Form 2. It points a high precision laser on a tray of liquid resin, which causes a thin layer to solidify. This chemical reaction allows for the creation of water-tight printed parts. The 3D printing speed is comparable to FFF machines when comparing layer thickness and density. SLA printers are also known for printing high-detailed objects.

    Formlabs Form 2 Review: Unboxing and Setup

    Setting up the Form 2 was a breeze. Our Formlabs Form 2 review sample came securely packaged. We found every part nicely labeled. There’s a helpful setup guide on the Formlabs website. Even if you’ve never assembled a printer before, you can do this in no time.

    Just put the printer on a flat and sturdy surface (a.k.a. “table”). The dimensions of the printer are 35 × 33 × 52 cm, which is big, but not huge compared to other 3D printers.

    Next, you open the orange cover and attach the build platform. If you are new to SLA 3D printers, you might be surprised to find that the build platform of the Formlabs Form 2 hangs upside down… that‘s because the object is “drawn out” of the resin, so to speak.

    Formlabs Form 2 Review Build Plate
    Formlabs Form 2 Review Build Plate

    After that, you put the resin tray in place and click in the tray wiper. The latter is an improvement over the previous generation Form 1-series. Every time a layer is finished, the print bed moves up a little. Then the wiper moves and makes sure the resin is spread equally on the tray. The result? You’ll get fewer misprints.

    After this step, you slide the Form 2 resin tank into the printer, plug in the power cord, and start the printer. The tray is automatically filled with resin. We didn’t have to do any calibration (unlike with the Form 1 and Form 1+).

    Last stop is adding the Formlabs Form 2 to your wireless network. As an alternative, you can use the USB- or Ethernet ports to transfer files.

    All in all, setting up the Formlabs Form 2 didn’t take us more than 1 hour.

    Formlabs Form 2 Review: Available Resin Types

    Formlabs Form 2 review materials
    Formlabs Form 2 review materials

    There are several resin types to choose from. The resins consist of methacrylic acid esters, photoinitiators, proprietary pigment, and other secret ingredients. If you are planning to use your own resins, you will run into problems — the cartridge system of the Formlabs Form 2 is proprietary.

    Formlabs offers two flavors of standard resins. The standard resins come in clear, white, gray, and black. A liter of these “bread and butter” resins costs €160 / $150 — that’s not exactly cheap.

    The second type of resins for the Formlabs Form 2 are functional resins. They also come in different flavors.

    • Tough Resin is good if you want to have more durable or resilient prototypes. The standard resin isn’t strong enough for daily use. They break easily. So this is the one you should order if you’re building functional parts. A 1-liter tank costs €160 / $175.
    • Flexible resin is bendable and compressible. You pay $199 for a liter.
    • Castable resin is made with jewelers in mind. The resin burns out without ash or residue. The price is $300.
    • Dental resin is Class 1 biocompatible. It’s designed to directly print surgical or pilot drill guides. If you don’t have a clue what that is, you’ll probably never need to order it. Price is a whopping $399.

    But wait, there are other consumables! First, there’s the resin tank, which — according to Formlabs — should be switched out every 2 liters of resin. A tank will cost you €66. It also comes with the wiper.

    You can also buy a second build platform if you want to speed up the workflow in an intensive use case scenario.

    Formlabs Form 2 Review: Software

    Form 2 Review Software
    Form 2 Review Software

    In our Formlabs Form 2 review process, we found the interplay between the software and hardware to be the real beauty of the 3D Printer.

    For 3D printing, you need a software slicer to tell the 3D printer what to do. Formlabs have developed their own tool called PreForm. As with other 3D slicers, it lets you import STL files, which are placed on the print bed and displayed in the software. PreForm also auto-repairs broken meshes.

    In most cases, you don’t want to 3D print your object directly on the build plate, as you might accidentally scratch it when you try to remove it. To prevent this, Preform invites you to add supports, which are customizable in density and strength. The support structures on the build plate are bent slightly upwards, so you can slide a removal tool under them — that’s clever!

    There‘s also a “One Click Print” button, which should be sufficient for most use cases. Unless your 3D object doesn’t fit the printer, you will probably not adjust the size. It’s also possible to place several objects onto the build plate and have it 3D printed in one go.

    The software auto-rotates the object and adds support structures where needed. If you’re happy with your results, the software will calculate the layers and give you an estimate on how many layers will be printed and how much resin you’ll need for it. One thing that was somewhat annoying; Preform only shows you the estimated printing time if you click on the field… this should be an easy option to add.

    The print is now transferred wirelessly to the 3D printer. If you‘re printing a highly complex and large model, calculating and transferring can take up a few minutes.

    To start the print, you have to press a button on the printer itself.

    The Formlabs Form 2 will retain most of the 3D prints you’ve already made, so you can start a new print without having to run to the computer again. It’s the little things like these that make this 3D printer a joy to use.

    The software can also notify you by mail when the print is finished — that‘s a thing you’d love to see as standard in many FFF 3D printers.

    If you’re designing 3D objects, you should know that the minimum supported wall thickness is 0.4 mm, and the unsupported wall thickness is 0.6 mm. A proper design guide can be found at the Formlabs site.

    Formlabs Form 2 Review: Printing

    It takes the Formlabs Form 2 considerable time to heat up the resin tray to 30 degrees Celsius / 95 degrees Fahrenheit. If you place the printer in a very hot or very cold environment, you might reconsider taking the printer to a more “moderate climate”. When the resin is at the right temperature, the build plate lowers itself into the resin-filled tray.

    You can keep track of your print on the touchscreen, on your computer, or even on a smartphone. Formlabs uses a ring in lieu of a progress bar. The outer ring shows the layers, the inner one the progress of the current layer. Also, there’s a constant time estimate of remaining print time.

    Over the course of our Formlabs Form 2 review, we found the graphical user interface of the printer to be extremely clear, helpful, and easy to understand. We also liked the LCD touch screen — it’s bright and responsive. The menu isn’t overloaded with information and displays the right choices at the right time. There’s only one button which is used for confirming actions and also serves as the power switch.

    Formlabs Form 2 Review Power Switch
    Formlabs Form 2 Review Power Switch

    The build speed is comparable to FFF machines when comparing layer thickness and density. It’s roughly 1-3 cm/hour along the Z axis when printing at 100 microns. The Formlabs Form 2 can 3D print in 25, 50, and 100 microns.

    Formlabs Form 2 Review: Post-Production

    Formlabs Form 2 Post Production
    Formlabs Form 2 Post Production

    Post-production is where SLA printing becomes ugly. If you‘re using an FFF printer, you just pluck the model from the build plate, and you’re usually ready to go. For SLA 3D printers like the Formlabs Form 2, that‘s not the case.

    As you’re printing with liquid resin, you will have to remove the print from the plate, immerse it in chemicals, then remove the supports. This can take up a considerable amount of time.

    Formlabs offers a finishing kit, which we found extremely helpful. It consists of a rinse station with two buckets, which you partially fill with isopropyl alcohol (IPA).

    Formlabs Form 2 Review Finishing Kit
    Formlabs Form 2 Review Finishing Kit

    Before you begin post-processing, you should wear protective gloves and eye protection. Avoid breathing in gas, mists, vapors or spray of resin — or any other chemicals — and wash your skin thoroughly after handling. Working with resin is considered to be relatively safe, but in some rare cases, skin irritations and allergic reactions have been reported.

    First, you should put on some rubber gloves. Be careful when removing the build plate. As it’s still covered with liquid resin, the “goo” has a tendency to drip. Next, you need the removal tool to slide it under the “quick release tabs” generated by the PreForm software. With larger prints, you’ll need to pry them firmly from the build platform.

    Next you rinse the print; drop it in the tank and leave it there for roughly 20 minutes. For smaller parts, reduce the soak time accordingly. A rinse bottle will help you clean any internal channels of your print.

    formlabs form 2 Post-Production 2
    formlabs form 2 Post-Production 2

    Allow the (still sticky) print to dry for several hours. As a final step, you remove the support structures with a pair of “flush” cutters. This can be demanding, as the Preform software has the tendency to make the supports a little stronger than needed in order to provide a good print.

    In our Formlabs Form 2 review process, we found that too many supports can leave ugly dots on your final print — if you want perfect results, you’ll have to experiment with the support structure settings and also clean them after removing the support. Also, we found it quite hard to remove supports that lie in the inner structures of a delicate print.

    You could even break some delicate pieces from your print, as we did in this example.

    Formlabs Form 2 Review Misprint
    Formlabs Form 2 Review Misprint

    You can then finish your prints by spraying them with acrylic paint, or post-cure them in UV lightboxes. Formlabs provide good support information on priming prints.

    Formlabs Form 2 Review: Wrapping up

    As we’ve stated several times in our Formlabs Form 2 review — this is a stunning machine! We were very impressed with the quality of results this SLA 3D printer delivered, and it did it constantly.

    There are some challengers to their crown. If you consult this list of competitors, you’ll find that most rival machines start at $5000 — so for small budgets, the Formlabs Form 2 stays “best in class.” The cheapest alternative we can recommend is XYZ Printing’s Nobel 1, which only costs $1,900, but is said to deliver less quality (we haven’t reviewed this printer yet).

    If you just want to print out high detail models only occasionally, you might be better off ordering from a 3D printing service. The costs of the consumables (trays, resin) for the Formlabs Form 2 add up and will dent a hole in a non-professional budget.

    But if you are looking for a reliable, professional, high-quality SLA 3D printer you can use on a daily basis, then look no further. The Formlabs Form 2 is a premium printer that delivers stunning results.

    License: The text of „Formlabs Form 2 Review – Best Resin 3D Printer of Fall 2018“ by All3DP is licensed under a Creative Commons Attribution 4.0 International License.

    Subscribe to updates from All3DP

    You are subscribed to updates from All3DP

    Website: LINK

  • JGAurora A5 3D Printer: Review the Facts Here!

    JGAurora A5 3D Printer: Review the Facts Here!

    Reading Time: 2 minutes

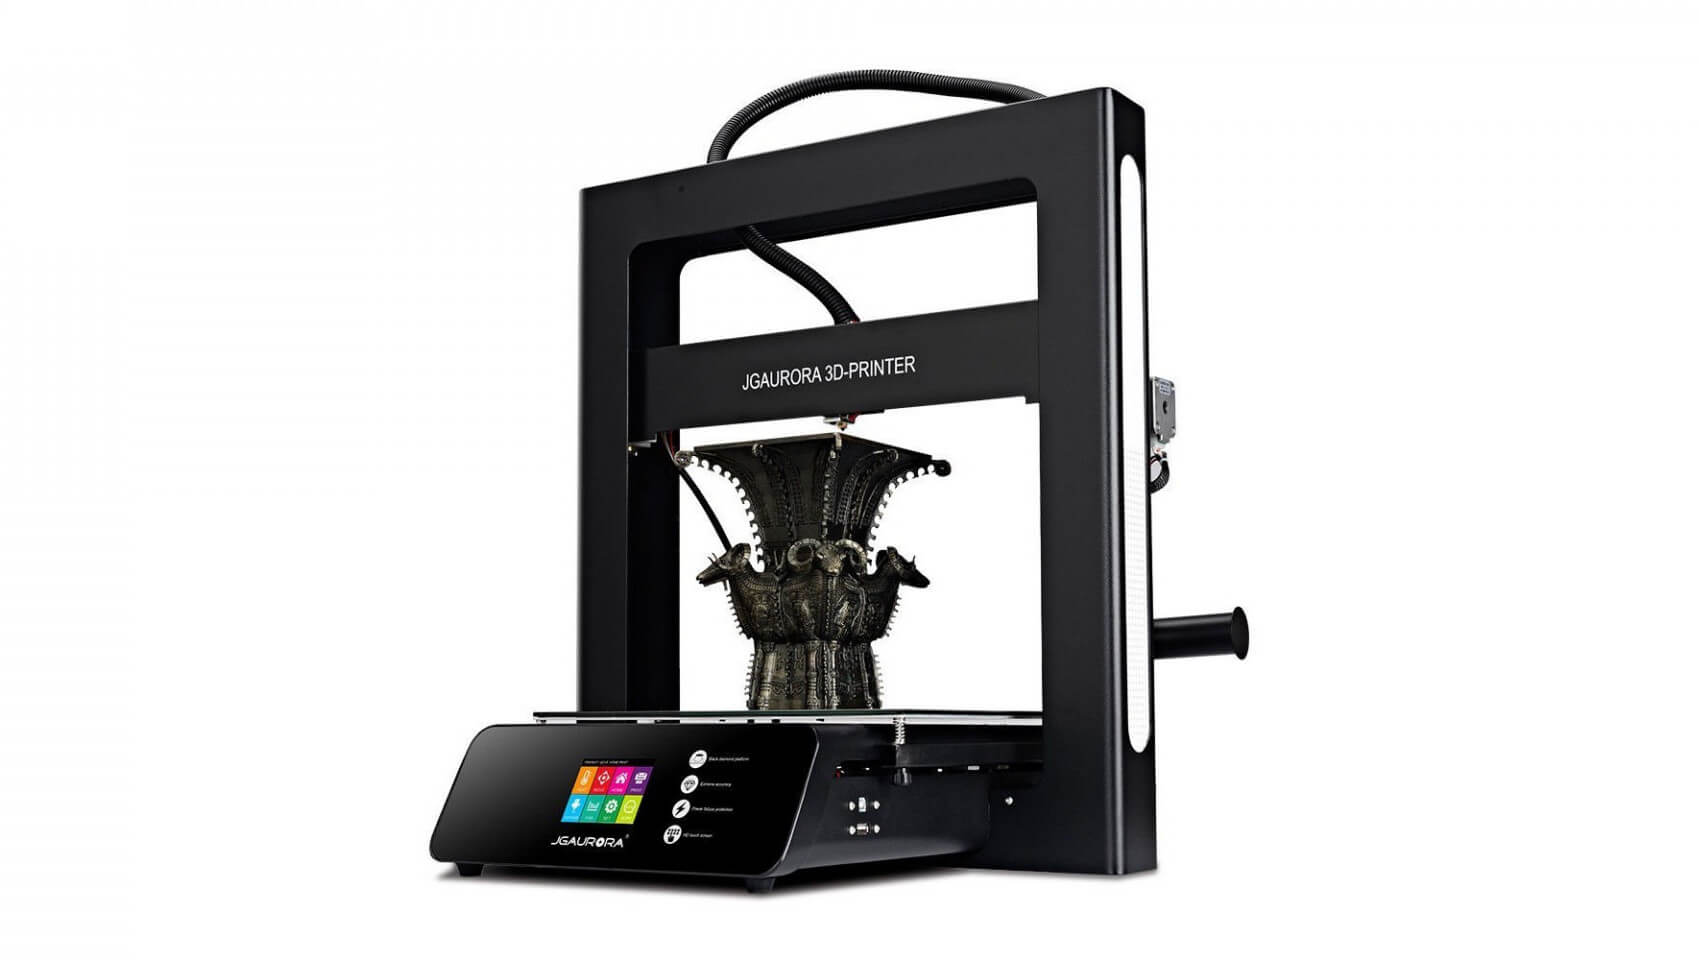
    The JGAurora A5 is a big machine – if you want to add it to your workshop, you’ll definitely need to clear some space. The printer itself is capable of producing prints as big as 305 x 305 x 320 mm, which puts it in the range of the popular Creality CR-10 (300 x 300 x 400 mm, in-depth review here).

    The JGAurora A5 3D printer comes partially assembled. All you have to do is to mount the Z-Axis to the base part, set up the spool holder, make sure set the machine to the proper voltage for your country. The whole process shouldn’t take longer than 1 hour.

    Having done that, you attach the spool holder and feed the filament in the Bowden extruder. Beginners should start 3D printing with the PLA provided in the box, as it is easier to handle than notoriously difficult materials like ABS or Nylon. The hotend, by the way, is an E3D V6 hotend clone with a custom heatsink.

    The heat bed (the manufacturer calls it “Black Diamond Glass Heated platform”) is a glass plate with some additional coating, comparable to the Anycubic Ultrabase. Before you start the first prints on the JGAurora A5 3D printer, you have to level the bed. The printer software will help you by moving the nozzle to the bed’s edges, but you still have to calibrate the bed manually by turning screws.

    Models can be loaded via a USB stick. Alternatively, you can hook up the machine to a computer and print directly from there. Even if there’s a Wifi option in the printer menu, it is clearly not working and also not advertised to do so. Also, there’s no SD card slot available.

    When it comes to slicing, the manufacturer recommends Cura. For the right settings, please follow this informative thread on Thingiverse.

    There are two interesting features on the JGAurora A5 3D printer that you don‘t find in most printers.

    1. Filament out detection: Every time the filament runs out, the printer stops and emits a loud warning signal.
    2. Power recovery: Not only the Prusa i3 MK3 offers this great feature. The JGAurora A5 3D printer can handle power outages and, according to Maker’s Muse, the printer handles this perfectly. When reconnected to a power line, the printer heats up the hotend and continues without any problems.

    Website: LINK

  • TEVO Tornado 3D Printer: Review the Facts Here

    TEVO Tornado 3D Printer: Review the Facts Here

    Reading Time: 2 minutes

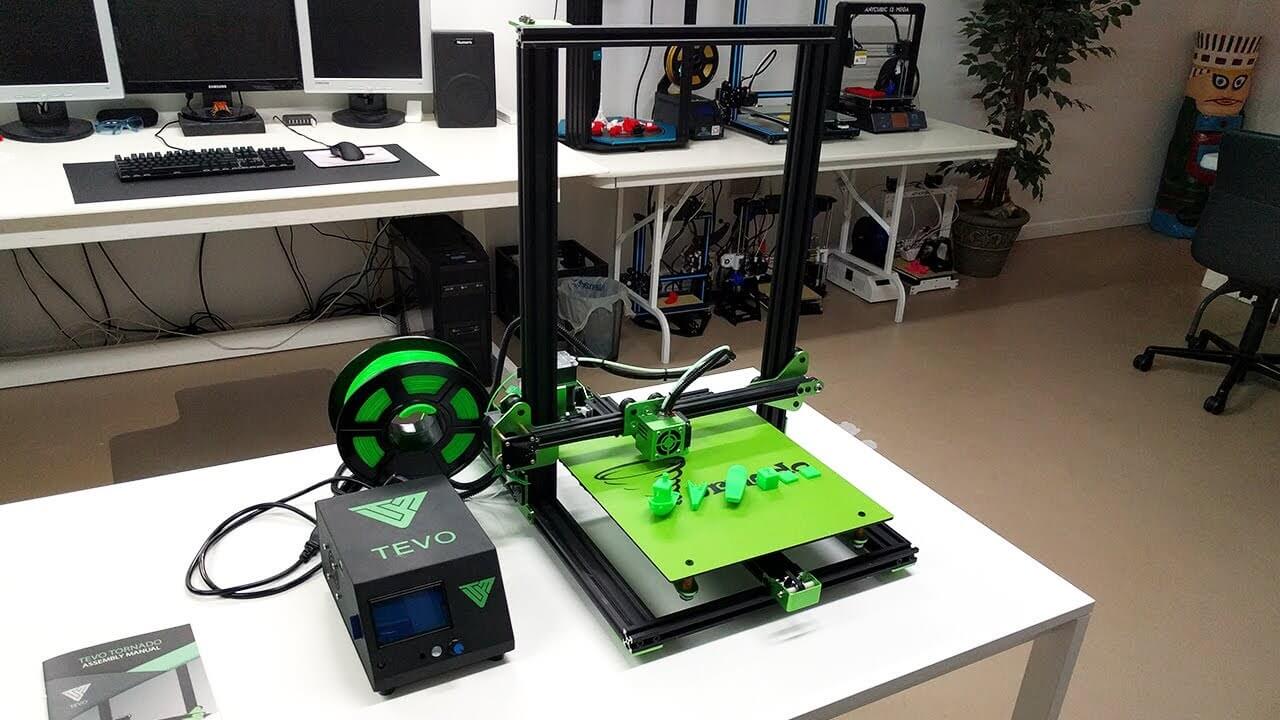
    Generally speaking, the most appealing feature of the TEVO Tornado 3D printer is the 300 X 300 X 400 mm build size, which for around $350 seems like a bargain in-and-of-itself.  Pair that with a 50 micron minimum layer thickness and a 150 mm/s print speed, and this 3D printer sounds pretty decent.

    The TEVO Tornado 3D printer is partially assembled, but most people should be able to get everything setup in under an hour.

    At first glance, the TEVO Tornado 3D printer looks like a clone of the extremely popular Creality CR-10 (and in many ways, it is identical). However, there are a few features that separate these two similar FDM machines.

    One of the biggest differences is that the TEVO Tornado comes equipped with a Titan extruder from E3D. This high-end accessory is commonly used to upgrade budget 3D printers, but TEVO opted to include it with the stock kit. With the Titan extruder, the 3D printer should be better able to handle a wide range of filaments, such as PLA, ABS, PETG, exotics, TPU, and others.

    Another defining feature of this 3D printer is the 110 volt heated bed, allowing the print area to heat up to high temperatures in under a minute. On the other hand, some people in the 3D printing community claim that the Creality CR-10 offers better quality electronics and a larger support group.

    Last but not least, the TEVO Tornado tends to be a bit cheaper than the Creality CR-10, but not by much. The prices for both of these 3D printers seem to vary from time to time, but the TEVO is usually around $20-30 cheaper.

    There are a few issues that TEVO Tornado 3D printer owners have reported on various forums and community groups. One glaring problem that has been raised by the 3D printing community is “salmon skin” on the surface of 3D prints. As you can guess from the name, some users have reported that the 3D printer produces objects with a strange striped pattern. However, this reported dilemma can be remedied with stepper smoothers.

    After skimming through the TEVO Tornado Owners Facebook group, which has nearly 6,000 members, we noticed a few other issues that were being discussed. Some users claim to have an issue with the quality of 3D prints coming from the SD card that TEVO provides. Others have noted low voltage to the Y-axis stepper motor, which can be alleviated by increasing the voltage.

    With a 3D printer at such a low price point, these various issues are neither surprising nor a deal breaker. However, it’s certainly worth noting the downsides alongside the advantages. Like many desktop FDM machines under $500, the TEVO Tornado is a project 3D printer, and could require some tweaking and modifications to achieve higher print quality.

    Website: LINK

  • Tronxy X1 3D Printer: Review the Facts Here!

    Tronxy X1 3D Printer: Review the Facts Here!

    Reading Time: 2 minutes

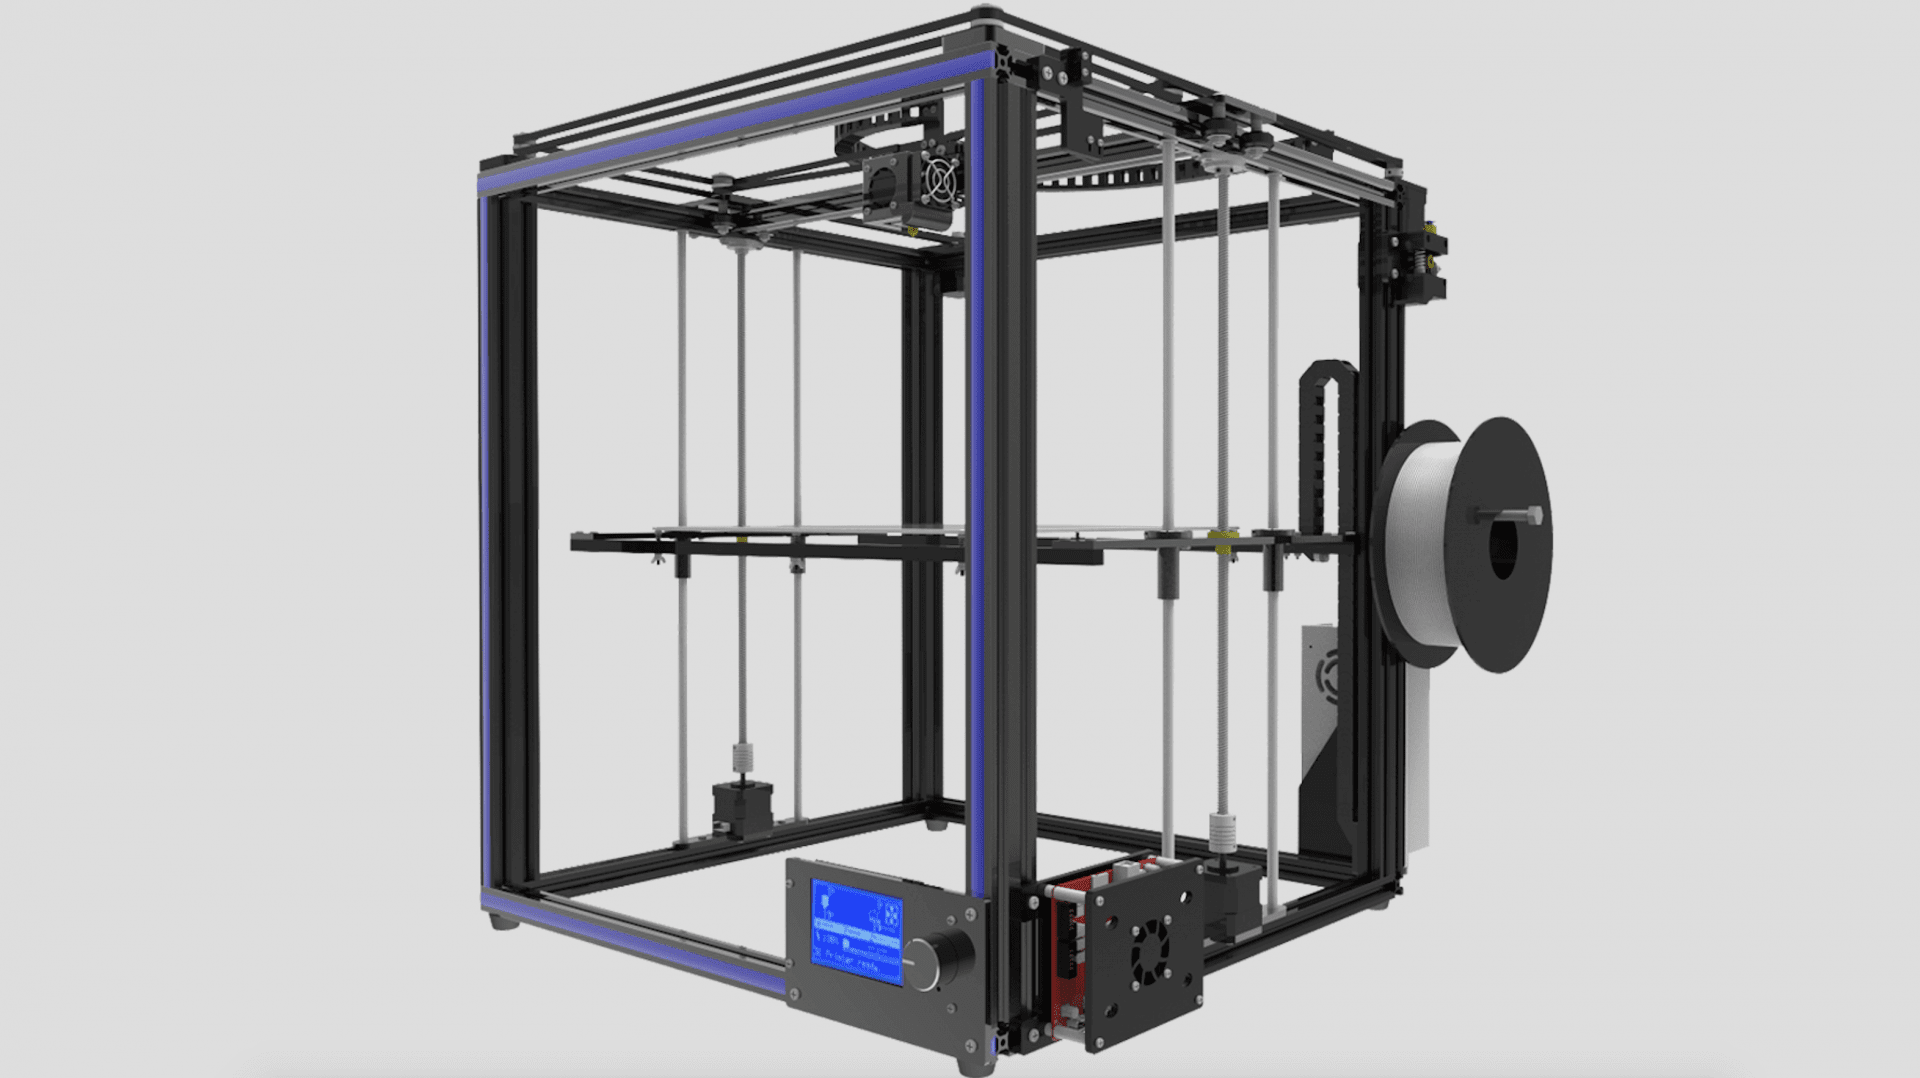
    There are a few features that make the Tronxy X1 3D printer a viable option for consumers on a budget. However, the most enchanting perk of this 3D printer is the exceptionally low price tag. It can regularly be found on retail websites like GearBest and AliExpress for under $150.

    This 3D printer is a DIY kit, but the simple single-arm design makes it easier to put together than other unassembled kits, such as the Anet A8. Although we haven’t had the opportunity to build the Tronxy X1 3D printer ourselves, the general consensus from user comments on GearBest is that its incredibly easy to assemble. Unlike many other cheap DIY kits, the Tronxy X1 is said to have impressively descriptive documentation.

    There are some complaints about things like a wobble in the X-axis, but these issues seem easily solvable with a bit of tweaking and tightening.

    With this inexpensive DIY kit, you get a sturdy aluminum frame, 150 x 150 x 150 mm build area, and 100 micron resolution. The X1 also has an external control box, which is where the SD Card slot is located.

    As one of the cheapest DIY 3D printer kits on the market, the Tronxy X1 is becoming more and more popular for makers on a strict budget. But with that low price comes a few sacrifices.

    The printer has no heated bed–making it difficult to print materials outside of PLA– no part cooling fan, and no auto-leveling function. In a video review from YouTuber Maker’s Muse, he alleviates the fan issue by setting up a desktop fan beside the printer. As you can see, the printer is quite limited in functionality, but if you get a bit creative you can maximize the potential of the Tronxy X1.

    For less than $150, it’s not shocking that these features are missing, and the printer seems to deliver quality prints for the price point. If you want to invest more into improving the  3D printer over time, you can purchase and mount features like a heated bed and part cooling fan.

    Website: LINK

  • TronXY X5S 3D Printer: Review the Facts Here!

    TronXY X5S 3D Printer: Review the Facts Here!

    Reading Time: < 1 minute

    The TronXY X5S is one of the new 3D printers kits which seems to hit a sweet spot with customers worldwide. TheTronXY X5S is the bigger brother of the TronXY X3S and has overtaken it in popularity. Since early 2018, it has become one of the best-selling 3D printers on stores like Gearbest and Aliexpress.

    The most obvious feature of the machine is its size. A 3D printer that offers a build volume of 330 x 330 x 400mm for under $300 sounds like a very good deal – but is it really?

    Please note that this is not a full Tronxy X5S 3D printer review, as All3DP’s editorial team hasn’t taken an in-depth look at the printer. But can provide you with insights on what the specifications really mean. Also, we’ve collected voices from the 3D printing community that have built a TronXY X5S.

    Website: LINK

  • Lulzbot TAZ 6 Review: The Best Large Format 3D Printer

    Lulzbot TAZ 6 Review: The Best Large Format 3D Printer

    Reading Time: 11 minutes

    The Lulzbot TAZ 6 comes assembled in a sizable box that features its name in big, bold letters alongside the company’s iconic logo. This triumphant choice in packaging fits the printer’s large build volume and open source bravado that Aleph Objects prides itself on.

    Right away, unpacking this printer reveals a number of useful tools and components. Aleph Objects includes the following with the Lulzbot TAZ 6 3D printer:

    • LulzBot Hexagon Hot End Tool Head with 0.50mm Nozzle
    • Quick Setup Guide
    • 4GB SD Card
    • Filament Feed tube
    • Toolkit bag
    • 15 Piece Metric Hex Key Set
    • Pliers, Needle Nose
    • Tweezers
    • Standard Precision Knife
    • Dental Pick
    • Part Removal Knife (clam knife)
    • Metric Ruler
    • Complete documentation for Lulzbot TAZ 6

    Now, with all of these spare parts, you might assume that some assembly is required for this printer. But the Lulzbot TAZ 6 demands the minimum amount of effort from the user. Simply snap everything into place and you’re ready to start calibrating just 20 minutes after tearing the packaging tape away from the printer’s vibrant box.

    This task is made even easier by the exceptional and eye-catching documentation that accompanies the Lulzbot TAZ 6. There are three different booklets included with the 3D printer, including a comprehensive user manual, as well as a “Start Here” and “Operation” guide.

    The introductory “Start Here” guide offers a step-by-step on how to properly unpack and setup your Lulzbot TAZ 6. Upon cracking open this booklet, you’ll find a plethora of high-resolution images and corresponding information. First, the user must remove the packaging foam and tape used to protect the printer during its shipping journey.

    After these preliminary steps, it’s time to assemble the remaining parts of the Lulzbot TAZ 6. Following the guide, this entire process should only take about 20-30 minutes to complete. To start, you must mount the Y-axis assembly to the printer frame, using four thumbscrews to secure the print surface in place.

    There are a few additional cables to connect (all of which are visually displayed in the documentation), followed by mounting the tool head. Again, this is another step that the Lulzbot team has managed to make as intuitive and convenient as possible. Last but not least, you snap the filament guide tube onto the side bracket and voilà, it’s time to start printing.

    Although the setup was mostly trouble-free, I did have a gripe with the way this filament guide tube was assembled. But more on that in the following section. From the “Start Here” guide, we move directly into the “Operation” booklet, which details how to get printing after assembly is complete.

    The guide helps you get acquainted with the special Lulzbot edition of Cura, the popular 3D printing slicer developed by Ultimaker. It also shows how to properly load filament and ensure that you’re first print goes off without a hitch. Lastly is the Lulzbot TAZ 6 user manual, which isn’t needed to start printing, but offers a comprehensive overview of everything you need to know about the hardware and software.

    Generally speaking, Aleph Objects’ 3D printer range arguably has one of the best minimalistic designs on the market. The Lulzbot TAZ 6 is certainly no exception to this. The printer’s frame is comprised of a sturdy black powder-coated metal, with smooth steel rods that use self-lubricating linear bushings. Sprinkled amongst the sleek black frame are components printed in Lulzbot’s lime green material, adding a little vibrance to the otherwise stark design.

    As we’ve mentioned, the Lulzbot TAZ 6 is pretty gigantic, and the minimalist frame allows you to observe the 3D printing action from almost any angle.

    While most of the setup process was pretty intuitive, one glaring issue was the erratic filament feed guide tube. The starting point of this tube contraption connects right behind the printer’s spool holder. But from there, the user is left with a wonky tube that has no real endpoint, and ends up sort of just hovering above the extruder.

    During one print, the tube was being whipped around by the extruder so much that my PETG filament snapped mid-print. After situating the tube in a better position, this problem didn’t occur again. We were even able to resume the print after reinserting the filament, which showcased the printer’s ability to pickup where it left off. Still, it was one of the few flaws we found amongst the otherwise impeccable design.

    The user interface is tastefully placed in the upper lefthand corner of the printer, easy to access without being overly intrusive. Sleek, sturdy, and simple are the three perfect words to describe the design of the Lulzbot TAZ 6.

    After setting up the Lulzbot TAZ 6, it was time to start with our first print. And what better way to christen a Lulzbot 3D printer than with the beloved Rocktopus model. This suave octopus is an easy and quick print, holding up its one human-like hand making the sign that is synonymous with rock-and-roll.

    However, the standard Rocktopus model is underwhelmingly small compared to the build size of the Lulzbot TAZ 6. Thus, we used Lulzbot Cura to scale up the design fill the print bed.

    The resulting print is a massive sea creature diligently telling us all to keep on rocking. Even at this massively increased size, the large-scale Rocktopus came out with superb detail.


    Once we completed the two Rocktopus prints, we moved onto the one-and-only 3DBenchy model, the acclaimed 3D printer torture test that comes in the form of a tiny boat.

    Upon opening the latest version of Cura Lulzbot Edition, the slicer offers three different preset printing profiles mode: high quality, high speed, and standard. Interested in what each of the three profiles offered, we decided to print a Benchy model for each.

    In the Standard profile (0.25mm), the Benchy model was nearly flawless, handling overhangs and geometric shapes with ease. The only noticeable issue was the small text on the back of the boat, which was likely muddled due to the printer’s 0.50mm nozzle. Despite this, the Lulzbot TAZ 6 produced a fine little ship on the Standard setting. It took about one hour and 05 minutes to print.


    3DBenchy printed with different slicing profiles: High Speed (Left), Standard (Center), High Quality (Right)

    On the “High Speed” profile (0.38mm), the print speed was increased greatly, spitting out a formidable Benchy in just 43 minutes. However, the difference in quality was definitely apparent, particularly in the ship’s hull. The base of the Benchy model was far from perfect, but the overhangs and geometrical shapes on top came out almost identically to the “Standard” Benchy.

    Finally, it was time to try out the “High Quality” profile (0.15mm). This particular Benchy model came out incredibly smooth, by far the best resolution of the three. However, we noticed that the first layer (which shows the “CT3D.xyz” text) was completely missing.

    A bit flabbergasted by this issue, we dug a bit deeper to figure out what the problem was. After some investigation, it seems that there was a bug within the slicer software, not the hardware. Aside from the mysteriously missing first layer, the high-resolution Benchy passed most of the benchmarks. It took about one hour and 20 minutes to print.


    Despite the apparent bugs in the Cura Lulzbot Edition slicer, the printer itself had proven itself to be worth the hype thus far.

    After the initial journey printing the 3DBenchy and Rocktopus models, it was time to kick things into gear and find out what the Lulzbot TAZ 6 was really capable of. We printed an array of models in different filaments types, including ABS, PETG, Flexbile, Woodfill, and other exotic materials.

    Looking to print something functional that would also test the ability of the Lulzbot TAZ 6, and so we selected the popular Measuring Cube by iomaa. We figured this to be the perfect model to test considering the food-safe nature of PETG filament. The design is both practical and has geometric properties that will challenge the printer.


    The Lulzbot TAZ 6 handled the Innofil EPR InnoPET with ease, producing smooth layers and stunning details. The most impressive parts of the print are the difficult angles printed without supports, as well as the different measurements that are cleanly inscribed on the model.

    Next up, we loaded in some ABS to print the Gear Bearing design by emmett. The model is a planetary gear set that is meant to be pre-assembled, meaning you get a rotating gear system right off the print bed. After scaling up the model to make it bigger, we printed it with Blue ABS from Rigid.ink.


    The Lulzbot TAZ 6 also managed to print this material with phenomenal results. It took a bit of twisting and turning to loosen the model up, but soon after the print was complete we had a working gear that was printed as a single piece.

    We also wanted to experiment with exotic filaments like wood and metal filled PLA. We used 3D Cork from the Polish filament producer Pri Mat3D to print everyone’s favorite model: Baby Groot. The Lulzbot TAZ 6 was able to print this cute little waving character with no supports, and the Cork filament provided a woodsy charm that suits the model perfectly.


    There were a few issues with retraction, leaving some stringy or rough surfaces on the print. However, with a bit of tweaking to the slicer settings, the wood fill can surely be optimized to turn out even better.

    Last but not least, we decided to give flexible filament a go, using Yellow Flexfill material produced by the Czech company Fillamentum. Unfortunately, we didn’t have the LulzBot TAZ Flexystruder Tool Head v2 at our disposal. The optional tool head is engineered to print with flexible filaments, and without it, we were unsure of how the Lulzbot TAZ 6 would react.

    Refusing to be deterred, we loaded up the flexible filament and circled back to the beloved Rocktopus model. It took some tweaking and one failed print, but we were ultimately able to print a decent model with the printer’s stock tool head.

    There was a bit of stringiness left on the model, but this is a common theme when 3D printing flexible filaments. All in all, we were impressed to see the Lulzbot TAZ 6 handle this difficult material without the specially developed Flexystruder.

    We’ve briefly mentioned some of the trouble we had with the latest Cura Lulzbot Edition slicer, but overall the software was both accessible and expansive. While slicing a 3D model, you can either use the recommended settings for a specific filament and printing profile, or you can customize and tweak each part of the printing process.

    When using the custom print setup, the Cura Lulzbot Edition slicer allows you to control every aspect of the shell, infill, print speed, cooling, experimental settings, and much more.  Advanced users can take complete control over the Lulzbot TAZ 6, while the user interface on the printer offers further possibilities to modify setting mid-print.

    With the recommended print setup, there’s a long list of materials to choose from. Although many filament types are not included on this preset list, you can easily import settings or create your own filament profiles.

    Aside from our aforementioned bug issue with the “High Detail” profile, the slicer itself seems a little bit slower than other options, including the basic version of Cura.

    All in all, the specialized slicer is easy to use and provides full control over the Lulzbot TAZ 6. Still, the slicing speed and issue with printing profile keeps Cura Lulzbot Edition from earning a perfect 10.

    After testing the Lulzbot TAZ 6 with a multitude of filaments and models, we found this monstrous machine to be exceptionally reliable and easy to use.

    The generous build size, unmatched dependability, and sturdy design makes the Lulzbot TAZ 6 well worth its high-end price.

    The Lulzbot TAZ 6 printer is certainly not for makers on a strict budget. But those who are willing to pay the price for a steadfast and enormous printer will be hard-pressed to find a better option. While we faced a few issues with the slicer, the hardware itself worked incredibly well.

    We ultimately found the Lulzbot TAZ 6 to be a beastly and highly reliable machine. We fed multiple types of filament through the extruder, including PLA, ABS, PETG, Exotics, and even flexible. All of these materials printed successfully, and most with impeccable quality. Needless to say, as frequent users of the Lulzbot Mini, we were very pleased with our Lulzbot TAZ 6 experience.

    All in all, the Lulzbot TAZ 6 is a workhorse designed for pro-sumers and hobbyists that want to keep their maker spirit going from sunrise to sundown.

    However, it the Lulzbot TAZ 6 is a bit outside of your price range, take a look at some worthy alternatives below.

    If the Lulzbot TAZ 6 is a bit outside of your price range, or the sheer size of this printer just frightens you, there are a number of good alternatives you can turn to.

    First and foremost, you can downsize to the Lulzbot Mini, a smaller and more inexpensive member of the Aleph Objects family. For half the price, you’ll get a 152 x 152 x 158 mm build volume and equal 3D printing capabilities. However, unlike the Lulzbot TAZ 6, the Mini has no standalone 3D printing feature, which means you’ll have to stay tethered to a PC.

    If size is an important factor, but the Lulzbot TAZ 6 is outside of your price range, the Creality CR-10 may be a suitable alternative. Although you lose a bit of that reliability that Aleph Objects offers with its 3D printers, the CR-10 has quickly become the go-to option for makers on a budget. For under $500, you’ll get a print area of 300 x 300 x 400mm. However, keep in mind that you’ll be missing out on the consistency and performance that comes with owning a Lulzbot 3D printer.

    Zortrax M300


    Check Price

    Is the Lulzbot TAZ 6 just not big enough for you? Perhaps the Zortrax M300 will tickle your fancy with its 300 x 300 x 300 mm build area. This Polish 3D printer is a bit bigger, but it also cost more money. On top of that, you miss out on the advantages of having open source hardware, as the M300 will encounter more restrictions than the Lulzbot TAZ 6.

    Website: LINK

  • Sinterit Lisa Desktop SLS 3D Printer: Review the Facts!

    Sinterit Lisa Desktop SLS 3D Printer: Review the Facts!

    Reading Time: 3 minutes

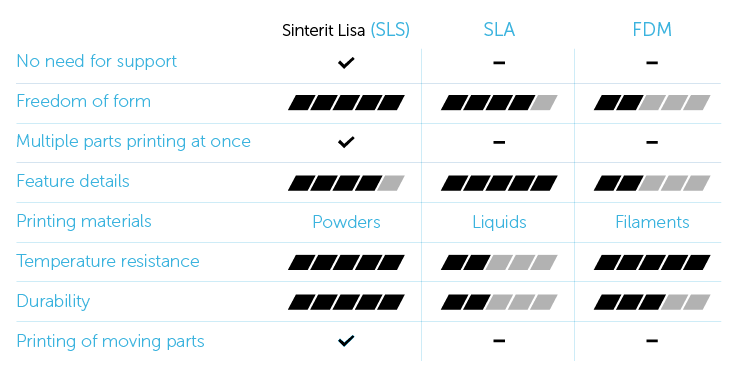
    What makes the Sinterit Lisa so unique is the successful integration of SLS technology into a compact and easy to use machine. Generally speaking, there are a number of advantages that SLS technology offers over FDM and SLA, such as the ability to print without supports, nest multiple objects in a single printer, and produce parts that offer increased durability and temperature resistance.


    Sinterit Lisa

    The Sinterit Lisa manages to boast these same benefits at a major fraction of the cost. The printer is designed for small business, designers, or engineers that need functional prototypes and parts.

    With SLS 3D printing technology, you are able to print without the need for support structures. Moreover, you can nest multiple parts in a single powder bed, making the technology more efficient than FDM and SLA 3D printing in many cases.

    The Sinterit Lisa offers a minimum layer thickness of up to 0.075 mm, XY accuracy of .05 mm, and a 150 x 200 x 150 mm build volume.


    Sinterit Lisa

    The Sinterit Lisa also includes a 4-inch touchscreen to walk you through the entire printing process, from the initial set-up to cleaning the machine once the print is complete. There’s also Wi-Fi connectivity and an onboard camera, which means you can watch the print process through the screen.

    Currently, Sinterit is offering two proprietary non-toxic powders, including PA12 and Flexa Black. After sandblasting the model, you’re left with a functional part straight from the printer. The Sinterit Lisa includes all of the tools you need to start printing, and the team also offers installation and training.

    Although the Sinterit Lisa is compact and inexpensive for a SLS printer, it’s still a professional-grade machine that should be taken seriously. You need a workshop that is fit for handling tasks like sieving fine powder and sandblasting.

    Nonetheless, the Sinterit Lisa is the most accessible SLS 3D printer currently on the market, making it a intriguing option for pro-sumers and small businesses.


    Sinterit Lisa

    Website: LINK

  • Beginner’s Guide on How to Buy a 3D Printer

    Beginner’s Guide on How to Buy a 3D Printer

    Reading Time: 5 minutes

    So you want to buy a 3D printer? Read this guide before you go shopping to get the best printer for your needs and your budget.

    You’ve heard so many great things about 3D printers and what you can do with them. There are so many wonderful machines which can make your builder’s dreams come true. But if you want to buy a 3D printer, what model should you choose? How much should you spend? And where’s the best place to buy a 3D printer? Here’s a guide to the most pressing questions when buying a 3D printer.

    How to Buy a 3D Printer – Question #1: Should I Buy a 3D Printer?

    Before you start shopping, first think about what and how often you want to 3D print. Here’s our experience in a nutshell:

    • If you are eager to try out the technology, you’re probably better off visiting a Fablab or a Makerspace near your location. As 3D printers are expensive and have a steep learning curve, you’ll get help directly from the good people there – and you can save a lot of money if you don‘t click with the technology.
    • If you just want to have a single part printed once a month, there‘s no need to buy a 3D printer yourself. It is significantly cheaper to use 3D printing services and networks such as 3D Hubs, i.Materialise, Sculpteo or Shapeways to get your stuff printed professionally. There are a lot of alternative 3D printing services you can use. To get the best price, please use All3DP’s price comparison service.

    So, if we can rule out these exceptions, you are a candidate to buy a 3D printer.

    How to Buy a 3D Printer – Question #2: What Type of 3D Printer Should I Buy?

    Currently, there are nine major 3D printing technologies (read all about them here). As you probably don‘t want to buy a $500.000 metal 3D printer, there are just two consumer 3D printer types which are relevant. They are called FDM and SLA.

    1. Buy an FDM 3D Printer

    FDM is the most common 3D printing method used in desktop 3D printing. Thermoplastic filament is heated and extruded through an extrusion head that deposits the molten plastic in X and Y coordinates, while the build table lowers the object layer by layer in the Z direction.

    This type of 3D printers is a cost-effective means for product development and rapid prototyping in small business and education sectors since it’s capable of fabricating robust parts reliably and quickly. They use a variety of interesting materials.

    If you buy a FDM 3D printer, you can choose from a variety of brands, there are at least 50 great companies to choose from. You can find the best FDM 3D printers here, the prices ranges from $300 to $5000.

    2. Buy an SLA 3D Printer

    SLA works by exposing a layer of photosensitive liquid resin to a UV-laser beam so that the resin hardens and becomes solid. Once the laser has swept a layer of resin in the desired pattern and it begins to harden, the model-building platform in the liquid tank of the printer steps down the thickness of a single layer, and the laser begins to form the next layer. Each layer is built on top of the preceding one.

    Like the FDM 3D printer technology, objects with overhangs 3D printed with this type of 3D printer will require support structures. And after printing has completed, the object must be rinsed with a solvent. Sometimes it’s also baked in a UV oven to finish processing.

    SLA creates smooth surfaced objects with extreme detail, and it’s increasingly popular in industries like jewelry and cosmetic dentistry for creating castable molds.

    The price range for an SLA 3D printer is between $3000 and §10.000. You can find the best SLA 3D Printer models here.

    How to Buy a 3D Printer – Question #3: Where Should I Buy My 3D Printer?

    If you want to buy a 3D printer in  2017, you can choose from a lot of options. Here are some 3D printer buying tips:

    1. Buy a 3D Printer from Amazon

    3d printers on amazon

    Amazon is a great source for buying 3D printers. They offer lightning-fast delivery, have most items in stock, and you can count on their reliability and obligingness.

    All3DP offers several articles on buying 3D printers and 3D printing accessories at Amazon. They are updated on a regular basis.

    But please be aware that of 3D printer manufacturers don‘t sell their printers through Amazon – but you can buy most of the 3D printer models directly from the manufacturers. Here are the best makes and models.

    2. Buy a 3D Printer For Less Money

    prusa i3 kit

    If you don’t have a ton of money on your hands, you still can buy a great 3D printer – here’s a list of the best affordable 3D printers.

    Of course, you can always buy a second-hand 3D printer. Here‘s what you have to consider:

    It doesn’t stop there. If you have some experience in building things, you can also buy a 3D printer kit. You’ll have to assemble the printer yourself, but that’s probably the best way of learning the most about your 3D printer. Most kits cost significantly less than assembled 3D printers. You can find the best models here.

    3. Buy a 3D Printer on Kickstarter

    Quite frankly: If you’re just entering the wild and wonderful world of 3D printing, better refrain from backing a great looking, dead cheap 3D printer at Kickstarter or Indiegogo. First, you won’t get instant gratification and will have to wait several months (if not years) until the printer arrives. Second, there’s a risk in buying a 3D printer through crowdfunding. There are a lot of things that can go wrong, fraud being one of them.

    But if you know what you‘re doing, a Kickstarter 3D printer can be a great way of getting a cutting-edge 3D printer. Also, many great 3D printing companies on Kickstarter.

    All3DP provides a weekly updated and annotated list – you find the 9 Kickstarter 3D Printer Projects Live Right Now here.

    How to Buy a 3D Printer – Additional Info: What Else is there to Know?

    There’s a lot to learn when it comes to 3D printing. Here are some resources that will help you understand 3D printing better:

    If we can help you in other ways on buying a 3D printer, please let us know in the comments.

    Website: LINK