
It has been a cold winter for Tom Shaffner, and since he is working from home and leaving the heating on all day, he decided it was finally time to see where his house’s insulation could be improved.
An affordable solution
His first thought was to get a thermal IR (infrared) camera, but he found the price hasn’t yet come down as much as he’d hoped. They range from several thousand dollars down to a few hundred, with a $50 option just to rent one from a hardware store for 24 hours.
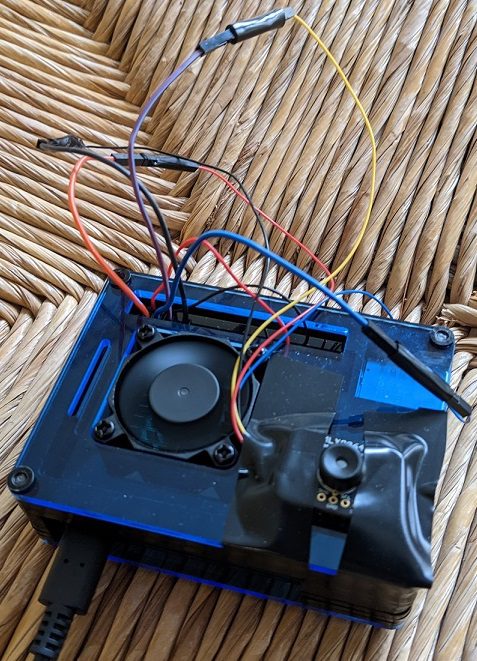
When he saw the $50 option, he realised he could just buy the $60 (£54) MLX90640 Thermal Camera from Pimoroni and attach it to a Raspberry Pi. Tom used a Raspberry Pi 4 for this project. Problem affordably solved.
A joint open source effort
Once Tom’s hardware arrived, he took advantage of the opportunity to combine elements of several other projects that had caught his eye into a single, consolidated Python library that can be downloaded via pip and run both locally and as a web server. Tom thanks Валерий Курышев, Joshua Hrisko, and Adrian Rosebrock for their work, on which this solution was partly based.

Tom has also published everything on GitHub for further open source development by any enterprising individuals who are interested in taking this even further.
Quality images
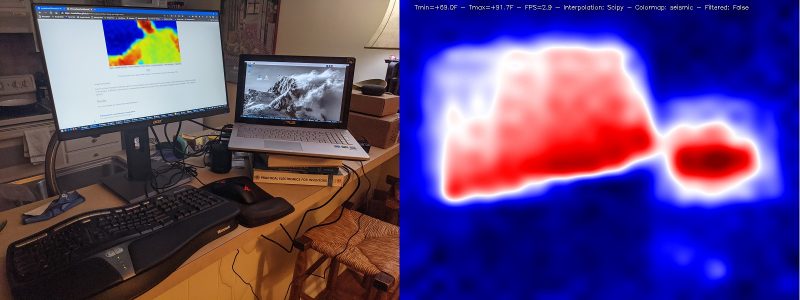
The big question, though, was whether the image quality would be good enough to be of real use. A few years back, the best cheap thermal IR camera had only an 8×8 resolution – not great. The magic of the MLX90640 Thermal Camera is that for the same price the resolution jumps to 24×32, giving each frame 768 different temperature readings.
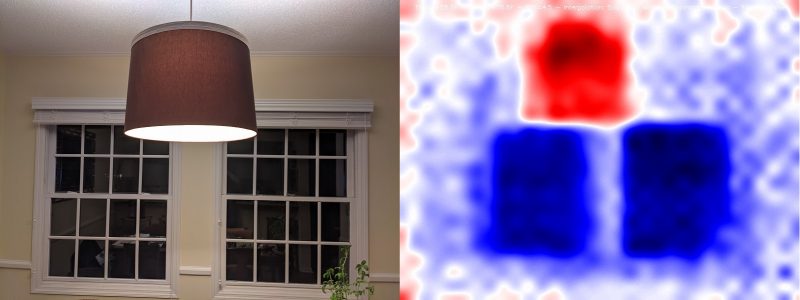
Add a bit of interpolation and image enlargement and the end result gets the job done nicely. Stream the video over your local wireless network, and you can hold the camera in one hand and your phone in the other to use as a screen.
Bonus security feature
Bonus: If you leave the web server running when you’re finished thermal imaging, you’ve got yourself an affordable infrared security camera.

Documentation on the setup, installation, and results are all available on Tom’s GitHub, along with more pictures of what you can expect.
And you can connect with Tom on LinkedIn if you’d like to learn more about this “technically savvy mathematical modeller”.
Website: LINK
