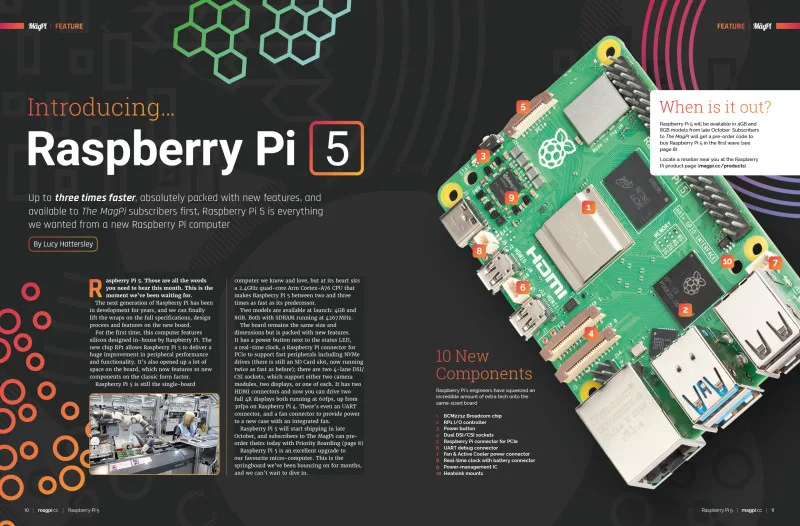
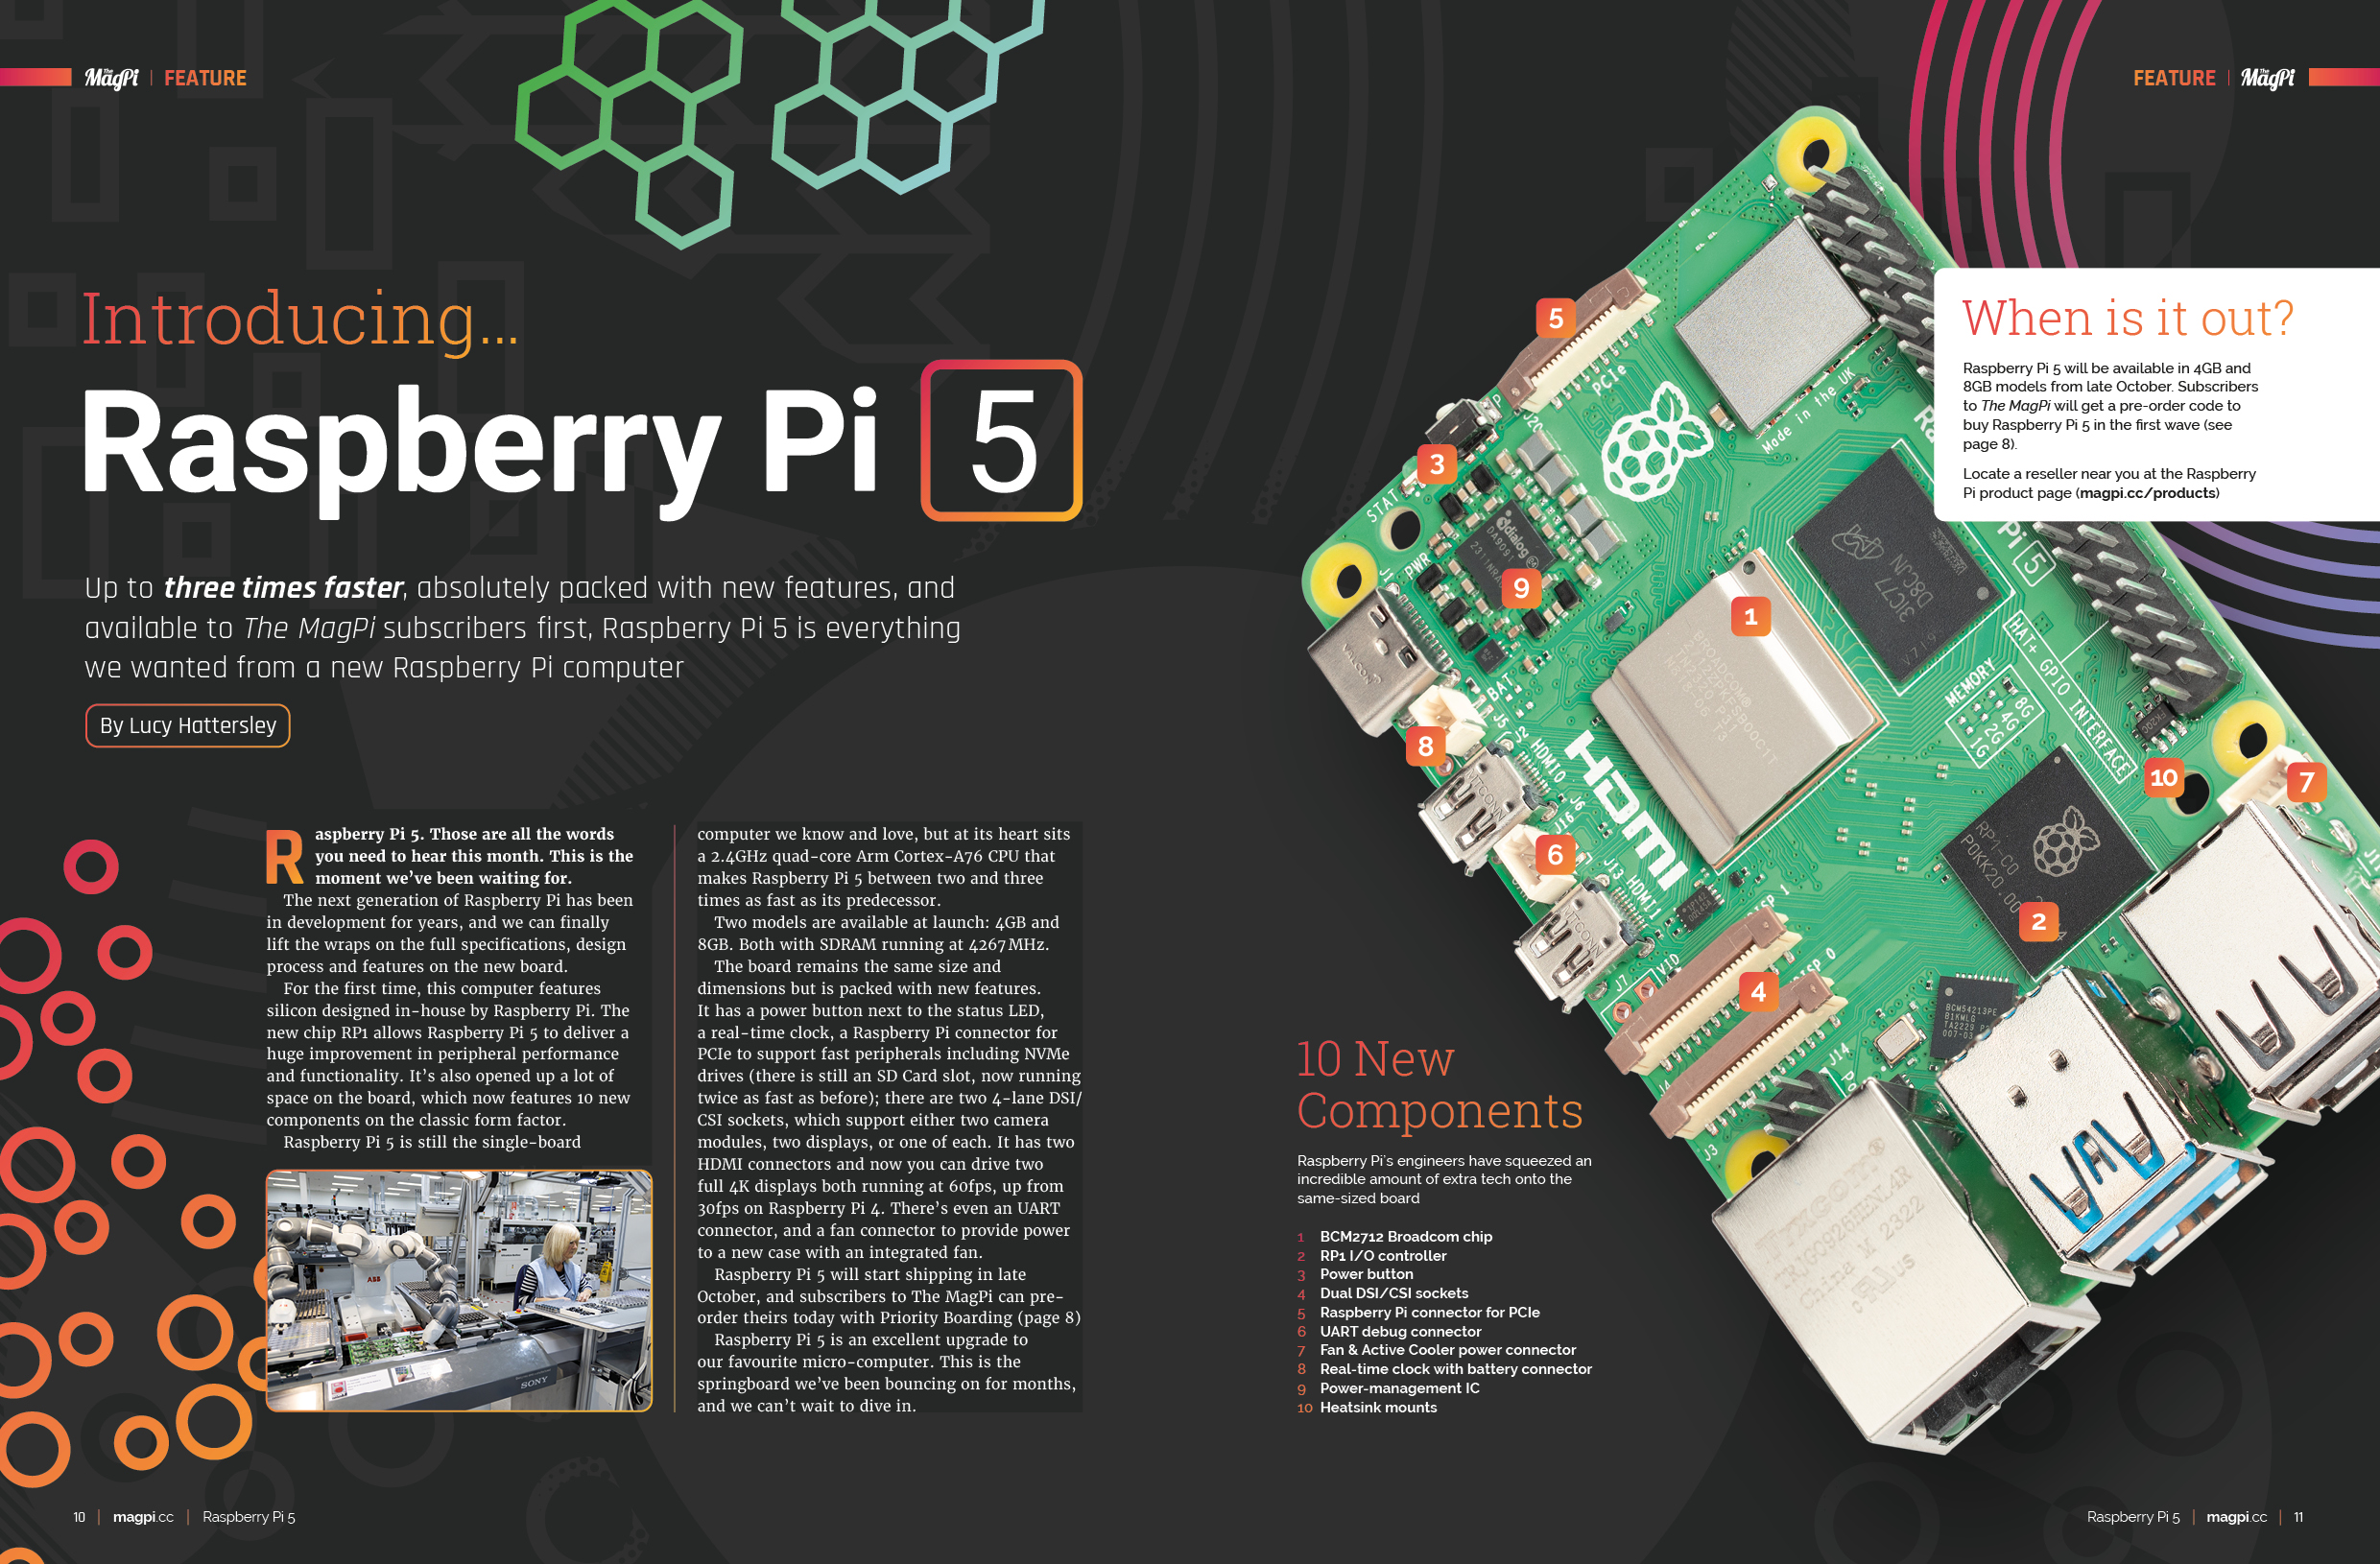
The incredible new computer from Raspberry Pi is a giant leap forward in features and performance. Now running a 2.4GHz ARM CPU inside a brand new BCM2712 Broadcom chip, Raspberry Pi is up to three times faster than Raspberry Pi 4. And a new Raspberry Pi RP1 chip takes over most of the I/O, freeing up space for a raft of new features: a power button, Dual DSI/CSI sockets, a Raspberry Pi connector for PCIe (along with an upcoming HAT to offer super-fast M.2 drive storage), a real-time clock with a battery connector and a custom power management chip. All this alongside amazing new accessories including a redesigned Raspberry Pi Case with fan, an Active Cooler attachment, and PoE and M.2 accessories coming soon.
There’s a lot to learn about this exciting new computer, and you’ll find out all about it in this month’s edition of The MagPi.
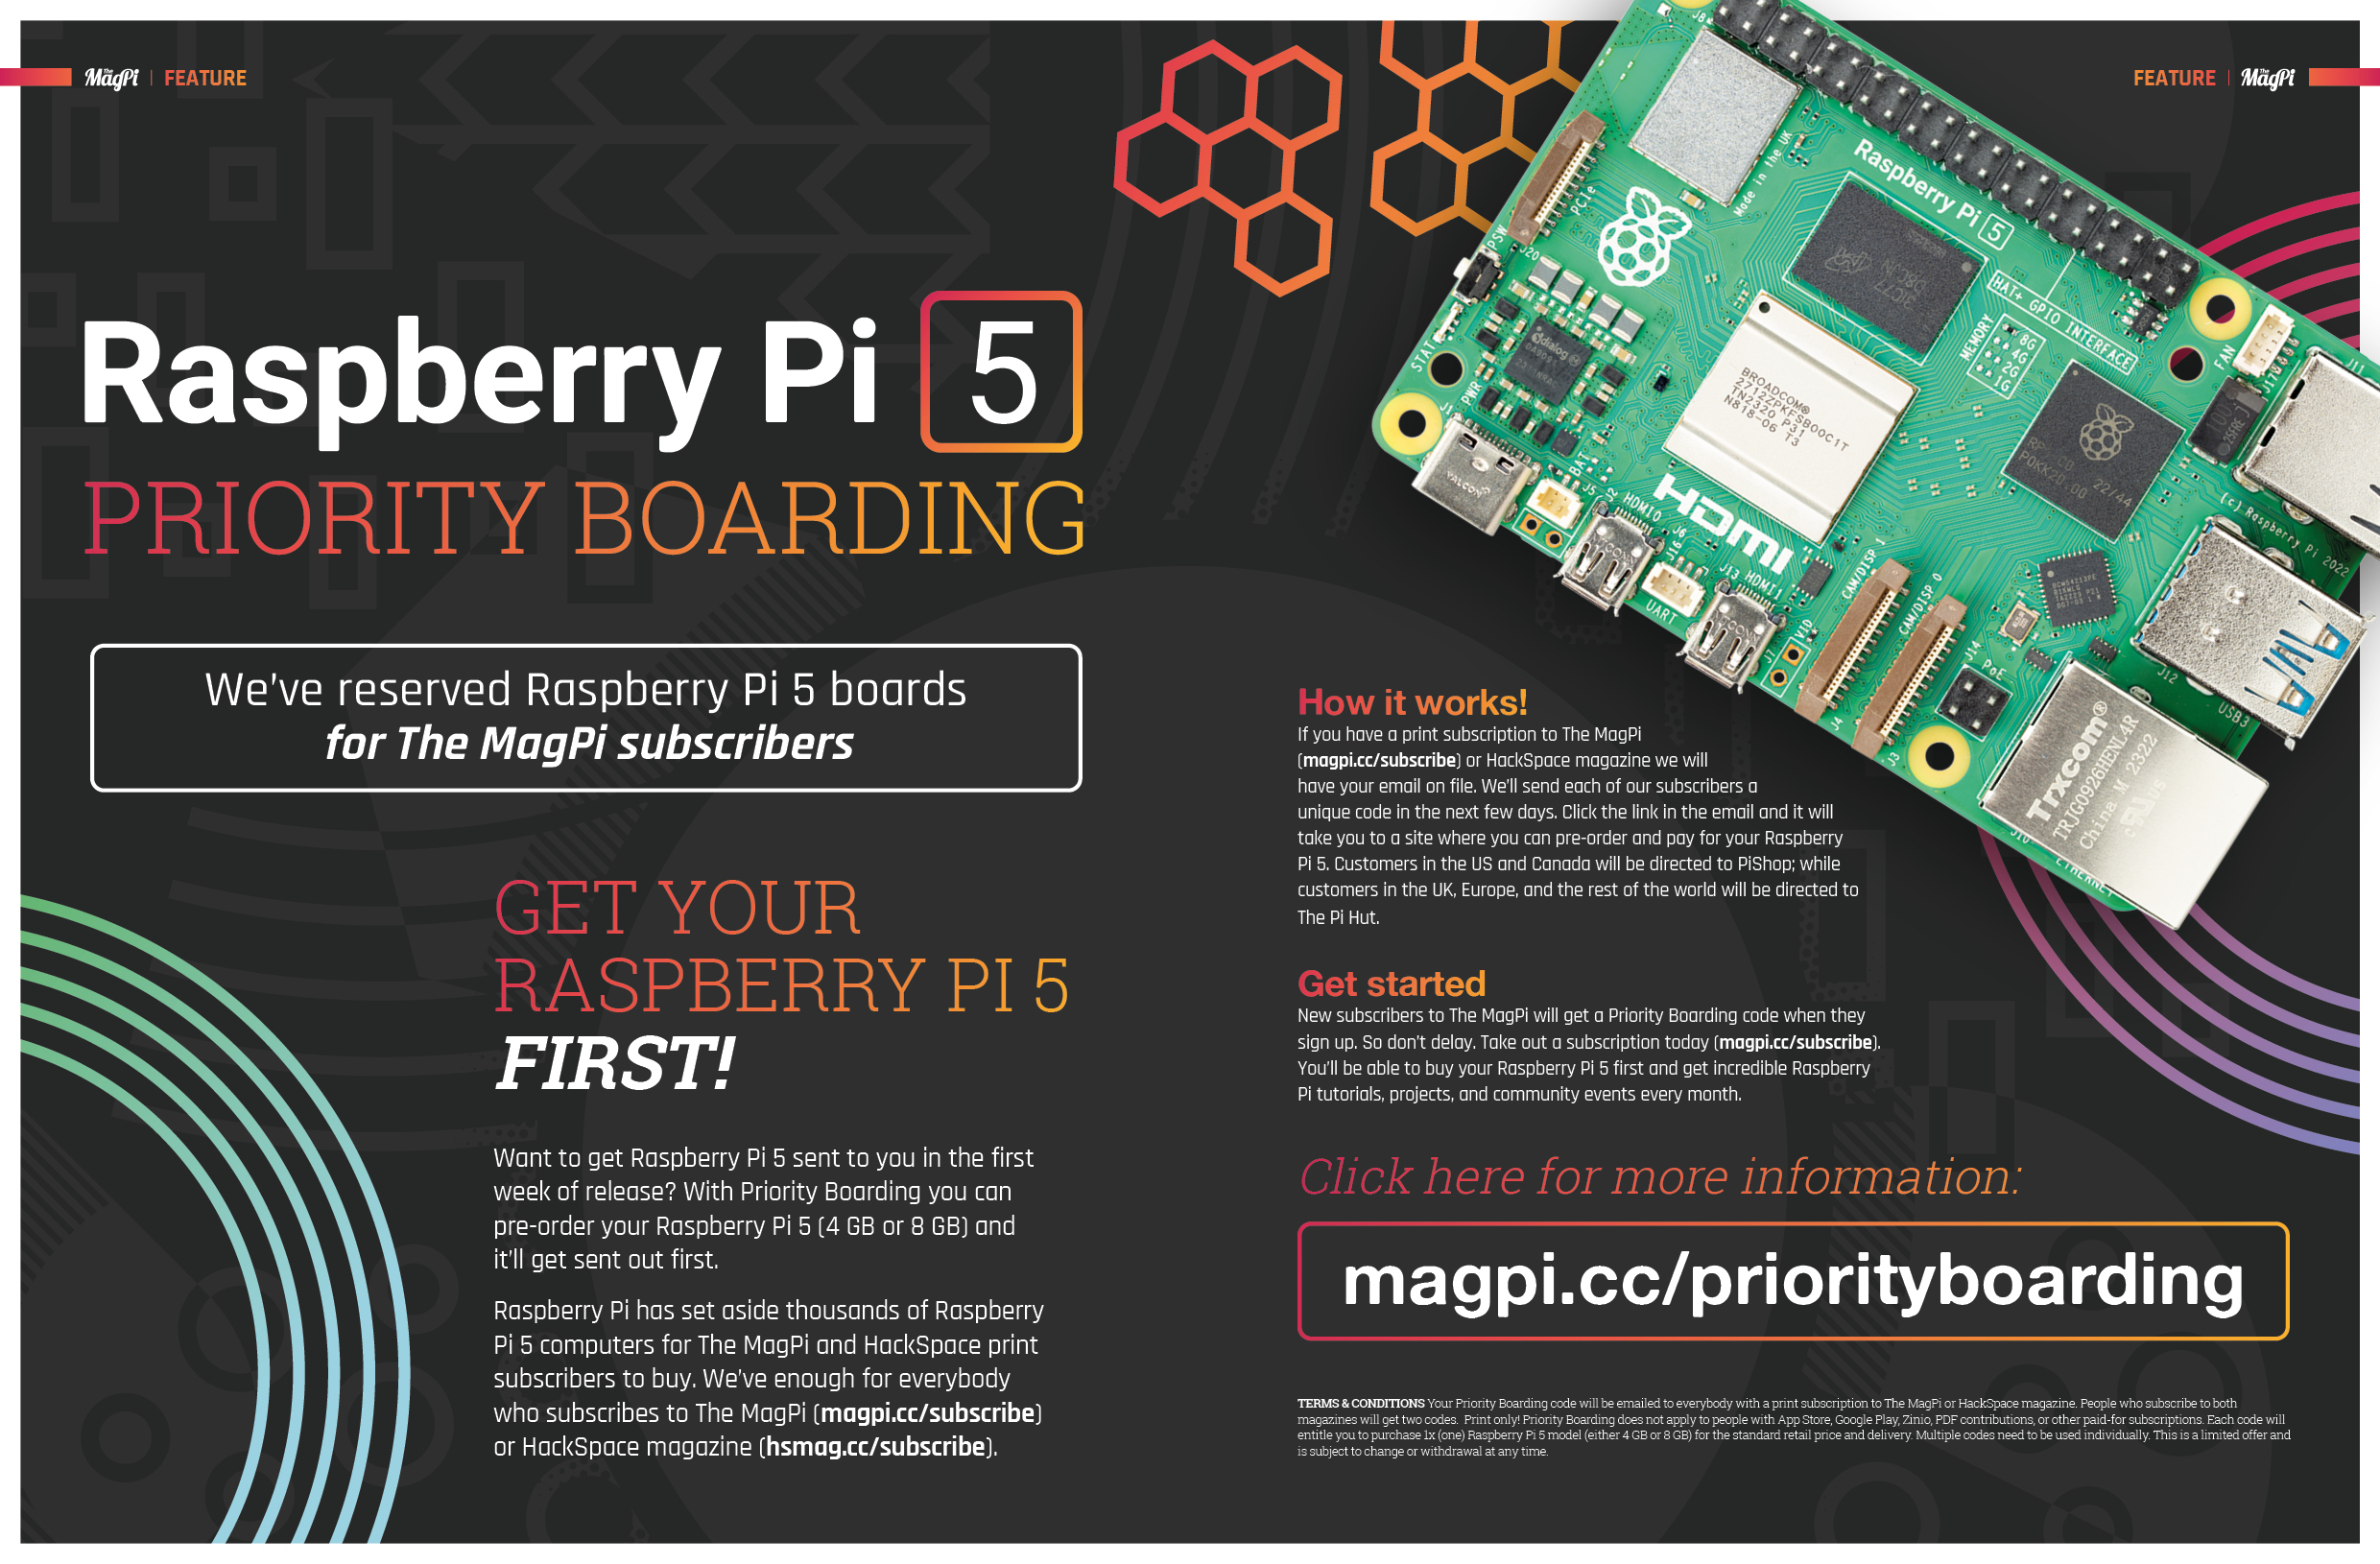
Raspberry Pi 5 Priority Boarding
We’ve reserved Raspberry Pi 5 boards for subscribers to The MagPi magazine and HackSpace to pre-order. If you’ve got a print subscription to one of our magazines, you’ll be able to buy your Raspberry Pi 5 first. See Priority Boarding for more information.
Engineering and documentation interviews
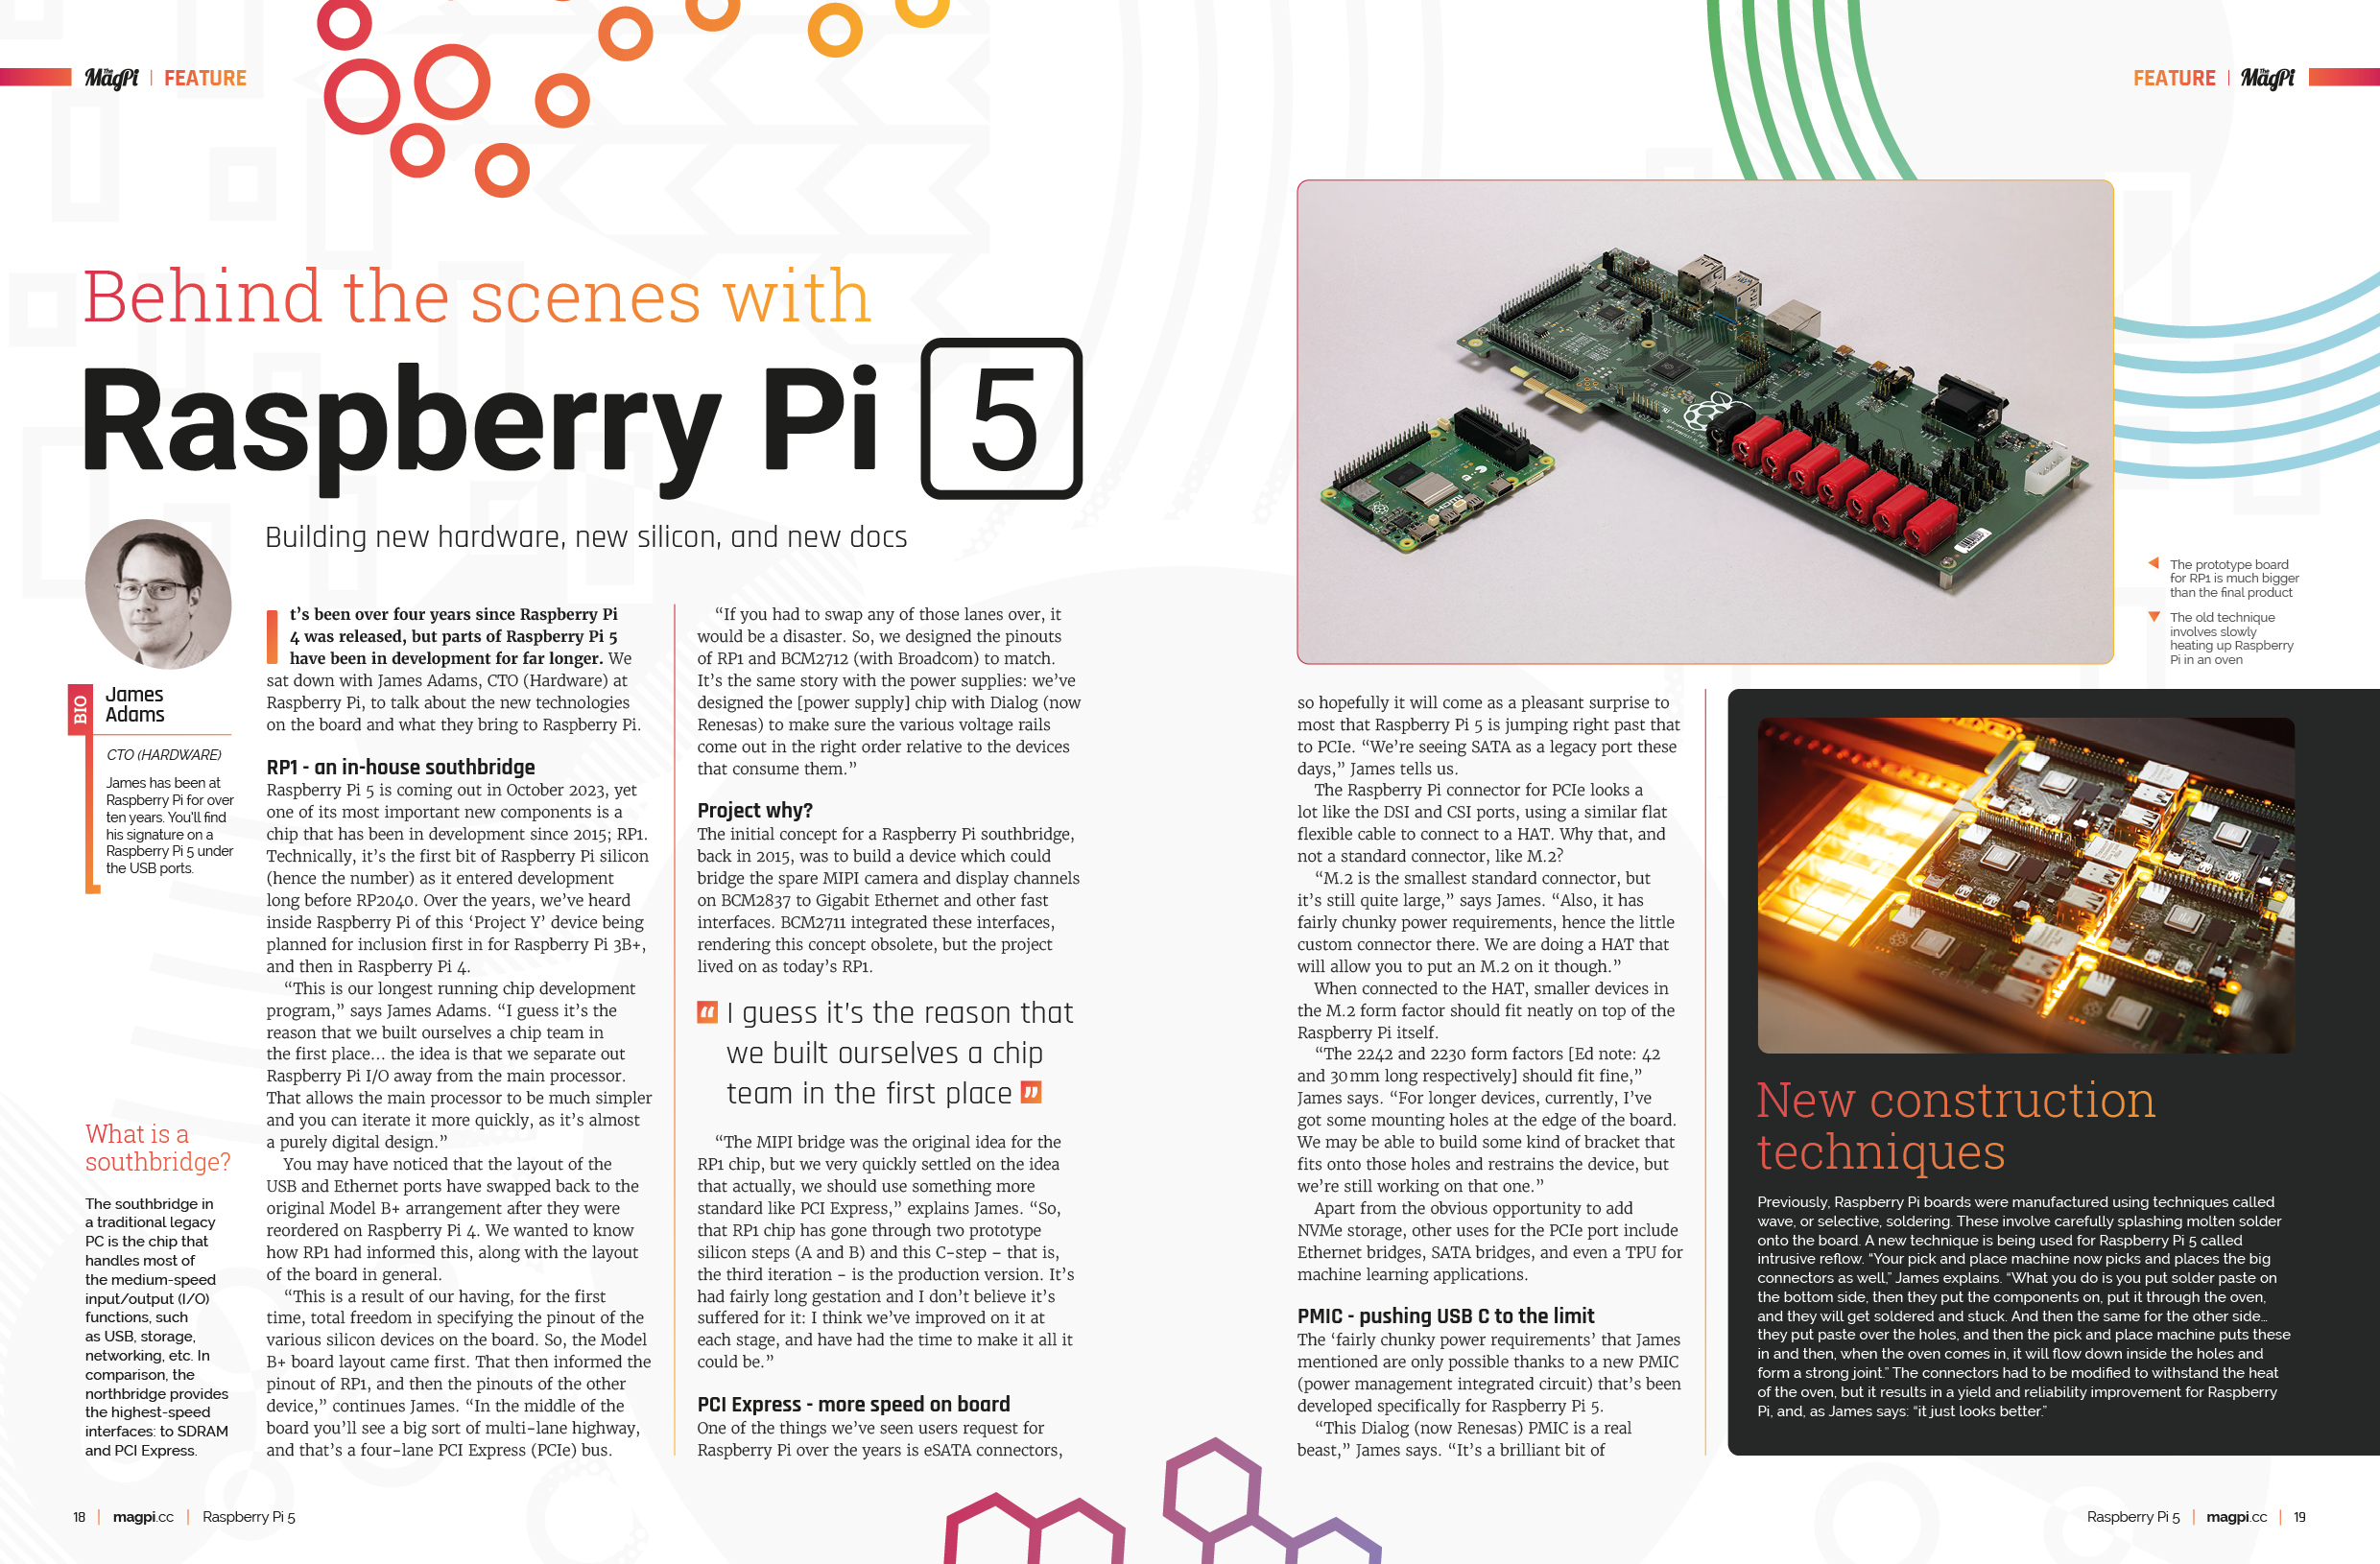
Rob sat down with James Adams, CTO (Hardware) and Alasdair Allan (Head of Documentation) for an exclusive interview on the new hardware. They cover in-depth the new RP1 chip, and why it’s such an important feature in Raspberry Pi 5 and with the new Raspberry Pi connector for PCIe and M.2 implementations. The new power chip is explained in depth. Our feature digs deep into the Raspberry Pi 5 hardware and explains why it’s designed just the way it is.
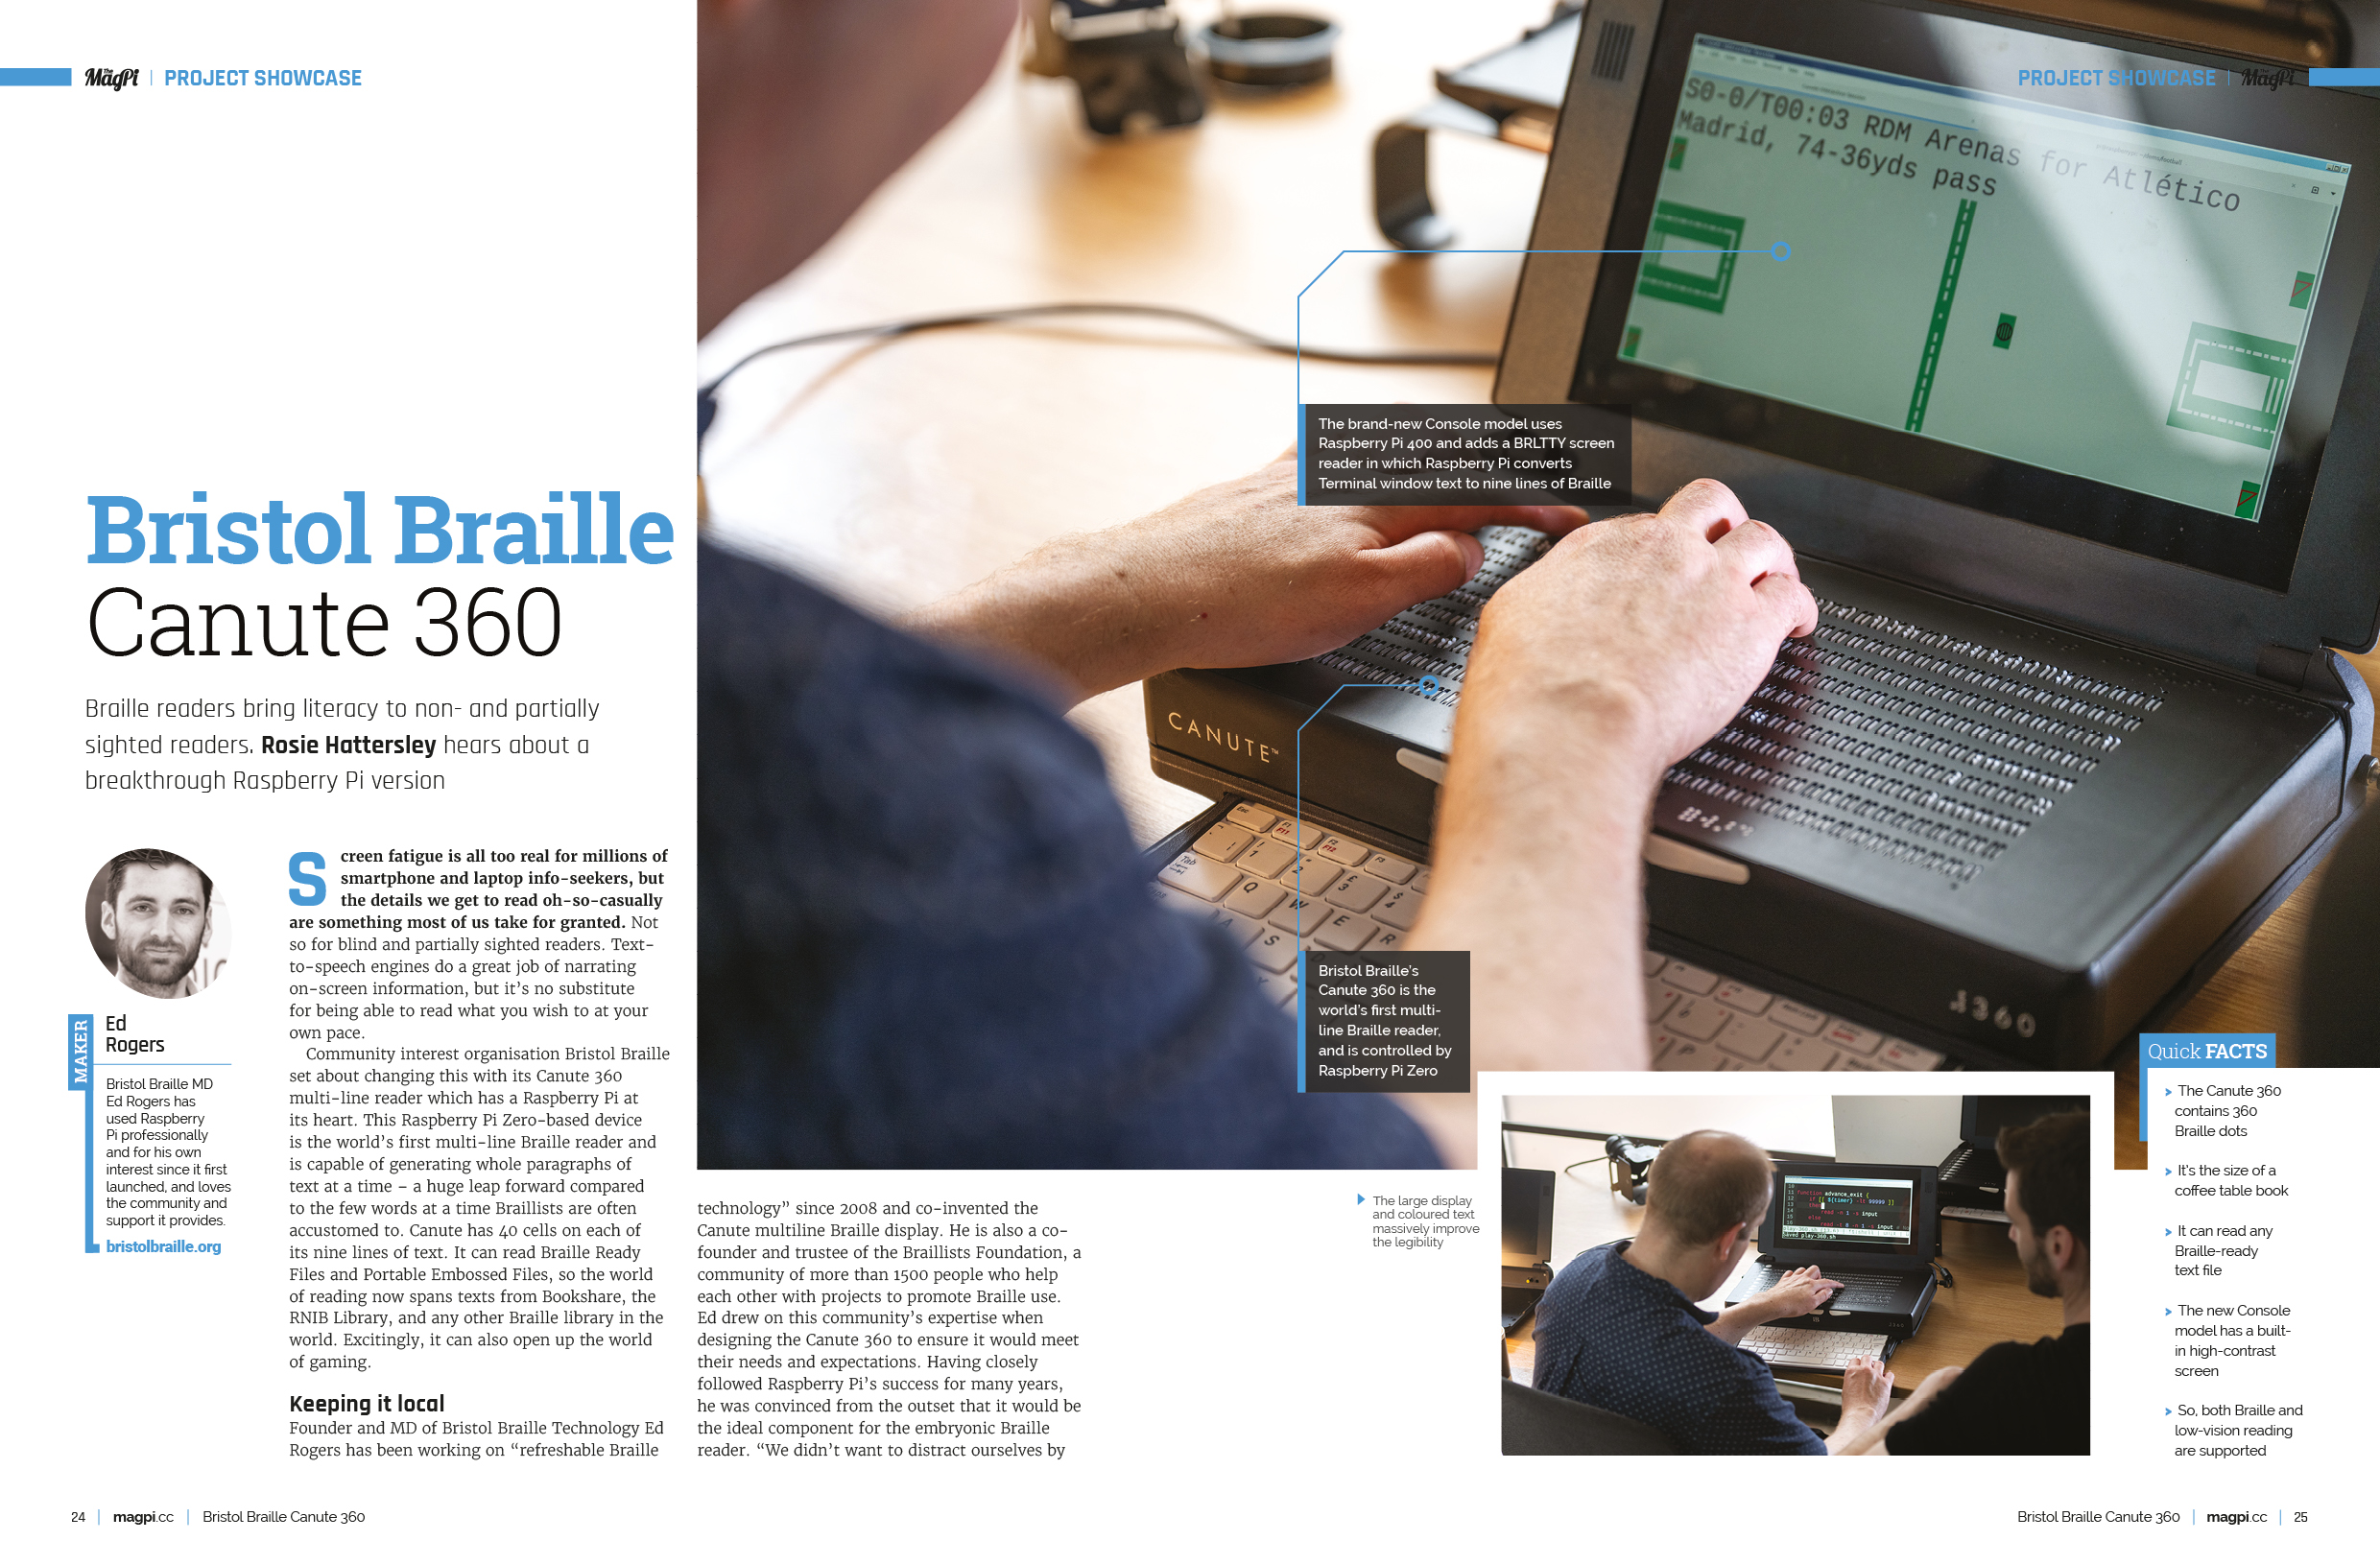
Bristol Braille Canute 360
We’re incredibly proud of the variety of projects the Raspberry Pi community comes up with. Bristol Braille, developed the Canute 360, is the world’s first multi-line Braille reader and is powered by Raspberry Pi Zero. This innovative device generates entire paragraphs of copy, and converts a Terminal window into Braille for non- and partially-sighted people. It provides a significant advance over traditional Braille devices.
Zelda Guardian Security Camera
Naomi has recreated a model of a Guardian from The Legend of Zelda to monitor her dog. This working model has a rotating head and uses a Raspberry Pi Camera instead of firing a laser. The result is a fantastic camera project that’s lovingly recreated and painted to look just like the real thing.
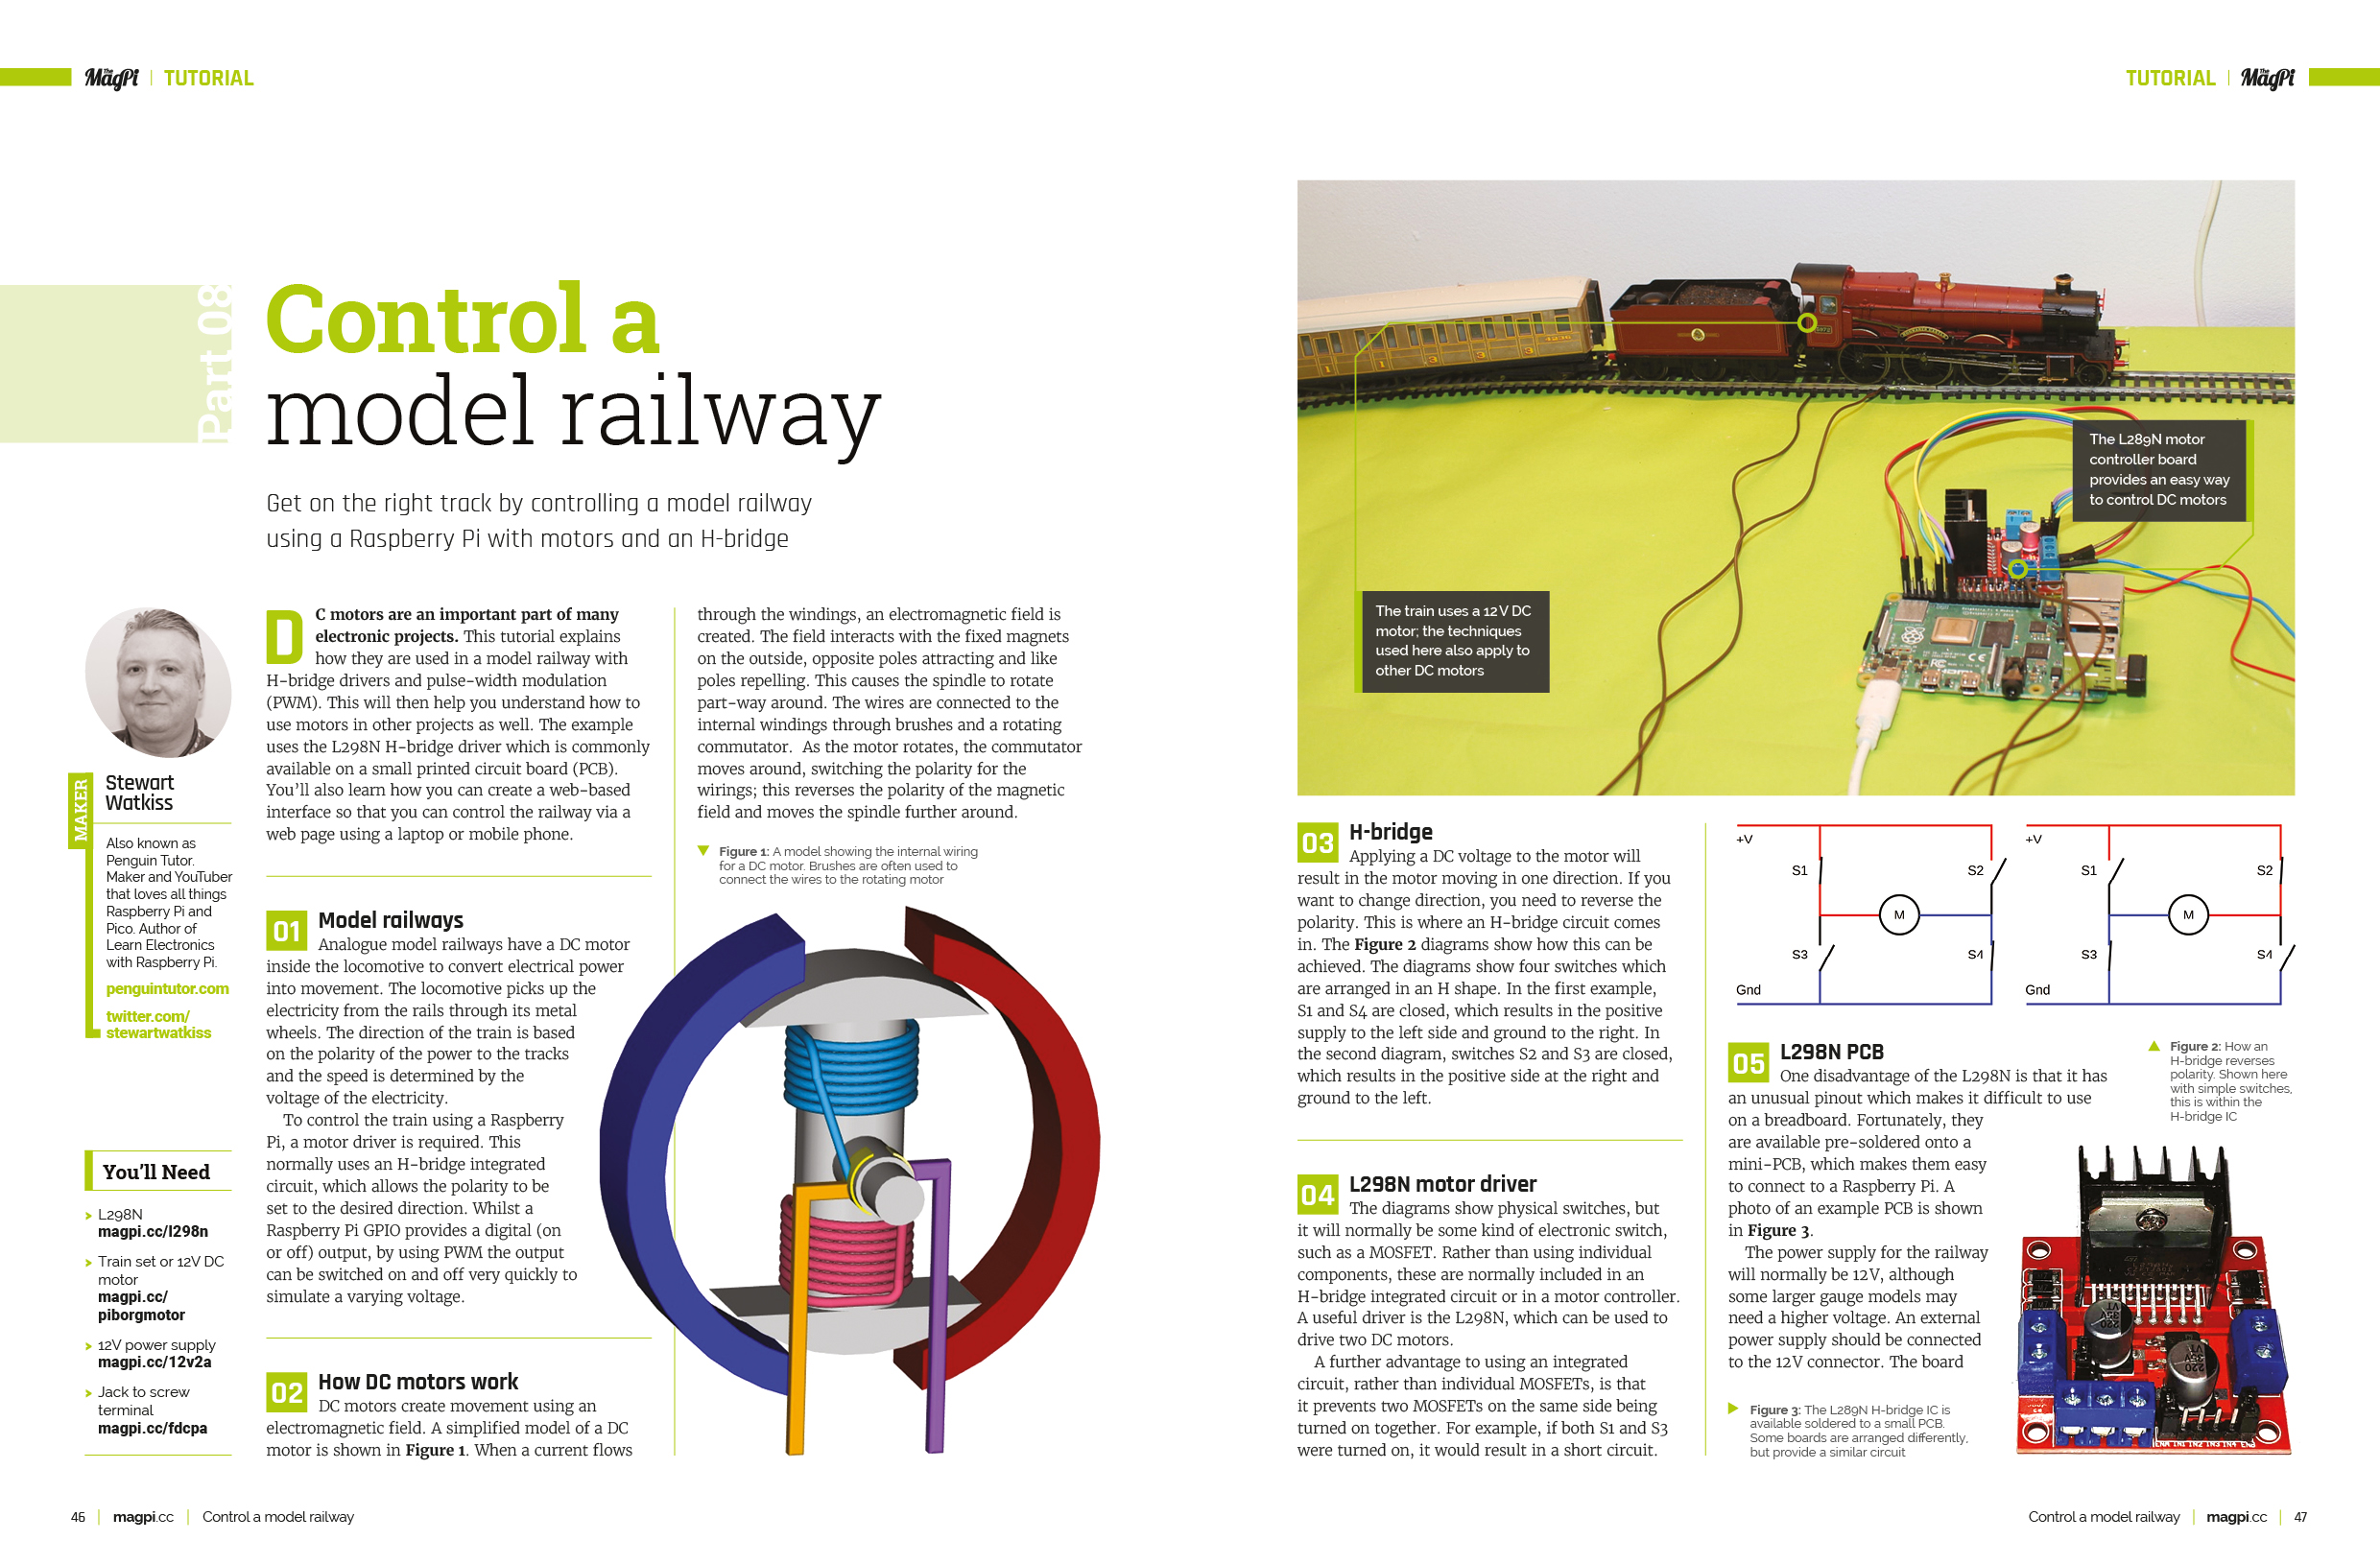
Control a model railway
Stewart Watkiss has spent the last few issues of The MagPi explaining electronics and circuit control. Now it’s time to put it to use by controlling a model railway. This tutorial features servo motors and Raspberry Pi along with an L289N H-bridge driver on a motor control board. This enables Raspberry Pi to power and control the train directly on the track.
Trick or Treat
It’s nearly time for Halloween and Rob has created this fangtastic feature packed with ghoulish projects. It’s got everything from haunted mirrors to talking doorbells and an automated candy dispenser.
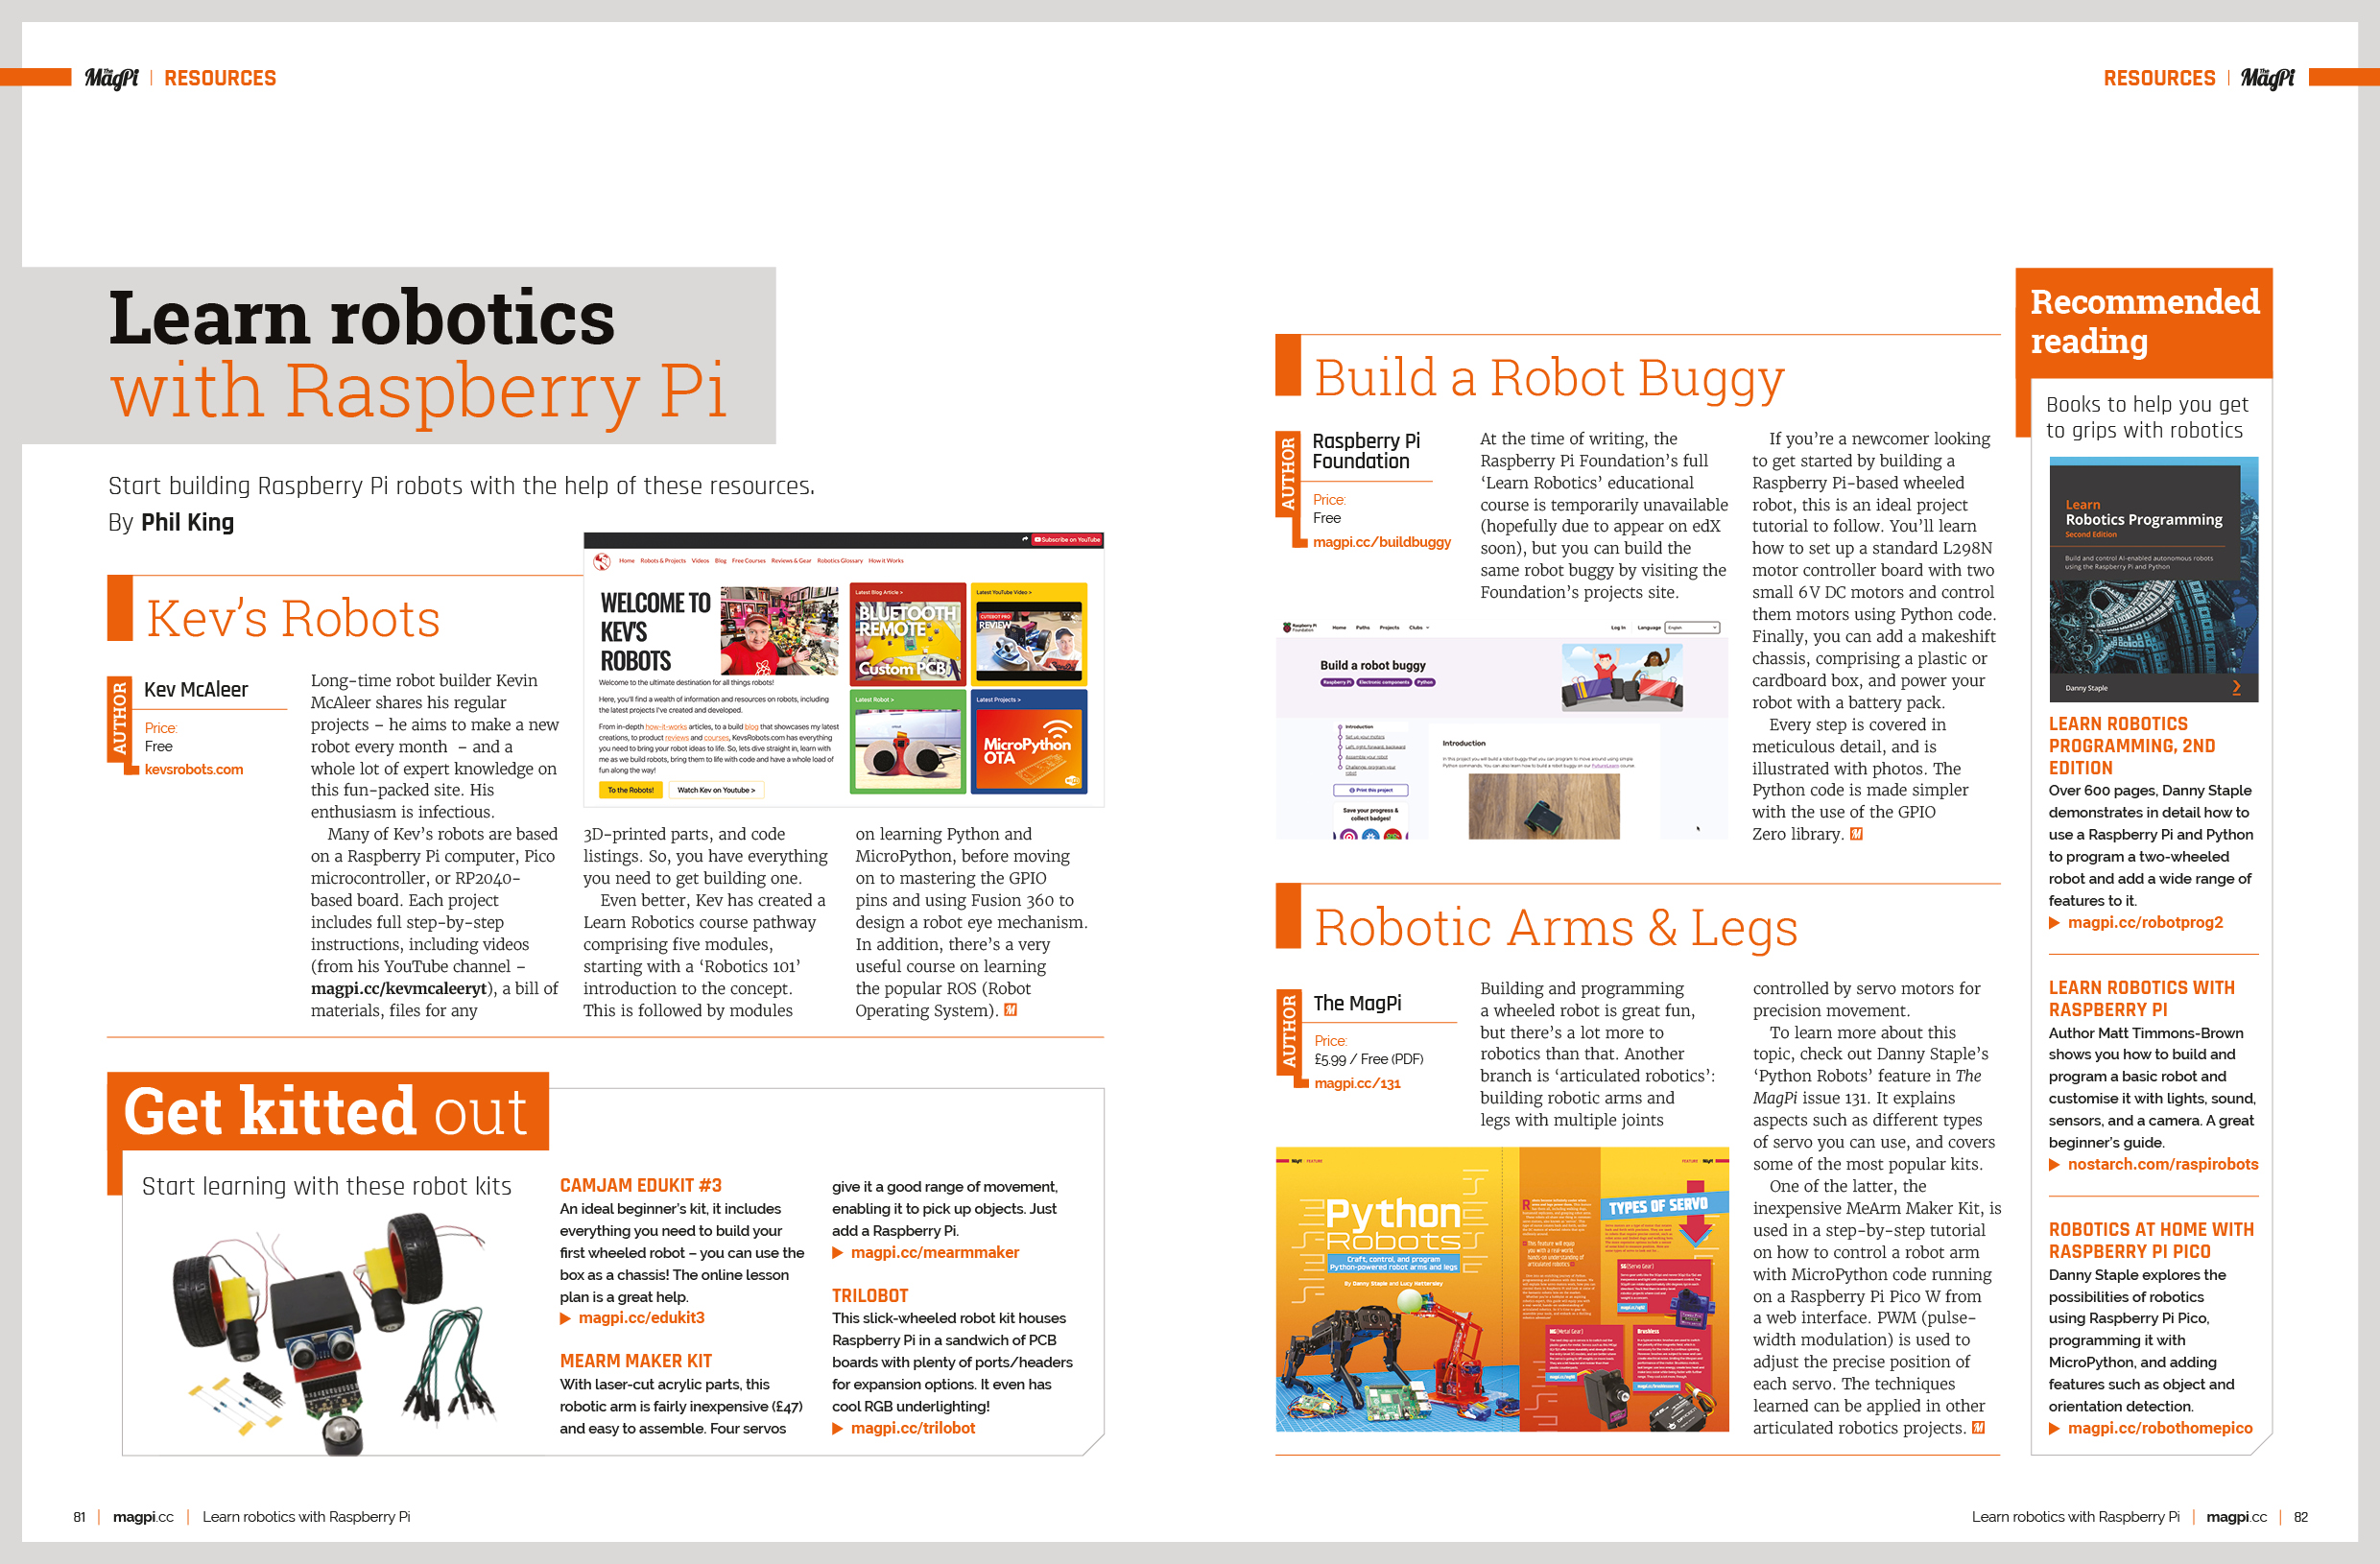
Learn robotics with Raspberry Pi
If you’ve ever fancied making a robot, either the wheeled variety or one with arms and legs, then our Learn Robotics spread has all the resources you need. Discover some of the best makers around, along with easy-to-use kits and tutorials, books and websites
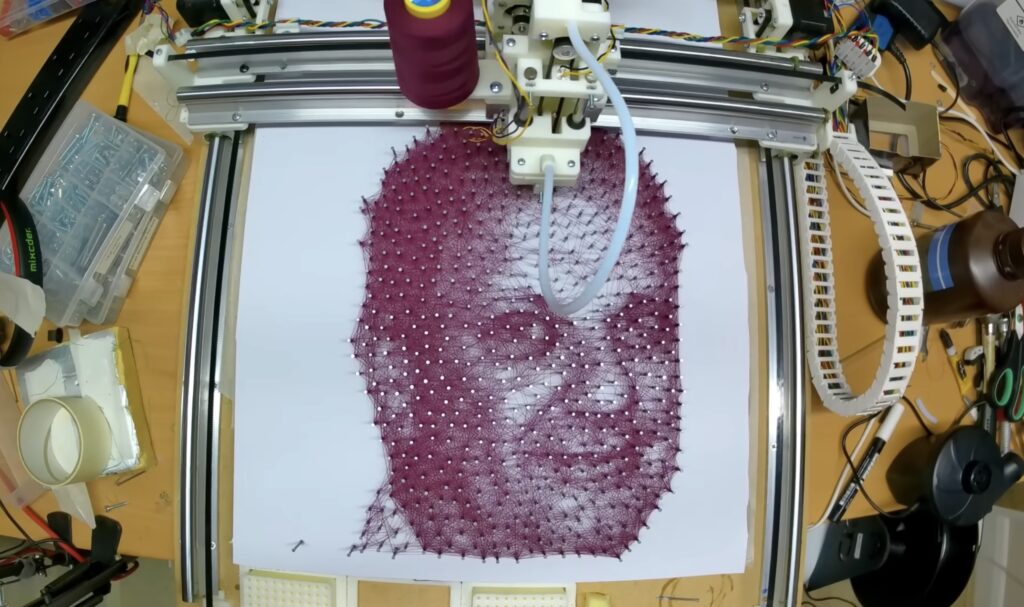
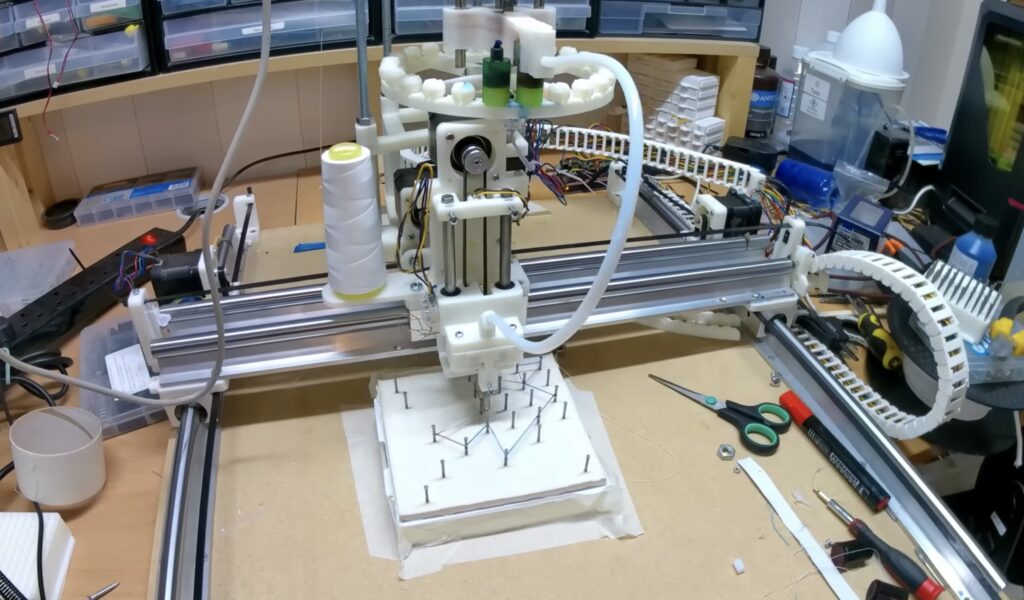
String art is impressive precisely because it is so difficult to make. Even a simple piece of string art will contain hundreds of feet of thread carefully looped around posts to create areas of varying density that act as shading. Everything from calculating the string’s path to physically laying down the string is a challenge. But after an immense amount of work, Paul MH was able to develop a machine that can produce string art at the touch of a button.
Paul spent years working on this project and it shows. Every step of the process required trial-and-error with different prototypes. To create an art piece, the machine first has to insert dozens or hundreds of nails into the foam bed. That necessitated the invention of a mechanism to feed nails and a neural network to verify that each nail feeds properly. The machine then has to convert an image into a string path, with that path avoiding collisions with nails, looping around nails enough to maintain tension, generating the proper string density, and preventing any tangles.
At its heart, this is a CNC machine that accepts custom g-code generated by Paul’s software. That G-code runs on an Arduino Mega 2560 board, which controls the machine’s motors through a RAMPS 1.4 shield. The concept is similar to a conventional DIY CNC router and the kinematic system is familiar, but this machine needed a multitude of custom parts. Most of those were 3D-printed over many iterations until Paul had a working machine.
As you can see in Paul’s recent video update, the machine can produce very nice string art. It can take any image as input, but high-contrast pictures without a lot of fine detail work the best.
Good old-fashioned tabletop games are a lot of fun to play, but they’re a pain in the butt to set up. We all know the pain of divvying out Monopoly money and organizing tiny plastic houses. Connect Four players might spend as much time organizing pieces between games as they do actually playing. To facilitate Connect Four speed runs, Jared Dilley built this board that automatically sorts the pieces after a game.
A normal Connect Four board just dumps all the pieces out of the bottom after a game, forcing players to classify them by color. Dilley’s updated board does all of that automatically. At the push of a button, it will begin ejecting pieces from the bottom. Little motorized flaps cause the falling pieces to drop one way or the other. The machine repeats that process for all the rows and each player ends up with a pile of the appropriate pieces on their side of the board, ready for a new game.
An Arduino Mega 2560 detects whether a piece is red or black using an infrared sensor. Dilley adjusted the sensor so that it registers an infrared reflection for red pieces, but not black pieces. Each column has its own sensor, so the Arduino can recognize the colors of the entire bottom row. It then sets the positions of the flaps accordingly using servo motors controlled through a servo shield. Finally, another servo quickly releases the bottom row and then moves back to block the following row. That process repeats until all the pieces have been sorted.
We can’t imagine that many people play enough Connect Four to make this worthwhile, but it is still a lot of fun to see in action and crosses into “oddly satisfying” territory.
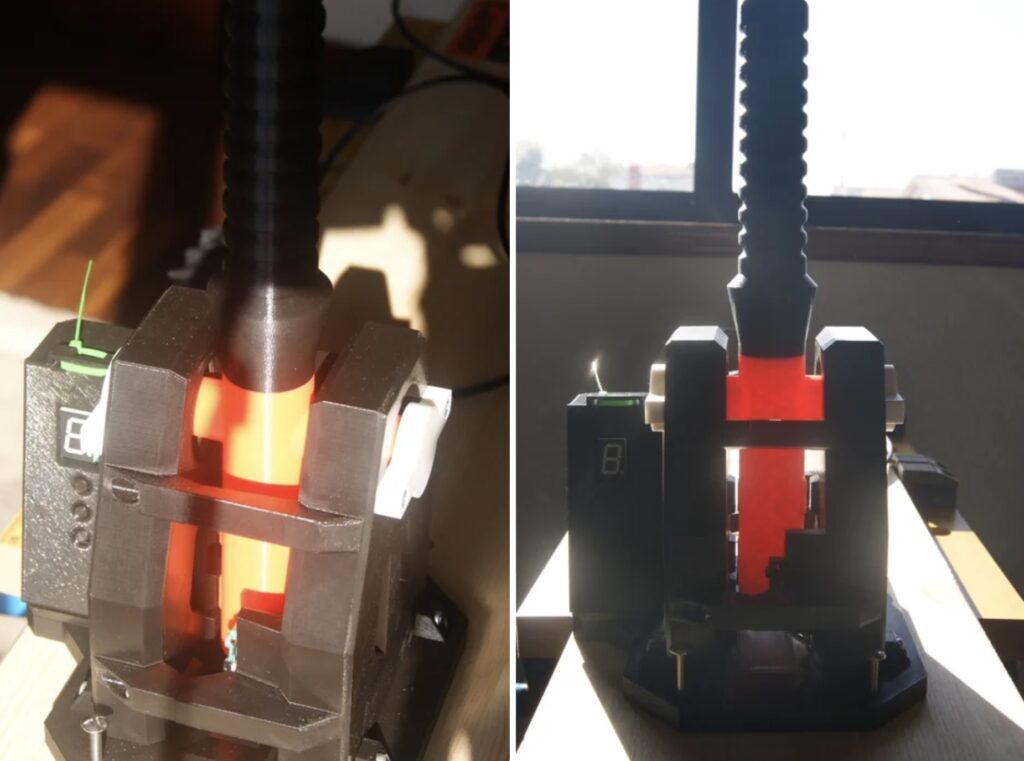
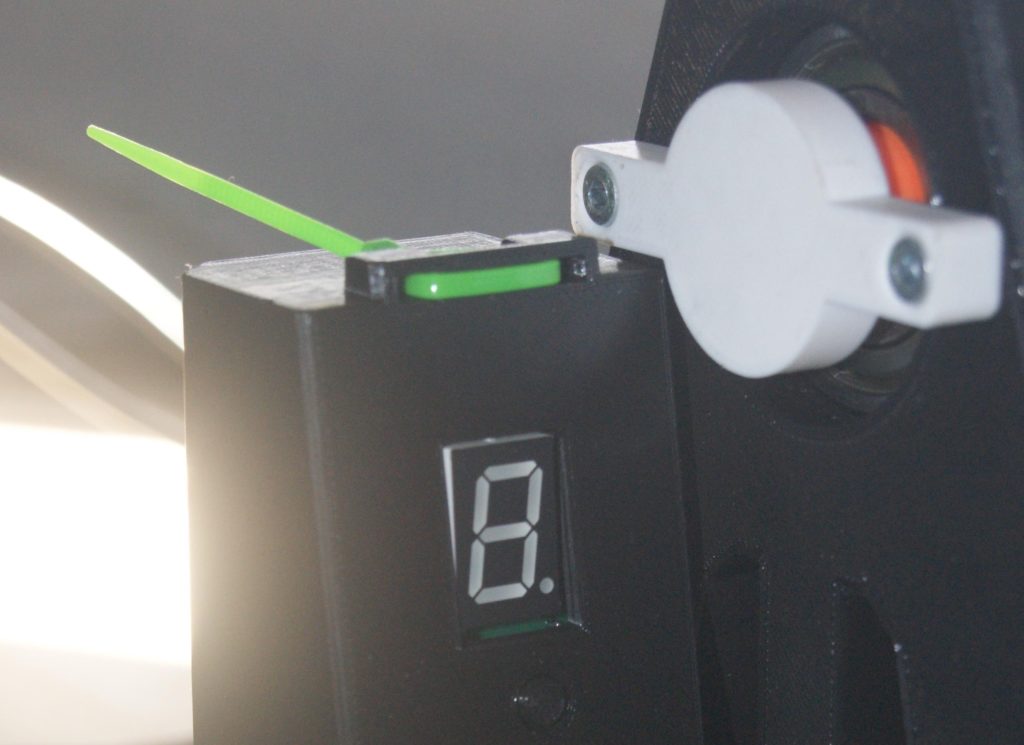
A sequential transmission is one that only allows you to move up or down by a single gear at a time. They’ve always been the norm for motorcycles, because they’re lightweight and compact. And Formula One cars have sequential transmissions for the same reasons. But unlike motorcycles, which require manual shifting, Formula One cars have lightning-fast electronic systems. To recreate that for racing sims, Carlos Almeida designed this sequential gear shift controller.
Real Formula One cars have paddle shifters, so that drivers can shift while keeping their hands on their steering wheels. This is a little bit different and looks more like a conventional shifter at first glance. It is a large lever that the user can push forward to move up a gear, or pull back to move down a gear. A seven-segment display shows the current gear number.
Most of the mechanical components are 3D-printable and an Arduino MKR1000 WiFi board is the primary component. Moving the shift lever pushes a switch, which the Arduino registers. Almeida developed the sketch using PlatformIO. It sets the Arduino up as a standard USB HID that will work with any racing sim or game, because it sends key presses like any keyboard or gamepad. It doesn’t receive feedback from the PC, so it has to keep track of the current gear and let the user set the number of gears available using small buttons below the readout display.
If you want a physical sequential shifter for racing sims, this will make a great weekend project.
The Internet of Things has the power to transform your home into a futuristic web of cutting-edge gadgets, working together to make life easier, safer, and more entertaining.
And while the IoT has a bunch of day-to-day applications like watering your plants and keeping your cupboards stocked, you can also use it to throw a killer party.
Done right, you can build a smart home that leaves your guests gobsmacked, talking for months about their experience and frantically searching for ways to recreate it in their own homes.
In this article, we’ll look at a few of the ways you can use the IoT to enhance your guests’ experiences and become the talk of the town (in a good way).
What exactly is the Internet of Things?
The IoT is a way of connecting multiple everyday devices to the internet and each other, enabling them to perform smarter tasks such as collecting, processing, and exchanging data of different kinds.
For example, while an ordinary kettle is only good for boiling water, a smart kettle connected to the IoT can be controlled from your smartphone, set to automatically start boiling at a specific time, and be asked to do different things like keep the water at a certain temperature.
When it comes to throwing a party that will go down in legend, the IoT can be a big asset.
Impress your guests with the Internet of Things
1. Smart home ambiance
The first step to throwing a great party is setting the mood, and that applies to small gatherings, dinner parties, and even just hangouts.
The IoT can be a big help here, allowing you to tap into smart lighting with the help of color-changing bulbs and synchronized effects. At the tap of a button or your smartphone, you can produce customized lighting patterns and hues, engineering exactly the right environment to fit the vibe.
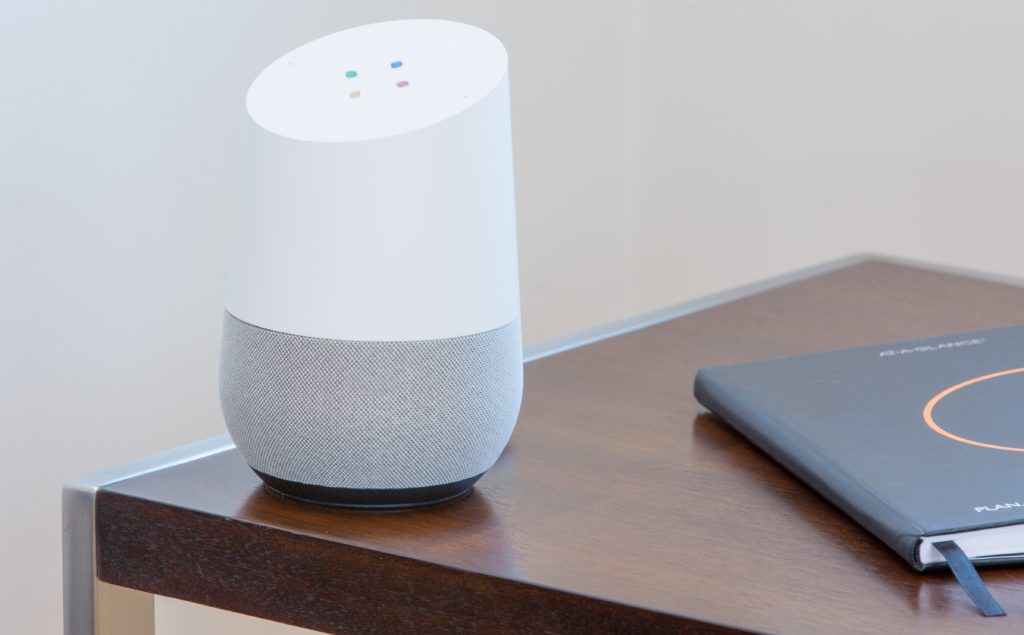
You can also integrate your lighting systems with voice control assistants, so you and your guests can change the ambience with simple commands.
2. Interactive entertainment systems
With the IoT, you can take entertainment to the next level.
Use smart speakers to create fully immersive music and sound, perfectly adapted to the mood of the room and the desired noise level. Switch from soft background music to a lively dance floor with a simple voice command.
If you have a home theater or a gaming room, you can integrate these with the IoT to build a more customizable and personalized setup for guests.
3. Smart food and beverage management
If you really want to impress your guests, fill them up with delicious food and get them tipsy.
This is yet another place where technology can help — an IoT-connected kitchen can revolutionize the catering process, allowing you to host truly unforgettable cookouts and dinner parties.
Smart refrigerators with inventory tracking and recipe suggestions work alongside automated cocktail mixers and cupboards that send an alert to your phone whenever you’re running low on a certain ingredient.
You’ll go from being a stressed, overwhelmed amateur chef to the master of your kitchen, effortlessly commanding your army of tech tools to run the show confidently.
4. Intelligent climate control
The only thing worse than a party where everyone is sweltering hot, is one where they’re all too cold to even peel off their winter coats.
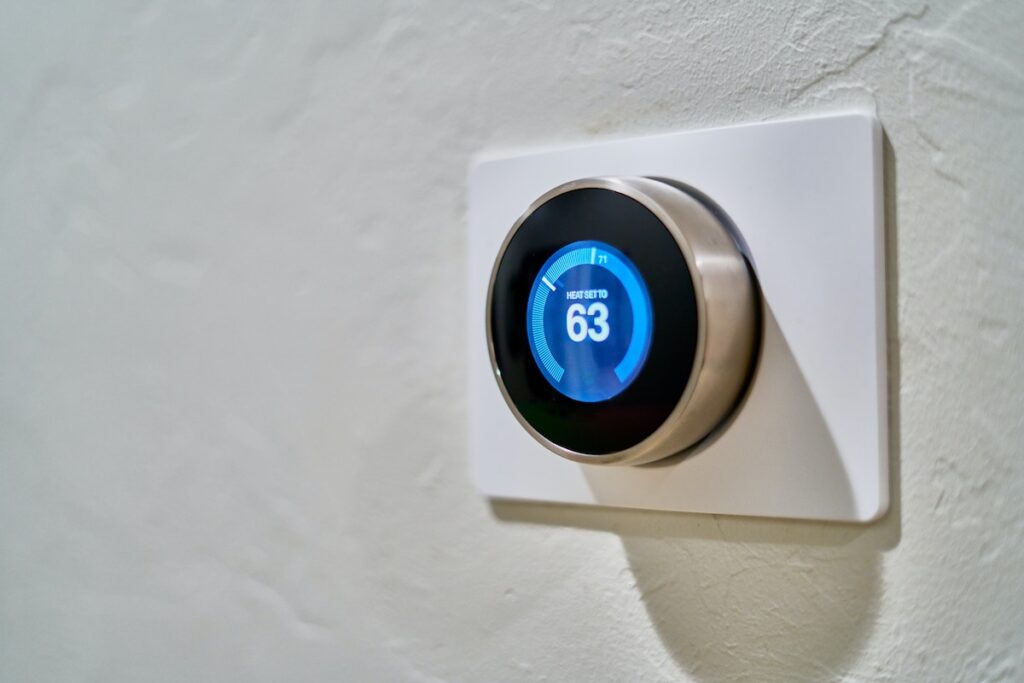
The good news for any aspiring host is that home automation can solve this age-old problem once and for all. Smart thermostats and HVAC systems are designed to keep your home in the perfect state of equilibrium — using automated adjustments to make a Goldilocks zone where all your guests feel just right, all the time.
The best smart homes can do this in an energy-efficient way, too, ensuring you don’t waste fuel and money keeping a room warmer than it needs to be for everyone’s optimal comfort. And you can easily adjust the temperature from your smartphone, a remote control, or voice commands.
5. Personalized guest experiences
The best parties are the ones where everyone feels welcome, and there’s no better way to create that vibe than with personalization.
The IoT can come in very useful here, helping you install things like smart mirrors which greet your guests personally and share information about the party like important times to remember and directions to specific places.
How well do you know your guests? If you can create a small profile on each one, your smart home can even put together tailored entertainment recommendations, ensuring the mood of the party fits the mood of the guests, and that there’s a bit of something for everyone on the playlist and the menu.
6. Automated home security
Parties can be a ton of fun, but they come with a few risks as well. When everyone is distracted and occupied, it’s sometimes easy for unwanted visitors to sneak in under cover of the crowd.
With IoT-driven security cameras and automated monitoring systems, you can keep your guests and property safe at all times, not just when the party is in full swing. You can program your smart security system to provide real-time alerts when something isn’t right, and even gain remote access.
If security is a key concern for you, you can give trusted guests their own digital keys and temporary access, gaining more control over who leaves and enters your event.
7. Smart party planning
If you aren’t much of a planner, putting a first-rate shindig together can be a stressful experience.
With the right tech solutions though, even the most disorganized among us can become expert event coordinators, piecing together seamless itineraries and dazzling guests by taking every tiny detail into consideration.
Some examples here include:
Automated guest invitations and RSVP tracking
Integrated calendars, to-do-lists and reminders
AI-powered suggestions for how to plan and organize your event
8. Entertain your guests with AR and VR
Virtual reality and augmented reality are two emerging technologies that have the power to keep your guests engaged for hours.
Gone are the days when a two-dimensional console was the only source of gaming-based fun — now your guests can strap on a headset and immerse themselves in a detailed and incredibly entertaining fictional world, even competing with other guests.
It’s not just about gaming, either — AR and VR can be used to create beautiful cyber experiences for your guests, from interactive works of art to guided tours of faraway places.
9. Smart furniture and layouts
Equipping your seating areas with charging ports and built-in displays will delight your guests and create a much more comfortable and convenient place to chill out.
As time goes on, furniture will likely get even smarter. For instance, smart furniture could soon detect the number of guests and available space and automatically adjust, folding away or expanding certain sections as needed.
10. Eco-friendly hosting
Parties — especially the big ones — can pack quite the environmental footprint if you aren’t careful.
If you’re concerned about the impact of your party, there are several home automation tools that can help reduce your energy expenditure and help you plan a greener and more eco-friendly event.
For example, you can use smart energy management tools to track your usage over time and make adjustments to avoid wastage, like turning down the lights and heat in a room that hasn’t been occupied in a while.
Many up-to-date IoT devices will have these kinds of features built in, and will already automatically monitor and adjust their activity to use energy more optimally.
(Bonus tip) Preparing for hiccups
One of the risks of relying too heavily on tech for your party is that tech can sometimes go wrong.
Things like glitching devices, network issues, and features that are difficult to use can all get in the way of your guests having the best time possible. It’s important to be prepared for the possibility of things going wrong and have plans in place.
It’s always a good idea, for example, to have backup entertainment options in place. Is your VR system playing up? If so, having a more traditional console on hand can work as a great alternative while you get things back up and running.
Ultimately, you don’t want your party to be too tech-centric. It’s always smart to balance your high-tech features with more traditional hosting and entertainment activities — not just because tech can sometimes go wrong but because guests will always appreciate a human touch.
Host a party from the future
Home automation, driven by technologies like the IoT, can transform your next party into something your guests will never forget.
From big, show-stopping features like augmented reality works of art, to small but no less revolutionary tools like a smart dishwasher — home automation is the perfect party assistant.
With Arduino, you can even start building your very own automated party tools, using just a handful of easy-to-find components and a bit of coding knowledge. Check out a few projects below!
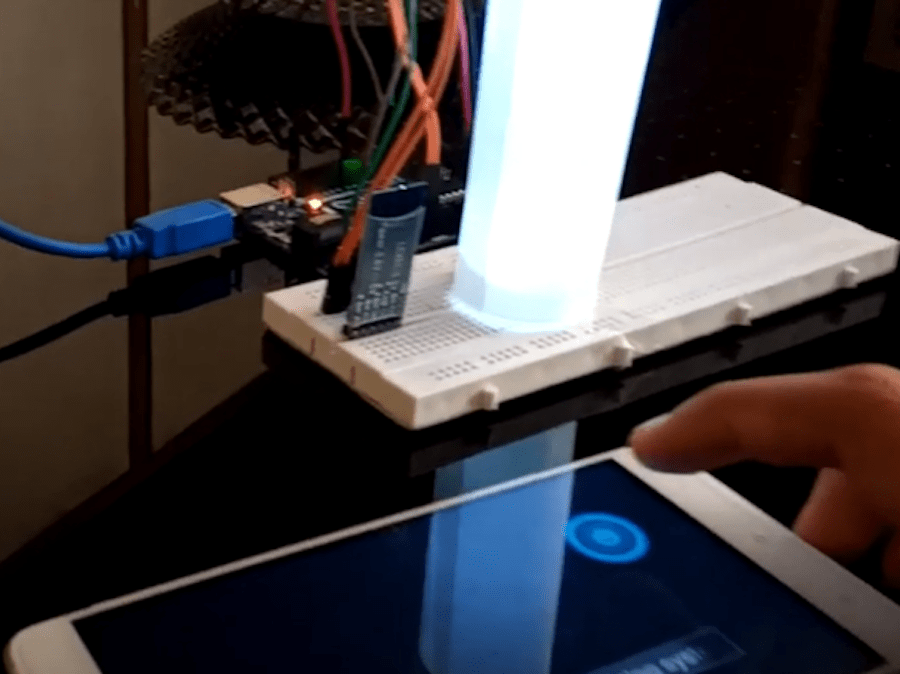
Bluetooth lighting system
Arduino user akk47 made this project allowing users to build a lighting system that can be controlled with nothing more than taps from your phone, wherever you are in the building.
It uses Bluetooth® and can be put together with just a handful of components. Projects like this are the first step towards your very own smart lighting system, making your home the envy of any guests.
Multi-zone heating controller
This project was built by Arduino user erkr because his rooms were either too hot or too cold when using a single thermostat.
It allows you to split your home into zones and control the temperature for each zone separately. It’s not only a great way to save on energy bills and create a more comfortable living environment, but it’s also a fantastic tool when hosting parties where rooms have different temperature needs.
PCB gyro gaming wheel
A good gaming setup can turn a good party into an unforgettable one. Arduino user ashraf_minhaj built this project — a gaming steering wheel that can add a new dimension to racing games.
This shouldn’t be too difficult to replicate for anyone with some background in making their own smart projects, and is a cheaper (and more fun) alternative to highly advanced gaming gadgets.
These are just a few ideas to give you some inspiration — with Arduino the sky really is the limit when it comes to creating fun and original new gadgets for your smart home. Get in touch with us to learn more and get started.
The UK Bebras Challenge is back and ready to accept entries from schools for its annual event, which runs from 6 to 17 November.
More than 3 million students from 59 countries took part in the Bebras Computational Thinking Challenge in 2022. In the UK alone, over 365,000 students participated. Read on to find out how you can get your school involved.
“This is now an annual event for our Year 5 and 6 students, and one of the things I actually love about it is the results are not always what you might predict. There are children who have a clear aptitude for these puzzles who find this is their opportunity to shine!”
Bebras is a free, annual challenge that helps schools introduce computational thinking to their students. No programming is involved, and it’s completely free for schools to enter. All Bebras questions are self-marking.
We’re making Bebras accessible by offering age-appropriate challenges for different school levels and a challenge tailored for visually impaired students. Schools can enter students from age 6 to 18 and know they’ll get interesting and challenging (but not too challenging) activities.
The winners of the Oxford University Computing Challenge 2023, with Professor Peter Millican at the OUCC Prize Day in the Raspberry Pi Foundation office.
What is the thinking behind Bebras?
We want young people to get excited about computing. Through Bebras, they will learn about computational and logical thinking by answering questions and solving problems.
Bebras questions are based on classic computing problems and are presented in a friendly, age-appropriate way. For example, an algorithm-based puzzle for learners aged 6 to 8 is presented in terms of a hungry tortoise finding an efficient eating path across a lawn; for 16- to 18-year-olds, a difficult problem based on graph theory asks students to sort out quiz teams by linking quizzers who know each other.
“This has been a really positive experience. Thank you. Shared results with Head and Head of Key Stage 3. Really useful for me when assessing Key Stage 4 options.”
– Secondary teacher, North Yorkshire
Can you solve our example Bebras puzzle?
Here’s a Bebras question for the Castors category (ages 8 to 10) from 2021. You will find the answer at the end of this blog.
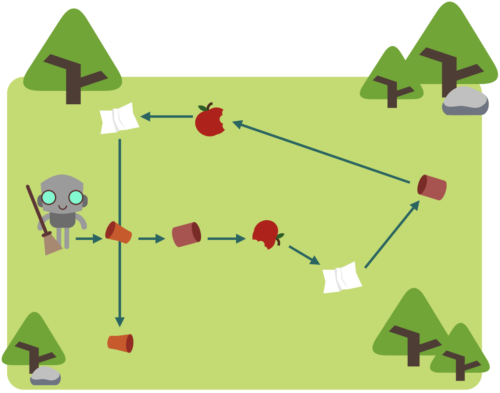
Cleaning
A robot picks up litter.
The robot moves to the closest piece of litter and picks it up.
It then moves to the next closest piece of litter and picks it up.
It carries on in this way until all the litter has been picked up.
Question: Which kind of litter will the robot pick up last?
How do I get my school involved in Bebras?
The Bebras challenge for UK schools takes place from 6 to 17 November. Register at bebras.uk/admin to get free access to the challenge.
By registering, you also get access to the Bebras back catalogue of questions, from which you can build your own quizzes to use in your school at any time during the year. All the quizzes are self-marking, and you can download your students’ results for your mark book. Schools have reported using these questions for end-of-term activities, lesson starters, and schemes of lessons about computational thinking.
Puzzle answer
The answer to the example puzzle is:
The image below shows the route the robot takes by following the instructions:
FLECS and Arduino Pro are partnering to make Industry 4.0 easier for you. FLECS is the easy-to-configure and open-source platform that allows industrial users to work with automation solutions dedicated to their machinery just as easily as we all handle the apps on our phone: install, manage and configure via web interface, and let the system keep track of versions and ensure updates.
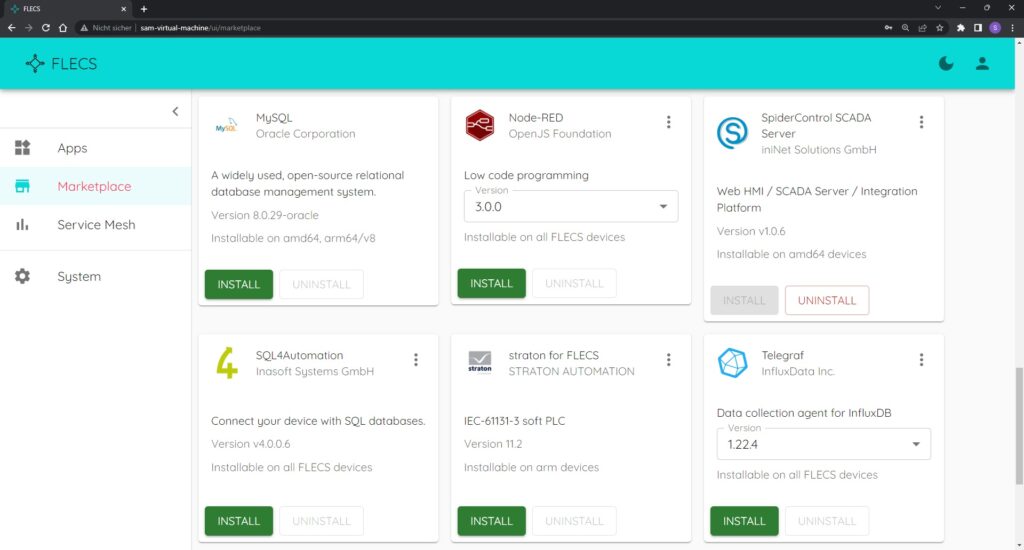
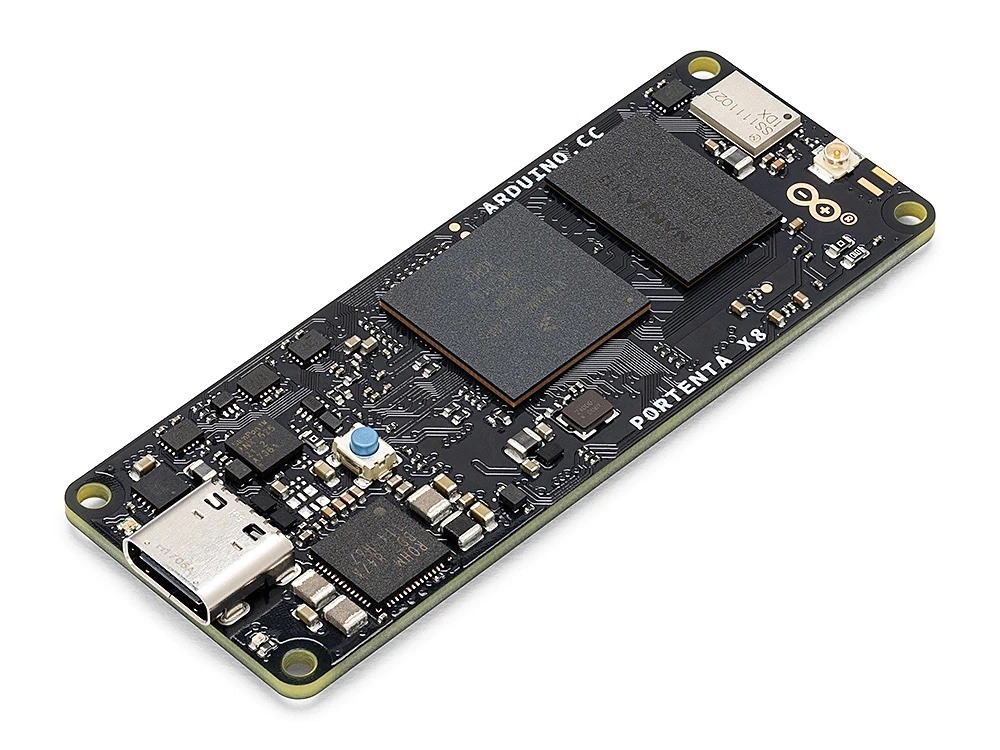
All you need is a Portenta X8 – our powerful, industrial-grade SOM with Linux OS preloaded onboard: connect it to your computer via USB, install FLECS for free (with, literally, one line of code), and access the FLECS UI to pick the right solution for production control, communication, SCADA (Supervisory Control And Data Acquisition), data analysis, fleet management and more.
“We are excited to offer the huge Arduino user community immediate access to our automation applications, so anyone can build and boost a wide variety of solutions for industrial contexts. It’s all made possible by Portenta X8, a groundbreaking product bringing Linux into the Arduino ecosystem.”
– Patric Scholz, Managing Director at FLECS
Indeed, while on one side you can now leverage all FLECS solutions in a few commands and clicks, on the other you will be working with one of Arduino Pro’s highest-performance modules: Portenta X8 is basically two industrial products in one, with the power of no less than 9 cores (an NXP i.MX 8M Mini Arm® Cortex®-A53 quad-core, up to 1.8GHz per core + 1x Cortex-M4 up to 400MHz, plus the STMicroelectronics STM32H747 dual-core Cortex-M7 up to 480MHz +M4 32-bit MCU up to 240MHz). And of course, the “superpower” of all Arduino products: being part of a comprehensive ecosystem of open-source hardware, software solutions, Cloud services and amazing community-based support.
The build process for Pironman is long and fiddly. The case itself comes partially assembled, but immediately requires disassembly to fit your Raspberry Pi inside. There then follows a 24-step assembly process that involves multiple flat conductor cables (FCC) to wire together the OLED display, SD card extender, and GPIO connector.
There are also multiple standoffs to connect the Pironman board underneath your Raspberry Pi 4 board. In total, we counted 28 different types of component in the case.
There are multiple opportunities for the build to go wrong. In this instance, however, ours booted up and worked the first time. Still, the build took us around three careful hours to complete.
The end result is cute, in a slightly hacked-together way with plenty of screws and gaps. It’s nowhere near as polished as some of the other cases on the market. But it is packed with components with a unique charm.
Verdict
8/10
A complex build results in a charming, if slightly hacky, micro PC-tower-style case with a range of interesting components.
Specs
Case: Aluminium tower case for Raspberry Pi 4 Model B (not compatible with Raspberry Pi 3)
Internals: Ice tower cooler with 5 mm copper pipe; Silent RGB fan with temperature control; On-board USB to M.2 SATA SSD, Supports TRIM and UASP; Available SSD Lengths: 22 mm × 30 mm, 42 mm, 60 mm, and 80 mm; Programmable 0.96˝ OLED
I/O: IR receiver for media centre; Power button for safe shutdown
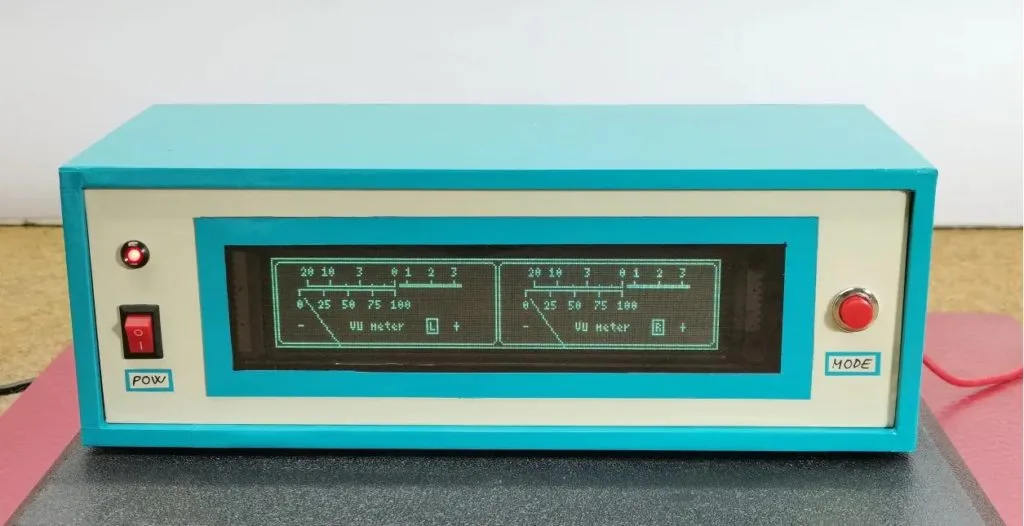
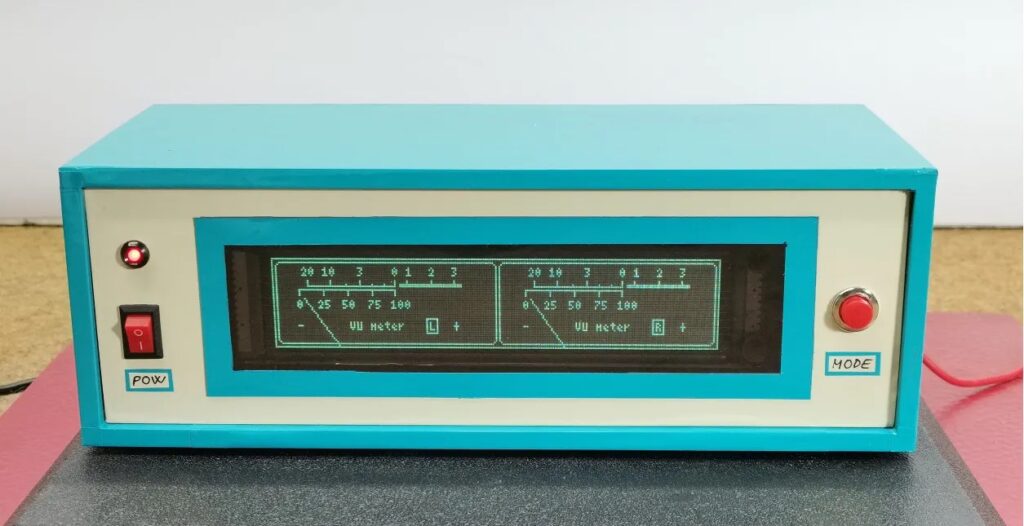
A volume unit (VU) meter is a simple gauge that indicates the amplitude of an audio signal, so higher decibels move the needle further. They’re common in the field of audio engineering and music production, with traditional VU meters being analog. But tuning an analog gauge is a challenge, so Mirko Pavleski designed a VU meter that looks analog and comes with all the benefits of a digital device.
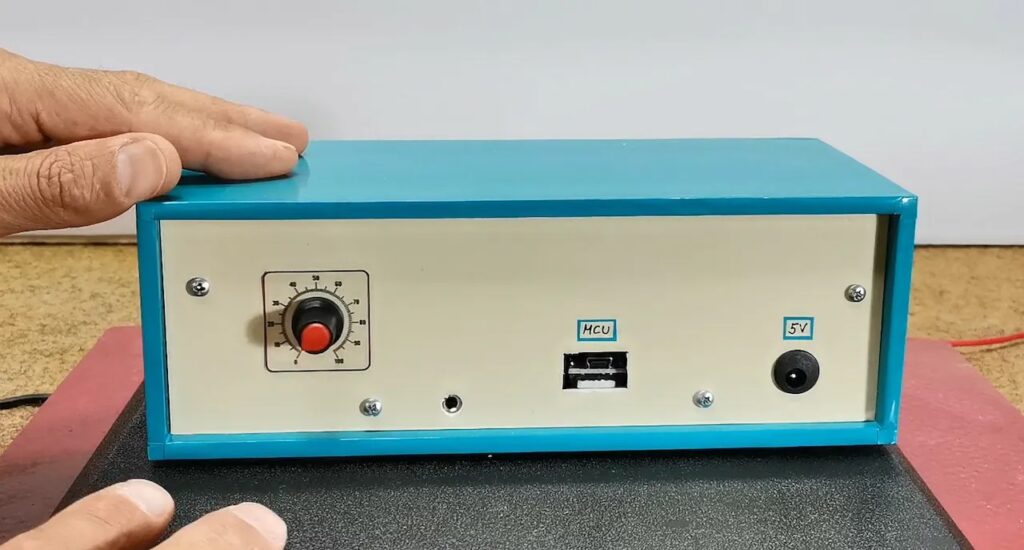
Monitoring the amplitude of a signal (like an audio signal) with a microcontroller is very easy — if that microcontroller has an ADC (analog-to-digital converter). MCU processors only understand digital ones and zeros, so the ADC is necessary to translate an infinitely granular analog signal into digital values that approximate it. The Arduino Nano board has eight analog input pins monitored by the ATmega328’s ADC and this project uses two of them: one for the left audio channel and one for the right.
The only other major component for this project is an GP1287 VFD (vacuum fluorescent display), which Pavleski chose for its high contrast and fast response time. It has a resolution of 256×50 and that is wide enough to show two virtual gauges side-by-side. The Nano simply performs an analog read for each audio channel, then updates the graphical gauge using the U8g2 library for monochrome displays. This VFD draws quite a lot of power and that necessitates the use of dedicated power supply. The only other components necessary are resistors, capacitors, and a rotary potentiometer.
Take a moment to go and look up some photos of the cockpits of airplanes and spacecraft. All of them are packed full of instruments and controls. So why do we feel like we can play a flight simulator with a regular gamepad? If you’re doing so, then you’re missing out on a lot of the experience. To get that deep immersion, Beko Pharm constructed a DIY cockpit for space sims like Elite Dangerous and Star Citizen.
Beko Pharm runs their sims on a Linux PC and that limits the compatibility with off-the-shelf rigs. But most of those are expensive and lackluster anyway, so Beko Pharm built a custom controller. Front and center is an LCD panel to display all kinds of data. Surrounding that are a multitude of indicator lights, buttons, and switches. The cockpit also includes a joystick and head tracking, so Beko Pharm can have complete control over their virtual spaceships.
An Arduino Mega 2560 drives all of the lights, which are WS2812B individually addressable RGB LEDs. It also monitors the joystick and buttons. The Arduino communicates with the simulation software using a custom interface developed with Node-RED and Rust. This lets it send commands and receive status data. It can, for example, illuminate a specific LED indicator if the simulation reports something like an engine failure.
All of those components mount onto a custom frame made of wood. That sits below Beko Pharm’s triple-monitor setup, creating the illusion that they are sitting in a real cockpit surrounding by controls and looking out of the windows.
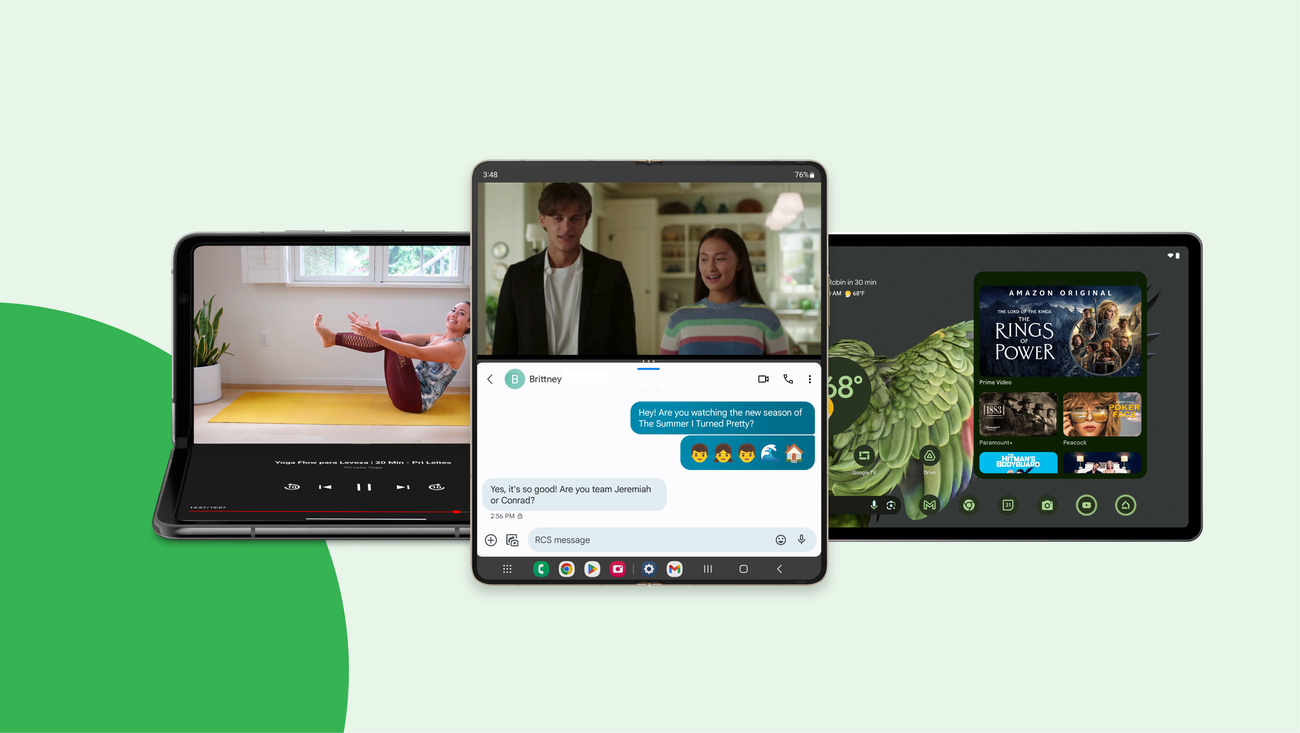
One of my favorite ways to unwind and relax is by watching TV shows and movies on my Pixel Fold. Since I always have my phone on me, I love being able to just flip it open to start enjoying videos on a large screen whenever I want.
I know I’m not alone, which is why we work with your favorite video streaming apps around the world to make sure they are available on Google Play, and to make sure they have been updated for larger screens, too. Today, we’re highlighting six video streaming apps that have been optimized for your Android foldable phone or tablet:
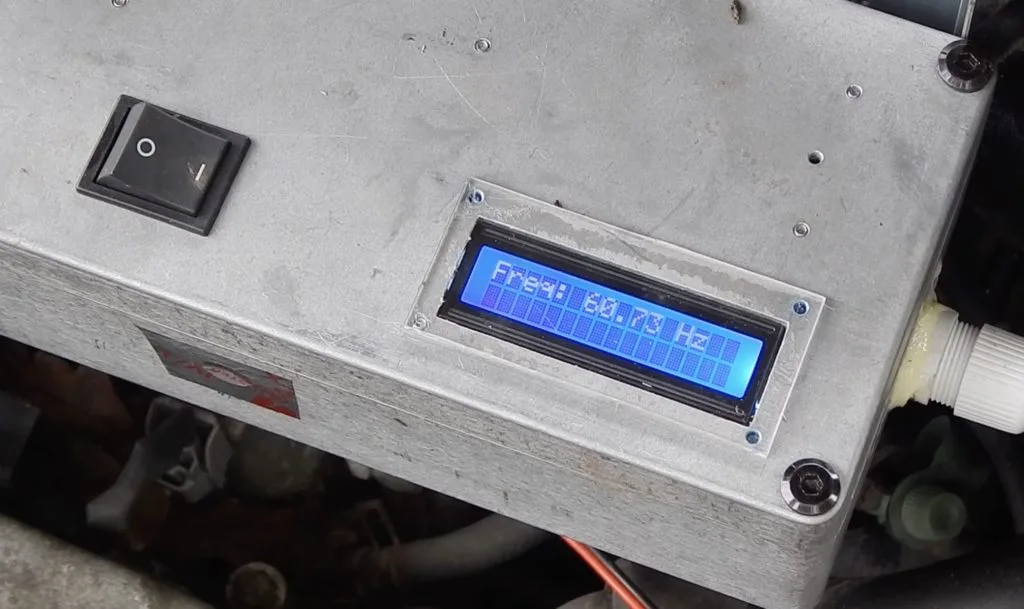
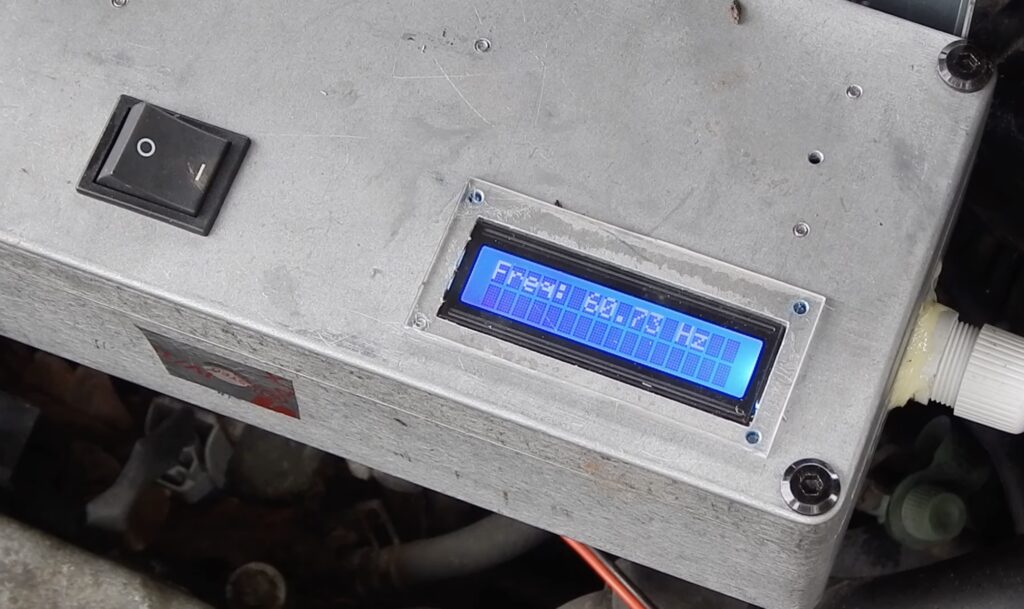
Generators are expensive pieces of equipment. You can get a small low-quality model for a few hundred dollars, but powerful high-quality generators cost thousands or even tens of thousands of dollars. Old cars, on the other hand, can be very cheap — especially if they aren’t roadworthy anymore. Jake von Slatt has a video series explaining how you can convert an old car with a working engine into a powerful generator.
Most of the cost of a generator is from the engine, and alternator or dynamo with inverter. In this case, the engine is in a Toyota Sienna minivan. The vehicle isn’t worth keeping on the road, but the engine still runs well. And that engine has plenty of power for a generator. The alternator came from a Harbor Freight generator that had a bad engine. To keep the AC voltage output at the steady 60Hz needed for household appliances and tools, von Slatt utilized an Arduino.
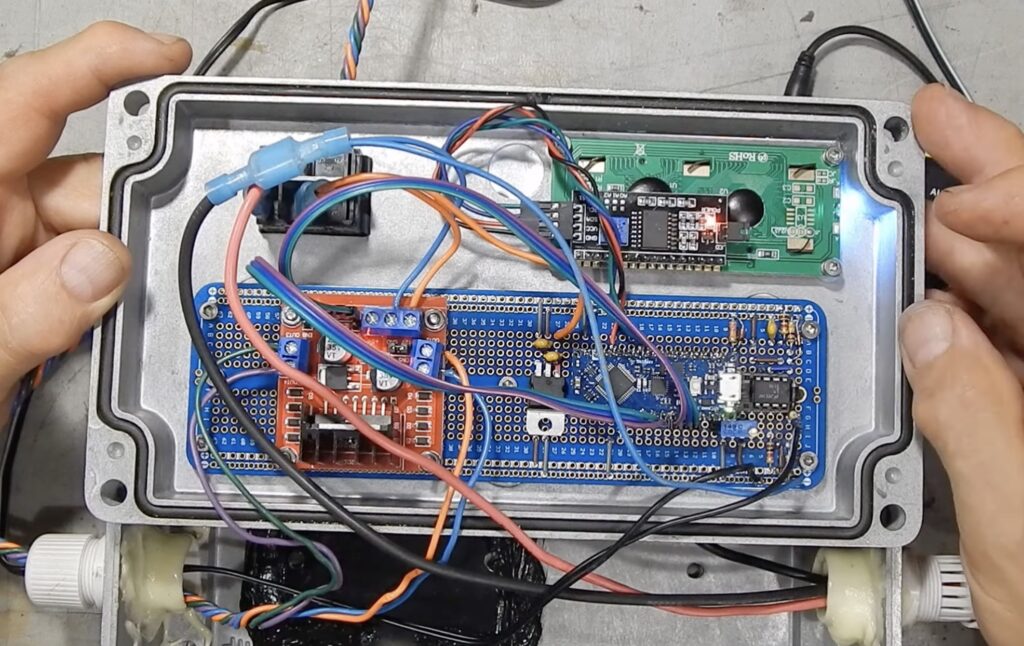
The Sienna has a cruise control system that actuates the throttle in an attempt to keep wheel speed consistent. But in this case, von Slatt needed it to keep the engine steady at 3600rpm to maintain 60Hz. So he built a simple circuit around an Arduino Nano Every board and an H-bridge. The Arduino controls the cruise control actuator’s servo motor through the H-bridge while monitoring the alternator output voltage (stepped down to 5V) frequency. If the frequency is too low, the Arduino rotates the cruise control actuator to increase engine speed until the frequency is exactly 60Hz. If the frequency is too low, it does the opposite.
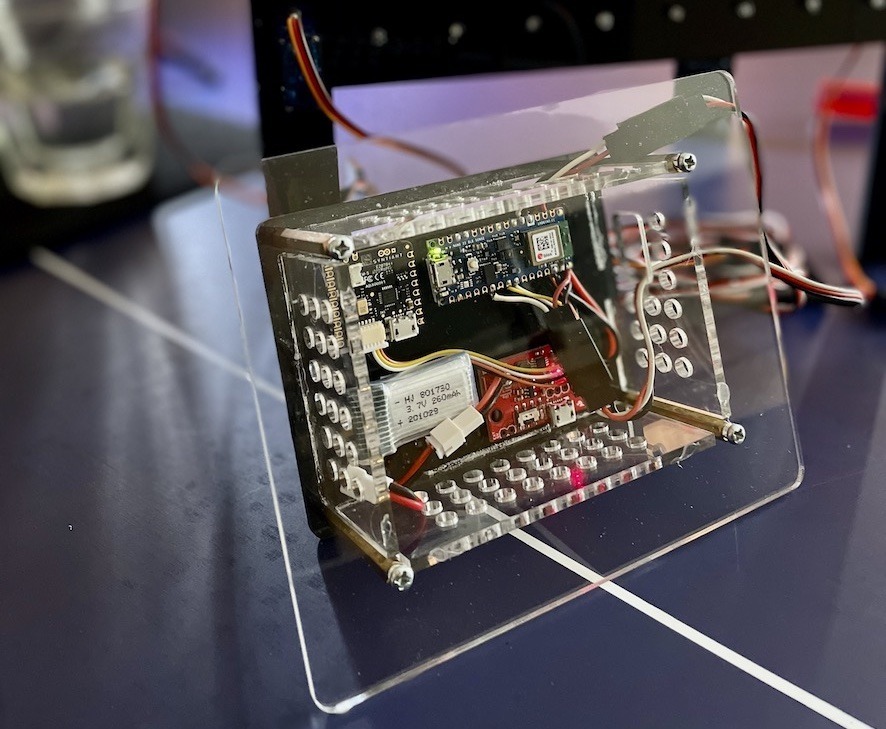
When dealing with indoor climate controls, there are several variables to consider, such as the outside weather, people’s tolerance to hot or cold temperatures, and the desired level of energy savings. Windows can make this extra challenging, as they let in large amounts of light/heat and can create poorly insulated regions, which is why Jallson Suryo developed a prototype that aims to balance these needs automatically through edge AI techniques.
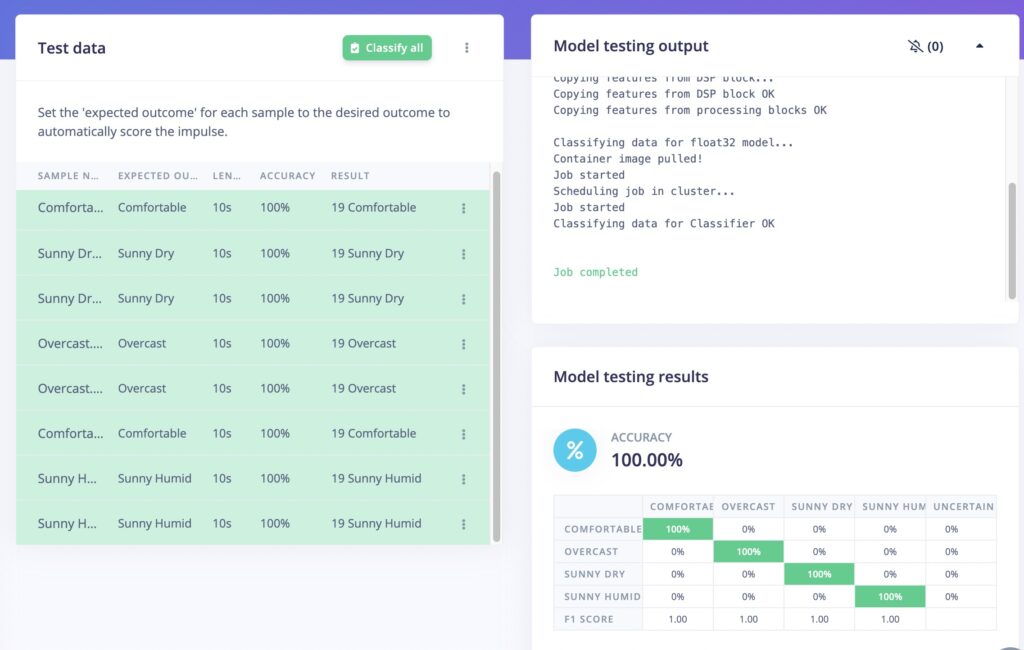
Suryo’s smart building ventilation system utilizes two separate boards, with an Arduino Nano 33 BLE Sense handling environmental sensor fusion and a Nicla Voice listening for certain ambient sounds. Rain and thunder noises were uploaded from an existing dataset, split and labeled accordingly, and then used to train a Syntiant audio classification model for the Nicla Voice’s NDP120 processor. Meanwhile, weather and ambient light data was gathered using the Nano’s onboard sensors and combined into time-series samples with labels for sunny/cloudy, humid, comfortable, and dry conditions.
After deploying the board’s respective classification models, Suryo added some additional code that writes new I2C data from the Nicla Voice to the Nano that indicates if rain/thunderstorm sounds are present. If they are, the Nano can automatically close the window via servo motors while other environmental factors can set the position of the blinds. With this multi-sensor technique, a higher level of accuracy can be achieved for more precision control over a building’s windows, and thus attempt to lower the HVAC costs.
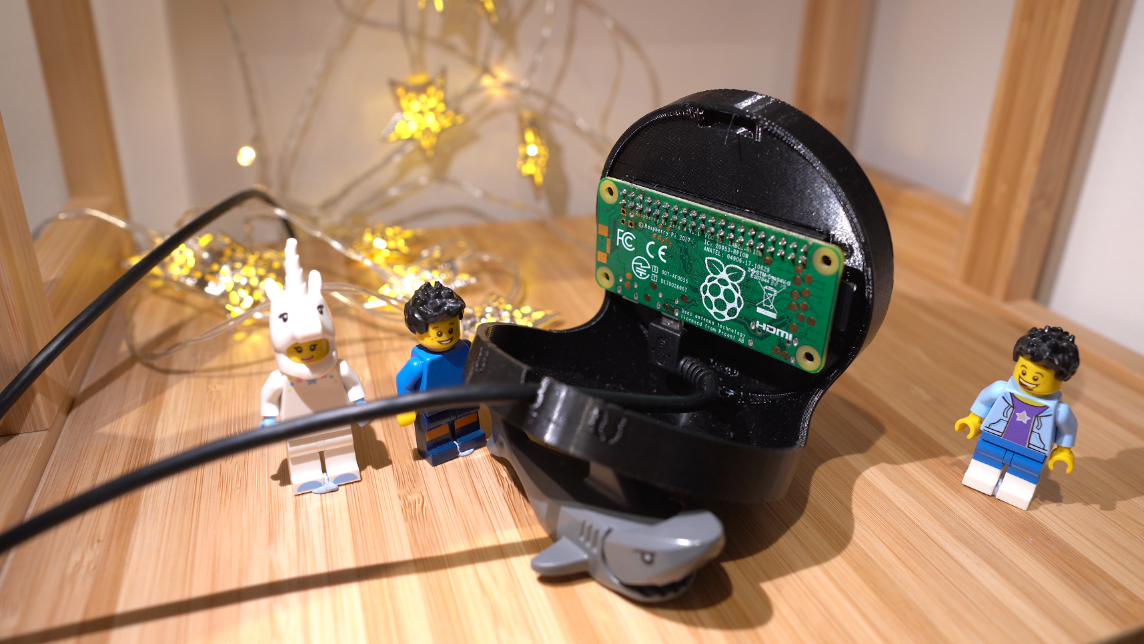
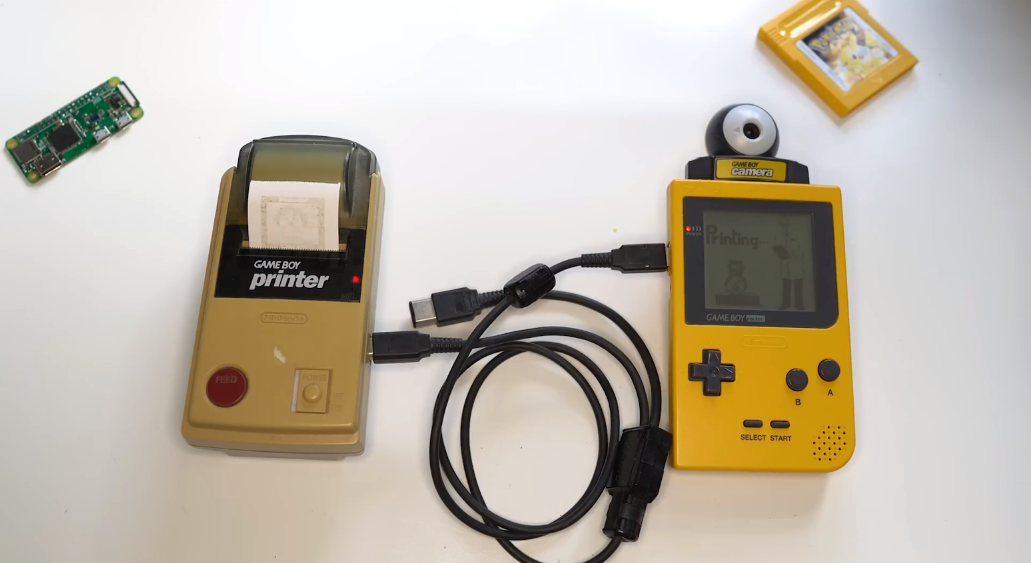
When Matt saw the 2.1-inch HyperPixel Round Touch Display in the Pimoroni shop, he decided it looked perfect. “This screen is designed for use with Raspberry Pi, so I used a Raspberry Pi Zero W.” Matt explains that he needed the wireless capabilities to download the photos from NASA. His approach would be similar to that used in his ‘Game Boy Camera Fast Wifi Adapter’ project (featured in The MagPi issue #110), which saw Matt find a way to pull the photos from the handheld console onto his smartphone.
Rounded approach
Although Raspberry Pi Zero W is “way overpowered for the job,” Matt chose it because it offers a quick and easy way for him to bring the project into being. “As always, with anything I’ve made with a Raspberry Pi, the hard bit for me was getting the code to run by itself at startup without any warnings or windows popping up over the top.” Matt also praises Pimoroni, who “have done the hard work of making the round screen so easy to use.” An alternative option would have been to use a microcontroller and a different round screen, but this would have taken far longer, as so many aspects would have needed to have been written or designed from scratch.
Another piece of good fortune was that someone else had already created a really good-looking case for the HyperPixel display that would look great sitting on a desk.
Matt wrote a Python script that checks the Blue Marble API for new EPIC photos, downloads them, and then loops showing each one in sequence on the screen using the Pygame library. The EPIC Daily Blue Marble API is provided by NASA and provides information about the images that the DSCVOR EPIC equipment collects here. Its Earth-Sun Lagrange positioning ensures that it is not just the acronym that is EPIC! It captures unique perspectives of astronomical events, such as lunar transits, using a 2048 × 2048 pixel CCD, coupled to a 30 cm aperture Cassegrain telescope.
Case work
The HyperPixel display was useful on its own, but needed something to hold it at a convenient viewing angle. Matt was about to design his own case, but did a quick check online to see whether anyone else in the community had designed a 3D-printable case for the round screen and Raspberry Pi combo. Happily, he found Cults3D user named ‘Printminion’ who had designed the perfect case.
Since Printminion’s case was specifically designed for the HyperPixel display, Matt was able to focus on how to make use of NASA’s Blue Marble API to get the incredible NASA photos on the screen. The API is named after the famous Blue Marble photo of Earth captured by the Apollo 17 space mission in 1972.
As well as daily images used to form Matt’s EPIC slide show, the API can serve up noteworthy images depicting our exploration of near space, and important images such as partial lunar eclipses and transits.
Matt has created a making-of video for the EPIC Satellite project on his YouTube channel. Look out for updates as he begins to make it even more epic, by adding options to view images of the moon and other planets.
In 2021, the average household had 25 connected devices, a massive increase on previous years, driven in no small part by the COVID-19 pandemic and lockdowns. And in 2023, the number of smart homes worldwide looks set to hit 195.8 million.
We’re living through a fascinating time for technology in general, with new breakthroughs hitting the headlines all the time, and the home automation industry is especially exciting.
In this article, we’ll dive into some of the main ways home automation is changing in 2023, some of the biggest current trends, and what’s on the horizon.
Emerging trends in home automation in 2023
2023 so far has been a big year for home automation, and there looks to be more to come. Let’s take a look at some of the most interesting emerging trends this year.
On top of that, the tech behind these gadgets is also developing fast, with new features emerging all the time. Today’s voice assistants are already a far cry from the first few generations of Amazon Alexa gadgets, and are capable of integrating with multiple devices and recognizing a range of different voices.
Edge computing and local processing
“Edge computing” refers to when data processing and analysis take place closer to the source of data generation (locally) rather than on centralized cloud servers somewhere else.
In the context of home automation, this means IoT devices can process the data they generate right there and then. This has a number of advantages, such as:
Low latency, because the data doesn’t have to travel all the way to a data center and back. This means tasks can be performed much quicker, and even in real-time.
Better bandwidth efficiency and reduced costs because only relevant information is shared over the network.
Better scalability, making it easier to add more devices to your smart home network.
Let’s check out a few examples of edge computing at work in smart homes.
Voice assistants like Amazon Echos with built-in processing capabilities are capable of handling voice commands locally, making them much more responsive and able to function smoothly even with the internet connection is unstable.
Security cameras can analyze video footage locally instead of sending that data to the cloud for analysis. This makes it easier to detect and report suspicious activity with much faster response times.
Managing things like lighting and temperature even when offline, keeping your working and living spaces in the most comfortable state at all times.
AI and machine learning
AI is a hot topic right now, and at times it can be hard to separate the truly exciting developments from the hype.
When it comes to home automation, though, AI holds a ton of promise.
Energy efficiency: AI can track the energy usage in your smart home appliances and make adjustments to ensure nothing is being wasted. It can also detect problems and unusual activity and take steps to correct any issues.
AI can add a touch of personalization to your smart home by learning your preferences and making automatic adjustments to things like temperature, lighting, and music.
Predictive maintenance: AI can monitor your smart home devices and predict when faults and issues are about to occur, helping you avoid outages and make repairs before they’re needed.
Sustainable and eco-friendly automation
We already briefly talked about how technologies like AI can help your smart home devices function more efficiently. In fact, smart heating and cooling systems, used correctly, can save users 50% of their energy consumption in some cases.
But that’s not the only way home automation can help you live more sustainably. For example, you can integrate your smart home with green energy sources like solar — something that’s becoming more common around the world.
What’s in store for the near future?
Now we’ve explored a few of the exciting things happening in home automation right now, let’s turn our gaze to the near future.
What can smart home owners look forward to over the next few years? This is where things get really interesting, as the rapid development of smart technologies mean things are changing fast.
Continued growth of 5G
5G technology looks set to grow in both popularity and sophistication throughout the next decade.
According to Ericsson’s 2022 Mobility Report, 5G subscriptions will reach 4.4 billion globally by the end of 2027, and account for around 48% of total mobile subscriptions.
For smart home owners, this means even faster connectivity, lower latency, and support for increasingly powerful and sophisticated IoT devices that aren’t possible just yet, as well as the opportunity to build more complex and connected smart home networks.
Augmented reality and virtual reality in smart homes
The AR and VR market is expected to grow at a compound annual rate of 13.72% between 2023 and 2027, which has a ton of exciting implications for home automation.
One example here is smart home maintenance. Augmented reality apps can make it much easier to repair faulty devices by providing real-time, 3D instructions that are far clearer than any manual or YouTube tutorial. AR can also be used to improve home design by helping you visualize how new furniture, decorations, and layouts will look before committing to them.
Even better security and privacy features
Keeping our families, homes, and possessions safe is always going to be a primary concern, and smart technology here is developing in some really interesting ways.
One example is the use of biometric tech to improve home security. The global biometrics market is projected to hit $83 billion by 2027, with voice recognition alone expected to reach $27 billion.
What does this mean for smart homes? Biometrics can be used to identify people with extremely accurate levels of precision, allowing you to enter your home with just your fingerprint, a scan of your iris, or even a voice command — while keeping everyone else out.
Other promising trends in smart home security include advances in data encryption and privacy controls to keep your IoT devices secure.
AI-powered home health monitoring
Keeping track of your vital signs and health metrics is more than just a hobby for fitness enthusiasts — for older people and those with health issues it can literally be life-saving.
Wearable devices like smart watches can track key health data, issue reminders to take medication, and alert emergency services when things go wrong. These devices can even be used to monitor individuals’ movement patterns and predict falls and other accidents.
We’re still some way off fully automated health care, but this is a step in the right direction.
Entire smart cities
Cities around the world are getting bigger, and that means they need to get smarter.
Home automation isn’t just for houses and apartments — it can be scaled up to the size of a city, a trend which is well underway. The global smart cities market is expected to grow at an annual compound rate of 13.13% until at least 2028.
Smart cities use technology like 5G, the Internet of Things, and AI to build more efficient, safe, and pleasant environments for millions of people to share. These technologies drive features such as:
Better connectivity for everyone, like accessible WiFi anywhere in the city including on transport.
More efficient and better-connected public transport systems, including more intelligent traffic management based on constant monitoring using sensors.
More efficient usage of energy, based on tracking usage and minimizing wastage.
Better waste management, using sensors to measure how full waste bins are and issuing alerts when it’s time to empty them.
Staying ahead of the smart home curve
With so much happening so fast, with no signs of slowing down, staying up-to-date with home automation tech can feel like an impossible task.
However, there’s a lot you can do to ensure you stay ahead of the curve and access these incredible benefits as they roll onto the market. Let’s check out a few ideas.
Keep your network current
Your home automation devices are only as good as the network they run on. That means a robust and up-to-date home network is one of the best investments you can make in your smart home.
Consider upgrading to a Wi-Fi 6 router, or the even more advanced 6E router. This will open up new possibilities when it comes to 5G and bring a new level of speed and slickness to your IoT network.
Another option is to set up a mesh network — a collection of connectivity sources around your home instead of a single router — to provide better coverage.
Keep your devices maintained
With the rate at which home automation technology is advancing, devices that were brand new just a few years ago are quickly becoming outdated.
This is especially true for firmware — it’s essential to keep your devices updated at all times to ensure they’re optimally secure and can take advantage of new features and capabilities.
Remember that your devices won’t last forever, and have some kind of plan in place to review and replace any older technology.
Stay informed
One of the best ways to keep pace with the rapidly changing world of home automation is to join online communities and attend events.
Of course, it’s not always feasible to travel huge distances to attend conferences and expos just to learn more about your smart home devices, but you can learn a lot from joining the right forums and online groups. These can help you get quick answers to questions, gain inspiration for future projects, and stay up to date with all the latest news and advice.
Here are some ideas:
r/HomeAutomation on Reddit, a subreddit dedicated to home automation with tips, questions, and shared projects.
Arduino’s community and forum: a place for Arduino users to gather and talk about their own projects, share guides, and discuss challenges they have encountered.
There’s also an extensive list of Facebook groups, YouTube channels, and blogs to explore, and specific technologies and devices often have their own dedicated support groups and online spaces.
Get into DIY
What better way to access the next generation of home automation technology than to build it yourself?
Today it’s easier than ever for total amateurs to build their own IoT devices and home automation projects, with nothing more than some simple components and a bit of basic coding knowledge.
At Arduino, we help people get started with their own home automation journey. Our products are built to help everyone from complete beginners to advanced makers create their own smart home technology and share it with the world.
Contact us to learn more about this and how to get started.
Rodents, including mice, are problematic. They can cause significant damage to your home by chewing up wires, walls, and insulation, while leaving behind unsanitary droppings that present a health hazard. But those of us who love animals are reluctant to utilize traditional mousetraps. Not only are those fatal, but they can also cause a lot of suffering along the way. That’s why Trapsticles built this rodent-friendly catch-and-release mousetrap.
This mousetrap doesn’t kill rodents or harm them at all. It simply traps them in a large box, so the homeowner can relocate them. To keep a mouse from just coming back, it is necessary to release them far away. But that’s a lot better than killing them. It may also be possible to donate the captured mice to pet stores to use as feeders. That is still a little gruesome, but nature is like that.
The concept here is simple: it is a big box and the top is a trap door actuated by a servo motor. Bait (like peanut butter) lures mice onto the trap door, which then swings down to drop the critter inside. The door then closes so the mouse can’t escape — though one wily rodent was able to climb out of Trapsticles’s trap.
An Arduino Nano board controls the servo. It detects the presence of a mouse (or any small warmblooded creature) using a PIR sensor. Blinder-style shields prevent the PIR sensor from spotting anything that isn’t on the trap door, so a passing person doesn’t set it off.
As you can see in the video, this works well and is much more humane than the traps at your local hardware store.
Servers don’t usually need monitors, keyboards, or mice. Because the user only interacts with servers through separate devices under normal conditions, a server can just be a box with with a processor, RAM, storage, and network adapter. But that becomes an issue if something is wrong with the server that requires direct interaction. To help his dad in those situations, Abraham Limpo added an LCD interface to his father’s old file server.
Limpo’s father owns an HP ProLiant MicroServer that he uses as a file server. Its only real job is to provide storage that is accessible over a network and/or the internet. It was a simple black box, but Limpo upgraded it to make it more usable. He installed an interface that includes an LCD screen and a couple of buttons. The LCD shows the file server’s IP address, so it is readable without having to check the router for that info. And the buttons let Limpo’s father safely shut the system down without having to SSH in.
An Arduino Nano board monitors the buttons and controls the LCD screen. It receives information from the file server via a Node app. Limpo mounted those in the ProLiant MicroServer using a 3D-printed frame that sits in place of the unused drive bay. The LCD is just a standard 16×2 character model, but that is sufficient for displaying the IP address and a little bit of extra information.
Throughout this year, space agencies have been embarking on new missions to explore our solar system, and young people can get involved too through the European Astro Pi Challenge 2023/24, which we’re launching today.
Kids’ code in space with the Astro Pi Challenge
In the past few months India’s Chandrayaan-3 mission landed near the Moon’s south pole, NASA’s Parker Solar Probe flew by Venus on its way to the sun, and the SpaceX Crew-7 launched to the International Space Station (ISS), led by ESA astronaut Andreas Mogensen. We’re especially excited about Andreas’ mission because he’s the astronaut who will help to run young people’s Astro Pi programs on board the ISS this year.
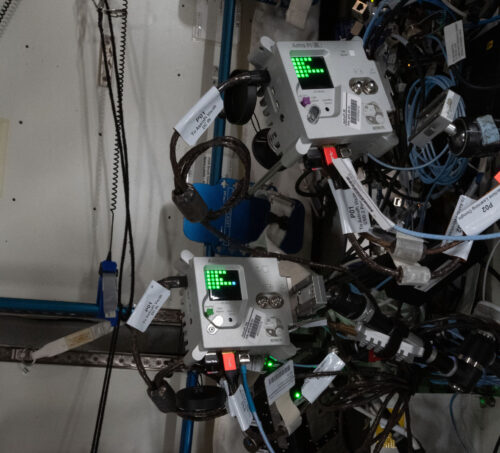
ESA astronaut Andreas Mogensen will help run kids’ Astro Pi code on board the ISS. Can you spot an Astro Pi computer in the photo?
As you may know, the European Astro Pi Challenge gives young people the amazing opportunity to conduct scientific experiments in space by writing computer programs for the Astro Pis, special Raspberry Pi computers on board the ISS.
Two Astro Pis on board the International Space Station.
The Astro Pi Challenge is free and offers two missions for young people: Mission Zero is an inspiring activity for introducing kids to text-based programming with Python. Mission Space Lab gives teams of young people the chance to take on a more challenging programming task and stretch their coding and science skills.
Participation in Astro Pi is open to young people up to age 19 in ESA Member States (see the Astro Pi website for eligibility details).
Astro Pi Mission Zero opens today
In Astro Pi Mission Zero, young people write a simple Python program to take a reading using a sensor on one of the ISS Astro Pi computers and display a personalised pixel art image for the astronauts on board the ISS. They can take part by themselves or as coding teams.
The theme for Mission Zero 2023/24 is ‘fauna and flora’: young people are invited to program pixel art images or animations of animals, plants, or fungi to display on the Astro Pi computers’ LED pixel screen and remind the astronauts aboard the ISS of Earth’s natural wonders.
A selection of Mission Zero pixel art images of animals.
By following the guide we provide, kids can complete the Mission Zero coding activity in around one hour, for example during a school lesson or coding club session. No coding experience is needed to take part. Kids can write their code in any web browser on any computer connected to the internet, without special equipment or software.
Mission Zero participants get a certificate showing the exact time and place where their code was run in space.
All young people that meet the eligibility criteria and follow the official Mission Zero guidelines will have their program run in space for up to 30 seconds. They will receive a unique and personalised certificate to show their coding achievement. The certificate will display the exact start and end time of their program’s run, and where the ISS was above Earth in this time period.
Mission Zero 2023/24 opens today and is open until Monday 25 March 2024. It’s very easy to support young people to get involved — find out more on the Astro Pi website:
Astro Pi Mission Space Lab will open soon
In this year’s Astro Pi Mission Space Lab, ESA astronauts are inviting teams of young people to solve a scientific task by writing a Python program.
The Mission Space Lab task is to gather data with the Astro Pi computers to calculate the speed at which the ISS is travelling. This new format of the mission will allow many more young people to run their programs in space and get a taste of space science.
The Strait of Gibraltar photographed by an Astro Pi on board the ISS during a previous Mission Space Lab.
Mission Space Lab will open on 6 November. We will share more information about how young people and mentors can participate very soon.
Sign up for Astro Pi news
The European Astro Pi Challenge is an ESA Education project run in collaboration with us here at the Raspberry Pi Foundation.
You can keep up with all Astro Pi news by following the Astro Pi X account (formerly Twitter) or signing up to the newsletter at astro-pi.org.
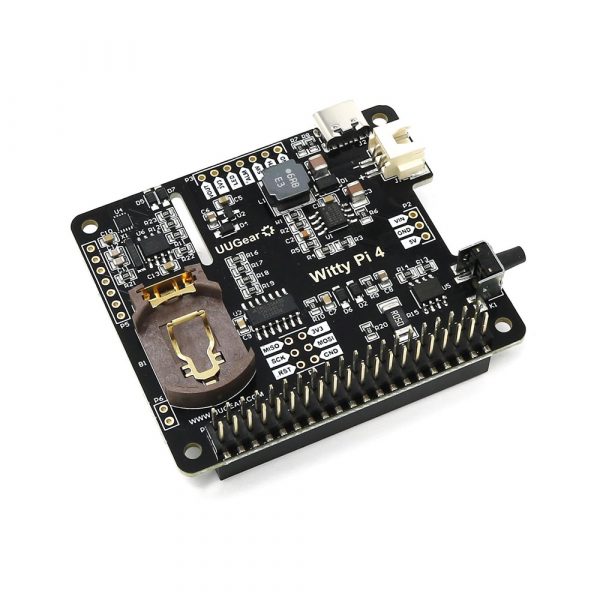
The Witty Pi 4 ($27.63) from UUGear is a great solution for all your Raspberry Pi timing, scheduling, and power management needs. No longer will you need to worry about the accuracy of your Raspberry Pi clock thanks to the on-board real-time clock and temperature sensor that allows for additional accuracy and temperature compensation. And anyone who has worked with the Raspberry Pi knows about power management and the relatively difficult nature of powering your Raspberry Pi on or off, and this is where the Witty Pi really shines.
Unlike a microcontroller that you simply power-off, you need to go through a powering-off sequence with your Raspberry Pi, similar to your desktop computer. And the Witty Pi can do that too! Now your Raspberry Pi can shut down and only wake up when needed, saving lots of power. If you have a remote monitoring project, or one that runs off battery power, the Witty Pi should be something to consider adding to the build.
Verdict
9/10 Great addition to a Raspberry Pi.
Adafruit Feather RP2040 with RFM95 LoRa Radio
The Adafruit Feather RP2040 RFM95 LoRa Radio board ($29.95), aka ‘RadioFruits’, is Adafruit’s take on a microcontroller with integrated long-range (LoRa) packet radio transceiver, along with a built-in USB and battery charging system. This is the perfect microcontroller board for creating wireless sensors that have a longer range and require less power than other wireless solutions like Bluetooth.
The board features an RP2040 chip running at 133MHz, the same as you can find on a Raspberry Pi Pico. You also get a generous 8MB of on-board QSPI flash and 264kB of RAM, plus on-board RGB LED, STEMMA QT connector, and lots of GPIO pins. Between the on-board battery management, LoRa radio, and RP2040, it would be hard to beat this little board for creating an outdoor sensor network.
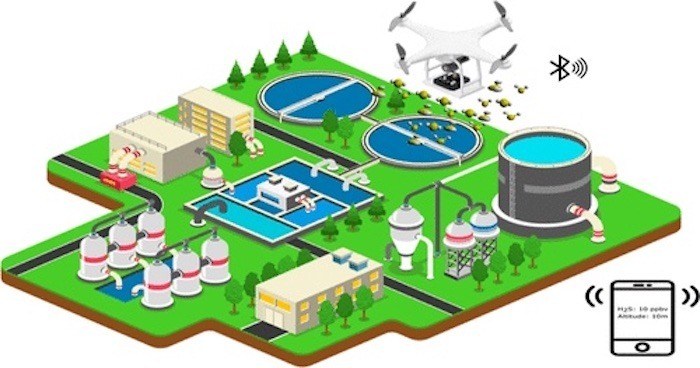
Air quality concerns encompass several different pollutants and irritants. Chlorofluorocarbons (CFCs) were, for example, a major concern in the 20th century due to the damage they cause to the ozone layer. But not all pollutants are easy to monitor. Hydrogen sulfide, which causes irritation of the eyes, nose, and throat at low levels and much more serious symptoms at high levels, can collect in pockets. To find them, researchers from Brazil have a developed a low-cost lab-on-a-drone.
The CDC reports that hydrogen sulfide exposure is a risk for those working in rayon textile manufacturing, petroleum and natural gas drilling and refining, wastewater treatment, and farms with manure storage pits. Because industry isn’t always keen on environmental protection, these researchers wanted a way to find pockets of high hydrogen sulfide concentration. To detect that gas efficiently at a variety of altitudes, they decided a drone-mounted approach was best.
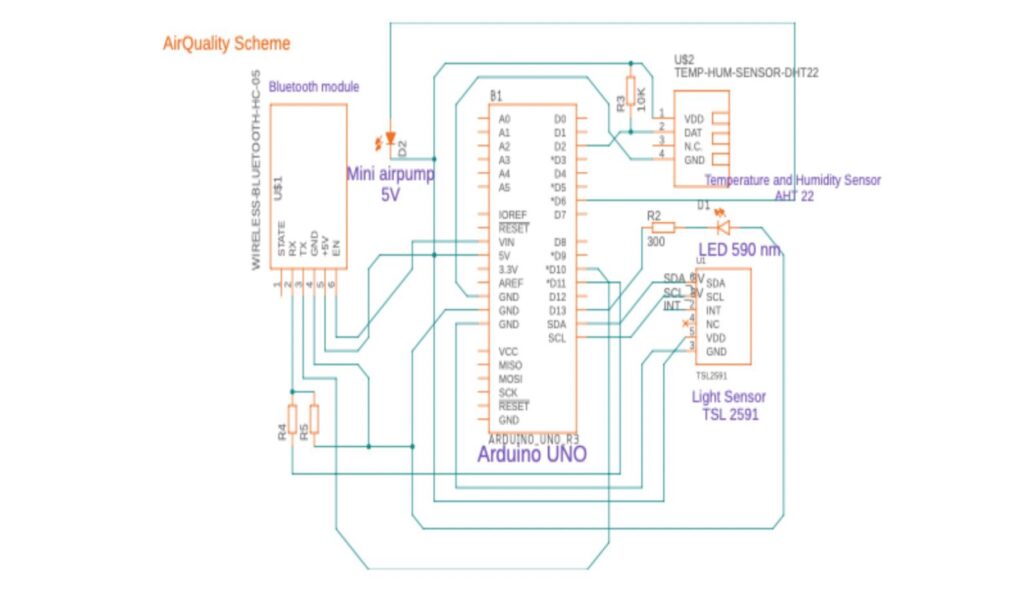
They achieved that by designing a sensor system light enough to be carried by off-the-shelf consumer drones. That payload consists of an Arduino UNO R3 board, the hydrogen sulfide sensor, an air pump for that sensor, and a DHT22 temperature and humidity sensor. It also has an HC-05 Bluetooth® module, so the researchers can monitor readings from anywhere within range.
The team found a significant increase in hydrogen sulfide levels as the drone got higher, indicating that existing sensors on the ground are insufficient for monitoring this kind of pollution. You can read more in their published paper here.
Images credit:Leal et al. Analytical Chemistry, 2023, DOI: 10.1021/acs.analchem.3c02719
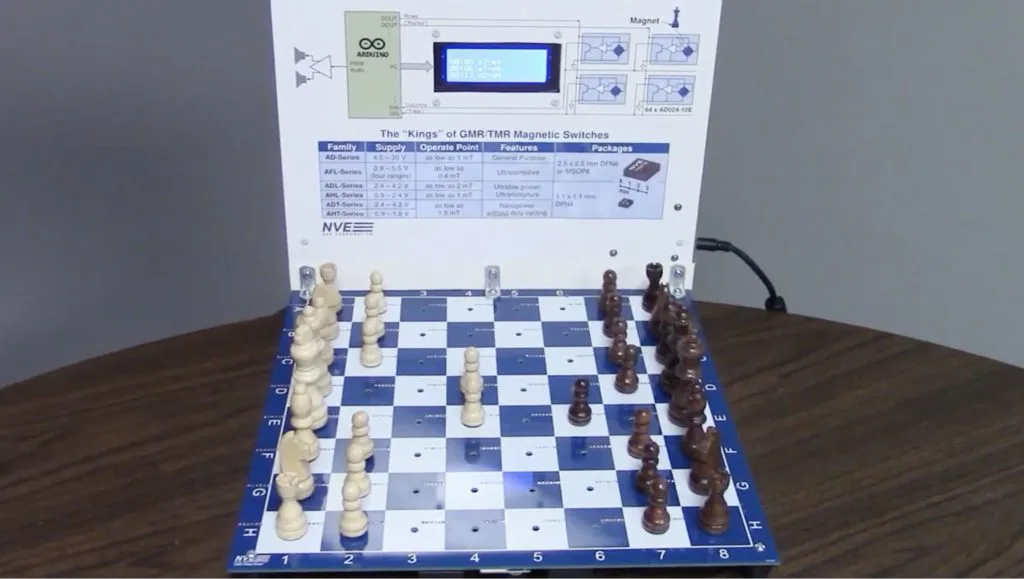
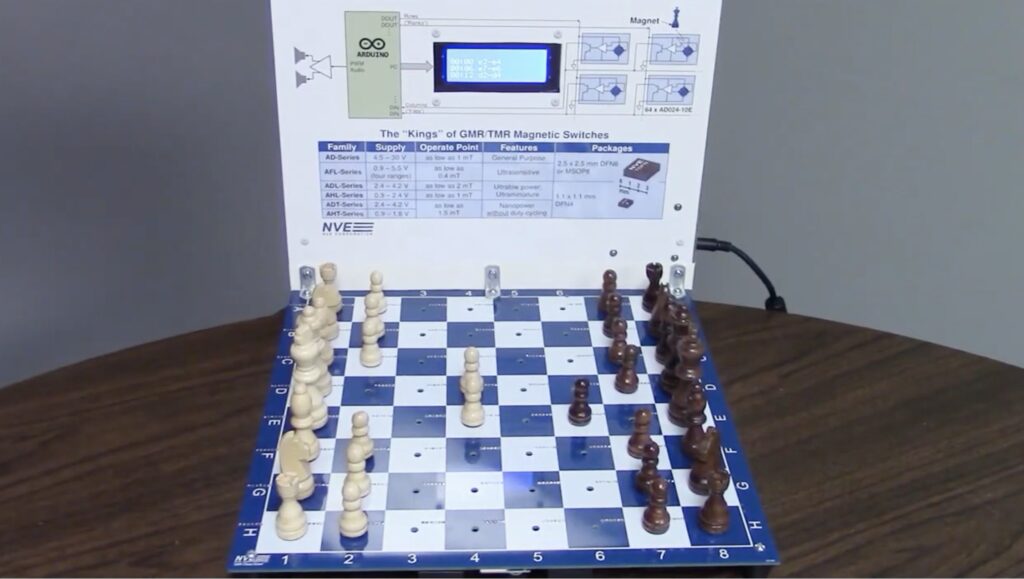
You can play chess just as easily on a $2 set from a thrift store as you can on a $2,000 ornate set from a bespoke retailer. But that doesn’t stop people from building or buying those fancy chess sets. If you’re the DIY type, you may even be interested in an electronic chessboard like this one from the NVE Corporation team, which was made possible by practical magnetic switches.
This is an electronic chessboard that registers moves and speaks them out loud. That can make it useful for people who don’t have good eyesight. It also allows for the possibility of recording entire matches on a connected computer. Chessboards like this aren’t uncommon, but this project was simplified by the use NVE’s GMR magnetic switch sensors. Those detect the presence of magnets in the bases of the chess pieces, with enough tolerance to account for variation in placement and board thickness.
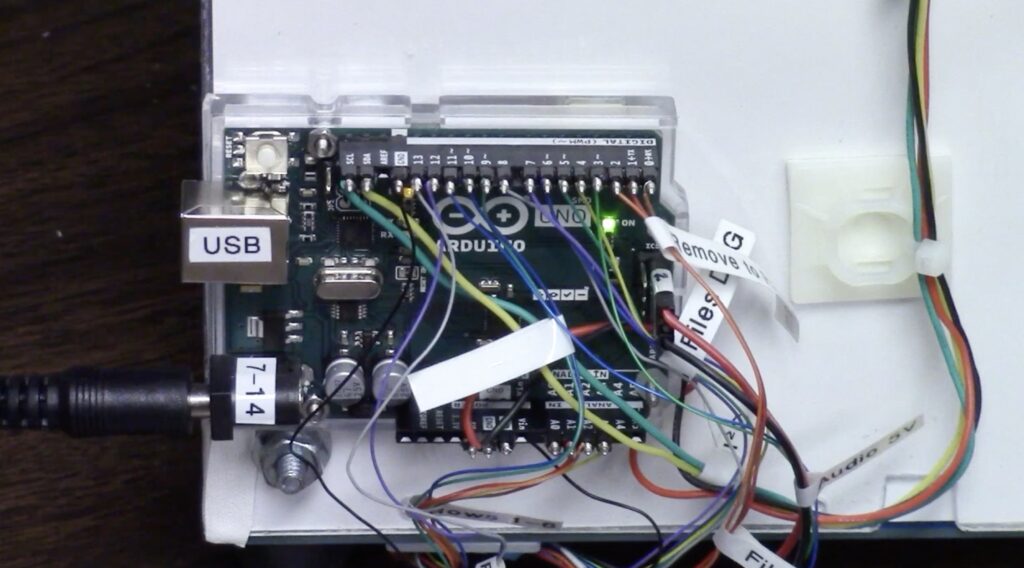
An Arduino UNO R3 board monitors all 64 of those switches through a matrix similar to keyboard. When a player picks up a piece, the Arduino notes the square that changed states. Then, when the player puts down the piece, the Arduino records that square, too. It can then output PWM (pulse-width modulation) audio to an amplifier board that says, for example, “B7 to B6” using the Talkie library.
By updating a running log of every piece’s position, it would also be possible for it to instead say “pawn to B6.” But the current implementation doesn’t do so.
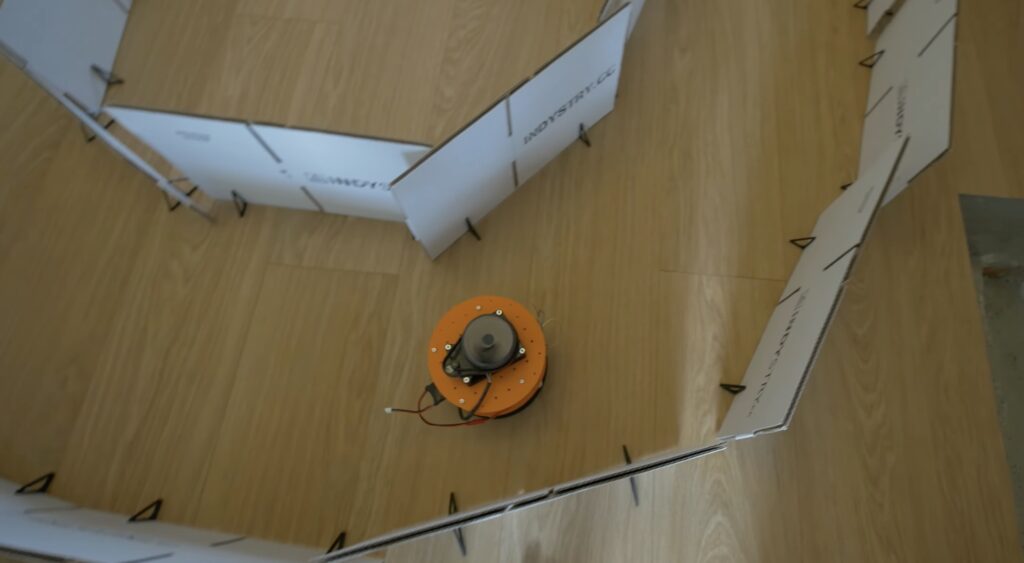
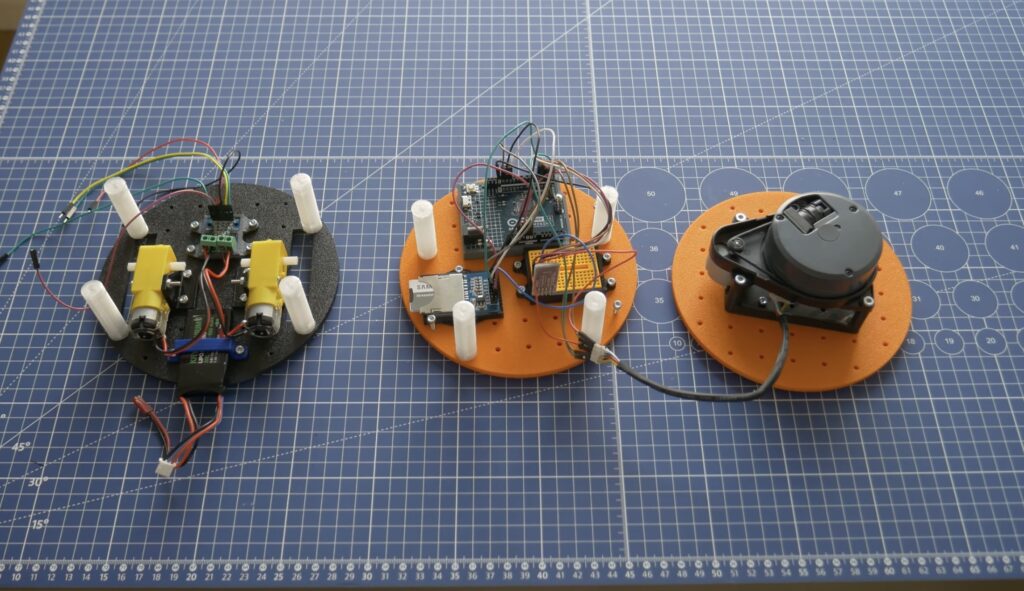
The rapid rise of edge AI capabilities on embedded targets has proven that relatively low-resource microcontrollers are capable of some incredible things. And following the recent release of the Arduino UNO R4 with its Renesas RA4M1 processor, the ceiling has gotten even higher as YouTuber Nikodem Bartnik has demonstrated with his lidar-equipped mobile robot.
Bartnik’s project started with a simple question of whether it’s possible to teach a basic robot how to make its way around obstacles using only lidar instead of the more resource-intensive computer vision techniques employed by most other platforms. The chassis and hardware, including two DC motors, an UNO R4 Minima, a Bluetooth® module, and SD card, were constructed according to Open Robotic Platform (ORP) rules so that others can easily replicate and extend its functionality. After driving through a series of courses in order to collect a point cloud from the spinning lidar sensor, Bartnik imported the data and performed a few transformations to greatly minify the classification model.
Once trained, the model was exported with help from the micromlgen Python package and loaded onto the UNO R4. The setup enables the incoming lidar data to be classified as the direction in which the robot should travel, and according to Bartnik’s experiments, this approach worked surprisingly well. Initially, there were a few issues when navigating corners and traveling through a figure eight track, but additional training data solved it and allowed the vehicle to overcome a completely novel course at maximum speed.
Um dir ein optimales Erlebnis zu bieten, verwenden wir Technologien wie Cookies, um Geräteinformationen zu speichern und/oder darauf zuzugreifen. Wenn du diesen Technologien zustimmst, können wir Daten wie das Surfverhalten oder eindeutige IDs auf dieser Website verarbeiten. Wenn du deine Einwillligung nicht erteilst oder zurückziehst, können bestimmte Merkmale und Funktionen beeinträchtigt werden.
Funktional
Immer aktiv
Die technische Speicherung oder der Zugang ist unbedingt erforderlich für den rechtmäßigen Zweck, die Nutzung eines bestimmten Dienstes zu ermöglichen, der vom Teilnehmer oder Nutzer ausdrücklich gewünscht wird, oder für den alleinigen Zweck, die Übertragung einer Nachricht über ein elektronisches Kommunikationsnetz durchzuführen.
Vorlieben
Die technische Speicherung oder der Zugriff ist für den rechtmäßigen Zweck der Speicherung von Präferenzen erforderlich, die nicht vom Abonnenten oder Benutzer angefordert wurden.
Statistiken
Die technische Speicherung oder der Zugriff, der ausschließlich zu statistischen Zwecken erfolgt.Die technische Speicherung oder der Zugriff, der ausschließlich zu anonymen statistischen Zwecken verwendet wird. Ohne eine Vorladung, die freiwillige Zustimmung deines Internetdienstanbieters oder zusätzliche Aufzeichnungen von Dritten können die zu diesem Zweck gespeicherten oder abgerufenen Informationen allein in der Regel nicht dazu verwendet werden, dich zu identifizieren.
Marketing
Die technische Speicherung oder der Zugriff ist erforderlich, um Nutzerprofile zu erstellen, um Werbung zu versenden oder um den Nutzer auf einer Website oder über mehrere Websites hinweg zu ähnlichen Marketingzwecken zu verfolgen.


