Kategorie: Mobile

  • 6 cybersecurity mistakes people make — and what to do instead6 cybersecurity mistakes people make — and what to do instead

    6 cybersecurity mistakes people make — and what to do instead6 cybersecurity mistakes people make — and what to do instead

    Reading Time: 5 minutes

    From sending emails to scrolling through social media, our lives are very much online. Every click, login, and piece of information we share builds our digital footprint, one that requires constant protection from online threats like scams and malware. Implementing best practices to stay safe online can feel overwhelming, but don’t worry — we’re here to help!

    We asked two of our experts to walk us through the all-too-common cybersecurity mistakes people make online, and what to do instead. Read on to learn more about which habits you should drop for good, and how to start this year with a safer, more secure online life.

    Mistake #1: Using the same password everywhere

    Reusing passwords is one of the most common cybersecurity habits we all should drop, says Sriram Karra, senior product manager of sign-in security. This seemingly innocuous habit can create a dangerous domino effect. For example, say you use your Gmail password on another platform and that platform suffers a breach — then, your Google Account also becomes vulnerable. „No matter how strong our online security is, a breach of a third-party website can compromise your Google Account if you’re reusing passwords,“ Sriram says.

    What to do instead: Never reuse passwords; instead, use Google Password Manager to make it easier to generate and keep track of unique sign-in credentials. In addition, „pay special attention to picking a strong and unique password for your Google account, because if that Google account gets compromised you can also lose access to other accounts,“ Sriram says. “Many websites send password reset links to your registered email. This means if someone gains access to your Gmail, they could easily take over your other accounts by resetting their passwords.”

    You can also add passkeys to your Google account, which will allow you a safe and simple way to sign into your account using your device’s biometrics or PIN. And as other services add passkey support, start using them for a convenient and password-free sign-in experience.

    Mistake #2: Neglecting software updates

    It might be tempting to ignore those annoying software update reminders, but our experts caution against it. “Allowing regular software updates is actually the second-most crucial security practice after using a password manager,” says Christiaan Brand, group product manager of identity. These updates often contain vital security patches that fix vulnerabilities attackers exploit. Delaying them leaves your devices, data, and privacy at risk.

    Plus, if you procrastinate on updating, many software updates have a way of forcing themselves eventually, often at inconvenient times. This can disrupt your workflow or downtime, and sometimes even lead to application crashes or temporary loss of functionality.

    What to do instead: Prioritizing timely software updates is essential for maintaining a healthy and secure digital life. Regularly update your devices‘ software, ensuring you benefit from the latest security patches and protections. Platforms like Android and ChromeOS provide most system and security updates automatically to ensure your devices stay up-to-date against emerging threats, providing a proactive defense mechanism without you having to do anything.

    Mistake #3: Overlooking 2-Step Verification

    Another crucial online security mistake is neglecting to turn on 2-Step Verification, a security feature that adds a step during sign-in to help prevent someone from accessing your account unless you allow it. „Adding a second step of verification can cut down many kinds of attacks, including 100% of automated bot attacks,“ Sriram says. Yet, users often ignore setting up this simple and effective feature.

    What to do instead: Turn on 2-Step Verification by following these instructions for your Google Account. Once it is on, 2-Step Verification sends prompts to your phone to allow log-in attempts. It adds an extra layer of protection, making unauthorized access to your account a significantly more challenging feat. It’s like having a second lock on your digital door — a small inconvenience for a significant boost in security.

    If you are at a higher risk due to your profession, online presence, or personal circumstances, you can opt into our Advanced Protection Program.

    Mistake #4: Not setting a screen lock PIN on your mobile device

    „It might seem like a hassle, but configuring a screen lock on your device, even if it seems unnecessary, is crucial for protecting your data,“ Christiaan says. This simple step safeguards your information from unauthorized access and accidental triggers, bringing peace of mind and reinforcing good security habits.

    Not all screen lock PINs are created equal, however; Sriram says to avoid using weak PINs with easily identifiable patterns like 1234. „These methods may seem convenient, but they pose a significant security risk if your phone falls into the wrong hands,“ he says.

    What to do instead: Choose a strong screen lock option, like a complex password or biometric authentication, which uses fingerprint or facial recognition — Google Pixel phones, for example, offer convenient and secure biometric options. If you lose or misplace your phone, Google’s Find My Device tool helps you locate and secure it. And even in trusted locations like your home or office, you can choose when and how long your phone stays unlocked.

    Mistake #5: Clicking on suspicious links

    Cybercriminals often disguise malicious links as legitimate ones, making it difficult to discern truth from deception. „It’s hard to advise never clicking on things or only clicking on links from trusted senders,“ Christiaan acknowledges, because in today’s digital landscape, malicious links can come in the form of legitimate-looking emails and seemingly harmless posts on social media. But if you’re not careful, all of these can be a gateway to malware and data theft.

    What to do instead: Stay vigilant; be wary of any links you click on, even ones that look legitimate. For an extra layer of protection, make sure to enable Google Enhanced Safe Browsing, which identifies and warns against a list of known phishing and malware sites that is updated in real-time. By leveraging this tool, you actively shield yourself from threats that could compromise your security. It’s like having a personal online security guard keeping an eye out for you while you browse.

    Mistake #6 Not having a password recovery plan

    Forgetting your password or misplacing your phone — a crucial part of a two-factor authentication system — can happen to anyone. „These are normal occurrences, and we have robust automated Account Recovery to deal with them,“ Sriram assures us. But if you haven’t set up a recovery plan before they happen, you can be caught stranded without access to your account for a long time.

    What to do instead: Create a recovery plan before you need it, so when the time comes you won’t be locked out of your account. You can add a recovery email address or phone number so Google can contact you if you get locked out of an account. Be sure to set up your account with sufficient verification information to make sure it is up to date for a smoother recovery process. Like a spare key, Google’s account recovery options give you the tools to regain access, even if you lose your password or device.

    By following our experts’ advice and using Google’s powerful tools, you can build a strong digital defense and navigate the ever-changing digital landscape with confidence.

    Website: LINK

  • Arduino Cloud Café: Let’s chat about environmental monitoring!

    Arduino Cloud Café: Let’s chat about environmental monitoring!

    Reading Time: < 1 minute

    Exciting news! We’re gearing up for the second edition of Arduino Cloud Café, and we’re thrilled to have you join us. Tune in on Tuesday, February 13th at 5pm CET for an engaging session on environmental monitoring.

    This time, we have two fantastic guests — Bill from Dronebot Workshop and Muhammad Afzal, author of “Arduino IoT Cloud: A Guide for Developers — who will be sharing their insights and connected projects. It’s an opportunity you won’t want to miss!

    Save the date and be ready to dive into the world of Arduino Cloud with us:

    The post Arduino Cloud Café: Let’s chat about environmental monitoring! appeared first on Arduino Blog.

    Website: LINK

  • Grounded cognition: physical activities and learning computing

    Grounded cognition: physical activities and learning computing

    Reading Time: 4 minutes

    Everyone who has taught children before will know the excited gleam in their eyes when the lessons include something to interact with physically. Whether it’s printed and painstakingly laminated flashcards, laser-cut models, or robots, learners’ motivation to engage with the topic will increase along with the noise levels in the classroom.

    Two learners do physical computing in the primary school classroom.

    However, these hands-on activities are often seen as merely a technique to raise interest, or a nice extra project for children to do before the ‘actual learning’ can begin. But what if this is the wrong way to think about this type of activity? 

    In our 2023 online research seminar series, focused on computing education for primary-aged (K–5) learners, we delved into the most recent research aimed at enhancing learning experiences for students in the earliest stages of education. From a deep dive into teaching variables to exploring the integration of computational thinking, our series has looked at the most effective ways to engage young minds in the subject of computing.

    An adult on a plain background.

    It’s only fitting that in our final seminar in the series, Anaclara Gerosa from the University of Glasgow tackled one of the most fundamental questions in education: how do children actually learn? Beyond the conventional methods, emerging research has been shedding light on a fascinating approach — the concept of grounded cognition. This theory suggests that children don’t merely passively absorb knowledge; they physically interact with it, quite literally ‘grasping’ concepts in the process.

    Grounded cognition, also known in variations as embodied and situated cognition, offers a new perspective on how we absorb and process information. At its core, this theory suggests that all cognitive processes, including language and thought, are rooted in the body’s dynamic interactions with the environment. This notion challenges the conventional view of learning as a purely cognitive activity and highlights the impact of action and simulation.

    A group of learners do physical computing in the primary school classroom.

    There is evidence from many studies in psychology and pedagogy that using hands-on activities can enhance comprehension and abstraction. For instance, finger counting has been found to be essential in understanding numerical systems and mathematical concepts. A recent study in this field has shown that children who are taught basic computing concepts with unplugged methods can grasp abstract ideas from as young as 3. There is therefore an urgent need to understand exactly how we could use grounded cognition methods to teach children computing — which is arguably one of the most abstract subjects in formal education.

    A recent study in this field has shown that children who are taught basic computing concepts with unplugged methods can grasp abstract ideas from as young as 3.

    Anaclara is part of a group of researchers at the University of Glasgow who are currently developing a new approach to structuring computing education. Their EIFFEL (Enacted Instrumented Formal Framework for Early Learning in Computing) model suggests a progression from enacted to formal activities.

    Following this model, in the early years of computing education, learners would primarily engage with activities that allow them to work with tangible 3D objects or manipulate intangible objects, for instance in Scratch. Increasingly, students will be able to perform actions in an instrumented or virtual environment which will require the knowledge of abstract symbols but will not yet require the knowledge of programming languages. Eventually, students will have developed the knowledge and skills to engage in fully formal environments, such as writing advanced code.

    A graph illustrating the EIFFEL model for early computing.

    In a recent literature review, Anaclara and her colleagues looked at existing research into using grounded cognition theory in computing education. Although several studies report the use of grounded approaches, for instance by using block-based programming, robots, toys, or construction kits, the focus is generally on looking at how concrete objects can be used in unplugged activities due to specific contexts, such as a limited availability of computing devices.

    The next steps in this area are looking at how activities that specifically follow the EIFFEL framework can enhance children’s learning. 

    You can watch Anaclara’s seminar here: 

    [youtube https://www.youtube.com/watch?v=BgjSKhqRHDU?feature=oembed&w=500&h=281]

    You can also access the presentation slides here.

    Research into grounded cognition activities in computer science is ongoing, but we encourage you to try incorporating more hands-on activities when teaching younger learners and observing the effects yourself. Here are a few ideas on how to get started:

    In 2024, we are exploring different ways to teach and learn programming, with and without AI tools. In our next seminar, on 13 February at 17:00 GMT, Majeed Kazemi from the University of Toronto will be joining us to discuss whether AI-powered code generators can help K–12 students learn to program in Python. All of our online seminars are free and open to everyone. Sign up and we’ll send you the link to join on the day.

    Website: LINK

  • UNO R4 Stars: Meet Brenda Mboya

    UNO R4 Stars: Meet Brenda Mboya

    Reading Time: 3 minutes

    The launch of the Arduino UNO R4 marks a huge leap forward for our community. For us, it’s also the chance to celebrate the people who bring our ecosystem to life with their bright ideas, radiant enthusiasm, and shining insight.

    That is how the UNO R4 Stars blog post series began: to highlight makers who have not only created amazing projects with Arduino, but who are giving back to the community by sharing as they go and helping others make anything they wish.

    We invite you to discover each profile, hoping you might find a North Star to navigate around an expanding galaxy or venture into completely new universes.

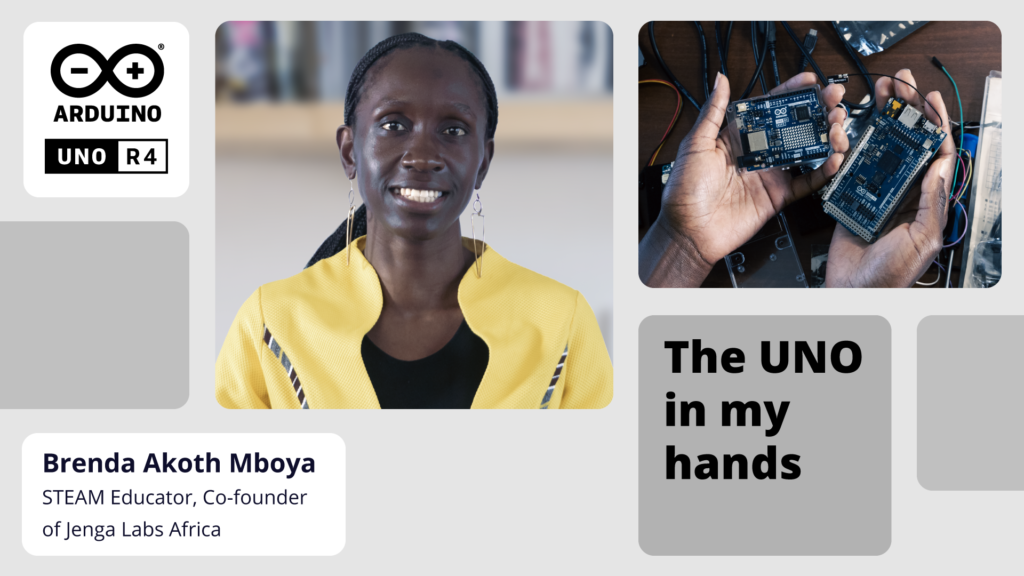
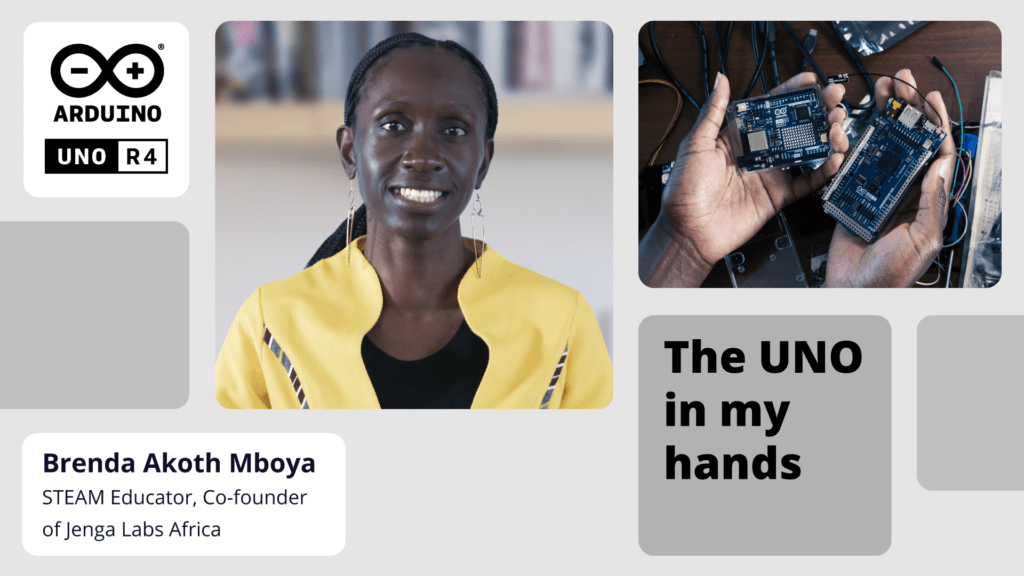
    Brenda Akoth Mboya, a trailblazing STEM educator and the co-founder of Jenga Labs Africa, embodies the spirit of Arduino-driven innovation in the realm of education and community empowerment. “My passion lies in inspiring African youth by using technology and leadership as tools,” she affirms – and we take pride in being the platform of choice for her vision. 

    Mboya’s journey with Arduino began with a revelatory moment, when she realized that technology could be both easy and fun, empowering even children under 13 to create meaningful and innovative projects of their own.

    Initiating Jenga Labs Africa in 2019, Mboya embarked on a groundbreaking venture to introduce 4th Industrial Revolution technologies to the next generation of African innovators and makers. Through collaborations with West African schools, the startup has seamlessly infused STEM activities into curricula and set up makerspaces available to all students.

    In addition, Mboya actively engages young minds in the technology space as part of the Arm Engage program and the Arduino user group in Kenya, organizing events that bring together electronics enthusiasts eager to dive into the vast potential of microcontrollers. A recent major achievement was the successful orchestration of a 12-hour hackathon in Kisumu, leveraging the capabilities of IoT to address critical agricultural challenges in western Kenya. The event showcased the exceptional talents of the local youth – something that Mboya holds dear: “Being a maker in 2023, especially in the African continent, means having the tools to create solutions tailored to African needs – thus moving away from being mere consumers of Western technologies, and towards becoming creators of solutions that address specific African use cases.”

    Indeed, the project that most deeply resonates with her vision at the moment is the one-year Leadership and Technology Program Jenga Labs is about to launch in Kibera, one of Nairobi’s largest slums. This initiative aims to empower the community by training them on Arduino technology, enabling them to create innovative solutions for the myriad problems and challenges they face every day. Mboya sees this as a transformative way to give back, fostering a sense of leadership and innovation that can spark positive change. In Mboya’s world, Arduino is not just a tool: it’s a catalyst for African youths to shape their destinies and contribute to the advancement of their communities.

    [youtube https://www.youtube.com/watch?v=10_TUOeLEEw?feature=oembed&w=500&h=281]

    We asked Mboya, “What’s your favorite part of the UNO R4?”

    • The LED matrix for quick visualization, allowing for instant satisfaction as well as clear help in debugging.
    • The USB-C connector: having this extremely popular option means “I can even use my phone’s cable to quickly do something on the Arduino.”
    • The top-notch speed and connectivity features compared to the UNO Rev3.

    Keep up with the updates on Mboya’s impact on the world by following her LinkedIn profile or visit Jenga Labs’ website!

    The post UNO R4 Stars: Meet Brenda Mboya appeared first on Arduino Blog.

    Website: LINK

  • Bullfrog synthesizer review

    Bullfrog synthesizer review

    Reading Time: 3 minutes

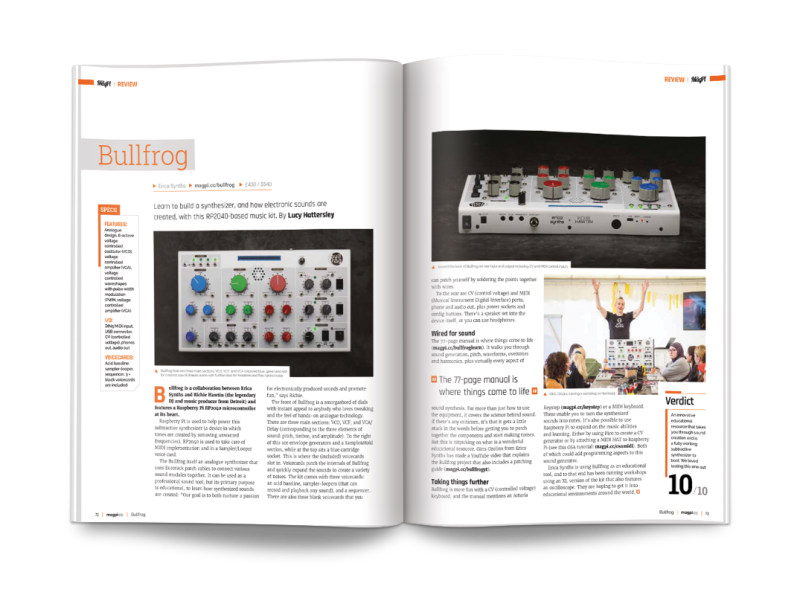
    The front of Bullfrog is a smorgasbord of dials with instant appeal to anybody who loves tweaking and the feel of hands-on analogue technology. There are three main sections: VCO, VCF, and VCA/Delay (corresponding to the three elements of sound: pitch, timbre, and amplitude). To the right of this are envelope generators and a Sample&Hold section, while at the top sits a blue cartridge socket. This is where the (included) voicecards slot in. Voicecards patch the internals of Bullfrog and quickly expand the sounds to create a variety of noises. The kit comes with three voicecards: an acid bassline, sampler-loopers (that can record and playback any sound), and a sequencer. There are also three blank voicecards that you can patch yourself by soldering the points together with wires.

    Around the back of Bullfrog we see input and output including CV and MIDI control inputs

    To the rear are CV (control voltage) and MIDI (Musical Instrument Digital Interface) ports, phone and audio out, plus power sockets and config buttons. There’s a speaker set into the device itself, or you can use headphones.

    Wired for sound

    The 77-page manual is where things come to life. It walks you through sound generation, pitch, waveforms, overtones and harmonics, plus virtually every aspect of sound synthesis. Far more than just how to use the equipment, it covers the science behind sound. If there’s any criticism, it’s that it gets a little stuck in the weeds before getting you to patch together the components and start making noises. But this is nitpicking on what is a wonderful educational resource. Girts Ozolins from Erica Synths has made a YouTube video that explains the Bullfrog project that also includes a patching guide.

    Taking things further

    Bullfrog is more fun with a CV (controlled voltage) keyboard, and the manual mentions an Arturia Keystep or a MIDI keyboard. These enable you to turn the synthesized sounds into notes. It’s also possible to use Raspberry Pi to expand on the music abilities and learning. Either by using Pico to create a CV generator or by attaching a MIDI HAT to Raspberry Pi (see this OSA tutorial). Both of which could add programming aspects to this sound generator.

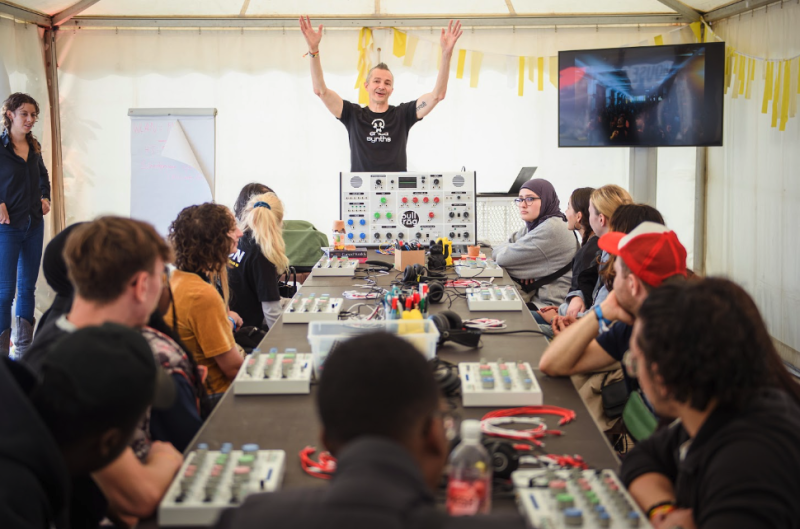
    Girts Ozolins running a workshop in Hamburg

    Erica Synths is using Bullfrog as an educational tool, and to that end has been running workshops using an XL version of the kit that also features an oscilloscope. They are hoping to get it into educational environments around the world.

    Verdict

    10/10

    An innovative educational resource that takes you through sound creation and is a fully working subtractive synthesizer to boot. We loved testing this one out.

    Specs

    Features: Analogue design, 8-octave voltage controlled oscillator (VCO), voltage controlled amplifier (VCA), voltage controlled waveshapes with pulse width modulation (PWM, voltage controlled amplifier (VCA)

    I/O: DIN5 MIDI input, USB connector, CV (controlled voltage), phones out, audio out

    Voicecards: cid bassline, sampler-looper, sequencer, 3 × black voicecards are included

  • An integrated learning experience for young people

    An integrated learning experience for young people

    Reading Time: 3 minutes

    We’re currently trialling the full integration of our Code Editor in some of the projects on our Projects site, with the aim of providing a seamless experience for young learners. Our Projects site provides hundreds of free coding projects with step-by-step instructions for young people to use at school, in Code Clubs and CoderDojo clubs, and at home. When learners make text-based programming projects in our Python and web design project paths, they use our Code Editor to write and run code in a web browser.

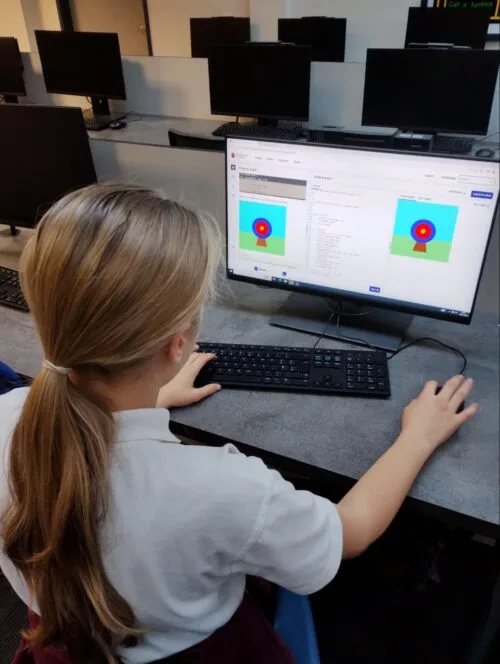
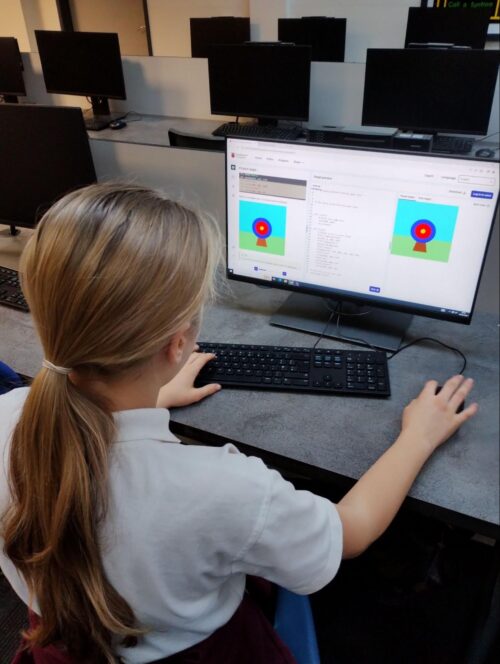
    A young person at a computer in a classroom.

    Our new integrated learning experience allows young people to follow the project instructions and work in the Code Editor in a single window. By providing a simpler workspace, where learners do not need to switch between windows to read instructions and input code, we aim to reduce cognitive load and make it easier for young people to learn.

    How the new integrated experience works

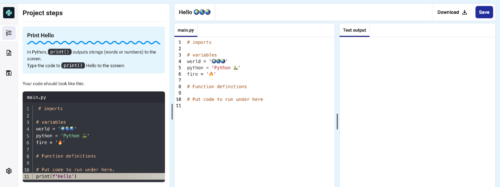
    In the integrated project workspace, learners can access the project instructions, coding area, and output (where they can see what they have made) all in the same view. We have reorganised the project guides into short, easy-to-follow steps made up of simple instructions, including code snippets and modelled examples, for learners to work through to create their projects. The project guides feature fresh designs for different types of learning content, such as instruction steps, concept steps, code snippets, tips, and debugging help.

    A screenshot of the new Code Editor.

    We have also optimised this learning experience for young people using mobiles and tablets. On mobile devices, a new ‘Steps’ tab appears alongside the ‘Code’ and ‘Output’ tabs, enabling learners to easily navigate to the project guide and follow the steps to make their projects.

    Try out our new learning experience

    We are testing our new integrated learning experience as a beta version in three projects: 

    • Hello world (part of our ‘Introduction to Python’ project path) 
    • Target practice (part of our ‘Introduction to Python’ project path) 
    • Anime expressions (part of our ‘Introduction to web development’ project path) 

    In each of these projects, young people can choose to complete the original version of the project, with the project instructions and Code Editor in separate windows, or click the button on the project page to try out the new integrated learning experience.

    A screenshot of the new Code Editor.

    We’d love to hear how your young learners get on with this new integrated experience. Try it out in the three projects above and share your feedback with us here.

    Code Editor developments have been made possible with generous support from the Cisco Foundation.

    Website: LINK

  • A gaming platform tailored to those with special needs

    A gaming platform tailored to those with special needs

    Reading Time: 2 minutes

    As a society, we have decided to enact some measures to make our world more accessible to those with disabilities. Wheelchair ramps, for example, are often legal requirements for businesses in many countries. But we tend to drop the ball when it comes to things aren’t necessities. For instance, entertainment options are an afterthought much of the time. That’s why Alain Mauer developed this LED gaming platform for people with special needs.

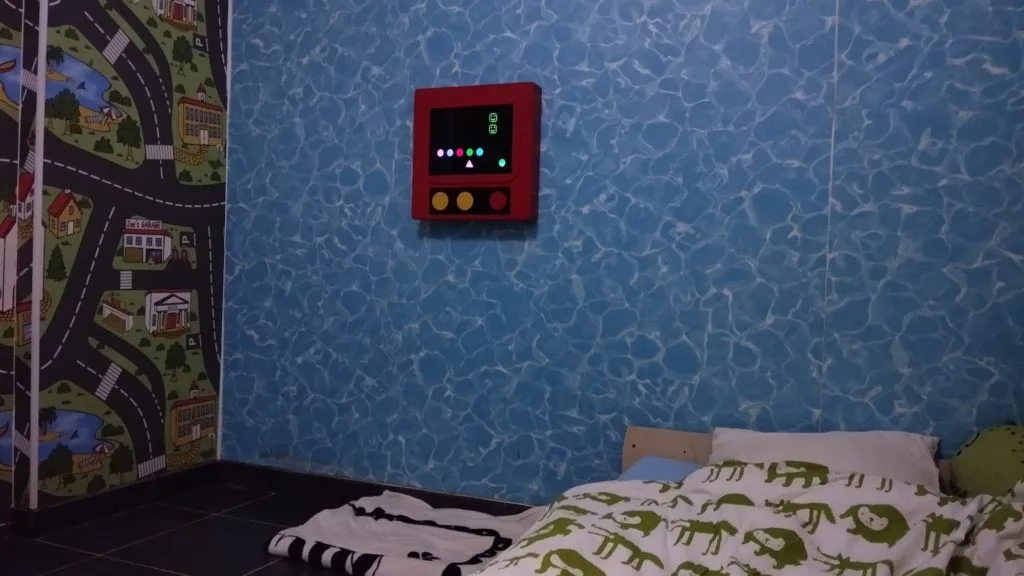
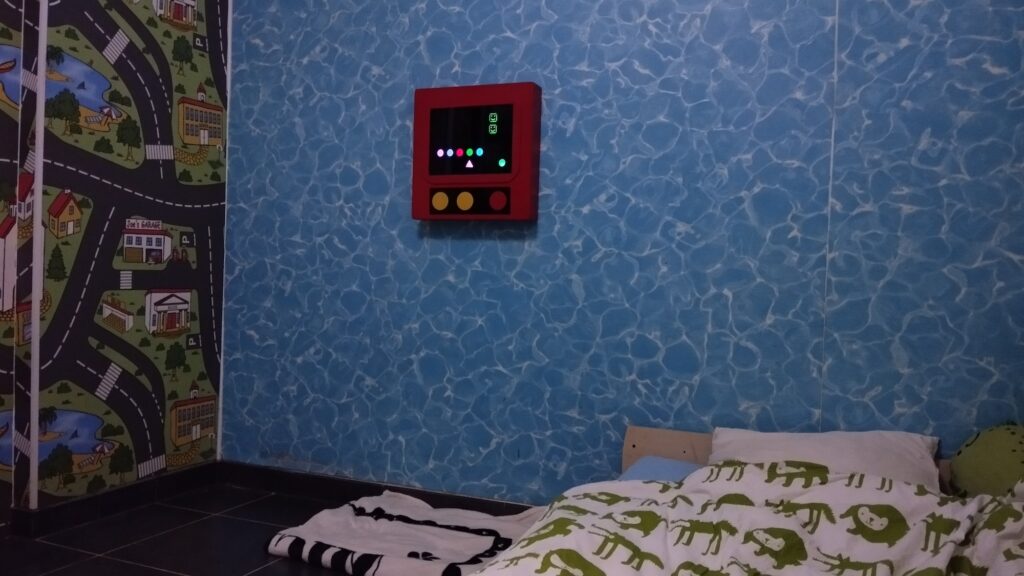
    This device offers a lot of flexibility so that builders can tailor it to a specific individual’s own needs and tastes. Mauer designed it for his son, who is 17 years old and lives with non-verbal autism. Entertainment options intended for neurotypical people don’t engage the teen, but toys designed for children fail to hold his interest for long. This game, dubbed “Scott’s Arcade,” is simple to understand and interact with, while still offering a lot of replayability. It is also durable and able to withstand rough handling.

    Scott’s Arcade consists of a “screen” made up of individually addressable RGB LEDs and a faceplate with shape cutouts that act as masks for the LEDs. An Arduino Nano controls the lights and responds to presses of the large buttons beneath the screen. It can trigger sound effects through a DFRobot DFPlayer Mini MP3 player as well.

    [youtube https://www.youtube.com/watch?v=p7KceTKOyhQ?feature=oembed&w=500&h=281]

    Mauer programmed a few simple games for the device, such as a matching game that challenges the player to find the circle of the same color as the triangle. When they succeed, they’re rewarded with fanfare sound effects and flashing lights. Makers can also program their own games to suit the players’ abilities and interests. 

    The post A gaming platform tailored to those with special needs appeared first on Arduino Blog.

    Website: LINK

  • Persistence of vision (POV) candle

    Persistence of vision (POV) candle

    Reading Time: 2 minutes

    His solution was to make use of persistence of vision (POV) – the brief retention of a visual impression on the eye’s retina that creates the illusion of a moving image in film and television.

    Shine a light

    While the general consensus was that POV displays require too much in the way of supporting machinery to make them work, such as bearings and slip rings, Tim had the bright idea of getting a whole tiny device, including battery and motor, to spin.

    He quickly threw together an LED matrix board design. “It took about a week for the matrix PCB to arrive,” he says, “which gave me a little time to think about how it was going to go together, but once I had all the parts building the whole thing only took a couple of hours.

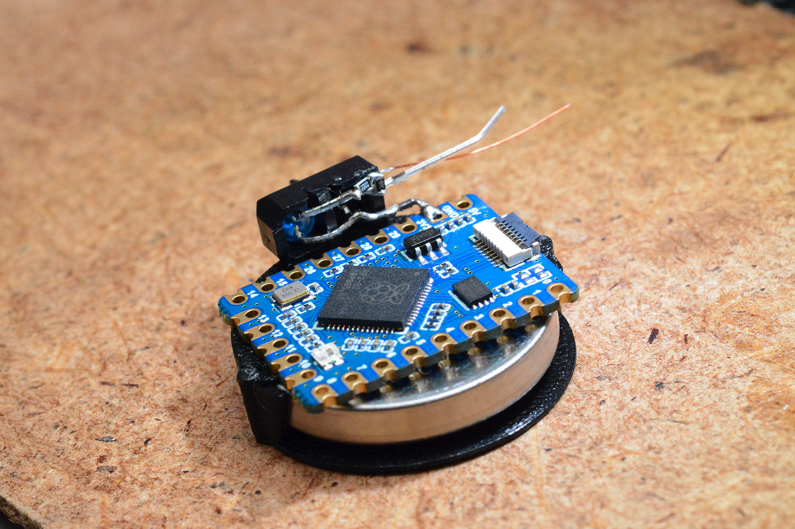
    For the brains of the device, he looked at using Raspberry Pi Pico, but eventually opted for a Waveshare RP2040-tiny partly due to its smaller size (about half that of Pico).

    “Aside from the low cost and easy availability, one of the nice things about the RP2040 is that you can set, or get, all of the GPIO pins in a single clock cycle,” he notes. “This makes implementing a custom matrix very easy. The software [for the project] does very little at all: it just steps through an array of numbers to send to the GPIO port.”

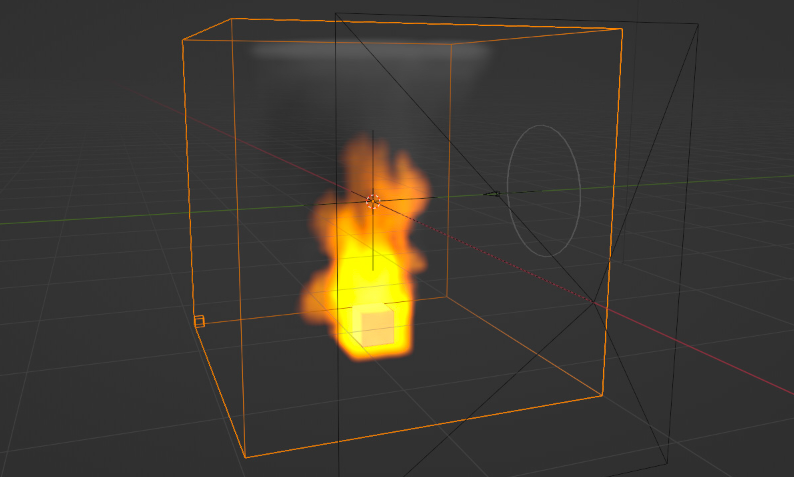
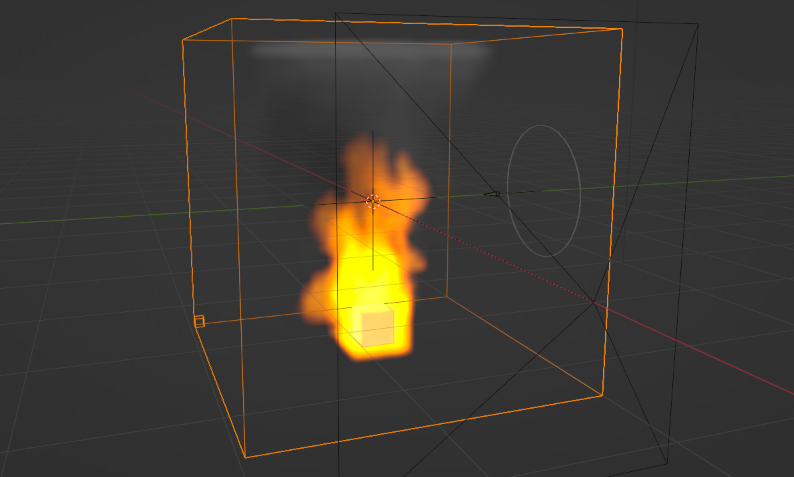
    The flame effect is an animation based on volumetric data and rendered in the open-source Blender 3D modelling application. Tim first experimented with a rotating cube and fluid simulation. “Getting the software to work and generating those animations took maybe a couple of days of experimenting.”

    Spinning around

    The candle is spun around by a Mabuchi RF-410CA motor Tim had to hand. This can rotate at up to 5900rpm, but for a 30fps animation he used PWM to reduce it to around 1800rpm.

    Power for the project is supplied by a LIR2450 coin cell housed in a custom 3D-printed battery holder. “The amount of current a battery can deliver is related to its capacity,” says Tim, “so it’s not just about making the battery last as long as possible, it’s also that a smaller battery might not be able to drive the motor at all.”

    From this initial prototype, “the next step is to make a circuit board out of the hand-wired mess it is currently, and then increase the resolution of the display. We can roughly double the number of LEDs without changing the design, but beyond that we’ll need to rethink how the display is driven.”

  • This DIY Jurassic Park pinball machine is a T-Rexcellent use of Arduino

    This DIY Jurassic Park pinball machine is a T-Rexcellent use of Arduino

    Reading Time: 2 minutes

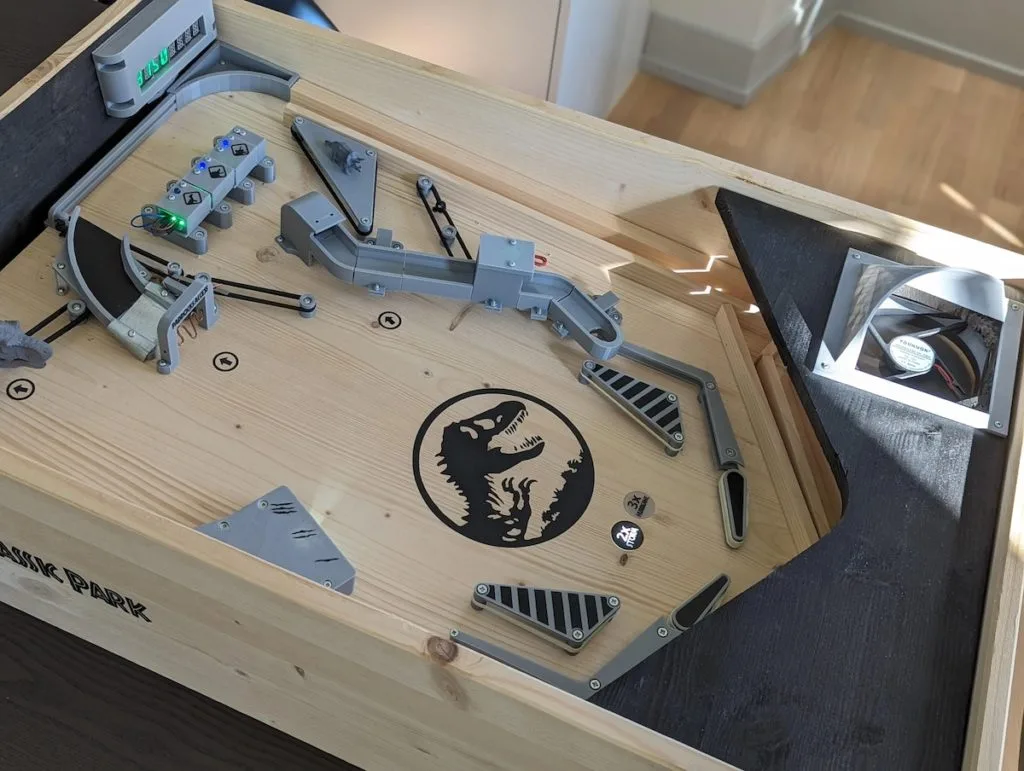
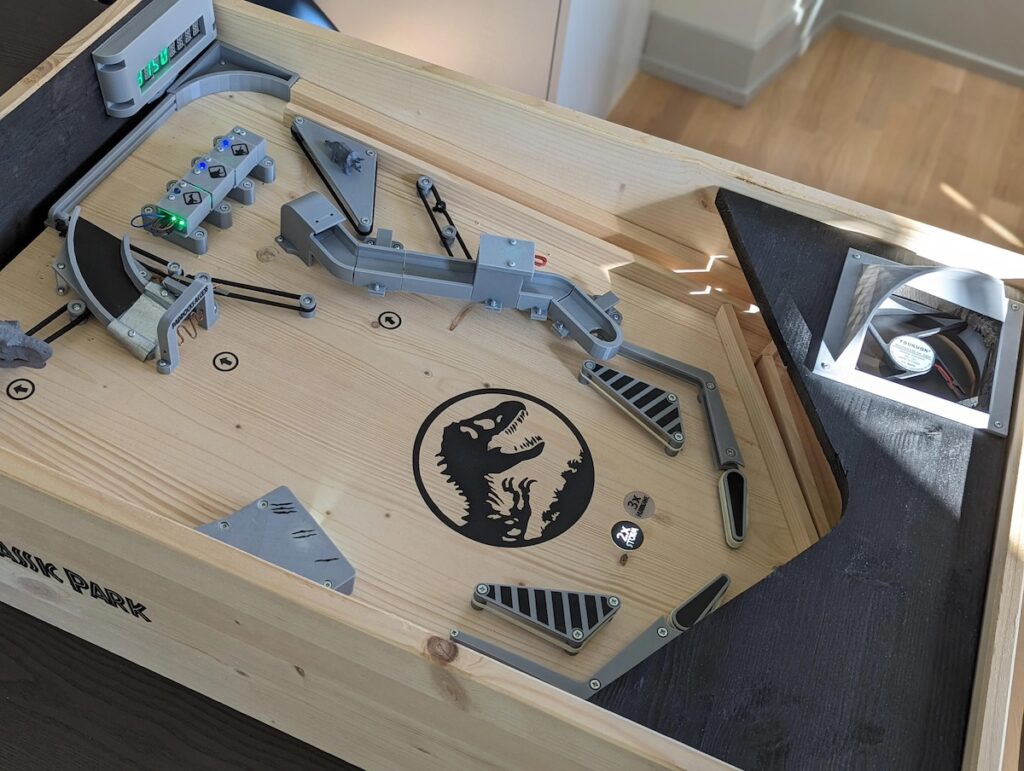
    Pinball machines are prime examples of the dizzying heights achieved by engineers in the electromechanical era before digital electronics came along. But while those classic pinball machines are extremely impressive from an engineering standpoint, they required an immense amount of expertise and were therefore unapproachable to most. By utilizing modern digital components like Arduino development boards, Barjo was able to construct this amazing Jurassic Park-themed pinball machine.

    From a user perspective, this looks and operates a lot like a classic pinball machine. But instead of relying on complex mechanical linkages and vast arrays of electric switches, it takes advantage of today’s microcontrollers and sensors. The table is mostly wood and Barjo 3D-printed a bunch of custom parts, such as the paddles, pathways for the ball, and enclosures for the electronic components. 

    Some of the parts, like the spring-loaded ball launcher, are standard off-the-shelf pinball components that are available through retailers that sell refurbishment parts. But most are custom and work using electronic circuitry. The electronic components operate under the control of an Arduino Nano and an Arduino Mega 2560. The Nano is tasked with the flippers, while the Mega handles the displays, sensors, and solenoids.

    [youtube https://www.youtube.com/watch?v=mECeqFCJsRA?feature=oembed&w=500&h=281]

    There are a variety of sensors on the table, such as infrared break beam sensors to detect the passing ball. Those can trigger solenoids to open up gates to specific pathways, like the T-Rex paddock that lets the player rack up additional points. Those points, and some status information, show up on an eight-digit seven-segment display. And, of course, there are plenty of flashing lights to create the ideal pinball experience.

    The post This DIY Jurassic Park pinball machine is a T-Rexcellent use of Arduino appeared first on Arduino Blog.

    Website: LINK

  • What’s up, Docs? Arduino Docs gets a revamp!

    What’s up, Docs? Arduino Docs gets a revamp!

    Reading Time: 3 minutes

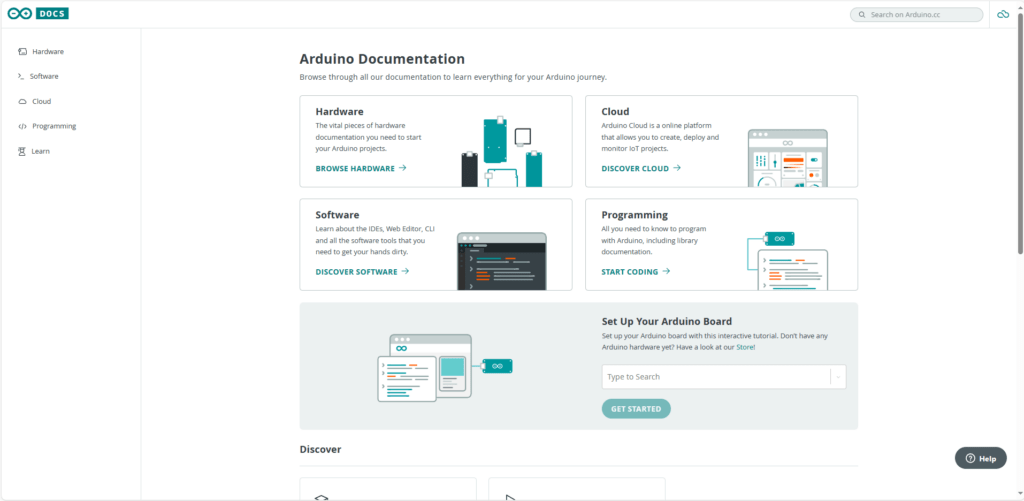
    Have you checked out Arduino Docs lately? If it looks different, that’s because we can finally reveal the makeover we’ve been working on for months – in line with our constant efforts to learn, improve, and share all of it along the way!

    You can always count on Arduino Docs

    Arduino Docs is our public and collaborative repository of info, tech specs, and tutorials. It is a huge mass of online resources that we create, organize and maintain also thanks to our amazing community’s contributions (managed via GitHub: here’s how you can help if you are interested). 

    With 75+ current hardware products documented, hundreds of tutorials, and dozens of datasheets, it’s definitely the go-to resource center any time you have a new Arduino product, want to learn a new skill, or need help to figure something out! Want to host a web server on your brand new MKR WiFi 1010? Can’t wait to dive into the ultimate manual for your Opta micro PLC? Wondering how to set up a security system using ML? Need a solid starter guide for Arduino Cloud, the IDE 2, or Arduino in general? Arduino Docs has you covered, with specific and updated information to support all of this and so much more.

    What’s new and improved!

    Open-source through and through, Arduino Docs is a shared space that’s wonderfully alive with updates and new ideas. But it can also get messy and confusing – and that’s why we decided to revamp its design and architecture completely, to improve your experience and navigation.

    Our goal was to make all the resources more accessible: easier to find, easier to consult. That’s why you can now explore a new and improved Arduino Docs:

    • It welcomes you with a new homepage. Don’t know where to start? Pick one of the main sections featured here: choose between hardware, software or Cloud, and see what each one has to offer.
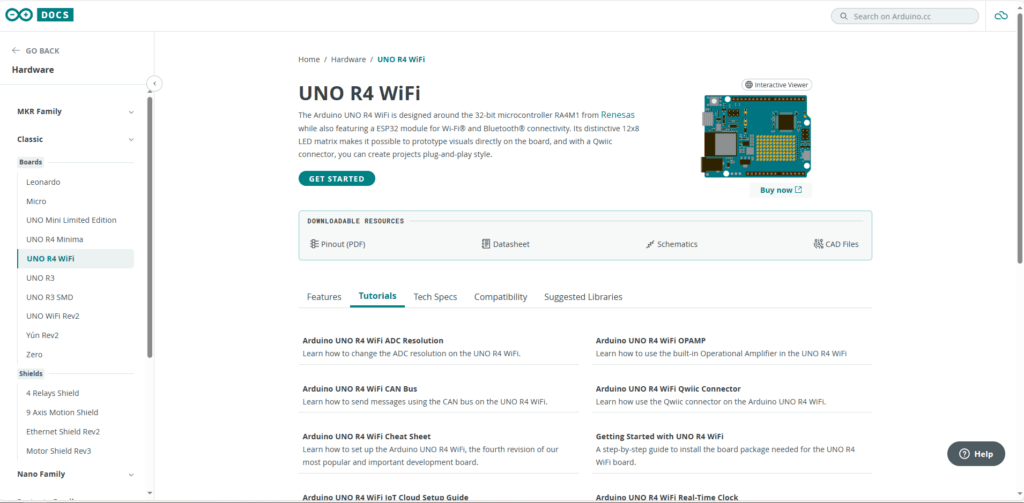
    • It has a sidebar so you never get lost. The side menu mirrors the main sections and drills down so you always know where you are as you browse documentation.
    • It streamlines finding hardware info. Datasheets and tutorials specific to each component are now presented within its dedicated page.
    • It helps you get started. As much as we’ve worked on making specific items more intuitive to find, we know sometimes you’re just curious about discovering more about a broader subject. That’s why we’ve included new suggestions to get started with the Arduino Cloud or MicroPython, and you’ll see a whole Learn section prominently displayed.
    • It looks (and works) better on mobile. A big improvement for smaller devices! 

    The myriad resources and open-source nature of the project remain the same. But they now live in a neater home, where it’s easier and faster for you to find everything you need to discover, learn, make, and share your knowledge about Arduino. 

    The post What’s up, Docs? Arduino Docs gets a revamp! appeared first on Arduino Blog.

    Website: LINK

  • Celebrating the community: Sahibjot

    Celebrating the community: Sahibjot

    Reading Time: 4 minutes

    In our series of community stories, we celebrate some of the wonderful things young people and educators around the world are achieving through the power of technology. 

    A young person sits in a classroom.

    In our latest story, we’re heading to Vivek High School in Mohali, India, to meet Sahibjot, a 14-year-old coding enthusiast who has taken his hobby to the next level thanks to mentorship, Code Club, and the exciting opportunity to take part in the Coolest Projects 2023 global online showcase.

    Introducing Sahibjot

    [youtube https://www.youtube.com/watch?v=B1smFMsrOE8?feature=oembed&w=500&h=281]

    When he was younger, Sahibjot loved playing video games. His interest in gaming led him to discover the world of game development, and he was inspired to find out more and try it out himself. He began to learn to code in his spare time, using tutorials to help him develop his skills.

    A young person sits at a table outside and uses a laptop.

    Keen to share the joy he had experienced from gaming, Sahibjot set himself the challenge of creating a game for his cousin. This project cemented his enthusiasm for coding and developing games of his own.

    “I always felt that I have played so many games in my life, why not make one and others will enjoy the same experience that I had as a child.

    For my cousin, I made a personal game for him, and he played it and he liked it very much, so once he played it, I felt that, yes, this is what I want to do with my life.” – Sahibjot

    Mentorship and collaboration

    While continuing to hone his computing skills at home, Sahibjot heard that his school had started a Code Club. After initially feeling nervous about joining, his enthusiasm was bolstered by the club mentor, Rajan, talking about artificial intelligence and other interesting topics during the session, and he soon settled in. 

    A group of students and a teacher at computers in a classroom.

    At Code Club, with support and encouragement from Rajan, Sahibjot continued to develop and grow his coding skills. Alongside his technical skills, he also learned about teamwork and working collaboratively. He embraced the opportunity to help his peers, sharing his knowledge with others and becoming a mentor for younger club members. 

    Three students chat outside a school building.

    “Last year, we joined this coding club together and we became friends. He’s a very friendly person. Whenever we need him, he just quickly helps us. He helps us to troubleshoot, find any bugs, or even fix our codes.” – Akshat, fellow Code Club member

    A global opportunity

    The next step for Sahibjot came when Rajan introduced him and his fellow Code Club members to Coolest Projects. Coolest Projects is a celebration of young digital creators and the amazing things they make with technology. It offers participants the opportunity to share their tech creations in a global, online showcase, and local in-person events celebrating young creators are also held in several countries.

    A group of students in a classroom being guided through their computing projects by a teacher.

    Sahibjot was eager to take part and showcase what he had made. He submitted a Python project, a ping-pong game, to the online showcase, and was very excited to then see his creation receive a special shout-out during the Coolest Projects global livestream event. He was delighted to share this achievement with his friends and family, and he felt proud to be representing his school and his country on a global stage.

    “I told everyone around me that there was going to be a livestream and I possibly might be featured in that, so that was really exciting. I learned a lot about just not representing my school and myself as an individual, I learned about representing my whole nation.” — Sahibjot

    Sahibjot’s passion for computing has helped shape his aspirations and ambitions. Looking to the future, he hopes to use his technology skills to benefit others and make an impact.

    “Using code and technology and all of the things like that, I aspire to make effort to do something with the world, like help out people with technology.” — Sahibjot

    Inspire young creators like Sahibjot

    To find out how you and young creators you know can get involved in Coolest Projects, visit coolestprojects.org. If the young people in your community are just starting out on their computing journey, visit our projects site for free, fun beginner coding projects.

    For more information to help you set up a Code Club in your school, visit codeclub.org.

    Join us in celebrating Sahibjot’s inspiring journey by sharing his story on X (formerly Twitter), LinkedIn, and Facebook.

    Website: LINK

  • Raspberry Pi OS goes dark

    Raspberry Pi OS goes dark

    Reading Time: 4 minutes

    This has taken a few weeks longer this time, simply due to the sheer amount that changed under the hood in Bookworm, but the bug-fix release is now ready and can be installed from today via Raspberry Pi Imager, or downloaded from the usual place on our website. Or, to upgrade an existing image, simply use the updater icon on the taskbar, or (if you’re more old-school) open a terminal and type

    $ sudo apt update

    followed by

    $ sudo apt full-upgrade

    This update includes improved support for encrypted connections in WayVNC; the latest version of Thonny; Mathematica and Scratch 3 working on Raspberry Pi 5; and a bunch of other small bug fixes and tweaks. But we thought we’d give you a little bonus in this release too…

    A few weeks ago, Eben wandered past my desk, and remarked, “wouldn’t it be nice if we had a dark theme?” (He’s not the first person to suggest this, but he is the boss, so I tend to pay more attention when he suggests things!) And as it happened, I wasn’t particularly busy that day.

    Our PiXflat theme has been around for a few years now – we launched it along with Raspberry Pi OS Buster back in 2019. It started out as a mildly tweaked version of the default GTK theme called Adwaita, but it changed quite a bit over the years, so now doesn’t have all that much in common with Adwaita any more.

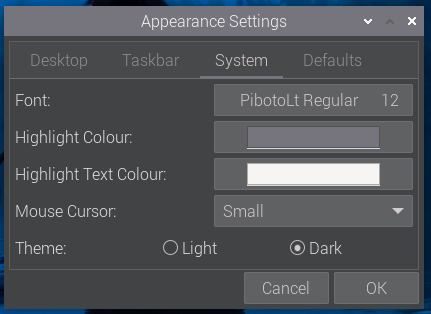
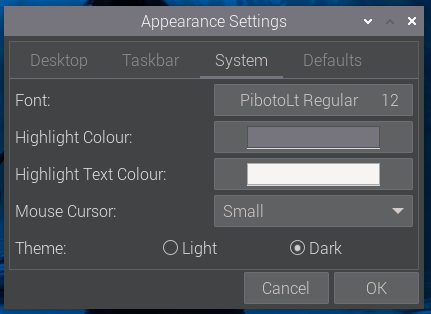
    The Appearance Settings menu in Raspberry Pi OS

    A theme is basically a big CSS (cascading style sheet) file as used for styling web pages, e-books and the like, which defines the appearance of every widget used to draw applications. (A widget is a user interface element such as a button or a text label.) You can set the colour, the font, the background and numerous other aspects for each widget, and you can set different values depending on whether the widget is active (e.g. a button which is being pressed), whether it is disabled, whether the mouse pointer is over it, and so on. And when I say it is a “big” file – it’s really big: PiXflat is around 4500 lines.

    Dark mode

    Creating a dark theme can be relatively easy, or really hard, depending on how the colours have been defined in your original theme. If all your colours are defined as variables, it is relatively easy – but if all your colours are hard-coded values then it is rather more time-consuming. In PiXflat, as in Adwaita before it, the colours were all hard-coded! So the first job was to go through 4500 lines of CSS and find all the hard-coded colours, replacing them with variables, and then setting those variables to the original hard-coded values so I didn’t break the original light theme.

    Then, having done that, it was time to consider how each one of those colours should change to produce a suitable dark appearance. The obvious first step was simply to invert each colour, so that black became white and so on. The trouble with this is that while what you end up with is indeed dark, it doesn’t usually look that good.

    So then the hard work began – choosing exactly which contrasting colour was going to be used in the dark theme to replace the light version. This involved setting the values of around 70 colour variables to create a set that worked together; you have to take into consideration having sufficient contrast between elements so that you can still see everything clearly, so that text is still readable against darker backgrounds, so that the colour change when you move the mouse over an element is still obvious, and so on. And it all interacts, so you find that if you tweak one colour, you then need to tweak four or five others to keep all the contrast correct.

    Endless themes

    From past experience with PiXflat, creating a theme is very much like the proverbial painting of the Forth Bridge; it’s never really finished, because you keep making little tweaks. But the theme which I have called PiXnoir – the dark version of PiXflat – is now ready to use; like PiXflat it will doubtless continue to evolve over time, but the first version is included in this release.

    We’ve made it easy to switch between the themes. Just open ‘Appearance Settings’ from the ‘Preferences’ section of the main menu, go to the ‘System’ tab, and switch the ‘Theme’ option from ‘Light’ to ‘Dark’. Most applications will load the new theme on the fly, but some applications – particularly Geany and Calculator – use their own internal themes as well, so you’ll need to close those first if they are running in order to get the theme to change

  • Off-grid remote generator starter helps avoid trekking outside in bad weather

    Off-grid remote generator starter helps avoid trekking outside in bad weather

    Reading Time: 2 minutes

    Living off the grid is a dream for many people, but it also presents unique challenges that are otherwise absent in our urban-centric lifestyles. One of the largest adjustments one has to make is the lack of readily available power, as it typically comes from renewable wind/solar or generator setups. In element14 Presents host Kaleb Clark’s case, his Honda EU-7000iS generator works in combination with some solar panels around his property, although the generator is located nearly 200 feet away and downhill, making it a very tough journey to operate in bad weather.

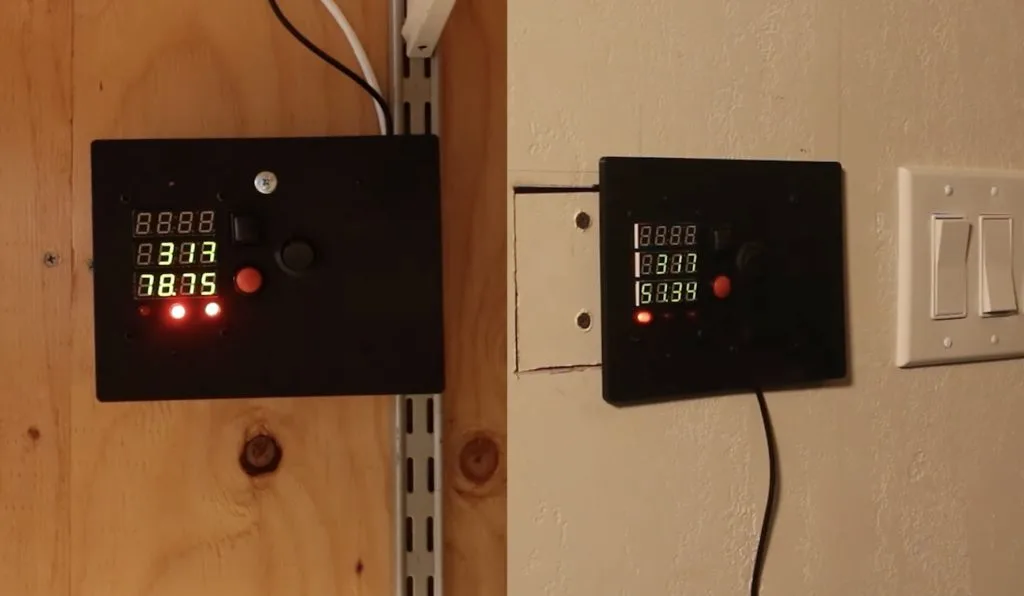
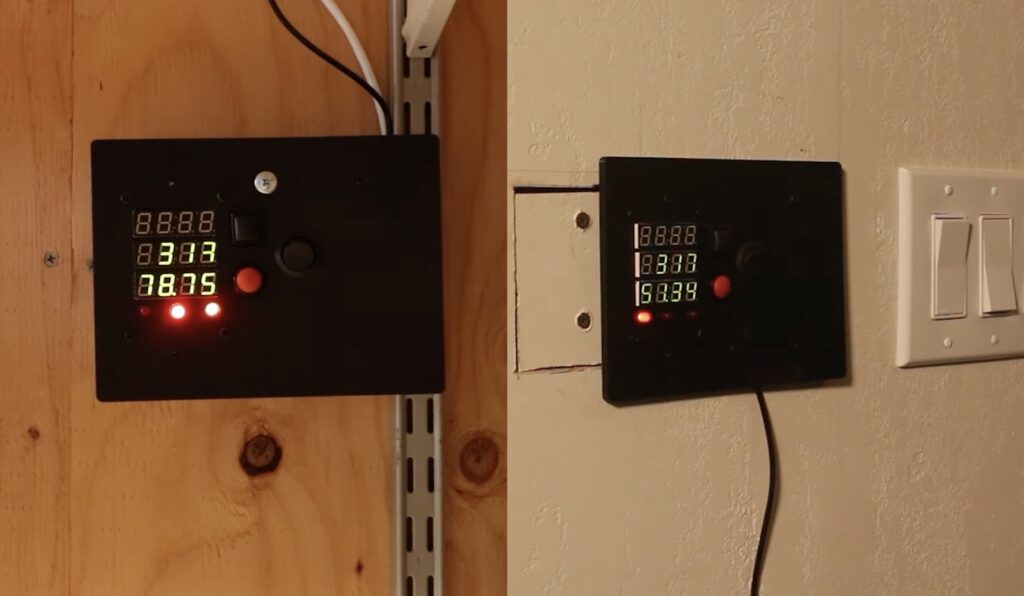
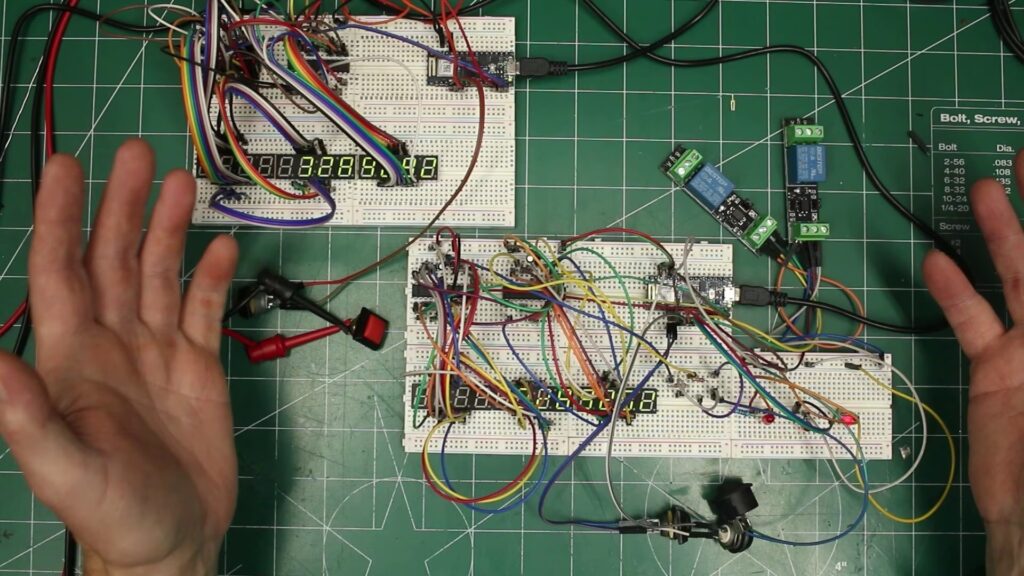
    After finding a bypass cable with one pair of leads for enabling the generator and another pair for powering on the starter motor, Clark got a couple relays that could bridge their contacts together programmatically. In order to communicate the current output of the generator, solar panels, battery, and if the motor should run, a pair of Arduino Nano 33 IoT boards were chosen for both the house and generator sides of the project. They send data through Wi-Fi and MQTT to stay in consistent synchronization while either one is also connected to a few seven-segment display modules and MAX7221 LED drivers for showing the most recent data.

    While inside the house, Clark is able to simply hold down a button and watch how the generator across his property roars to life and begins producing measurable power output to the display. More information about this project can be seen in Clark’s video below!

    [youtube https://www.youtube.com/watch?v=0L8hSVrNQQo?feature=oembed&w=500&h=281]

    The post Off-grid remote generator starter helps avoid trekking outside in bad weather appeared first on Arduino Blog.

    Website: LINK

  • Code Club at Number Ten Downing Street

    Code Club at Number Ten Downing Street

    Reading Time: 4 minutes

    With the rapid advances in digital technologies like artificial intelligence, it’s more important than ever that every young person has the opportunity to learn how computers are being used to change the world and to develop the skills and confidence to get creative with technology. 

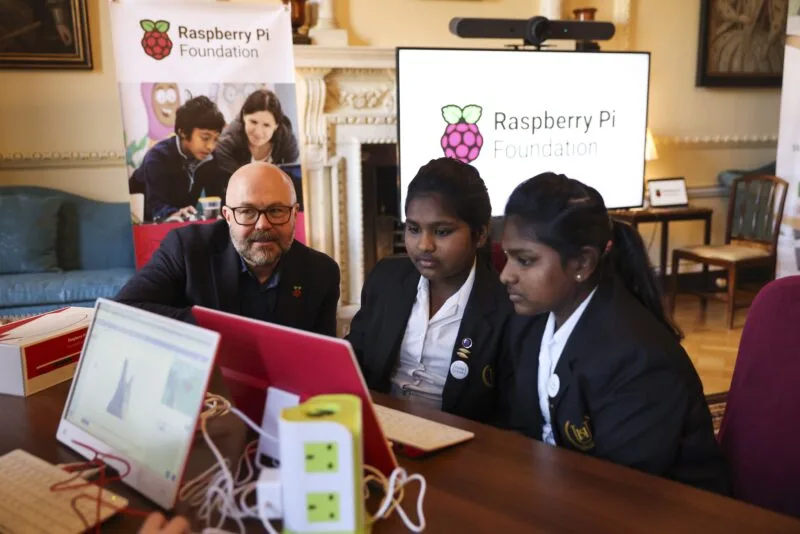
    Learners at a Code Club taking place at Number Ten Downing Street.
    Crown copyright. Licensed under the Open Government Licence.

    There’s no better way to develop those abilities (super powers even) than getting hands-on experience of programming, whether that’s coding an animation, designing a game, creating a website, building a robot buggy, or training an AI classification model. That’s what tens of thousands of young people do every day in Code Clubs all over the world. 

    Lessons at 10 

    We were absolutely thrilled to organise a Code Club at Number Ten Downing Street last week, hosted by the UK Prime Minister’s wife Akshata Murty as part of Lessons at 10.

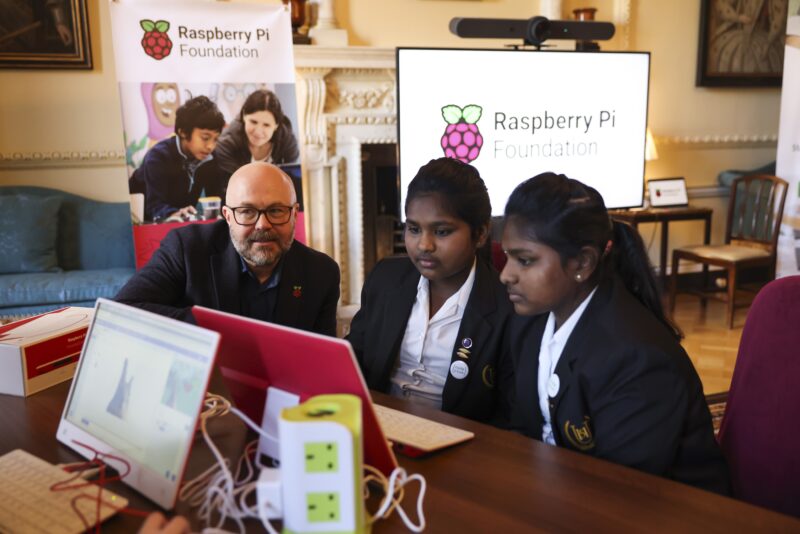
    A Code Club session taking place at Number Ten Downing Street.
    Crown copyright. Licensed under the Open Government Licence.

    Lessons at 10 is an initiative to bring school children from all over the UK into Number Ten Downing Street, the official residence of the Prime Minister. Every week different schools visit to attend lessons led by education partners covering all kinds of subjects. 

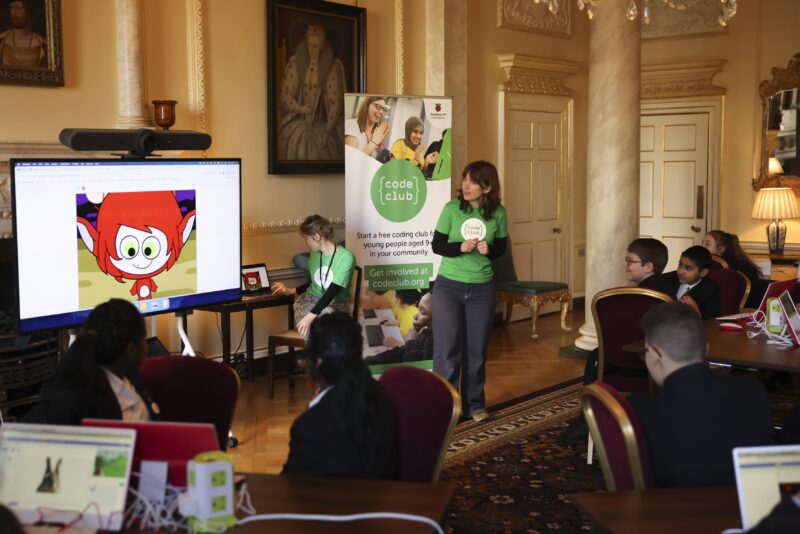
    A Code Club session taking place at Number Ten Downing Street.
    Crown copyright. Licensed under the Open Government Licence.

    We ran a Code Club for 20 Year 7 students (ages 11 to 12) from schools in Coventry and Middlesex. The young people had a great time with the Silly eyes and Ghostbusters projects from our collections of Scratch projects. Both stone-cold classics in my opinion, and a great place to start if you’re new to programming.

    A Code Club session taking place at Number Ten Downing Street.
    Crown copyright. Licensed under the Open Government Licence.

    You may have spotted in the photos that the young people were programming on Raspberry Pi computers (the incredible Raspberry Pi 400 made in Wales). We also managed to get our hands on some cool new monitors. 

    Mrs Murty’s father was one of the founders of Infosys, which ranks among the world’s most successful technology companies, founded in India and now operating all over the world. So it is perhaps no surprise that she spoke eloquently to the students about the importance of every young person learning about technology and seeing themselves as digital creators not consumers.

    Akshata Murty talks to Philip Colligan, CEO of the Raspberry Pi Foundation.
    Crown copyright. Licensed under the Open Government Licence.

    We were lucky enough to be in one of the rather fancy rooms in Number Ten, featuring a portrait by John Constable of his niece Ada Lovelace, the world’s first computer programmer. Mrs Murty reminded us that one of the lessons we learn from Ada Lovelace is that computer programming combines both the logical and artistic aspects of human intelligence. So true. 

    A global movement 

    Since Code Club’s launch in April 2012, it has grown to be the world’s largest movement of free computing clubs and has supported over 2 million young people to get creative with technology.

    Learners from a Code Club in front of Number Ten Downing Street.
    Crown copyright. Licensed under the Open Government Licence.

    Code Clubs provide a free, fun, and safe environment for young people from all backgrounds to develop their digital skills. Run by teachers and volunteers, most Code Clubs take place in schools, and there are also lots in libraries and other community venues. 

    The Raspberry Pi Foundation provides a broad range of projects that young people use to build their confidence and skills with lots of different hardware and software. The ultimate goal is that they are empowered to combine their logical and artistic skills to create something original. Just like Ada Lovelace did all those years ago.

    Learners at a Code Club taking place at Number Ten Downing Street.
    Crown copyright. Licensed under the Open Government Licence.

    All of our projects are designed to be self-directed, so young people can learn independently or in groups. That means that you don’t need to be a tech expert to set up or run a Code Club. We provide you with all the support that you need to get started.

    If you want to find out more about how to set up a Code Club, visit the website here.

    Website: LINK
  • Retro gaming for a new (old) generation with Raspberry Pi 5

    Retro gaming for a new (old) generation with Raspberry Pi 5

    Reading Time: 3 minutes

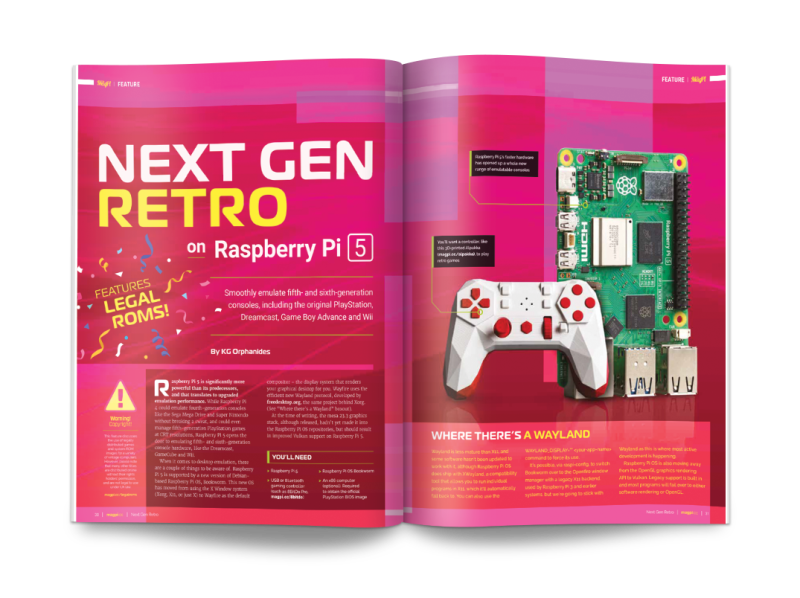
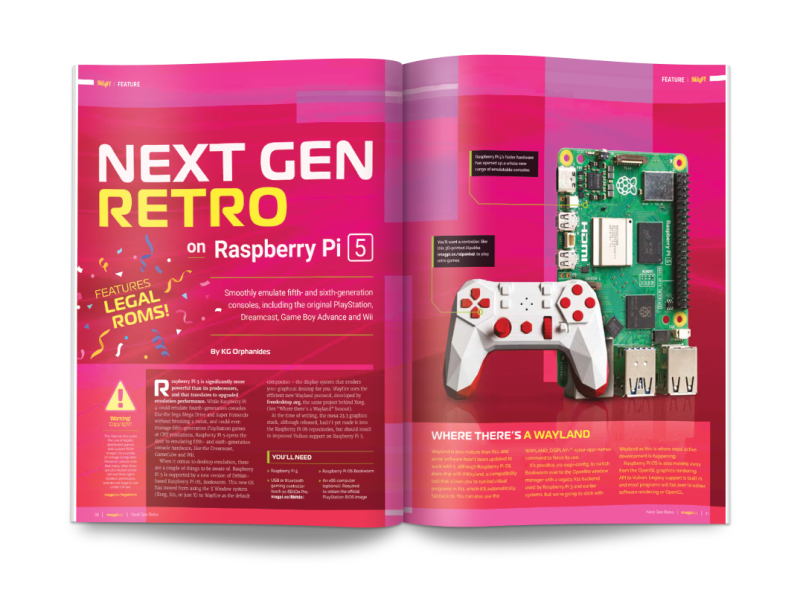
    Emulate a whole new generation of classic consoles with the more powerful Raspberry Pi 5

    Next gen retro

    Smoothly emulate fifth- and sixth-generation consoles including Playstation, Nintendo Game Boy Advance and GameCube, Sega Dreamcast and more. What’s more, there’s a whole new homebrew scene to discover, with brand-new games being made for these classic consoles.

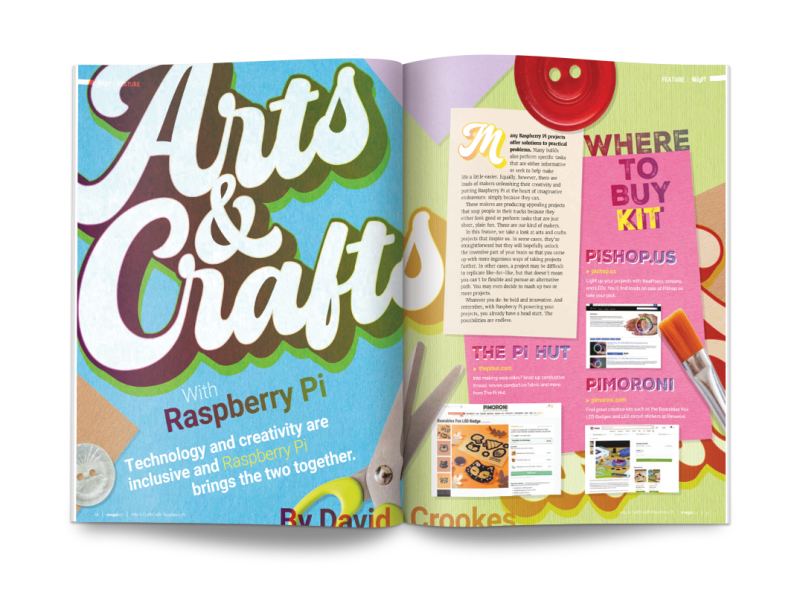
    Technology and creativity working hand in hand with Raspberry Pi

    Arts & Crafts with Raspberry Pi

    Technology and creativity are inclusive and Raspberry Pi brings the two together. These projects stop people in their tracks because they either look good or perform tasks that are just sheer, plain fun.

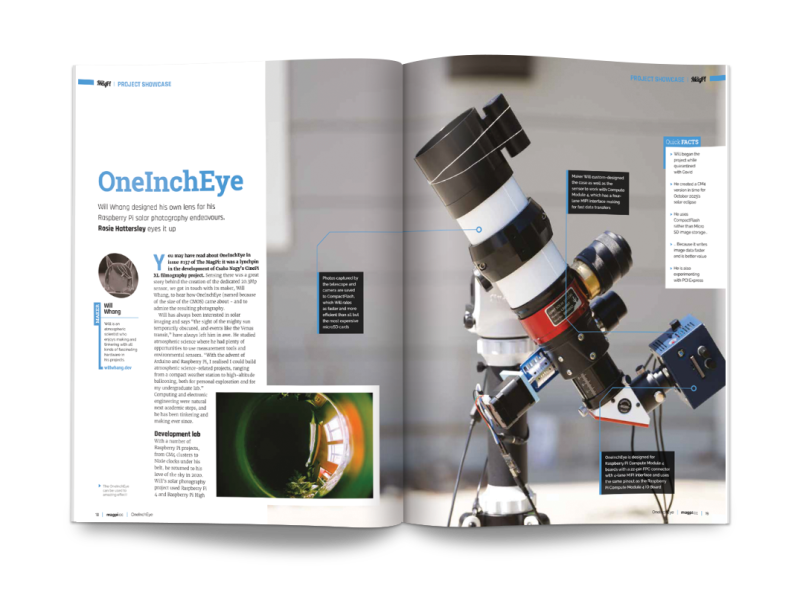
    Discover incredible projects like OneInchEye, the Raspberry Pi solar camera

    The best Raspberry Pi projects

    We’ve got a fantastic selection of project showcases this month. Such as this OneInchEye for solar photography. It can capture 4K images at 30fps (frames per second) or 20MP at 12fps for RAW recording.

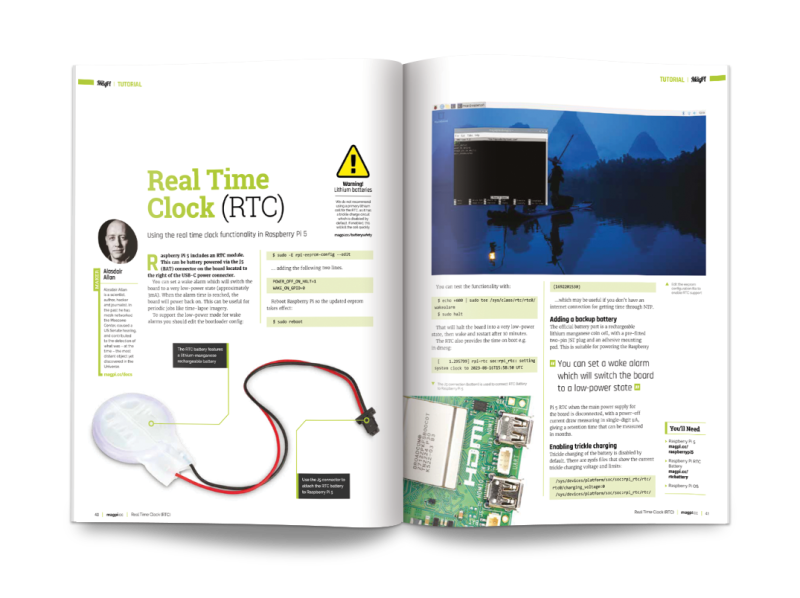
    Add real time clock functionality to Raspberry Pi 5 using a lithium battery

    Learn to use Raspberry Pi’s RTC funcitonality

    Our step-by-step tutorials walk you through the process of learning to use Raspberry Pi. Amongst other tutorials, this month is this fantastic step-through of the new RTC (real time clock). Attach a lithium battery to Raspberry Pi to automatically turn the device on and off while keeping perfect time.

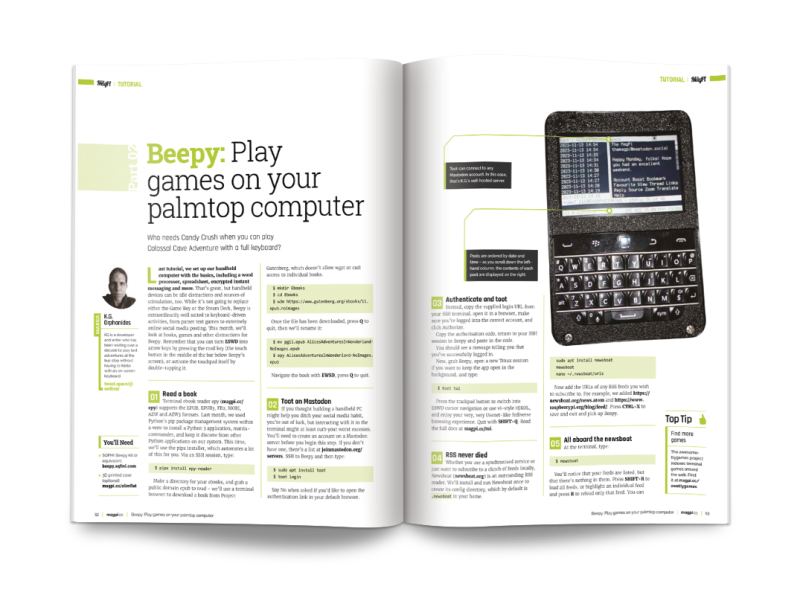
    Play games on a Raspberry Pi palmtop computer with Beepy

    Play games on Beepy

    We’re still smitten with the Beepy device that turns Raspberry Pi into a PDA (personal digital assistant) with a BlackBerry-style keyboard. In keeping with the theme this month we’re looking at a range of text adventures and other games you can play on this diminutive device.

    Learn how sound synthesizers work using the RP2040-powered Bullfrog synth

    Learn to use a synthesizer

    We adore this Bullfrog Synth developed in association with Richie Hawtin (aka Plastikman). Inside a RP2040 is used to generate audio and integrate MIDI control while a series of wires are used to link the various synth elements together. It’s the ideal way to learn about sound generation.

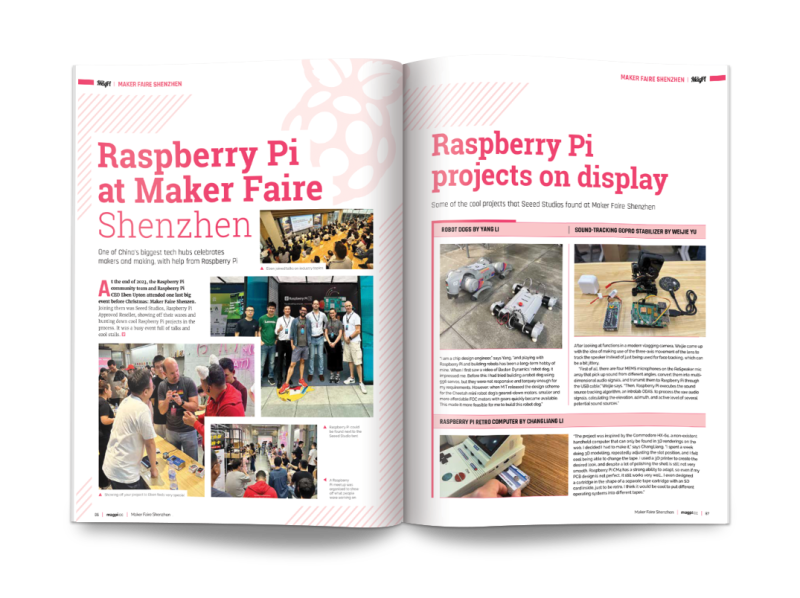
    Raspberry Pi at Maker Faire Shenzen

    Raspberry Pi at Maker Faire Shenzen

    Raspberry Pi CEO Eben Upton attended one last big event before Christmas: Maker Faire Shenzen. Joining them was Seeed Studios, a Raspberry Pi Approved Reseller, showing off their wares and hunting down cool Raspberry Pi projects in the process. It was a busy event full of talks and cool stalls!

  • Win! One of three CrowVision displays!

    Win! One of three CrowVision displays!

    Reading Time: < 1 minute

    Subscribe

  • Retro Gaming with Raspberry Pi (3rd Edition) out now

    Retro Gaming with Raspberry Pi (3rd Edition) out now

    Reading Time: 2 minutes

    This book is packed with information on retro gaming. In particular, it covers how to retro game with Raspberry Pi 5 in a lot of detail. Learn to use all the major emulation systems, and recreate retro consoles up to the Dreamcast and Sony Playstation generations. It’s packed with homebrew software and new games being developed for original systems. This year’s retro gaming guide is bigger than ever: 180 pages. Each page is packed with classic gaming goodness. We’re incredibly proud of this one and we hope you enjoy reading it as much as we did writing it.

    Click here to buy your copy of Retro Gaming with Raspberry Pi (3rd edition).

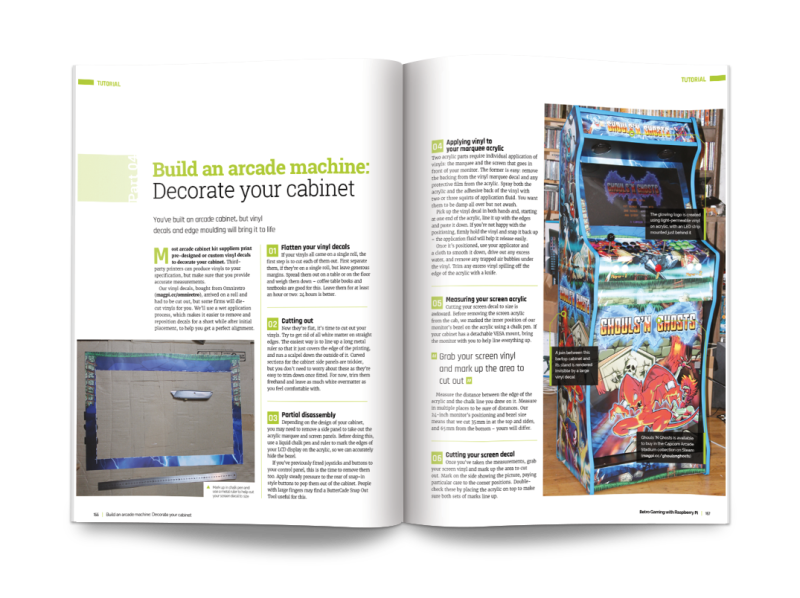
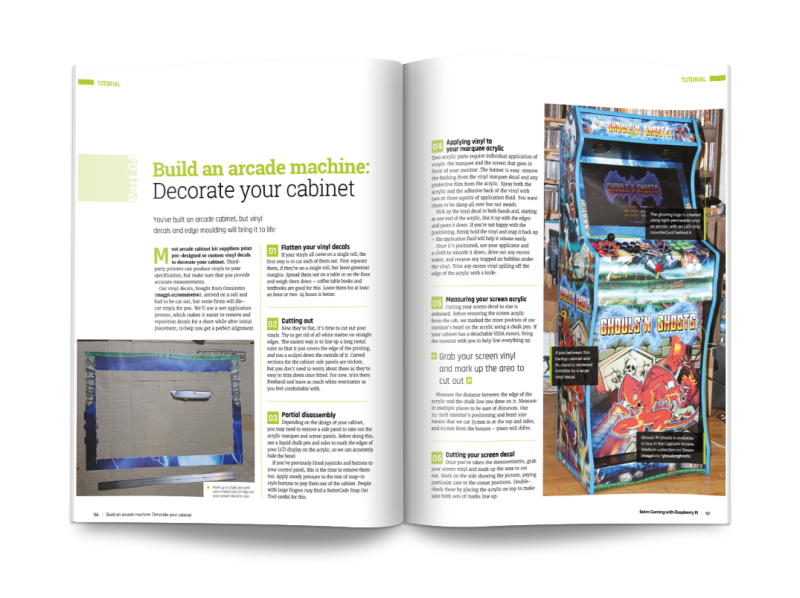
    Finally build that arcade machine of your dreams

    Build your dream consoles and arcade machine

    Use ready-made emulation software to quickly and easily turn Raspberry Pi into a huge range of retro consoles and computers. It’s easy to set up a retro gaming console and we’ll show you how. You’ll even learn how to build your own portable gaming consoles and finally achieve that dream of owning your own arcade machine.

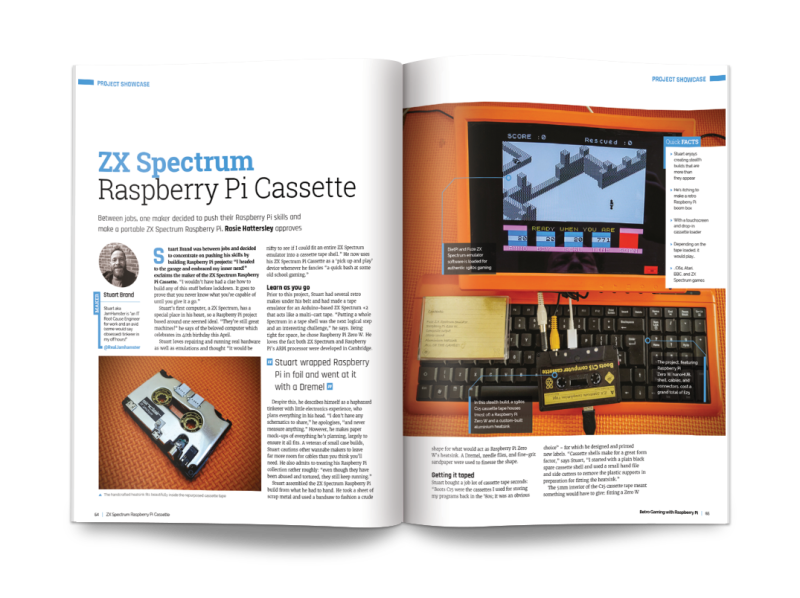
    One maker put a complete ZX Spectrum inside an original cassette tape

    Rediscover those systems from your childhood

    We’ve got the latest information hot from The MagPi team on how to emulate a whole new generation of consoles. From the Nintendo GameCube, to Sony PlayStation, and the Sega Dreamcast. Discover how to play new games on these classic systems with Raspberry Pi.

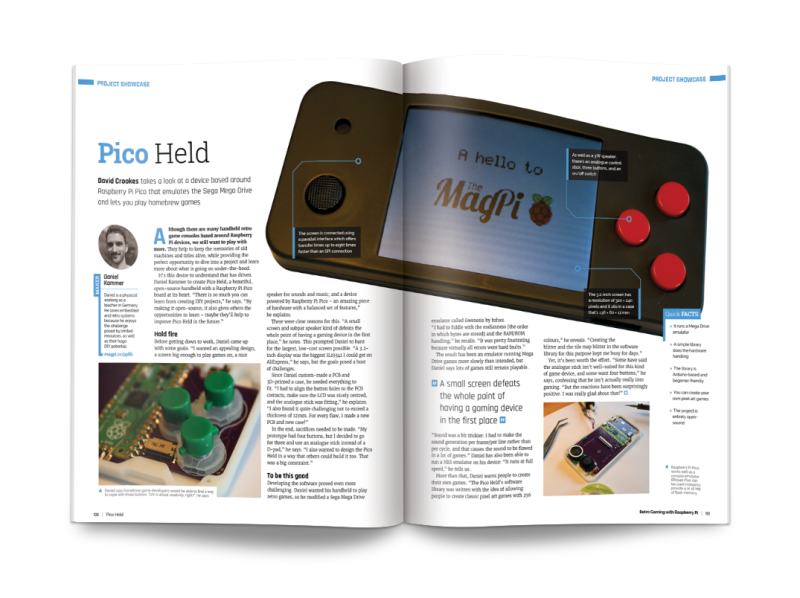
    Build a handheld retro console with Raspberry Pi Pico

    Meet incredible makers and hear all about their builds

    We’ll show you how to download retro games and emulate them with Raspberry Pi computers. You’ll discover how to build your consoles, both handheld and television-based and hear from some of the best makers around. They share their secrets to successful emulation.

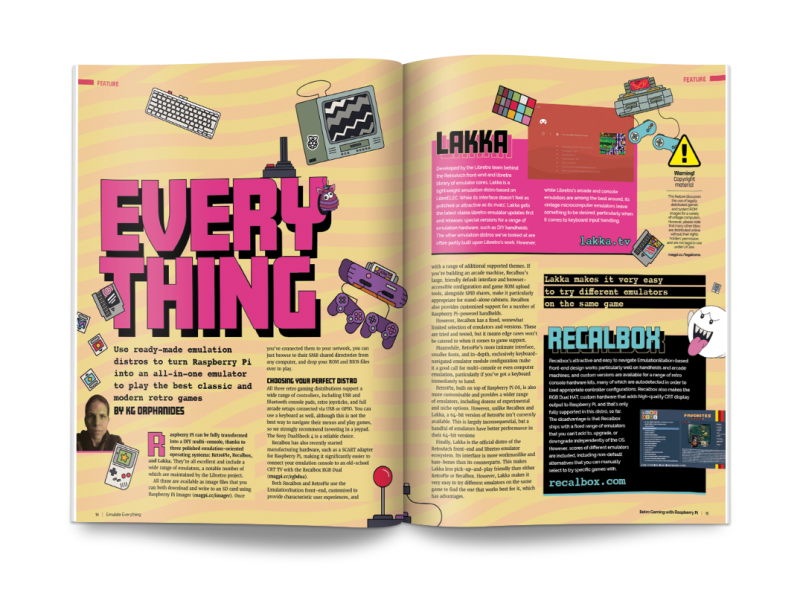
    Emulate a huge range of computers and consoles with Raspberry Pi

    Discover a thriving homebrew scene

    There are hundreds of developers making games every bit as good as back in the 1980s and 1990s. And they’ve only got better at making classic games. We’ll show you how to find new games for classic consoles, and how to get involved with this incredible gaming scene.

    Pick up your copy of Retro Gaming with Raspberry Pi (3rd edition) from the Raspberry Pi Press store today.

  • Get ready for Mission Space Lab with our new simulation tool

    Get ready for Mission Space Lab with our new simulation tool

    Reading Time: 5 minutes

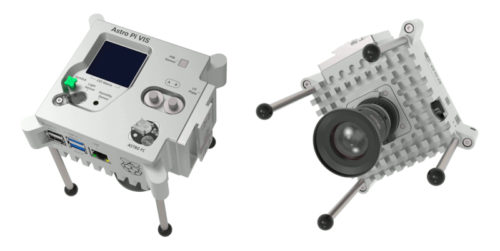
    Since November, registration is open for Mission Space Lab, part of the European Astro Pi Challenge 2023/24. The Astro Pi Challenge is an ESA Education project run in collaboration with us here at the Raspberry Pi Foundation that gives young people up to age 19 the amazing opportunity to write computer programs that run on board the International Space Station (ISS). It is free to take part and young people can participate in two missions: Mission Zero, designed for beginners, and Mission Space Lab, designed for more experienced coders.

    Two young people working together on a tech project.

    This year, Mission Space Lab has a brand-new format. As well as introducing a new activity for teams to work on, we have created new resources to support teams and mentors, and developed a special tool to help teams test their programs. 

    A young person writes Python code.

    A big motivator for these changes was to make the activity more accessible and enable more young people to have their code run in space. Listening to feedback from participants and mentors, we are creating the opportunity for even more teams to submit programs that run on the ISS this year, by offering a specific activity and providing more extensive support materials.

    A scientific task

    For this year’s mission, ESA astronauts have given teams a specific scientific task to solve: to calculate the speed that the ISS is travelling as it orbits the Earth. People working in science often investigate a specific phenomenon or try to solve a particular problem. They have to use their knowledge and skills and the available tools to find ways to answer their research question. For Mission Space Lab, teams will work just like this. They will look at what sensors are available on the Astro Pi computers on board the ISS, develop a solution, and then write a Python program to execute it. To test their program, they will use the new Astro Pi Replay software tool we’ve created, which simulates running their program on board the ISS.

    The two Astro Pi computers.
    The Astro Pi computers 

    To help teams and mentors take part in Mission Space Lab, we are providing a variety of supporting materials:

    • Our mentor guide has everything mentors need to support their teams through Mission Space Lab, including guidance for structuring the mission and tips to help teams solve problems.
    • Our creator guide helps young people design and create their programs. It provides information and technical instructions to help young people develop their coding skills and create a program that can be run on the Astro Pis on board the ISS.
    • We have created an ISS speed project guide that shows an example of how the scientific task can be solved using photos captured by the Astro Pi’s camera.

    We have also run virtual sessions to help mentors and teams familiarise themselves with the new Mission Space Lab activity, and to ask any technical questions they might have. You can watch the recordings of these sessions on YouTube: 

    The Astro Pi Replay tool

    Astro Pi Replay is a new simulation tool that we have developed to support Mission Space Lab teams to test their programs. The tool simulates running programs on the Astro Pi computers on board the ISS. It is a Python library available as a plug-in to install in the Thonny IDE where teams write their programs. Thanks to this tool, teams can develop and test their programs on any computer that supports Python, without the need for hardware like the Astro Pi units on board the ISS.

    The Astro Pi Replay tool works by replaying a data set captured by a Mission Space Lab team in May 2023. The data set includes readings from the Astro Pi ‘s sensors, and images taken by its visible-light camera like the ones below. Whenever teams run their programs in Thonny with Astro Pi Replay, the tool replays some of this historical data. That means teams can use the historical data to test their programs and calculations.

    A photo the Mediterranean sea with the coastline of Sicily and Tunisia
    The Mediterranean sea with the coastlines of Sicily and Tunisia
    A photo the Irish Sea with the coastlines of the UK and Ireland
    The Irish Sea with the coastlines of Great Britain and Ireland
    A photo the Coastline of Southern Egypt and the Red Sea
    The coastline of southern Egypt and the Red Sea

    One of the benefits of using this simulation tool is that it gives teams a taste of what they can expect if their program is run on the ISS. By replaying a sequence of data captured by the Astro Pis in space, teams using sensors will be able to see what kind of data can be collected, and teams using the camera will be able to see some incredible Earth observation images.

    If you’re curious about how Astro Pi Replay works, you’ll be pleased to hear we are making it open source soon. That means you’ll be able to look at the source code and find out exactly what the library does and how.

    Get involved

    Community members have consistently reported how amazing it is for teams to receive unique Earth observation photos and sensor data from the Astro Pis, and how great the images and data are to inspire young people to participate in their computing classes, clubs, or events. Through the changes we’ve made to Mission Space Lab this year, we want to support as many young people as possible to have the opportunity to engage in space science and capture their own data from the ISS. 

    If you want a taste of how fantastic Astro Pi is for learners, watch the story of St Joseph’s, a rural Irish school where participating in Astro Pi has inspired the whole community.

    [youtube https://www.youtube.com/watch?v=lR5bJBvUh64?feature=oembed&w=500&h=281]

    Submissions for Mission Space Lab 2023/24 are open until 19 February 2024, so there’s still time to take part! You can find full details and eligibility criteria at astro-pi.org/mission-space-lab.

    If you have any questions about the European Astro Pi Challenge, please get in touch at contact@astro-pi.org.

    Website: LINK
  • This escape room-in-a-box looks like a blast

    This escape room-in-a-box looks like a blast

    Reading Time: 2 minutes

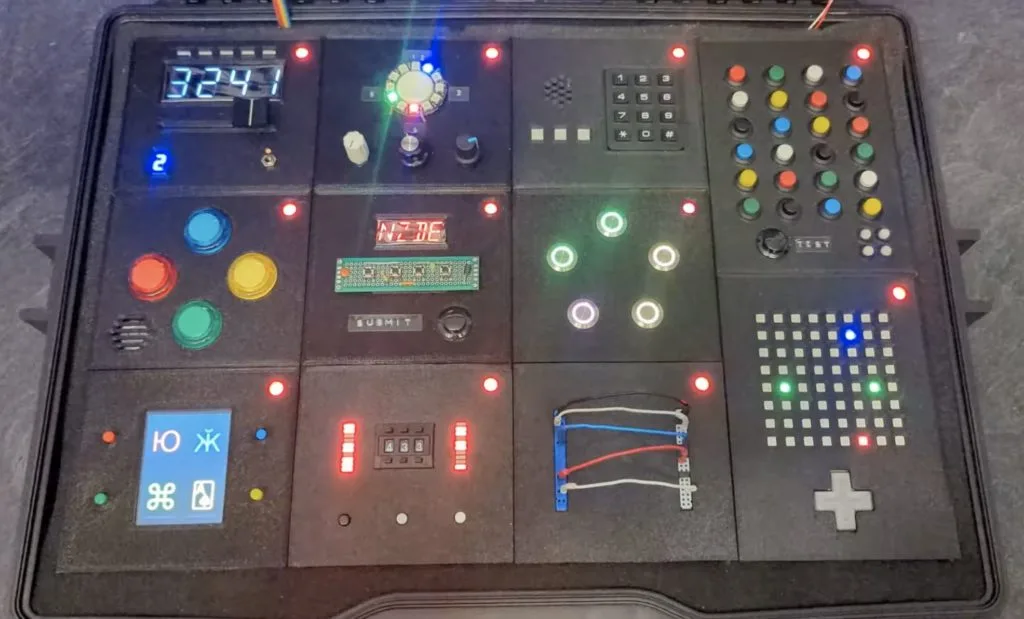
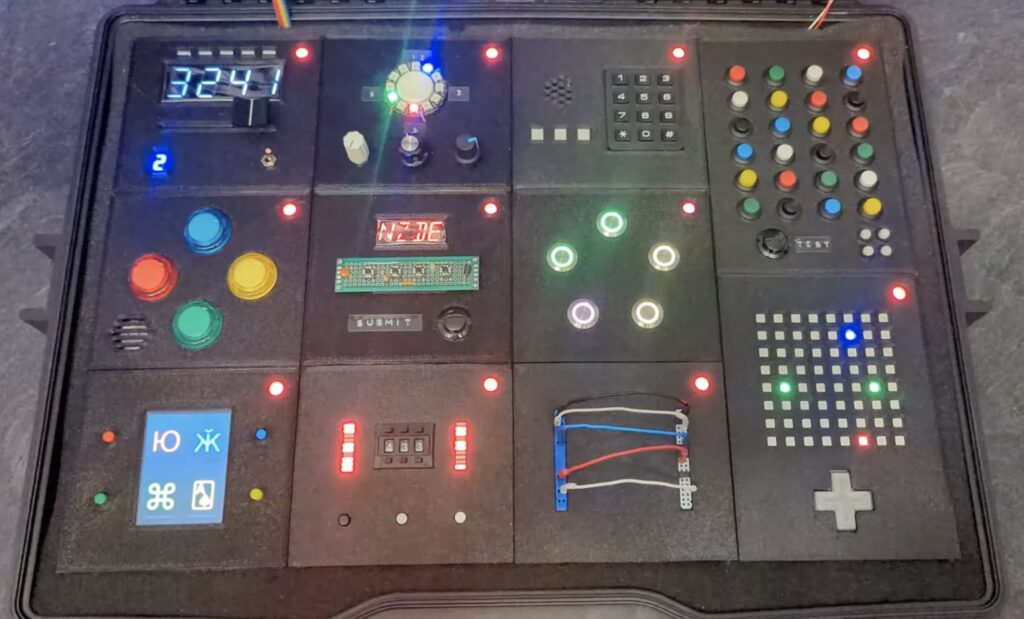
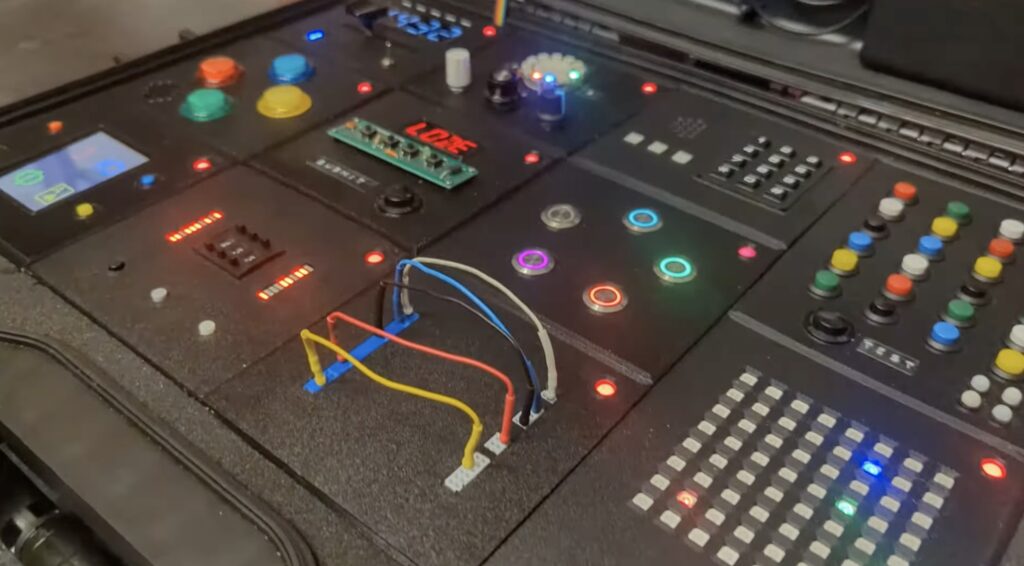
    Keep Talking and Nobody Explodes is a fun party game for iOS and Android that presents players with the challenge of cooperatively defusing a virtual bomb. It is a bit like those “no, cut the blue wire!” scenes in movies, because only one player can see the bomb. The other player(s) has access to information about the bomb and good communication is necessary to guide the first player through the disarming process. Inspired by that game, Heath Paddock built this physical escape room-in-a-box for his friends that looks like a blast to play.

    This self-contained escape room works almost exactly like Keep Talking and Nobody Explodes, but lets the player in charge of defusing interact with a physical “bomb.” If they wait too long or mess up the disarming process three times, the bomb explodes and the players lose.

    As with Keep Talking and Nobody Explodes, this device has several modules that each act as distinct puzzles. For example, one module has an LED matrix “maze” that the defuser must guide a dot through. But they can’t see the walls of the maze, so they have to rely on instructions from the “expert” player that has access to the documentation.

    One Arduino oversees the whole game, tallying failed attempts and counting down until detonation. And each module also has its own dedicated Arduino to read the inputs and set the outputs (such as LEDs and displays) for that specific puzzle.

    To keep everything in sync, Paddock developed his own communication protocol. It allows any Arduino to send a message to the central Arduino by passing it along a serial chain that goes through every Arduino in the box. That chain forms a big loop, so every message will eventually reach its destination.

    [youtube https://www.youtube.com/watch?v=scMQZVPicUo?feature=oembed&w=500&h=281]

    This project is a delight to see in action and looks like a lot of fun. It takes the proven gameplay of Keep Talking and Nobody Explodes and adds tactility to enhance the experience.

    The post This escape room-in-a-box looks like a blast appeared first on Arduino Blog.

    Website: LINK
  • Tabletop device teaches you the basics of sailing before hopping on board a real boat

    Tabletop device teaches you the basics of sailing before hopping on board a real boat

    Reading Time: 2 minutes

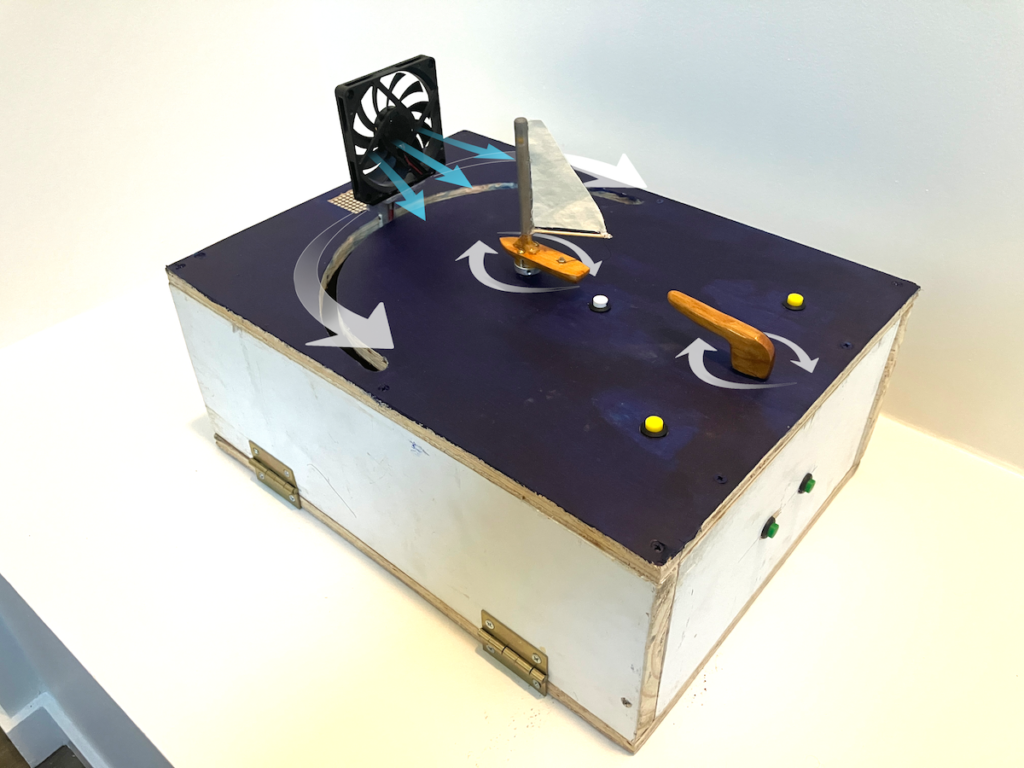
    Sailing is a great way to get outdoors and explore the open waters, yet it can also pose some risks to the pilot and passengers if they are unfamiliar with how the boat handles under different wind conditions. As Kif Scheuer notes in his project write-up, traditional instruction relies on simple 2D illustrations, so he decided to take it a step further and build a highly interactive demonstrator that can affect a model sailboat in a more realistic/physical manner.

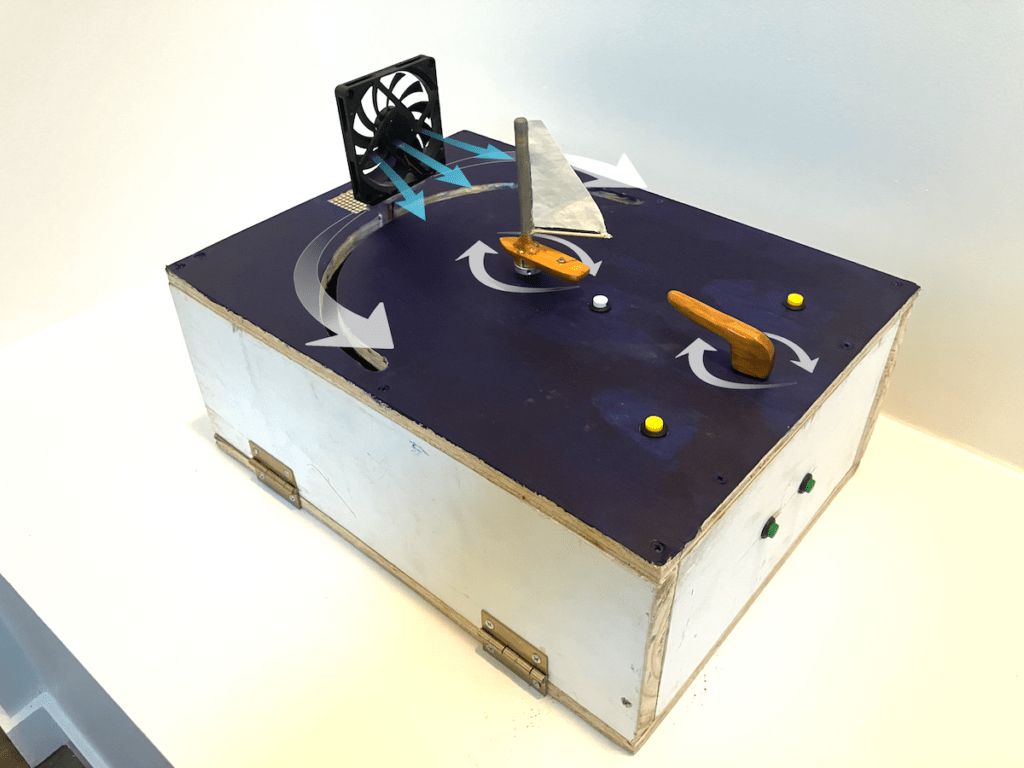
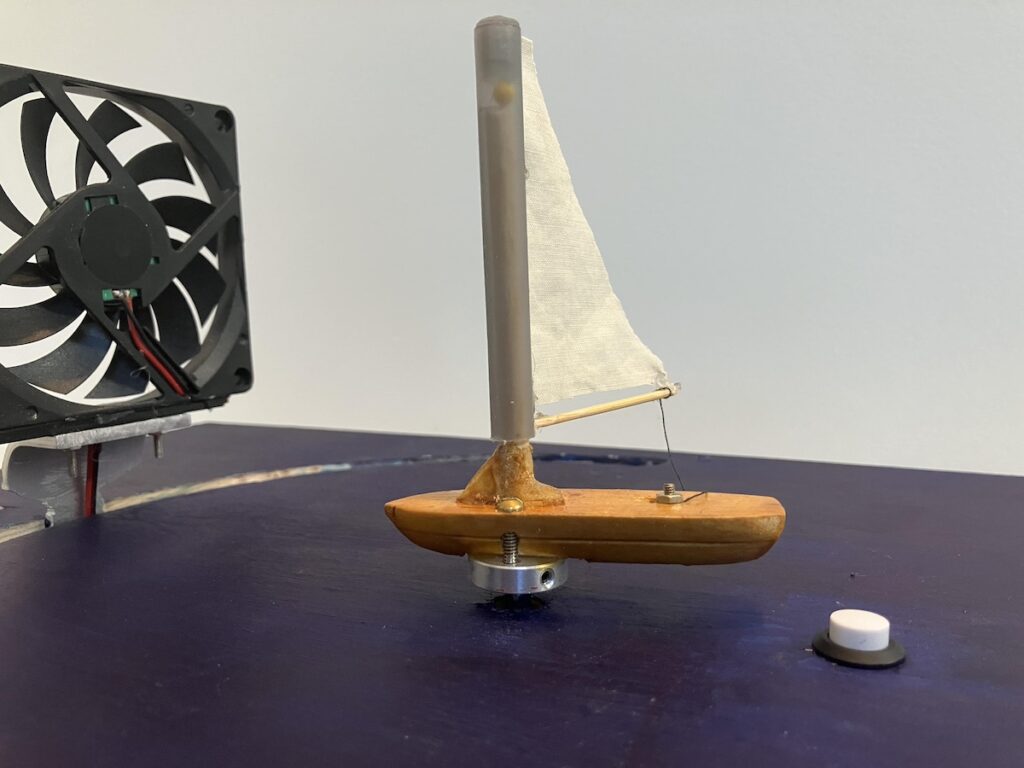
    Because this device is meant to simulate sailing, Scheuer needed some sort of wind generator in the form of a 5V PC fan that was powerful enough to move the boat’s sail. It’s mounted onto an aluminum arm that is positioned on the output shaft of a NEMA17 stepper motor, thus allowing the Arduino UNO Rev3 to pivot its direction. Similarly, the boat was also hooked up to another stepper motor so that it could turn according to the fan’s updated position along its arc. The other electronics include a display for showing the current mode, a potentiometer for user interaction, and several buttons that control the mode/fan angle.

    Once assembled, the user is able to switch between the various modes: manual, selective, random, and wind, with this last mode enabling the user to pivot the fan rather than the boat to observe how the sail reacts. You can read more about the sailing demonstrator on Instructables.

    [youtube https://www.youtube.com/watch?v=KycTKhT0dbs?feature=oembed&w=500&h=281]

    The post Tabletop device teaches you the basics of sailing before hopping on board a real boat appeared first on Arduino Blog.

    Website: LINK

  • 3, 2, 1! Join us in the countdown for Arduino Days 2024

    3, 2, 1! Join us in the countdown for Arduino Days 2024

    Reading Time: 3 minutes

    Three is the magic number, and extending the annual event that celebrates our community from one to three days will make for a very special edition this year. Today, we are finally announcing the dates for Arduino Days, taking place on March 21st, 22nd and 23rd, 2024. Mark your calendars, and bookmark the dedicated website for up-to-date information as we get closer to launch.

    Now in its 11th year, this is the event that brings together all Arduino users and shines the spotlight on the most outstanding projects and ideas – across the world! We’ve had some great contributions in the past: remember Jeanne Harignordoquy’s World Wind Radio in 2023, or the Blue Box Project by Judit Giró Benet and Billy Chen in 2021? All sessions will be broadcast in live streaming (and later remain available on our YouTube channel) for maximum accessibility and visibility.

    Arduino Days are also a great time for us at Arduino to share our knowledge and unique point of view, including awesome ways to leverage our newest solutions (last year, we focused on the Nicla family and Opta) and insights from our own management – and even guest stars like Bruce Sterling

    This year, we look forward to showcasing a huge range of applications, from industrial-grade solutions to wow-worthy prototypes, and from educational tutorials to completely original ideas that put a twist on our ecosystem. We’ll also treat our community to some exciting new product announcements, behind-the-scenes from our collaborations with industrial partners, and deep dives on current trends like Edge AI, TinyML, real-time monitoring, and so much more. Stay tuned! 

    The Call for Speakers

    We will share the complete three-day agenda in the run-up to the event, but first… we want to give you the chance to be part of Arduino Days with your most impressive and interesting projects! Submit yours following the easy process on the dedicated website.

    Should you be selected as a speaker for the 2024 edition, our team will be in touch to support you in producing the most effective video or presentation for the Arduino Days lineup – so you can be sure to make the best of your 10 minutes at the center of our stage.

    Visit the Arduino Days website for details or go directly to the submission form for speakers.

    The Call for Organizers

    We are also currently accepting submissions for organized events around the world, to take place during Arduino Days (either online or in person). If you want to be part of this incredible network of initiatives, tell us more by answering the call! All submissions will be featured on our website for a boost of visibility, and selected organizers will receive an exclusive package of communication material. 

    Visit the Arduino Days website for details or go directly to the submission form for organizers.

    Whether you want to speak at Arduino Days or add to the celebrations with your own original event, we can’t wait to see your suggestions – and for the whole Arduino community to see YOU!

    The post 3, 2, 1! Join us in the countdown for Arduino Days 2024 appeared first on Arduino Blog.

    Website: LINK

  • Garrita is an Arduino GIGA Display-powered slideshow

    Garrita is an Arduino GIGA Display-powered slideshow

    Reading Time: 2 minutes

    Watching back a slideshow of some of your favorite times of the past years is a great way to reflect on what’s happened and get excited for the future. The Electronic Cats crew wanted to incorporate this concept into a more simplified, interactive form which resulted in the Garrita project.

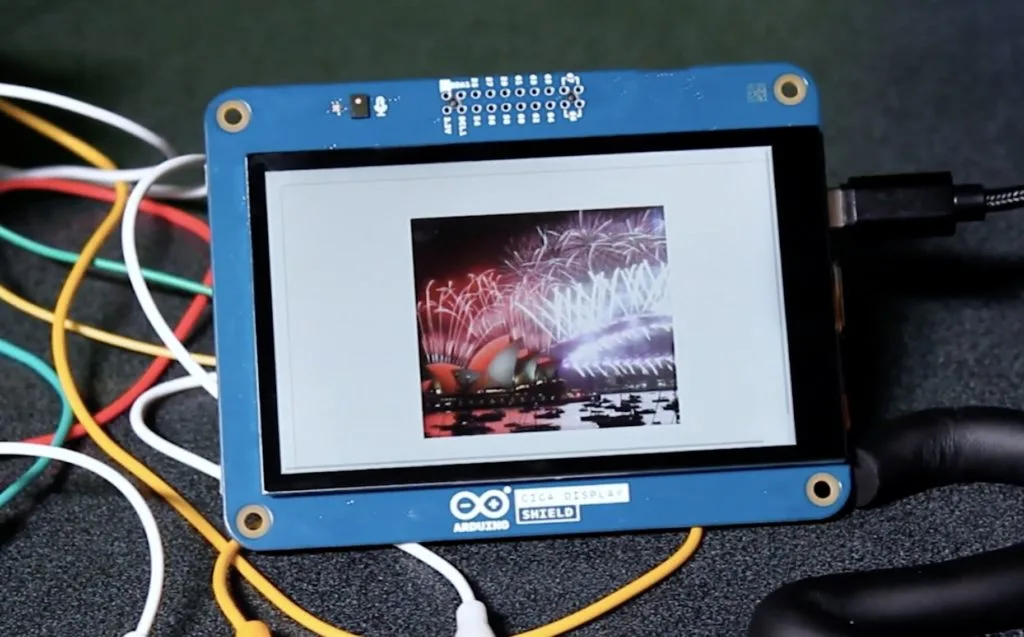
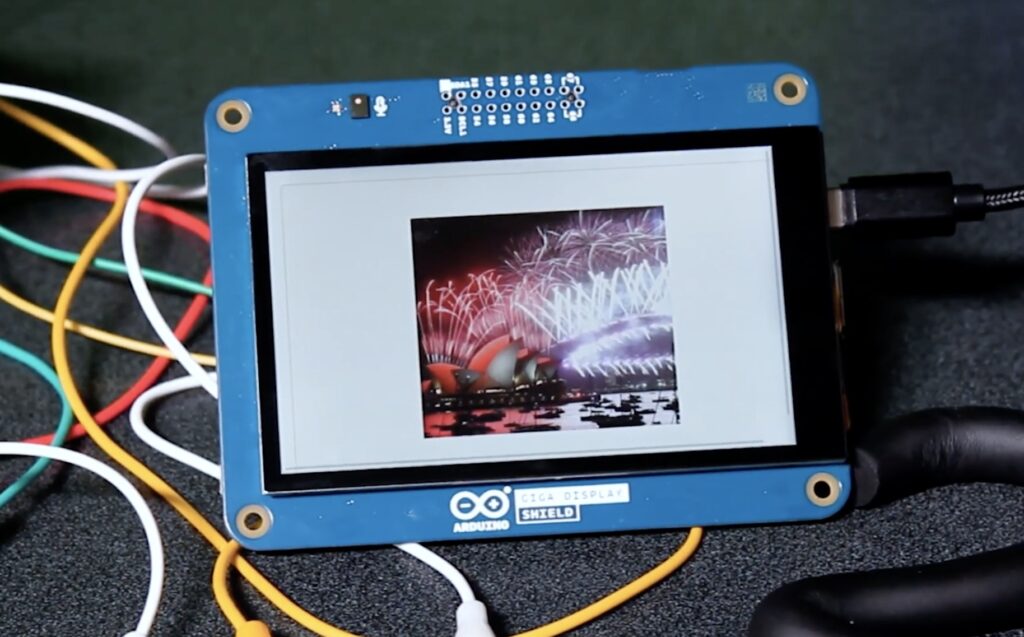
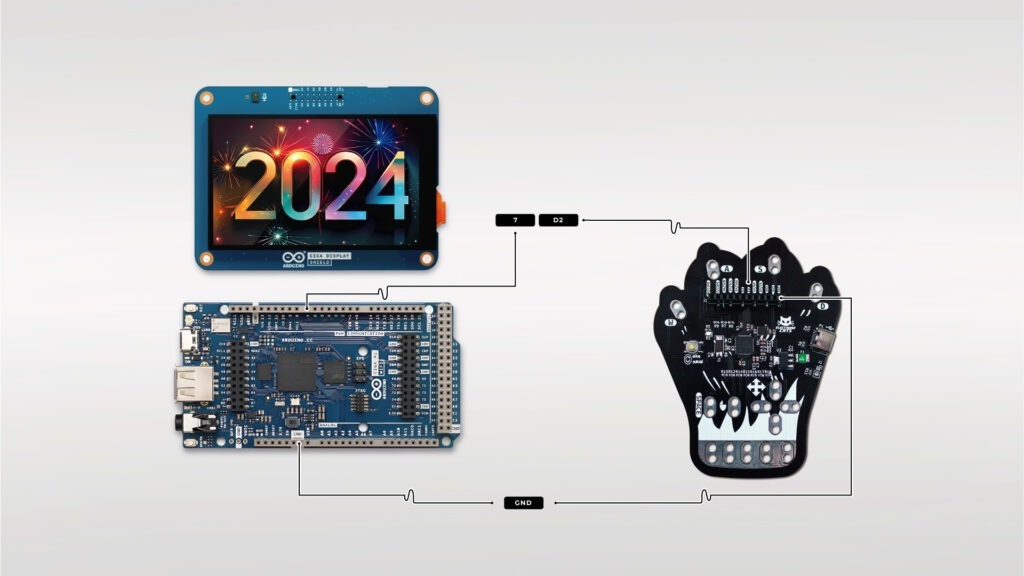
    Garrita is a homemade platform that lets an Arduino GIGA R1 WiFi with GIGA Display Shield transform into a highly mobile slideshow thanks to its larger onboard memory capacity and convenient layout. This year, the Electronic Cats were able to take their image shifter concept even further with Michi: an existing project that turns any conductive object into a capacitive touch-sensing controller. Whenever one of Michi’s inputs are toggled, the board sends a signal to the GIGA R1 WiFi that causes the current slide to advance to the next one.

    In order to go from a locally stored image to something on the Display Shield, users first transform their images into a more suitable format via the LVGL conversion tool. Once downloaded, the resulting files can be easily bundled into a Sketch before they become accessible in the application code. To see more about how the Electronic Cats built Garrita, you can read their write-up here on Hackster.io.

    [youtube https://www.youtube.com/watch?v=0q0BeLKqxn0?feature=oembed&w=500&h=281]

    The post Garrita is an Arduino GIGA Display-powered slideshow appeared first on Arduino Blog.

    Website: LINK