Kategorie: Mobile

  • CrowVi portable monitor review

    CrowVi portable monitor review

    Reading Time: 3 minutes

    Plug and play

    All versions of the CrowVi (from £92/$115) are able to be used out of the box with no extra set up – touchscreen models require you to use the USB-C port (not the power one) so the connected Raspberry Pi (or PC) can detect the inputs – but all models just need power and a HDMI connection.

    There’s no battery installed in the CrowVi so you’ll have to provide external power, portably with a mobile battery or powered by the device you’re connecting it to at home if you don’t have a spare plug. To cut down on cables and power sources, CrowVi suggests daisy chaining power by using the USB-C data port on the display to power a Raspberry Pi while out and about. You won’t be able to get Raspberry Pi 5 up to full power this way, however it will run well enough.

    As an aside, we understand the touchscreen is much like a standard touch display and is not sensitive enough for drawing, but does have the functions you’d otherwise expect from a smartphone or tablet.

    The cover can be removed if you don’t plan to use it

    Out and about

    With unseasonable warmth during the review period, we were able to take the screen out and test it in the most extreme of conditions: direct sunlight. IPS displays do tend to have better visibility out in the sun and this screen performed fine, just as you’d expect any display to work. Make sure to crank up the brightness but find shade if you can.

    As for power draw, a beefy power bank was able to keep everything running fine for a couple hours. Brightness levels and speaker use will affect this, so using external speakers or headphones will also change power draw.

    The colours and responsiveness of the screen are great too. The image is sharp, and it was as good as any monitor we use at home. The cover is very stiff, and the magnets attaching it very strong, to make sure the display is held in place when propped up – it may be a touch too stiff at the bend and we weren’t always sure it was in standing position. Over time, though, it has loosened up enough.

    The sturdy construction feels and looks great too – and as we’re home bodies we’re currently looking into how we can integrate it as a third screen in our set up, which is pretty high praise we think.

    If your smartphone supports display out, it’s a great way to have a portable video player

    Verdict

    8/10

    A great monitor in its own right that performs well out of the house and well enough in direct sunlight

    Specs

    Display: 13.3-inch, 1920×1080 IPS LCD

    Dimensions: 312mm × 198mm × 9mm

    I/O: USB-C power, USB-C data, Mini HDMI in, 3.5mm audio jack

  • A beautiful custom calculator built with IV-12 VFD tubes

    A beautiful custom calculator built with IV-12 VFD tubes

    Reading Time: 2 minutes

    Nixie tubes have been the go-to option for makers looking for retro display aesthetics for many years, because their distinct orange glow carries a lot of vintage appeal. But VFD (vacuum fluorescent display) tubes have been gaining in popularity recently and have different — though similar — appeal. Oskar took advantage of IV-12 VFD tubes to build this beautiful custom calculator.

    VFDs work like a cross between Nixie tubes and CRTs (cathode-ray tube). These IV-12 VFD tubes have seven segments that glow in a teal/cyan blue color (thanks to phosphor) and work at lower (and safer) voltages than Nixie tubes. They are bright and readable, which is why VFD technology was popular for automotive dashboards for decades. In this case, Oskar used five of these IV-12 VFD tubes for a custom calculator.

    Aside from those very distinct VFD tubes, this calculator also has a lovely wood enclosure and a nice-looking set of key caps for the mechanical Cherry MX Brown key switches. The enclosure is laser-cut plywood with a walnut veneer. Oskar mounted the switches on a 3D-printed base plate.

    An Arduino Nano board reads the keypad input, performs the calculations, and displays the results on the VFD tubes. A custom PCB simplifies the wiring, including for multiplexing to the VFD tubes, power connections from a lithium battery charger module, and altering voltage through boost and buck converters.

    This looks fantastic, but there is a caveat: it can’t display a decimal point. Some VFD tubes include a segment for that purpose, but the IV-12 model does not. Even so, the calculator is usable for people who can deduce where the decimal point should go. 

    The post A beautiful custom calculator built with IV-12 VFD tubes appeared first on Arduino Blog.

    Website: LINK

  • On-body LEDs help this guitar rock harder

    On-body LEDs help this guitar rock harder

    Reading Time: 2 minutes

    You don’t go to watch a band play live for the audio quality — most venues are atrocious in that regard. No, you go to enjoy the show as a whole and that includes the visuals. The more a band can do to make the performance look exciting, the more you’re going to enjoy it. To that end, Luigi Morelli helped luthier (and fellow Italian) Gianluca of Nadar Guitars build this one-of-kind LED-lit electric guitar.

    This guitar’s body looks like a left-handed B.C. Rich Warlock merged into a teardrop. It is a very unique design made all the more special by the LED lighting. Several strips of LEDs on the body resemble the traces of a circuit board, while additional LEDs run the length of the fretboard. There are eight different effects/animation programs and it is possible to switch between them using an infrared remote — a well thought-out feature, because a tech can control that along with the stage lights. 

    These are WS2812B individually addressable RGB LEDs that operate under the control of two Arduino Nano boards. One controls the lights on the neck (which only follow a single program) and the other controls the lights on the body. Power comes from a 5000mAh lithium battery.

    In his writeup, Morelli mentions that the LED circuit produced a hum around 1kHz. We assume that the guitar’s pickups would amplify that, but Morelli says that they were able to solve the problem — they’re just keeping the solution “a little industrial secret.” Hum or not, the guitar looks fantastic.

    [youtube https://www.youtube.com/watch?v=0P6V78JBBKI?feature=oembed&w=500&h=281]

    The post On-body LEDs help this guitar rock harder appeared first on Arduino Blog.

    Website: LINK

  • The Club Master is a Nano RP2040 Connect-powered device that improves your golf swing

    The Club Master is a Nano RP2040 Connect-powered device that improves your golf swing

    Reading Time: 2 minutes

    When playing golf, few things are as important as using the correct form when swinging, since even small deviations can be the difference between a hole-in-one and additional strokes. To improve his game, Concept Bytes has designed a small clip-on device called the “Club Master.” With it, he can get a live display of various data points which help track power, distance, and acceleration.

    Collecting and processing all of this data is an Arduino Nano RP2040 Connect due to its fast microcontroller, BLE connectivity, and onboard six-axis IMU, which meant an external accelerometer was not required. Before placing everything into a small, 3D-printed enclosure, Concept Bytes added power to his device with a single LiPo battery cell attached to a step-up voltage converter.

    The Club Master’s Arduino sketch continuously reads the latest acceleration data from the board’s IMU before performing a series of calculations to derive metrics including swing speed, the number of strokes, and distance traveled. All of the results are then sent to the Arduino Cloud and shown in a mobile-friendly IoT Remote app dashboard for quick access outdoors on the range.

    More details about the Club Master can be found in the TikTok video below, and if you’re curious about how edge ML can improve your putting, check out the Golf Ace project here.

    The post The Club Master is a Nano RP2040 Connect-powered device that improves your golf swing appeared first on Arduino Blog.

    Website: LINK

  • Summer time

    Summer time

    Reading Time: 2 minutes

    I’ve never had any real melancholy for summer ending – aside from, I suppose, having to go back to school when I was a kid – but while reading the game’s text I think I came close to understanding why people do.

    I do like summer though; after months of cold and dreary rain, it’s lovely to have a bit of sun. It also helps that I live near the beach so I can go for sunny and beautiful walks. I’m also pretty good with a barbecue if I do say so myself.

    At the time of writing this Final Word, the aurora borealis had appeared all over the UK thanks to Earth being in the path of a solar storm and… I missed it. I had no idea it was happening until I was snuggled up in bed on a Friday night and friends from Scotland and northern England started sharing photos. Good for them, I thought! It wasn’t until the morning I found out it had also reached my end of the country.

    Suit your needs

    I went out the following night to try and catch a glimpse but unfortunately for me – and the hoard of locals convening at a dark corner of the beach – there was nothing to see apart from some pretty stars.

    People had been taking photos on smartphones with night shot features, and that made me realise that a long-exposure Raspberry Pi camera would have worked perfectly… just like in the many astrophotography features I’d written. Unfortunately it was too late for photography that night, but it got me thinking about other outdoor activities I do which could be improved with a Raspberry Pi, rather than forcing myself to do something new just to use the SBC.

    Last year I decided on a near-whim to go hiking in the Peak District with some friends. It was a very wet August weekend so I’m glad I didn’t take a Raspberry Pi with me, but I understand there is a ton of geocaching you can do in the area. I’ve never played around with a geocache project, so if I revive the concept this year I might just have to make a Raspberry Pi-powered one.

    Staying in

    Unfortunately I also like staying home a lot. Maybe I need to invent a Raspberry Pi-powered air conditioner for myself as it is getting extremely roasty-toasty at home these days. I’m also always very interested in some minor gardening, whether it be herbs or some flowers, so perhaps this is the year I finally make an automated plant watering system.

    Well, with all that planning out of the way, maybe I can start thinking about Autumnal projects. Those long months of sunshine and heat can get oppressive…

  • 7 new Android features to elevate your everyday7 new Android features to elevate your everydayDirector of Product

    7 new Android features to elevate your everyday7 new Android features to elevate your everydayDirector of Product

    Reading Time: < 1 minute

    7. Unlock convenience with digital car key — coming to more vehicles

    Digital car key is now available on select MINI models and will expand soon to select Mercedes-Benz and Polestar vehicles. You’ll be able to lock, unlock and start your car with just your phone, or securely share your digital car key with family and friends.

    Website: LINK

  • You can now run Arduino and MicroPython side-by-side on multi-core microcontrollers

    You can now run Arduino and MicroPython side-by-side on multi-core microcontrollers

    Reading Time: 2 minutes

    We’re excited to announce a powerful new feature that we have been working on in collaboration with the MicroPython team! 

    Starting with the upcoming release (v1.23), MicroPython will offer support for Asymmetric Multiprocessing (AMP) on multi-core microcontrollers, based on the industry standard OpenAMP framework (see the MicroPython openamp module documentation for more information). 

    This enables Arduino users to run both an Arduino sketch and a MicroPython program simultaneously on multi-core modules and to communicate between the two. Supported boards include the Arduino GIGA R1 WiFi, Portenta H7 and Nicla Vision.

    The communication between Arduino and MicroPython is facilitated by using Remote Procedure Calls (RPC). This allows us to benefit from the simplicity of using MicroPython while unlocking access to all of Arduino’s rich libraries from MicroPython. 

    If you ever found yourself wanting to use MicroPython for a project, but were stuck on this one library that is only available for the Arduino language… your problem is now solved! 

    MicroPython AMP support provides the following key features:

    • Minimal and user-friendly API
    • Compatibility with Arduino’s RPC library
    • Remote processor lifecycle management, such as loading firmware and booting the secondary core
    • Support for synchronous and asynchronous remote procedure calls
    • Access to Arduino’s libraries from MicroPython

    For further details, please see the dual-core tutorial section on using MicroPython with the RPC library on Arduino Docs

    You spoke, we listened. The feature has been on the community’s wishlist for a while, so we couldn’t be any more proud to bring you this new advancement! We’re excited to see what kind of  creative applications it will unlock for our community. Leave a comment in the section below or share your endeavors on the Project Hub!

    The post You can now run Arduino and MicroPython side-by-side on multi-core microcontrollers appeared first on Arduino Blog.

    Website: LINK

  • The Clubs Conference is coming back

    The Clubs Conference is coming back

    Reading Time: 3 minutes

    Following the huge success of last year’s Clubs Conference, we are delighted to announce that we will be hosting the second-ever Clubs Conference on Saturday 30 November and Sunday 1 December 2024 in Cambridge, UK.

    Two educators at a conference.

    The event will be a weekend of learning and connecting for volunteers and educators involved in Code Club, CoderDojo, and other initiatives we support. We’d love for you to join us!

    What you can look forward to

    This year, we’re bringing the conference home to our offices in the centre of Cambridge.

    On Friday 29 November, you’ll have the opportunity to register early and attend an informal networking event with community members, including the Foundation team. 

    Saturday 30 November and Sunday 1 December will be filled with learning and development opportunities for you, including:

    • Thought-provoking talks and discussions
    • Hands-on, easy-to-follow workshops exploring a range of coding and digital making activities and related topics
    • Opportunities to connect with a diverse range of volunteers and educators

    Join us to learn from your peers running clubs in various contexts, develop your digital making skills, and share your own insights. We look forward to learning with you.

    Two smiling educators hold the Code Club posters.

    Interested in attending or contributing to the Clubs Conference?

    If you think you might want to attend the Clubs Conference, please fill in our form to express your interest. We will then get in touch when you can book your tickets. Tickets will be £5 for both days combined.

    An educator delivers a presentation during a workshop.

    Part of what made last year’s Clubs Conference so special was the range of exciting activities led by community members. If you’d like to host or co-host an activity this year, please also indicate this in the expression of interest form. We’ll be in touch in a few weeks to ask you more about your plans.

    Possible activities include:

    • Workshops
    • Discussion sessions
    • Talks
    • Project demonstrations

    Check out last year’s talks for inspiration.

    Bursaries for participants in the UK and Ireland

    If you would love to participate but you feel the costs of travelling would prevent you, you may be able to apply for a travel bursary. 

    To be eligible for a bursary, you need to:

    • Be registered as a club leader or volunteer at a Code Club or CoderDojo within the UK or Ireland
    • Be available to attend the Clubs Conference in Cambridge on both Saturday 30 November and Sunday 1 December 2024

    Please let us know whether you require a travel bursary when you fill in the expression of interest form.

    If you’re not in the UK or Ireland and have any questions about travel, please send us a message through our contact page using the subject ‘Clubs Conference’.

    If you have any suggestions about the Clubs Conference, we’d love to hear them. Let us know through the contact page, or on social with the tag #ClubsCon24.

    Website: LINK

  • Build a Raspberry Pi 5 media player in The MagPi magazine issue #142

    Build a Raspberry Pi 5 media player in The MagPi magazine issue #142

    Reading Time: 3 minutes

    Take advantage of Raspberry Pi 5's PCI-express compatible socket, an SSD drive and a remote control to build the ultimate do-anything media player

    Build a Raspberry Pi 5 Media Player

    Free your films, videos, and music with our ultimate SSD-powered Raspberry Pi media player. You get complete control over your movies, the ability to stream from all the big players, and access obscure services like public domain films and homebrew games. It’s a complete winner of a system.

    We interview Raspberry Pi's silicon design team about developing its own computer chip technology

    How Raspberry Pi built a silicon design team

    Raspberry Pi has built an ASIC (application-specific integrated circuit) team in Cambridge to design and produce custom silicon chips for its products for nearly ten years. This month we celebrate by chatting to the ASIC team at Raspberry Pi about how they build chips from scratch. It’s a fascinating deep dive into the world of silicon chip development.

    Discover incredible summer projects for your garden, holiday, and day-out adventure!

    Summer Projects

    Take to the great outdoors with our guide to amazing projects for your garden, campsite, beach, or just when going on an adventure. Just because the sun is shining it doesn’t mean you have to put Raspberry Pi down for the day. Take it with you and see what you can do outside.

    Recreate a classic Yamaha DX7 synthesizer with Mini Dexed

    Mini Dexed

    This great Mini Dexed project recreates a classic Yamaha DX7 synthesizer with Raspberry Pi and a DAC (digital analogue converter). The classic sound of this keyboard is behind lots of big music hits, and now it can be all yours.

    Keep a cat entertained with this mini 5-inch television build that plays videos of squirrels

    Cat TV

    This tiny telly built from a Raspberry Pi 5 and 5-inch display keeps a cat amused. Becky uses this project to show her cat streams of birds and squirrels. The full project is housed in a 3D-printed case that is easy to recreate.

    Control a myCobot 280 Pi robot arm by waving around a Wii remote

    Control a robot arm with a Wii remote

    How cool is this? Wave a classic Wii remote around and your robot arm will follow suit. This industrial myCobot 280 Pi from Elephant Robotics is a detailed arm designed for an industrial setting. Last month we showed you how to set it up; this month we’ll show you how to wave it around. 

    Recover data from age-old floppy drives, CDs and even ZIP drives (remember those?)

    Rescue your backups

    This month, KG looks at rescuing hard-to-read media, from forensic disk imaging tools that attempt to recover data from your drive, bit by bit. They take a close look at recovering data from CDs and floppy disks, helpful physical and software tools, and even help you get equipped to recover data from Iomega’s Zip disk super-floppy formats.

  • Check out these Arduino-powered research projects from CHI 2024

    Check out these Arduino-powered research projects from CHI 2024

    Reading Time: 4 minutes

    Held in Hawaii this year, the Association of Computing Machinery (ACM) hosted its annual conference on Human Factors in Computing Systems (CHI) that focuses on the latest developments in human-computer interaction. Students from universities all across the world attended the event and showcased how their devices and control systems could revolutionize how we interact with technology in both the real-world and virtual environments. These 12 projects presented at CHI 2024 feature Arduino at their core and demonstrate how versatile the hardware can be.

    MouseRing

    [youtube https://www.youtube.com/watch?v=vfuhSWn1n6g?feature=oembed&w=500&h=281]

    First on the list is MouseRing from students at Tsinghua University in Beijing that aims to give users the ability to precisely control mouse cursors with only one or two inertial measurement units (IMUs). Worn as a ring on the index finger, data collected from the MouseRing via an Arduino UNO Rev3 was used to both train a classification neural network and model the finger’s kinematics for fine-grained mouse cursor manipulation.

    MobileGravity

    [youtube https://www.youtube.com/watch?v=AnwGVFSCo8Q?feature=oembed&w=500&h=281]

    Because objects in virtual reality are only as heavy as the controller, simulating weight has always presented a challenge, which is why five students from the University of Regensburg in Germany devised their MobileGravity concept. With it, the user can place a tracked object onto a base station where an Arduino Micro then quickly pumps in/extracts water from the object to change its weight.

    AirPush

    [youtube https://www.youtube.com/watch?v=A-zo49cjAzc?feature=oembed&w=500&h=281]

    Another virtual reality device, the AirPush, is a fingertip-worn haptic actuator which gives wearers force feedback in up to eight directions and at five different levels of intensity. Through its system of an Arduino UNO, air compressor, and dual DC motors, this apparatus from students at the Southern University of Science and Technology in Shenzhen can accurately apply pressure around the finger in specific areas for use in games or training.

    Robotic Metamaterial

    [youtube https://www.youtube.com/watch?v=jMP2ZzKdTYA?feature=oembed&w=500&h=281]

    A Robotic Metamaterial, as described by students at Carnegie Mellon University, is a structure built from repeating cells that, on their own, cannot accomplish much, but when combined in specific configurations are able to carry out very complex tasks. Some of the Arduino Mega 2560-powered cells are able to actuate, sense angles, or enable capacitive touch interactions, thus letting a lattice of cells become a capable robot.

    MagPixel

    [youtube https://www.youtube.com/watch?v=LjblfPQ7zv8?feature=oembed&w=500&h=281]

    Instead of using pneumatics to bend materials, this team of students from Zhejiang and Tongji universities in China has designed a modular, flexible material using magnets which they call MagPixel. An Arduino UNO powers one such digital clock application leveraging MagPixel by energizing electromagnets within a ring to move the hour “hand” around the clock face.

    ArmDeformation

    [youtube https://www.youtube.com/watch?v=T5hFRTD4M9Y?feature=oembed&w=500&h=281]

    Proprioception, or the ability to inherently sense where limbs are in 3D space, is vital to how we navigate the world, but VR spaces can limit this ability. The ArmDeformation project from a group of Southern University of Science and Technology students in Shenzhen rests on the wearer’s forearm and then moves the skin below to simulate an external force thanks to an Arduino Mega and several DC motors.

    VRScroll

    [youtube https://www.youtube.com/watch?v=Xe2h-KaK9O8?feature=oembed&w=500&h=281]

    Grasping and moving objects is already quite the task in VR, but sketching a picture takes it to a whole other level of difficulty. Three students from the University of Virginia, therefore, have developed a shape-changing device that attempts to match the forms present in a 3D world for the purpose of sketching. After attaching a piece of paper to the surface, the VRScroll will bend into the correct shape using its two Arduino Uno WiFi Rev 2 boards and six motors.

    Desktop Biofibers

    [youtube https://www.youtube.com/watch?v=MfL6a9ZOTR4?feature=oembed&w=500&h=281]

    As an alternative to plastic-based fibers for use in smart textile prototyping/production, four University of Colorado-Boulder students built an open-source machine that is capable of spinning gelatine-based fibers in a compact footprint. Leveraging an Arduino Mega, the machine can spin biofibers through its heated syringe with GCODE input, thus creating a strong thread which potentially integrates wearable sensors.

    ExBreath

    [youtube https://www.youtube.com/watch?v=saXklFH8lo8?feature=oembed&w=500&h=281]

    The art of communication relies on many forms of signals- not just speaking, and harnessing the user’s breathing pattern to better communicate is ExBreath from students at Tsinghua University in Beijing. An Arduino Nano continuously monitors the breathing patterns from a wearer via a bend sensor and translates them into signals for a micro air pump. In doing so, small, externally-worn air sacs are inflated to reflect the sensed breathing pattern.

    ConeAct

    [youtube https://www.youtube.com/watch?v=blMrTkvVotg?feature=oembed&w=500&h=281]

    This smart material, called ConeAct by its creators at Carnegie Mellon University, is a modular system consisting of small cones joined together with four shape memory actuators (SMA) that either flex or become rigid at certain temperatures. An Arduino Nano coordinates the actions of each cone, and when one needs to bend, the onboard ATtiny1616 will activate its MOSFETs to begin heating the corresponding SMA wires.

    Tangible Stats

    [youtube https://www.youtube.com/watch?v=zAjfhZqQ5cE?feature=oembed&w=500&h=281]

    Targeted to those with blindness or low vision, the Tangible Stats project from a group of students at Stanford University allows them to more easily visualize statistical data by interacting with physical objects. The Arduino Mega-driven platform senses the number of stackable tokens placed into a column and provides quick feedback. Additionally, it can tilt the row of tokens to represent a sloping line.

    ActuAir

    [youtube https://www.youtube.com/watch?v=ezX6QCKcnlA?feature=oembed&w=500&h=281]

    Everyone needs access to fresh, clean air, but quickly seeing the indoor air quality of somewhere like an office meeting room/lobby is difficult. ActuAir, constructed by students at Newcastle University, is a wall-sized soft robotics display powered by a several Arduino UNO R4 WiFis that can each adjust the shape and color of a wall-mounted pouch to indicate the current CO2, temperature, or humidity levels — all of which is adjustable from an external web application.

    The post Check out these Arduino-powered research projects from CHI 2024 appeared first on Arduino Blog.

    Website: LINK

  • Win! 1 of 10 M.2 HAT+

    Win! 1 of 10 M.2 HAT+

    Reading Time: < 1 minute

    Subscribe

  • Vintage rotary phone becomes stylish kitchen timer

    Vintage rotary phone becomes stylish kitchen timer

    Reading Time: 2 minutes

    It seems like everything that happens in a kitchen requires exact timing. Whisk the batter for three minutes, knead the dough for 15 minutes, bake for 30 minutes, and so on. A timer is a necessity for cooking and baking, but there is no reason you need to use your phone or a boring egg timer from the dollar store. You can follow Scott-28’s lead and convert an antique rotary phone into a stylish kitchen timer.

    This looks like a very old rotary phone, but it is actually a versatile kitchen timer that counts down from as little as one second or as much as 99 hours and 99 minutes. Users enter the time by spinning the rotary dial, which is good fun. Then, when the countdown ends, the old school ringer bells start chiming. A four-digit seven-segment display is a bit anachronistic, but makes the timer more usable by showing the countdown. Lifting and then dropping the handset turns off the timer. 

    This all happens under the control of an Arduino UNO Rev3 board, which reads the pulses from the rotary dial and the singular input button. It also sets the seven-segment display and the LED indicators.

    The only tricky part was sounding the ringer, which requires AC power to function. To provide that from a DC power supply, Scott-28 used a LS057020 Black Magic Sine Wave Generator. That works like a power inverter, turning 5VDC into 70VAC (at 20Hz) to drive the ringer. 

    [youtube https://www.youtube.com/watch?v=joO1zkLfmjA?feature=oembed&w=500&h=281]

    The result is a timer that will impress anyone that walks into the kitchen. 

    The post Vintage rotary phone becomes stylish kitchen timer appeared first on Arduino Blog.

    Website: LINK

  • What would an IPO mean for the Raspberry Pi Foundation?

    What would an IPO mean for the Raspberry Pi Foundation?

    Reading Time: 7 minutes

    On 22 May 2024, we announced that we are intending to list the Foundation’s commercial subsidiary, Raspberry Pi Ltd, on the Main Market of the London Stock Exchange. This is called an Initial Public Offering (IPO). 

    The IPO process is — quite rightly — highly regulated, and information about the company and the potential listing can be found on the Investor Portal on Raspberry Pi Ltd’s website. If that’s what you’re looking for, head there. 

    In this blog post, I want to explain what an IPO of Raspberry Pi Ltd would mean for the Raspberry Pi Foundation. 

    A tale of two Raspberry Pis

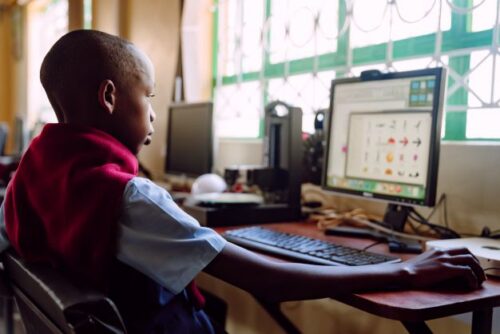
    The Raspberry Pi Foundation was founded in 2008 as a UK-based educational charity. Our co-founders wanted to inspire more young people to explore the joys of coding and creating with technology, with the goal of increasing both the number and diversity of kids choosing to study computer science and engineering.

    Their idea was to create a low-cost, programmable computer that could rekindle some of the excitement sparked in young minds at the start of the personal computing revolution by platforms like the BBC Micro and ZX Spectrum (incidentally also invented in Cambridge, UK). 

    Raspberry Pi Ltd was incorporated in 2012 as the commercial subsidiary of the Foundation and is responsible for all aspects of design, production, and distribution of Raspberry Pi computers and associated technologies. It has always been a commercial company, albeit one that was initially wholly owned by a charity. 

    Learners in a computing classroom.

    It’s fairly common for UK charities to have subsidiaries that handle their commercial activities. Guidance from the regulator, the Charity Commission, explains that it helps protect the charity’s assets and ensures that the charity benefits from tax relief on profits that are generated from commercial activities and used to advance the charity’s objectives.

    So Raspberry Pi has pretty much always been a tale of two organisations: the Foundation, which is a charity, and Raspberry Pi Ltd, which is a commercial company. While we are legally and practically separate organisations, we are united by a mission to democratise computing, and by a set of values that reflect the community of makers, engineers, and educators that have always been such a central part of the Raspberry Pi story.

    Computing for everybody

    In the years since the launch of the first Raspberry Pi computer in 2012, Raspberry Pi Ltd has continued to innovate and expand its range of products, evolving into a leading provider of high-performance, single-board computers and associated technologies for industrial and embedded uses, as well as for enthusiasts and educators, in markets worldwide. For more information on the company and all it has achieved, you should take a look at the Investor Portal.

    In a computing classroom, two young children look at a computer screen.

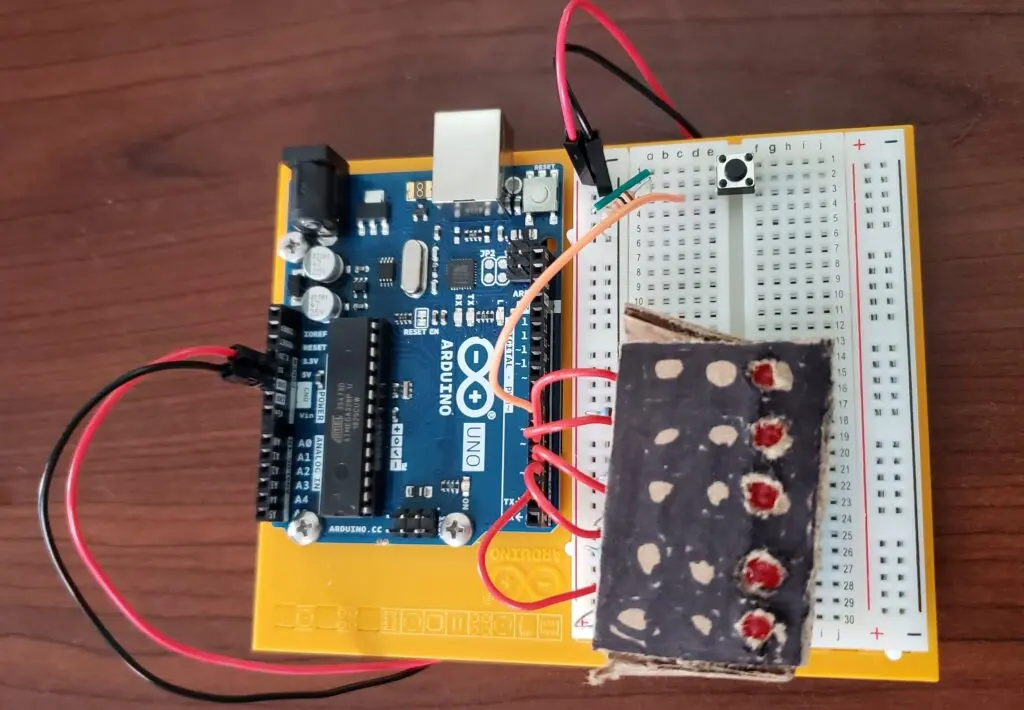
    For me, one of the most important things about a Raspberry Pi computer is that kids are learning to code on the same platform that is used by the world’s leading engineers and scientists. It’s not a toy, although it is a lot of fun. 

    Crucially, the commitment to low-cost computing that was at the heart of Raspberry Pi’s founding ethos remains unchanged and has been enshrined in a legally binding agreement between the Foundation and the company. This means that Raspberry Pi will always produce low-cost, general-purpose computers that can be used for teaching and learning.

    Over that same period, the Foundation has innovated and expanded its educational products and learning experiences to the point where we are now widely recognised as one of the world’s leading contributors to the democratisation of computing education. 

    Three learners and an educator do a physical computing activity.

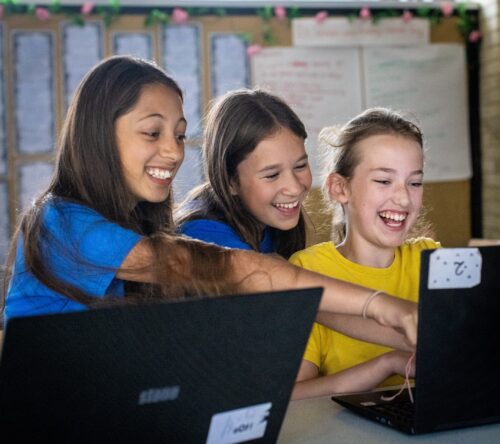
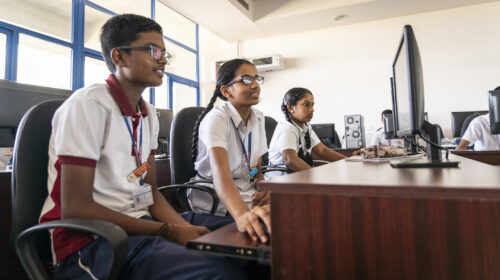
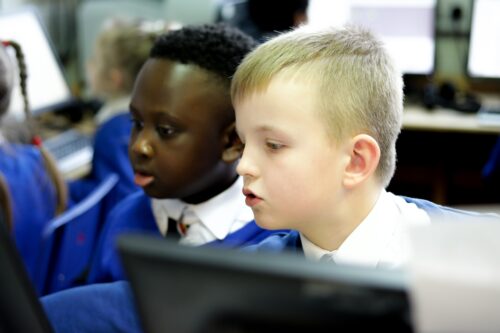
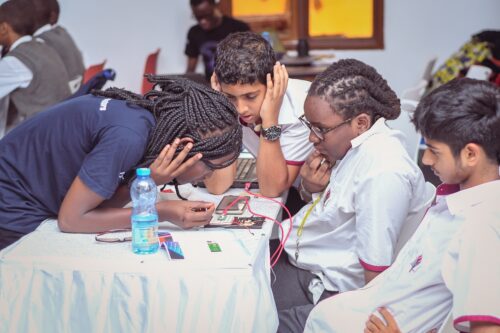
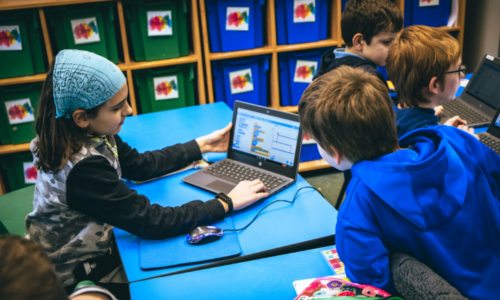
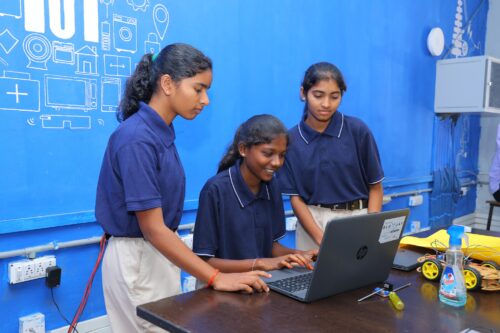
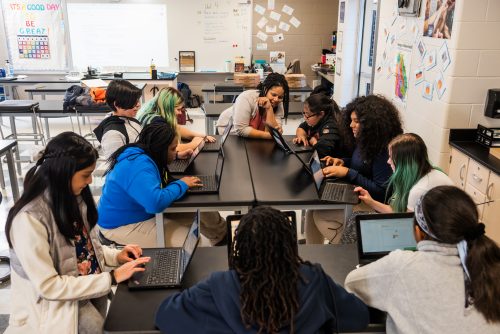
    We create curricula and classroom resources that are used in schools all over the globe, covering everything from basic digital skills to computer science and AI literacy. We provide high-quality professional development for teachers and we build software tools that reduce barriers, save time, and improve learning outcomes. We also support the world’s largest network of free coding clubs and inspire young people to get creative with tech through showcases and challenges. All of this is completely free for teachers and students wherever they are in the world. 

    We are also advancing the field of computing education through undertaking original research and translating evidence of what works into practice.

    Young people at a laptop in a club session.

    Importantly, the Foundation is device- and platform-agnostic. That means that, while Raspberry Pi computers make a huge contribution to our educational mission, you don’t need to use a Raspberry Pi computer to engage with our learning experiences and resources. 

    The next stage of growth and impact

    The proposed IPO is all about securing the next stage of growth and impact for both the Foundation and the commercial company. 

    To date, Raspberry Pi Ltd has donated nearly $50m from its profits to the Foundation, which we have used to advance our educational mission combined with over $60m in funding from philanthropy, sponsorship, and contracts for educational services.

    Three female students at the Coding Academy in Telangana.

    As the company has continued to grow, it has needed working capital and funding to invest in innovation and product development. Over the past few years that has mainly come from retained profits. Listing Raspberry Pi Ltd on a public market will enable the company to raise additional capital through issuing new shares, which will lead to broader reach, greater impact, and ultimately more value being created for the benefit of all shareholders, including the Foundation.

    From the Foundation’s perspective, an IPO provides us with the ability to sell some of our shares to raise money to finance a sustainable expansion of our educational activities. Put simply, instead of receiving a share of the company’s profits each year, we will convert some of our shareholding into an endowment that we will use to fund our educational programmes.

    What happens after the IPO? 

    Assuming we proceed with the IPO, what is now Raspberry Pi Ltd will become a public company that trades its shares on the Main Market of the London Stock Exchange. 

    A classroom of young learners and a teacher at laptops

    The Foundation will remain a significant shareholder and we will continue to share the Raspberry Pi brand. We will be involved in decision making on the same basis as all other shareholders. Our goal will be to support the company to be as successful as possible in its mission to make computing accessible and affordable for everybody.

    The Foundation will use any funds that we raise through the sale of shares at the IPO — or subsequently — to advance our ambitious global strategy to enable every young person to realise their full potential through the power of computing and digital technologies.

    A young person uses a computer.

    Partnership will continue to be at the heart of our strategy and we will work closely with businesses, foundations, and governments to ensure that our work reaches as many teachers and young people as possible. Our ambition is that around 50% of our activities will be funded from the endowment and 50% through partnerships and donations, enabling us to reach many more teachers and students by combining our resources and expertise with those of the many partners who share our mission.

    Creating a lasting legacy 

    Whatever happens with the IPO, Raspberry Pi has already had a huge impact on the world. It’s been an enormous privilege to be part of the journey so far, and I am hugely excited about the potential of this next phase.

    I want to pay tribute to all of our co-founders for setting us off on this great adventure, and particularly to Jack Lang, who very sadly passed away earlier this month. Jack made an exceptional and unique contribution to the Raspberry Pi story, and he deserves to go down in history as one of the most significant figures in computing education in the UK. I know he would have shared my excitement about this next chapter in the Raspberry Pi story. 

    With the pace of technological advances in fields like AI, our mission has never been more vital. We have the potential to positively impact the lives of tens of millions of young people who might otherwise miss out on the opportunity to change the world for the better through technology.

    Website: LINK

  • Kick off the Monaco Grand Prix weekend with these Formula 1-inspired Arduino projects

    Kick off the Monaco Grand Prix weekend with these Formula 1-inspired Arduino projects

    Reading Time: 6 minutes

    The Monaco Grand Prix is just days away and will likely be one of the most exciting races of the season. While most fans can’t participate directly — except as spectators — they can celebrate their passion through DIY projects. That’s why we’ve scoured the community to find the best of those builds for every skill level. Check out the list below!

    Formula 1 start lights

    Formula 1 races get underway with a light sequence that is unique in motorsports. That sequence starts with the lights illuminating one after another, telling the drivers to prepare. Then, after a random delay, the lights turn off and drivers can launch. This tests driver reaction, rather than memorized timing.

    Project Hub user BirdGuy’s project replicates those start lights using just an Arduino UNO Rev3, some LEDs and resistors, a momentary push button, and a breadboard. It is perfect for beginners, thanks to the simple wiring and sketch.

    Logitech Driving Force Shifter adapter

    Logitech’s G Driving Force Shifter is a popular six-speed racing simulator peripheral. Modern Formula 1 cars use electronic sequential shifters, but this accessory would be perfect for vintage F1 cars in racing sims.

    However, there is a problem: this shifter only works with a Logitech wheel. Dave Madison’s Arduino Leonardo-based adapter lets digital racers connect the shifter directly to a PC. It breaks out the DB9 connector and reads the inputs, then provides USB output. No soldering or breadboard necessary!

    Race lights reaction timer

    The previous start lights project is a great demonstration, but Stephan Holding’s reaction timer puts user skill to the test. The concept is very similar, but with a second button that represents an accelerator pedal and an OLED screen that shows the user’s reaction time.

    This project is a bit more complex, with that OLED screen, WS2812B individually addressable RGB LEDs, a piezo buzzer, and a laser-cut MDF enclosure. But it is still suitable for beginners who want to train their reaction time.

    Racing gates  

    Formula 1 is a wildly expensive sport, but dedicated enthusiasts can participate in amateur racing leagues to get their wheel-to-wheel fix. Those enthusiasts will want some way to measure lap times or speeds during practice and Project Hub user nfarrier’s DIY race photogate can help.

    This was designed for small-scale model cars, but the same hardware will work for full-size cars. Each PVC pipe gate has a homemade break-beam sensor and an Arduino UNO Rev3 monitors those. Enabling multiple lanes is as simple as adding more break-beam sensors. The Arduino times the interval between gate sensor triggers and sends the results to a basic Android app through an HC-05 Bluetooth for logging.

    Sequential gear shift

    Sequential transmissions, which weigh less and shift faster, took over F1 about 30 years ago. Most have “flappy paddle” electronic shifters integrated into the steering wheel, but many people prefer the feeling of reaching over to a shifter lever. Those people should enjoy Carlos Almeida’s sequential gear shift controller for sim racing.

    This project required 3D CAD modeling skills and a well-tuned 3D printer, so it is a step up in difficulty. It utilizes an Arduino MKR1000 WiFi board, because that is what Almeida had on hand. But it should work with several other models. There is even a seven-segment display that indicates the current gear.

    V12 engine clock

    Current Formula 1 regulations mandate the use of 1.6L V6 hybrid engines, but the V12 era was the most quintessential F1 experience for many fans. And the number of pistons on a V12 engine just happens to match the number of hours on a clock. That gave Will Reeve the inspiration to construct this V12 engine clock.

    Reeve styled this 3D-printed clock after a simplified V12 engine. As each hour passes, internal servomotors lift pistons to indicate the time. A seven-segment display on the front of the engine block shows the minutes. An Arduino Mega 2560 controls that process and LEDs provide accent lighting.

    Predicting the F1 champion with tinyML

    Cutting-edge machine learning models are capable of amazing feats and often reach conclusions that we humans cannot. Leonardo Gonçalves theorized that a machine learning model could predict the winner of a Formula 1 race and this project tests that idea.

    Gonçalves didn’t have access to actual F1 cars, so this project is only a demonstration of the concept using unpowered scale models. The idea is that a machine learning model trained on data from F1 cars can predict the winner of an ongoing race based on the new real-time data.

    Here, that data comes from an Arduino Nano 33 BLE Sense attached to the model car, which has all kinds of onboard sensors for collecting data, including an IMU (inertial measurement unit). That data went to a Neuton tinyML model for training and new data goes to the trained model for predictions. The results are fun to see, even if the test was dramatically simplified compared to a real race.

    Force feedback accelerator pedal

    The racing sim hardware we’ve already discussed only approximates the experience of driving a real car. But this active racing simulator pedal is much more robust and provides force feedback resistance. While drive-by-wire throttle systems are making it a thing of the past, mechanical throttle linkages impart noticeable feedback through the pedal. This DIY pedal replicates very high-end Simucube hardware, providing that feedback at a fraction of the cost.

    The two killer features are a load cell to measure pressure on the pedal and a large servo with a leadscrew to generate feedback. An Arduino controls the servo and reads the signal from the load cell’s amplifier. With the help of software running on a connected PC, this closed-loop system can accurately replicate the feel of an accelerator pedal in the real world.

    PorscheKart steering wheel

    Wesley Kagan is on an incredible quest to build his own F1 car, complete with a Mercedes V12 engine. There is a massive amount of custom work that Kagan has put into this project, but one of the highlights is the steering wheel. It looks and operates a lot like what you would see on an F1 car today, but is 100% bespoke.

    This requires three Arduino development boards. The first, an Arduino Mega 2560, collects data from the car’s sensors. The other two, Arduino Micro boards, read the steering wheel buttons and switches, and display content on the 3.5” LCD screen. That shows information like the current gear and speed, just like today’s F1 drivers see on their steering wheels.


    If you have an F1-themed project or get inspired to create one after watching the Monaco Grand Prix this weekend, be sure to upload it to the Project Hub!

    The post Kick off the Monaco Grand Prix weekend with these Formula 1-inspired Arduino projects appeared first on Arduino Blog.

    Website: LINK

  • 5 ways to use Arduino with kids

    5 ways to use Arduino with kids

    Reading Time: 5 minutes

    One of the great things about making is that it really is for everyone — every budget, every skill level, and every age group.

    Children are one of the groups that can benefit the most from Arduino. Getting exposed to making and home automation from an early age can be enormously beneficial for kids and their families, and can spark a lifelong love for technology.

    In this article, we’ll look at why Arduino is so great for kids, and some of the ways parents, older relatives, and teachers can use Arduino’s products to entertain, educate, and inspire young learners.

    Why is Arduino so great for kids?

    • It teaches valuable STEM skills: STEM has always been a lucrative field, and as we enter an increasingly tech-driven world this trend looks likely to continue. Arduino projects can help kids gain hands-on experience and build a solid foundation of STEM skills from an early age.
    • It can begin a lifelong love for engineering. Making projects from a young age can be the start of a wonderful journey, giving kids a passion that can follow them through life and lead to many great experiences.
    • It’s a community: The Arduino community extends across the entire world, with regular meetups and events where like-minded makers can get together. For kids, this can be a great way to make friends and be part of a wider group.
    • It helps build wider skills: On top of pure STEM, using Arduino can also help kids grow in other areas, by encouraging skills like problem-solving and teamwork.
    • It’s fun: What more needs to be said? Tinkering with Arduino projects is a ton of fun, and that’s a huge benefit in itself.

    5 ways to use Arduino with kids

    Now let’s take a look at some specific ways we can use Arduino with young learners, illustrated with a few real-life examples of projects.

    1. Learn through projects

    Arduino can be the perfect gateway into making and engineering as hobbies, by giving kids accessible and fun projects to learn fundamental skills and gain practical experience.

    Take a look at this project, for example — which teaches kids the fundamentals of AI and machine learning via a fun game. Since these skills are exploding in importance, getting a solid headstart here is a valuable opportunity.

    2. Projects for groups

    One of the best things about Arduino for kids is the teamwork aspect, and the ability to work together toward a shared goal. This not only brings a new dimension of fun to the activity but also helps foster social skills and make friends.

    Take a look at this automated gardening project from EDUcentrum. In this tutorial, kids build a smart watering system for a connected plant, which they will then monitor over time. Then, they’ll discuss the project with their peers and do a presentation.

    3. Projects for kids with kids with autism

    STEM really should be accessible to everyone, and in fact, children with autism can benefit enormously from Arduino projects.

    Arduino For Autism is a group dedicated to helping mentor kids with autism, showing them how to work with microcontrollers. It’s designed to give kids with autism an introduction to the world of making and STEM in general, helping lay the foundations for skills like coding, engineering, and game development.

    Arduino can also be a useful tool for parents of children with autism. Phillip Mallon is a great example — on his website he shares the projects he’s built to help his son Jason, who has severe autism. Examples include a simpler timer for time management and an easy-to-use MP3 player.

    4. Projects to help parents

    Parenting is a tough task, but Arduino can help in this area, too.

    For example, check out this baby formula tracker. The monitor is designed to help randallph and his wife keep track of their daughter’s feeding times and make sure she is eating the right amounts at the right intervals.

    5. Learning mixed with fun

    Learning doesn’t have to be a chore — and there’s no better proof of that than this project, a device that launches NERF darts to show how angles affect the trajectory of ballistics.

    It was built by Arduino user buildfams and won Arduino Project of the Month in March 2023. Buildfams and his son worked together to build the project — a valuable learning experience in itself — and ended up with a fun gadget and a great way to learn key physics concepts.

    Tools and products

    On top of project ideas, Arduino also has several tools and products specifically designed to help beginners and kids make a start with their own projects. Let’s take a closer look.

    Get started with making

    If you or your kids are brand new to making, Arduino’s Student Kit is made for you. It’s built to help learners get started with making projects, covering basic skills like coding and building electronic circuits. It’s made for complete beginners — making it perfect for kids — and includes 11 activities designed to guide the learner through key concepts and important skills.

    Learn key scientific skills

    If learning basic scientific skills and concepts is your goal, look no further than the Science Kit R3 by Arduino. Designed to teach key scientific skills, bringing abstract theories to life through practical, interactive projects.

    Learn the basics of STEM

    Arduino’s Starter Kit is the perfect introduction to STEM and can be used at home or in the classroom. The kit teaches fundamental skills like coding and electronics through engaging, fun projects. It covers a ton of important basic concepts, from sensors and actuators to digital logic, while also encouraging learners to think critically and work together to solve problems.

    Alvik

    Arduino enthusiasts have yet another product to play with! Alvik is designed for students and teachers to explore the world of robotics, introducing this fascinating field to young learners with a unique approach. Why not grab yours today?!

    Learn more about Arduino and how you can use it with young learners (and older ones too!).

    The post 5 ways to use Arduino with kids appeared first on Arduino Blog.

    Website: LINK

  • CDP Studio: Control a robot arm

    CDP Studio: Control a robot arm

    Reading Time: 6 minutes

    01 Install the software

    On your PC, visit cdpstudio.com/getstarted and download the free non-commercial version for Windows or Linux. During installation, select the ‘ARMv8 64-bit (Debian 11)’ component under CDP Studio 4.12, along with the one already ticked for your host PC. You will then be able to deploy projects to the myCobot 280 Pi arm, which uses a 64-bit version of Ubuntu.

    If you already have CDP Studio installed, make sure it’s updated to version 4.12, then go to Help > Package Manager and select ‘Add or remove CDP versions’ to add the ARMv8 64-bit (Debian 11) component.

    CDP Studio myCobot 01

    02 Download the project

    This is a complex project that would be time-consuming to build from scratch, so we’ll download it from CDP Studio’s GitHub repo. Go to magpi.cc/recordnplay, click the green Code button, and select Download ZIP. Unzip the file on your PC. Move the resulting myCobotRecordNPlay-main folder to the CDPStudioWorkspace/systems folder.

    03 Download and build library

    To deploy the project to the robot arm, you’ll also need the myCobotLib library. Go to the GitHub repo at magpi.cc/mycobotlib, click the Code button and Download ZIP. Extract it and then move the resulting myCobotLib-main folder to the CDPStudioWorkspace/libraries folder. Open the myCobotLib project file (with the .pro suffix) in CDPStudio, then right-click its name in the left panel and select Build.

    CDP Studio myCobot anno

    04 Open the project

    Now open the RecordNPlay CDP project file (.pro) in CDP Studio. If you click the arrow next to it in the left panel, you’ll note that it comprises two main applications. RecordNPlayUI runs the database logic for recording arm movement steps and shows a GUI on the PC to make programming the arm easier. It also has an ArmVisualizer pane that can be used to view the arm positions in 3D. This can be used even if you don’t have a real arm connected, so you can still run the project and see how recorded steps affect its movements.

    The RecordNPlayIO application is the part of the project that’s deployed to the myCobot Pi arm over the network, once paired, enabling CDP Studio to communicate with it.

    05 Prepare myCobot

    The myCobot arm’s Ubuntu OS has a non-standard version of the OpenSSH server. So you’ll need to make a small change to a config file so CDP Studio can communicate with it over the network. SSH into the myCobot with the username ‘er’ at its IP address; the default password is ‘Elephant’. Then enter:

    sudo nano /etc/ssh/sshd_config

    Locate the line that sets the PubkeyAuthentication parameter and set it to yes (and make sure the line is not commented out). Press CTRL+X, then Y to exit and save. Then restart the OpenSSH server with:

    sudo systemctl restart sshd

    CDP Studio myCobot 02

    06 Pair the arm

    Open the Deploy Configuration tab. Under Networks, press the Select button for ‘WiFi’. The ‘Devices – WiFi’ table below should start showing any devices available to pair with CDP Studio.

    Click the Username field for your myCobot (based on its IP address) and enter ‘er’, then click the Pair button next to it. You will be prompted to enter the password – the default is ‘Elephant’.

    Under Applications, change the Device for RecordNPlayIO application to your myCobot device name, then change the Toolkit to ARMv8 64-bit (Debian 11). When you run the RecordNPlay project, this will then be deployed over the network to the robot arm.

    CDP Studio myCobot 03

    07 Run the project

    Right-click RecordNPlay in the left panel and select Run & Connect. After a few moments, a new Arm Record‘n’Play window should appear, showing the GUI for recording arm movements. First, enter a name for the sequence and click Add. Then click Record to start recording steps. You can move the sliders, but it’s a lot easier to move the robot arm around and then click its LED panel button to add each position as a step. Recorded steps are shown in a list and can be updated or deleted individually using the buttons at the bottom right. The ‘Step duration’ bar sets the time for which an arm position is held.

    Try recording some steps and then hit the top-left Play button to play the sequence. If you have a myCobot arm connected, it should follow the movements you recorded; if not, select ArmVisualizer in the project’s left panel, then the DHChain Visualizer tab to view a 3D representation of the arm with its six joints. As you move between two steps, the visualisation shows both and the movement of the arm’s head with a red line. The gripper status is indicated by a green (closed) or grey (open) dot.

    CDP Studio myCobot 04

    08 Pick and place

    Now, let’s get our arm to pick up an object and place it down in another location. We placed a pencil sharpener on top of a biscuit tin, high enough to give the arm plenty of space to pick it up without the bottom of the gripper hitting the table.

    Move the arm between positions and press the LED panel button to record each step. You can also open and then close the gripper manually to program it. Make sure the arm is stationary, in the right position, before closing it. Then lift the arm up and move it round and down to where you want to place the object. After opening the gripper to drop it, move the arm straight up so you don’t bump into the item. You can adjust step positions in the GUI if needed. The steps are stored in an SQLite database too, so you could always edit that manually.

    CDP Studio myCobot 05

    09 Kinematics

    This project makes used of CDP Studio’s Kinematics framework, in the form of the DHChain component. The basic concept of kinematics is that if you input joint angles for a robot arm, or chain of links, the framework can calculate the end position in 3D space – as shown in our project’s ArmVisualizer pane, with the X/Y/Z coordinates shown in the Arm Record‘n’Play GUI.

    The method can also be used in the reverse direction, to convert a desired 3D end position into the required joint angles; this is known as ‘inverse kinematics’.

    Kinematics has many uses in the field of engineering, helping to calculate positions and velocities of moving parts such as those in an industrial robotic arm, or a bionic limb or exoskeleton. An example real-world case is the use of CDP Studio and kinematics is for controlling deck cranes on ships.

    CDP Studio myCobot 06

    10 Exploring the project

    You can click the Block Diagram tab to see how the project’s block-based components have been put together. At the highest level, there are two main blocks: for the RecordNPlayUI application for the GUI step recorder, and the RecordNPlayIO one for communicating with the myCobot arm. Here, the UI block’s DesiredStates port links to the IO block’s DesiredAngles port; it sends the angles set for the six joints, along with the gripper status, so that the arm will move accordingly. The ControlModes link is used to determine whether the arm should maintain a position or be allowed to move freely, for when you’re recording moves. CurrentStates is a feedback port from IO that’s used by UI to know what is the current position of the arm joints, gripper and LED button; this information is used by the recording process in UI.

  • 3 new ways to use Google AI on Android at work3 new ways to use Google AI on Android at workProduct Management Lead

    3 new ways to use Google AI on Android at work3 new ways to use Google AI on Android at workProduct Management Lead

    Reading Time: < 1 minute

    The modern workplace can be a whirlwind of employees juggling tasks and business leaders trying to simplify operations or improve security. Everyone approaches work differently, but we’re all aiming for more efficiency and productivity. This is where AI-powered tools come into the picture— around three-quarters of employees say that AI has enhanced their productivity and quality of work. Our mission to make AI helpful for everyone extends to the workplace, too. Here are three ways new Google AI on Android features can make work easier for your employees and developers — and, by extension, for you.

    Website: LINK

  • Harness the power and connectivity of your Arduino UNO R4 WiFi with this IoT lamp

    Harness the power and connectivity of your Arduino UNO R4 WiFi with this IoT lamp

    Reading Time: 2 minutes

    It can be tough to get started with building an Internet of Things (IoT) project from the ground-up, as getting connected, serving a webpage, and managing other devices can all be a challenge to a beginner. This is why the YouTuber known as “Mario’s Ideas” made an end-to-end tutorial that details everything one might need to build a smart RGB lamp.

    Because the Arduino UNO R4 WiFi contains an ESP32-S3 chip for its Wi-Fi radio and Renesas RA4M1 microcontroller, it was the perfect candidate. Mario’s sketch begins with a call to initialize the Wi-Fi module before attempting to connect to his local access point. Once finished, it enters a loop that continuously checks if a client has connected to the web server, and if one has, reads the requested path while also seeing if the string contains “/H” to denote an “ON” command to set the LED.

    Toggling an LED is useful, but Mario wanted to take things a step further by building a tangible — in this case a lamp. His 3D-printed enclosure features a recessed base and translucent cube for diffusing the light emitted by a grid of NeoPixels. Controlling the color was just as easy since any browser could still send a request path containing a color and get back the lamp’s updated status.

    To see more about this IoT lamp project, you can watch Mario’s video below!

    [youtube https://www.youtube.com/watch?v=JUgAKao-3bc?feature=oembed&w=500&h=281]

    The post Harness the power and connectivity of your Arduino UNO R4 WiFi with this IoT lamp appeared first on Arduino Blog.

    Website: LINK

  • Epic’s proposed remedies are bad for everyone but EpicEpic’s proposed remedies are bad for everyone but EpicVP, Government Affairs & Public Policy

    Epic’s proposed remedies are bad for everyone but EpicEpic’s proposed remedies are bad for everyone but EpicVP, Government Affairs & Public Policy

    Reading Time: 3 minutes

    Last month, Epic Games asked a U.S. federal court to impose harmful and unwarranted changes to Android and Google Play that would undermine the privacy, security, and overall experience of consumers, developers, and device manufacturers. Not only do Epic’s demands go far beyond the scope of the recent U.S. trial verdict — which we will be challenging — but they are also unnecessary due to the settlement we reached last year with State Attorneys General from every state and multiple territories.

    We recently shared with the court why we strongly object to Epic’s proposal — and at a hearing later this week, economic experts will reinforce the reasons why Epic’s proposed remedies are problematic and unnecessary. This includes:

    • Epic’s proposal puts Android users’ security at risk on third party app stores: Epic’s proposal removes Google’s ability to implement trust and safety measures that keep Android users safe. Unlike iOS, Android enables OEMs to preload third party app stores and allows users to download additional app stores directly. To maintain a positive user experience while also providing choice, Android incorporates common-sense measures to protect user security and privacy – measures which would no longer be allowed under this proposal.
    • Epic’s proposal hurts the privacy of Android users: Under Epic’s proposal, Google would be forced to tell any and all third party app stores which apps a user has installed on their phone through Google Play. It would wrongly expose a person’s personal apps usage – even for topics like religion, politics, or health — for Epic’s gain. This is a clear violation of user privacy.
    • Epic’s proposal leaves people vulnerable to malicious apps: Unlike on iOS, Android users have the option to sideload apps, meaning they can install an app directly from a developer’s website without going through an app store. We’ve implemented important protections to ensure users are still protected while enjoying choice in apps. However, Epic’s proposal would force Google to remove them — severely curtailing our ability to protect users from potentially malicious apps.
    • Epic’s proposal reduces developers’ control over their app distribution: Developers have many options for app distribution on Android, but when they choose to use Google Play, they know the trust and safety rules that keep our platform safe. However, Epic wants to force all other developers to publish their intellectual property through multiple channels without their consent. Under this proposal, developers may suddenly find their app on a store without the same user protections or in a store that carries inappropriate or offensive content they do not want to be associated with.
    • Epic’s proposal cuts off key business opportunities for developers: As part of the State Settlement, we have already agreed not to sign wide-ranging exclusivity agreements with developers to launch their full app catalog on Google Play. But Epic wants to entirely restrict Google’s ability to offer any financial incentives to developers to distribute their apps in the Play store, even on a non-exclusive and app-by-app basis. Epic’s proposed remedy would also prevent Google from working with developers to provide any exclusive content through apps distributed in the Play Store. This is a common strategy used to engage users and grow a developer’s business, yet Epic is seeking to limit this important opportunity for all developers.
    • Epic’s proposal hurts device manufacturers: Part of the State AG settlement ensures that any app store is free to compete for placement on an Android device. But Epic’s proposal would cut Google Play out of this process, reducing competition and therefore enabling rival app stores to underbid. This would reduce what OEMs can earn from pre-installation and placement on their devices, cutting into already narrow OEM margins in a way that could raise consumer prices.

    Epic’s proposed remedies were all clearly designed to only benefit itself. They would harm the Android ecosystem, and competition in general, by creating security and privacy risks, depriving developers and OEMs of key business opportunities, and undercutting Google’s ability to support our investments in Android and Google Play. We will continue to vigorously defend our right to a sustainable business model that enables us to keep people safe, partner with developers and OEMs to innovate and grow their businesses, and keep the Android ecosystem thriving and healthy for everyone.

    Website: LINK

  • Google Play Points is leveling up the rewards gameGoogle Play Points is leveling up the rewards gameGeneral Manager

    Google Play Points is leveling up the rewards gameGoogle Play Points is leveling up the rewards gameGeneral Manager

    Reading Time: 2 minutes

    In 2018, we launched the Google Play Points rewards program to say thanks for choosing Google Play as your destination for apps, games and digital content. Today, over 220 million members use Play Points to earn points and rewards.

    This year, we are leveling up Google Play Points with exciting new perks and rewards to connect you with experiences you’ll love. Plus, the higher your status, the more you’ll unlock. Here’s what to look forward to:

    New ways to play and win, starting with Diamond Valley

    Diamond Valley, a treasure hunt mini-game currently available for play in Korea and Japan, will launch in the U.S. on June 17. Search for diamonds and use them for a chance to win prizes like Pixel devices, exclusive merchandise from your favorite games, points bonuses, and more.

    Pre-register for Diamond Valley today and get a headstart with bonus diamonds. The first 50,000 Diamond and Platinum members to pre-register will also receive an exclusive Diamond Valley t-shirt. To pre-register and play the game when it opens, visit the Perks tab of Play Points home.

    Early access to new games, like Squad Busters

    We’re teaming up with the developers of some of your favorite franchises to give top members early access to the hottest new mobile games. Starting today, Diamond, Platinum and Gold members get exclusive early access to play Squad Busters. To build your squad, visit the Perks tab of Play Points home. Be on the lookout for more exclusive Squad Busters rewards coming soon.

    VIP experiences at gaming and entertainment events

    We regularly offer exclusive perks for members. This summer, we’re partnering with some of the hottest events in gaming and entertainment to bring you VIP experiences. Be sure to check the Google Play Store soon for more information and get ready for a summer of Play.

    To get started with Google Play Points, visit the Google Play Store. Tap your profile icon, then “Play Points” and “Join for free.” Then, Go Play!

  • Ready for SPS Italia 2024? Ready for accessible industrial automation!

    Ready for SPS Italia 2024? Ready for accessible industrial automation!

    Reading Time: 2 minutes

    Save the date on May 28th-30th, Arduino will be back at SPS Italia in Parma, showcasing how our open-source solutions are revolutionizing the industrial sector with high performance and accessibility.

    At Arduino’s booth #C020, hall 7, we’ll be presenting the latest additions to our ecosystem, designed to help companies of all sizes embrace digital transformation and the Industrial IoT. Here’s a sneak peek at what’s in store:

    Opta: the “Swiss Army knife” of industrial automation

    Opta is our versatile micro PLC: reliable, secure, and open-source, it avoids vendor lock-in and is the ideal choice for both newcomers and seasoned professionals. Opta can be programmed with standard IEC 61131-3 languages or within Arduino’s environment, offering unmatched flexibility.

    “With Opta, we aim to support companies looking for increased visibility into their processes through IoT retrofitting, breaking down barriers to industrial automation, and those that produce machinery, seeking a ready-to-use controller for IoT and edge AI. Opta offers high performance, secure connectivity, and unprecedented programming flexibility at an affordable price,” says Arduino’s CEO Fabio Violante.

    Opta Expansion Modules to boost your projects

    New expansion modules allow you to enhance Opta’s capabilities: the Arduino Pro Opta Ext D1608E, Arduino Pro Opta Ext D1608S, and Arduino Pro Opta Ext A0602 provide additional programmable inputs, relay outputs, and analog I/O options for diverse data acquisition and control needs.

    Live demos for a hands-on experience

    Explore live demonstrations of Opta and other key products from our Portenta and Nicla families. Discover how these solutions can be applied to industrial automation, remote monitoring, predictive maintenance, and more!

    A strategic partnership with Melchioni Electronics

    We’re excited to collaborate with Melchioni Electronics, enhancing our reach and support for Arduino’s innovative solutions. “We strongly support this partnership with the strength of our sales network – from major events like SPS in Parma and SIDO Lyon to e-commerce – because Arduino Pro is the perfect bridge between prototyping and large-scale production. It meets the needs of all customers looking for energy-efficient, low-power solutions integrating a connected ecosystem,” comments Michele Busnelli, Head of Product at Melchioni.

    Join us at SPS Italia 2024 to see how Arduino is driving innovation and efficiency in the industrial sector. Get in touch with our experts and visit our booth in hall 7, #C020!

    The post Ready for SPS Italia 2024? Ready for accessible industrial automation! appeared first on Arduino Blog.

    Website: LINK