Kategorie: Mobile

  • A teacher’s guide to teaching Experience AI lessons

    A teacher’s guide to teaching Experience AI lessons

    Reading Time: 5 minutes

    Today, Laura James, Head of Computing and ICT at King Edward’s School in Bath, UK, shares how Experience AI has transformed how she teaches her students about artificial intelligence. This article will also appear in issue 24 of Hello World magazine, which will be available for free from 1 July and focuses on the impact of technology.

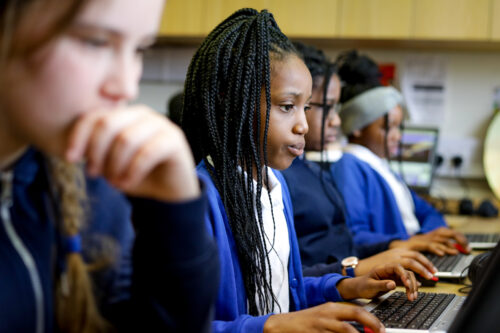
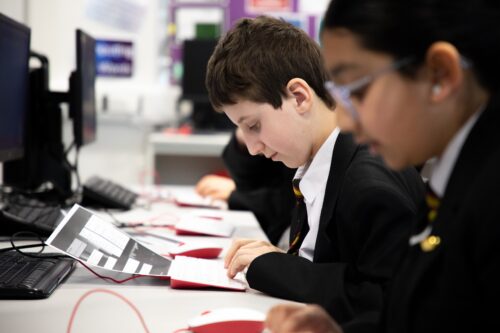
    I recently delivered Experience AI lessons to three Year 9 (ages 13–14) classes of about 20 students each with a ratio of approximately 2:3 girls to boys. They are groups of keen pupils who have elected to study computing as an option. The Experience AI lessons are an excellent set of resources.

    Everything you need

    Part of the Experience AI resources is a series of six lessons that introduce the concepts behind machine learning and artificial intelligence (AI). There are full lesson plans with timings, clear PowerPoint presentations, and activity sheets. There is also an end-of-topic multiple choice assessment provided.

    Accompanying these are interesting, well-produced videos that underpin the concepts, all explained by real people who work in the AI industry. Plus, there are helpful videos for the educators, which explain certain parts of the scheme of work — particularly useful for parts that might have been seen as difficult for non-specialist teachers, for example, setting up a project using the Machine Learning for Kids website.

    Confidence delivering lessons

    The clear and detailed resources meant I felt mostly confident in delivering lessons. The suggested timings were a good guideline, although in some lessons, this did not always go to plan. For example, when the pupils were enjoying investigating websites that produce images generated by a text prompt, they were keen to spend more time on this than was allocated in the lesson plan. In this case, I modified the timings on the fly and set the final task of this lesson as a homework task.

    Learning about AI sparked the students’ curiosity, and it triggered a few questions that I could not answer immediately. However, I admitted this was a new area for me, and with some investigation, found answers to many of their extra questions. This shows that the topic of AI is such an inspiring and important one for the next generation, and how important it is to add this to the curriculum now before students make their own, potentially biased, opinions about it.

    “I’ve enjoyed actually learning about what AI is and how it works because before I thought it was just a scary computer that thinks like a human.” – Student, King Edward’s School, UK 

    Impact on learners

    The pupils’ feedback from the series of lessons was unerringly positive. I felt the lessons on bias in data were particularly important. The lesson where they trained their own algorithm recognising tomatoes and apples was a key one as it gave students an immediate sense of how a flawed training data set created bias and can impact the answers from a supposedly intelligent AI tool. I hope this has changed their outlook on AI-generated results and reinforced their critical thinking skills.

    Many students are now seeing the influence of AI appearing in more and more tools around them and have mentioned that a career in AI is now something they are interested in.

    “I have enjoyed learning about how AI is actually programmed rather than just hearing about how impactful and great it could be.” – Student, King Edward’s School, UK 

    [youtube https://www.youtube.com/watch?v=D2uOT4MKNDU?feature=oembed&w=500&h=281]

    Tips for other teachers

    Clearly this topic is incredibly important, and the Experience AI series of lessons is an excellent introduction to this for key stage 3 students (ages 11–14). My tips for other educators would be:

    • I delivered these to bright Year 9s and added a few more coding activities from the Machine Learning for Kids website. As these lessons stand, they could be delivered to Year 8s (ages 12–13), but perhaps Year 7s (ages 11–12) might struggle with some of the more esoteric concepts.
    • Before each lesson, ensure you read the content and familiarise yourself with the lesson resources and tools used. The Machine Learning for Kids website can take a little getting used to, but it is a powerful tool that brings to life how machine learning works, and many pupils said this was their favourite part of the lessons.
    • Before the lesson, ensure that the websites that you need to access are unblocked by your school’s firewall!
    • I tried to add a hands-on activity each lesson, e.g. for Lesson 1, I showed the students Google’s Quick, Draw! game, which they enjoyed and has a good section on the training data used to train the AI tool to recognise the drawings.
    • We also spent an extra lesson using the brilliant Machine Learning for Kids website and followed the ‘Shoot the bug’ worksheet, which allowed pupils to train an algorithm to learn how to play a simple video game.
    • I also needed to have a weekly homework task, so I would either use part of the activity from the lesson or quickly devise something (e.g. research another use for AI we haven’t discussed/what ethical issues might occur with a certain use of AI). Next year, our department will formalise these to help other teachers who might deliver these lessons to set these tasks more easily.
    • Equally, I needed to have a summative assessment at the end of the topic. I used some of the multiple choice questions that were provided but added some longer-answer questions and made an online assessment to allow me to mark students’ answers more efficiently.

    “I have always been fascinated by AI applications and finally finding out how they work and make the decisions they do has been a really cool experience.” – Student, King Edward’s School, UK 

    From comments I have had from the students, they really engaged with the lessons and appreciated the opportunity to discuss and explore the topic, which is often associated with ‘deception’ within school. It allowed them to understand the benefits and the risks of AI and, most importantly, to begin to understand how it works ‘under the hood’, rather than see AI as a magical, anthropomorphised entity that is guessing their next move.

    “The best part about learning about AI was knowing the dangers and benefits associated and how we can safely use it in our day-to-day life.” – Student, King Edward’s School, UK 

    As for my perspective, I really enjoyed teaching this topic, and it has earned its place in the Year 9 scheme of work for next year. 

    If you’re interested in teaching the Experience AI Lessons to your students, download the resources for free today at experience-ai.org.

    Website: LINK

  • A DIY bottle-labeling machine perfect for homebrewers

    A DIY bottle-labeling machine perfect for homebrewers

    Reading Time: 2 minutes

    While it is certainly possible (and common) to put homebrewed beer into kegs, that requires regulated gas and large refrigeration space. A keg is also more difficult to transport and overkill if you just want to bring a few beers to a friend’s backyard BBQ. For those reasons, many homebrewers bottle their beer. Those homebrewers will want to check out this very impressive wet labeling machine built by Franz Hirschböck (AKA Fraens).

    This machine is mesmerizing to watch in action and would be genuinely useful to most homebrewers — or anyone else with a reason to label bottles. It works with standard printer paper, so users can print their own labels on an inkjet or laser printer at home. When a user places a bottle, the machine will automatically grab a new label, apply the glue, and then attach the label. It is even possible to adjust the amount of glue and the glue pattern by swapping out rollers.

    Hirschböck designed this bottle labeler as a mostly electromechanical machine, meaning that it doesn’t need much electronic sophistication to work. That’s all thanks to electric motors and an ingenious set of 3D-printed mechanical parts. But there are two exceptions: the button that starts the labeling process and an infrared sensor that detects the end of the label. An Arduino board monitors the button and sensor. 

    If you want to build this machine for your own bottling needs, Hirschböck has the files and plans available on Etsy and Cults3D. He even provides glue recipes to get started.

    [youtube https://www.youtube.com/watch?v=EXu-7_3RnEY?feature=oembed&w=500&h=281]

    The post A DIY bottle-labeling machine perfect for homebrewers appeared first on Arduino Blog.

    Website: LINK

  • A pair of Arduino UNO R4 boards power this Tron-inspired, decked-out shop room

    A pair of Arduino UNO R4 boards power this Tron-inspired, decked-out shop room

    Reading Time: 2 minutes

    Bob Clagett of the “I Like to Make Stuff” YouTube channel has recently undertaken an extensive shop renovation project where he is rearranging tools, tidying up various spaces, and even creating a dedicated “clean” room for his collection of 3D printers/electronics work. With its jet-black walls, Clagett felt it needed some RGB lighting to keep it interesting, and after taking inspiration from the Tron movie franchise, he had a few ideas.

    Before anything could be built, he first needed to select the ideal type of LED strip since the typical WS2812B strip lacks a diffuser and therefore emits harsh light. Rather, an RGBIC strip allows for individual segments of LEDs to be controlled from an Arduino UNO R4 WiFi and illuminate through a built-in diffuser. Five strips were attached to the ceiling and programmed to display a quickly-moving pixel that starts its animation sequence at a random interval. Clagett was also able to line the room’s large window pane with another one of these RGBIC strips, and thanks to the UNO’s Wi-Fi connectivity, indicate if it has an active internet connection.

    The final piece of specialty lighting was made by 3D printing a custom drum featuring various cutouts and placing it around a UV bulb. From here, a secondary Arduino UNO R4 Minima slowly rotates it using a 5V stepper motor that gives nearby fluorescent objects a flickering effect.

    To see how Clagett revamped his room’s lighting in more detail, watch his video below!

    [youtube https://www.youtube.com/watch?v=WWTxgRnQeJ4?feature=oembed&w=500&h=281]

    The post A pair of Arduino UNO R4 boards power this Tron-inspired, decked-out shop room appeared first on Arduino Blog.

    Website: LINK

  • Improve laser engraving speeds with an Arduino-controlled turntable

    Improve laser engraving speeds with an Arduino-controlled turntable

    Reading Time: 2 minutes

    Engraving items with a laser-based system at home is amazingly convenient for one-off parts, but what happens when the production volume needs to increase? For element14 Presents host Clem Mayer, this usually meant preparing many uniform pieces of engraving stock, opening the laser’s enclosure, placing down the material, and then finally running the machine. In doing so, the process could introduce errors and was simply inefficient, leading Mayer to think of a way to automate things instead.

    The limiting factor was mostly about how long it took to change the material, so Mayer got to work designing a carousel-like device that could house up to four sheets of stock and rotate each one into place after the previous one had finished. A stepper motor driven by a Trinamic TMC2100 was responsible for moving the drum while an Arduino UNO Rev3 received inputs from external switches and then sent pulses to the motor driver accordingly.

    Once placed into the laser cutter’s enclosure, Mayer quickly discovered that his vertical drum design was too tall and interfered with the toolhead. This necessitated swapping the orientation to a flat disc where material could be positioned around a spinning turn table. The original spring-loaded clamps were also exchanged for a magnetic system that is strong yet easily removable.

    To see more about this project, you can watch Mayer’s build log video below!

    [youtube https://www.youtube.com/watch?v=ZOcddbsn_Ao?feature=oembed&w=500&h=281]

    The post Improve laser engraving speeds with an Arduino-controlled turntable appeared first on Arduino Blog.

    Website: LINK

  • Massive tentacle robot draws massive attention at EMF Camp

    Massive tentacle robot draws massive attention at EMF Camp

    Reading Time: 2 minutes

    Most of the robots we feature only require a single Arduino board, because one Arduino can control several motors and monitor a bunch of sensors. But what if the robot is enormous and the motors are far apart? James Bruton found himself in that situation when he constructed this huge “tentacle” robot and his solution was to put an Arduino in each joint.

    This is an oblique swivel joint robot arm, which means that each joint sits at an angle relative to the axes of the preceding and succeeding segments. This creates movement that is unlike any other kind of robot arm.

    Bruton took this concept and scaled it up to ludicrous proportions. Each joint is a big ring made of plywood and 3D-printed parts, driven by a DC motor geared down 1600:1 and controlled through an ODrive module.

    Because the robot is so large, it would have been difficult to run wires from a single Arduino to all of the motor drivers — especially because those have to go through slip rings to allow for continuous joint rotation. Instead, Bruton put an Arduino Mega 2560 board in each joint to control that joint’s motor driver. Those operate under the control of a primary Mega 2560 located in the base, with communication handled through a CAN bus system.

    There is also another Mega 2560 in the remote control that Bruton built for the robot. That reads control input from switches and rotary encoders, then sends commands to the robot through a direct Wi-Fi connection (established via two ESP32 development boards). 

    Bruton designed this robot to exhibit at EMF Camp in the UK, where it was a popular attraction.

    [youtube https://www.youtube.com/watch?v=FVoqf73ZLZo?feature=oembed&w=500&h=281]

    The post Massive tentacle robot draws massive attention at EMF Camp appeared first on Arduino Blog.

    Website: LINK

  • How makers can use AR and VR

    How makers can use AR and VR

    Reading Time: 4 minutes

    Augmented reality (AR) and virtual reality (VR) are both currently experiencing a meteoric rise in popularity, with the combined market expected to reach $77 billion by 2025, from just $15.3 billion in 2020.

    For makers, AR and VR represent exciting opportunities to build new types of projects, tapping into entirely new possibilities and learning skills that will only become more valuable as time goes on. 

    We’ll explore the significance of AR and VR for makers and look at some of the ways in which makers can integrate these technologies into their projects, rounding off with some real-world examples. 

    AR and VR — what’s the difference?

    AR and VR are similar technologies, but they’re crucially different. Let’s take a quick look at what sets them apart.

    • Augmented reality involves overlaying digital elements onto the physical world, allowing us to observe and even interact with these virtual objects in the context of our actual environments.
    • Virtual veality is much more immersive — typically you will put on a headset and enter a completely virtual world, totally different from your actual physical environment.

    How can makers use AR and VR in their projects?

    Let’s take a look at some of the specific ways makers can leverage AR and VR to improve their projects, along with some examples from Arduino users.

    Gaming and fun

    AR and VR are both making a massive impact in the world of gaming, allowing for far more immersive, novel, and fun experiences. This represents a great opportunity for makers to play around with an entirely new trend, playing a small role in shaping this next chapter of video gaming.

    Probably the best example of this is Pokémon GO — where players track down Pokémon in real-world locations. But this is just the beginning. Ryan Chan decided to design a way for Minecraft — the best-selling video game of all time — to start using AR.

    Thanks to Chan’s work, Minecraft players can now control their in-game movements via their real-life actions. For example, taking physical steps forward will translate into in-game movement. Ryan’s project uses an Arduino MKR Zero board, a MPU-6050 IMU (inertial measurement unit), and two force-sensitive resistors.

    It’s an awesome approach to bringing a fresh set of features to an already established and popular game, and could mark a new generation of smart individual gamers making adjustments to their favorite games.

    Training safety, and education

    Developing new skills is essential if you want to keep making progress as a maker, but it can be tricky. After all, making is a highly technical and complex activity with no real rules.

    The good news is that AR and VR can be massively helpful here. AR can help make learning more interactive, intuitive, and visual by overlaying instructions and visual augmentations onto real-world objects. VR, meanwhile, can help by constructing immersive virtual environments where makers can practice technical tasks in a risk-free setting.

    Let’s check out an example. Kids typically don’t take fire drills too seriously, which means they miss out on important information. This is where AR can come in. This project from a team of engineers at Sejong University created an augmented reality fire drill system based on video games to make fire safety training more realistic and effective.

    By combining virtual reality, AR, and the real world, you can conduct fire drills that simulate smoke-filled rooms and other realistic elements, mimicking the actual experience of a fire much more than standard drills.

    On top of that, the team also made a fire extinguisher that works with the VR system but also looks and feels like the real thing. It connects to an Arduino UNO WiFi Rev2 and can give users the realistic sensation of operating a real extinguisher to put out flames.

    Data visualization and analytics

    It’s important for makers to be able to gain and analyze data related to their projects. This might be a central part of the project’s function — like with a wearable health monitor or a thermostat — or it may just be a way to learn more about your creation to make improvements.

    AR and VR can massively improve your ability to interact with and understand data. By representing data in an entirely new, much more immersive, and more visual way, these technologies can allow you to spot new insights, make connections, and learn more about your projects.

    Mars Kapadia chose to build his own set of smart glasses for a school science fair, using a transparent OLED display paired with Retro Watch software running on an Android phone and powered by an Arduino Nano Every and an HC-05 Bluetooth® module.

    Mars’ glasses also come with darkened lenses to keep the glare of the sun at bay when outdoors, which can also be lifted up when in darker environments.

    Get started today

    With Arduino, you can start bringing AR and VR into your own projects, expanding your horizons and opening up fascinating new possibilities to use this tech as it continues to grow.

    In our Project Hub, you can browse other people’s projects according to category, including AR and VR, and share your own work, too. 

    The post How makers can use AR and VR appeared first on Arduino Blog.

    Website: LINK

  • Audiophile Pi

    Audiophile Pi

    Reading Time: 3 minutes

    As someone interested in giving old tech a new lease of life, the idea came naturally. “I was inspired by the many high quality network audio streaming devices sold by the major stereo component brands such as Sony, Cambridge Audio, NAD and so on but I couldn’t justify the cost,” he explains.

    “I figured they just play back digital audio so I started looking at DIY options. I knew I wanted a standard-sized stereo component and decided an old stereo tuner would be reasonably-priced because they are not in very high demand, even among audiophile collectors.”

    The original Sony ST-JX411 case has been retained and provides plenty of room for the new components

    Treble buy

    Alan purchased three Sony ST-JX411s so that he could mix-and-match the best looking parts (“most were dented and dirty,” he says). He liked its look and noted it had space for a decent-sized LCD. “The Sony tuner has a retro vibe but doesn’t look too dated, and it fits in with much of my second hand stereo equipment,” he says. “I also thought that a repurposed tuning knob would be a nice touch for a streaming player – few attractive modern tuners have one.”

    The front panels were important. “I wanted to play a playlist or start and stop the device without using a web interface on my computer or phone,” he explains. “Another requirement was for an alphanumeric display for the currently playing song, title and file format. Since my amplifier already had a digital-to-analogue converter [DAC], I wanted quality digital audio – S/PDIF – too.”

    Alan, who has connected his streamer to a Loxjie A30 amplifier, is considering re-labelling the front buttons

    For the audio quality, Alan chose a HiFiBerry Digi2 Pro which uses the I2S sound port for S/PDIF audio output (without a DAC, he’d have opted for a DAC HAT such as the Raspberry Pi DAC Pro). To connect everything together, he used a small proto PCB board with some male headers. “That way I could use female-to-female jumpers to connect to the Pi GPIO pins,” he says.

    Setting the tone

    Alan retained the logic board which houses the front-panel buttons. “The main challenges related to reverse-engineering these buttons and I’m not sure I would have accomplished the project without a schematic diagram I found online,” Alan continues. As it was, Alan was able to read row and column values, reducing the number of wires from 17 to 11. He also replaced the logic board’s vacuum fluorescent with a new alphanumeric LCD, and Raspberry Pi’s ports were extended to the tuner’s back panel.

    To control the functions, Alan used the open-source project moOde. “I had already been using moOde on Raspberry Pi 4 and I was happy with its features and audio quality,” he says. “I also liked the simplicity of the moOde API, so I didn’t have to spend much time figuring that out.”

    The back of the unit remains as neat as it did when it was made thanks to the use of Adafruit panel mount extensions

    So how does it fare? Great, as it happens. “It works very well, with no issues,” Alan says. “And since I’m using the original board passively – that is with no power applied – there’s not as much to wear out or go wrong. I now use the music streaming player almost every day and the audio quality is indistinguishable from the original source material, at least to my ears.”

  • A gamified approach to therapy and motor skills testing

    A gamified approach to therapy and motor skills testing

    Reading Time: 2 minutes

    For children who experience certain developmental delays, specific types of physical therapies are often employed to assist them in improving their balance and motor skills/coordination. Ivan Hernandez, Juan Diego Zambrano, and Abdelrahman Farag were looking for a way to quantify the progress patients make while simultaneously presenting a gamified approach, so they developed a standalone node for equilibrium evaluation that could do both.

    On the hardware side of things, an Arduino Nano BLE 33 Sense Rev2 is responsible for handling all of the incoming motion data from its onboard BMI270 six-axis IMU and BMM150 three-axis magnetometer. New readings are constantly taken, filtered, and fused together before being sent to an external device over Bluetooth Low Energy. The board was also connected to a buzzer and buttons for user inputs, as well as an RGB LED to get a real-time status.

    The patient begins the session by first putting on the wearable and connecting to the accompanying therapist application. Next, a game starts in which the user must move their torso to guide an image of a shark over the image of a stationary fish within a time period — ultimately trying to get the highest score possible. Throughout all of this, a vision system synchronizes its readings with the IMU sensor readings for an ultra-detailed look at how the patient responds to the game over time.

    To read more about the project, you can visit the team’s write-up on Hackaday.io.

    [youtube https://www.youtube.com/watch?v=EA0CtgWG24I?feature=oembed&w=500&h=281]

    The post A gamified approach to therapy and motor skills testing appeared first on Arduino Blog.

    Website: LINK

  • Why do OTA updates matter in IoT?

    Why do OTA updates matter in IoT?

    Reading Time: 8 minutes

    Imagine you’ve just installed your state-of-the-art lighting control system, perfectly hidden in a box inside a wall, and everything seems to be working like a charm. But then, you spot a bug in the firmware. The thought of pulling the hardware back out sends shivers down your spine. You start wondering for how long you can just ignore the issue. The good news is you don’t have to, and there is a simple solution: over-the-air (OTA) updates!

    OTA updates are a crucial aspect of IoT (Internet of Things) devices, allowing you to remotely update the firmware or software of your connected devices without the need for physical access. This technology is a game-changer for both makers and businesses because it offers seamless maintenance, enhanced security, and improved user experience.

    At Arduino, we’ve long recognized the importance of OTA updates and do our best to assist users implement this technology. Over time, this has allowed us to identify some common questions on the topic: let’s dive into the top 10!

    #1: What are OTA updates, exactly?

    OTA updates refer to the process of delivering code updates to IoT devices remotely, without the need for physical connections or manual interventions. This can be achieved through wireless communication protocols such as Wi-Fi®, cellular, or Bluetooth®.

    The process typically involves uploading the updated firmware or software to a server, and then pushing it to the target devices over the internet or a local network. The device then updates itself without the need for manual intervention.

    #2: Why do we need OTA?

    Firmware updates are essential for IoT devices to maintain their functionality, security, and relevance over time. However, traditional methods of firmware updates, which require physical access or manual intervention, can be costly, time-consuming, and impractical in many scenarios. 

    OTA updates make it easier to keep devices up-to-date, bug-free, secure and capable of adapting to evolving requirements throughout their lifecycle

    #3: What types of devices benefit from OTA updates?

    OTA updates are particularly critical for the following scenarios:

    • IoT devices deployed in remote locations or difficult-to-access areas, such as industrial equipment, medical devices, or agricultural sensors.
    • High-value devices such as industrial robots or complex medical equipment, and critical infrastructure systems – such as power grids, water treatment plants, or financial systems – which demand frequent security updates and patches to ensure the highest level of protection against cyber threats.
    • Smart home devices like thermostats, security cameras, or voice assistants, which often undergo frequent software updates to introduce new features or enhance user experiences.
    • Devices with limited power or resources: IoT devices with constrained power or computational resources, such as wearables or environmental sensors, can benefit from OTA updates that minimize power consumption and extend battery life.
    • Systems that require continuous operation and minimal downtime, such as financial systems (ATMs, point-of-sale terminals), healthcare systems (electronic health records, medical imaging equipment).

    #4: What are the main challenges in using OTA updates for IoT?

    While OTA updates offer numerous benefits, there are several challenges and issues to consider in order to mitigate any risks or avoid potential pitfalls.

    • Device heterogeneity: IoT devices come in various forms, with different hardware and software configurations, making it challenging to develop and deploy updates that work seamlessly across all.
    • Connectivity and bandwidth limitations: Some IoT devices may have limited or intermittent internet connectivity, or operate on low-bandwidth networks, which can make it difficult to deliver large firmware updates.
    • Security concerns: OTA updates introduce potential security risks, such as unauthorized access or malicious code injection, if not implemented with proper security measures (we’ll explain more at #6!).
    • Scalability and management: As the number of IoT devices grows, managing and deploying OTA updates to large fleets can become a significant challenge.
    • Simplicity: Many OTA systems require complex infrastructure or elaborate operations. Finding the right platform to simplify the process can be challenging.

    #5: What are the benefits of over-the-air updates?

    Despite the challenges, OTA updates offer numerous benefits for IoT devices:

    • Increased device lifespan: By enabling remote updates, OTA updates can extend the usable lifespan of IoT devices, reducing the need for frequent replacements or costly on-site maintenance.
    • Deployment of bug and security fixes: OTA updates allow for the prompt distribution of bug fixes, security patches, and vulnerability remediation, ensuring that IoT devices remain secure and up-to-date.
    • Improved device performance and functionality: OTA updates can introduce new features, performance enhancements, and functionality improvements, keeping IoT devices competitive and valuable for users.
    • Reduced maintenance costs: By eliminating the need for on-site visits or device replacements, OTA updates can significantly reduce maintenance costs associated with IoT deployments.
    • Enhanced user experience: With seamless updates and continuous improvements, OTA updates can enhance the overall user experience by providing the latest features and addressing issues promptly.

    #6: Are OTA updates safe?

    Security is a legitimate concern when it comes to OTA updates, as they can potentially introduce vulnerabilities or be exploited by malicious actors. Hackers, for example, can potentially exploit the update process to gain unauthorized access or introduce malicious code. However, with proper security measures in place, OTA updates can be safe and secure.

    When choosing an OTA update solution for your IoT devices, look for features that ensure encrypted transmissions and secure authentication protocols, such as encrypted communication channels, secure boot mechanisms, code signing, and secure authentication and authorization processes.

    #7: What do makers typically use OTA updates for?

    OTA updates are particularly beneficial for makers working on IoT projects in various scenarios.

    • Home automation: Smart home devices like lighting systems, thermostats, and security cameras can benefit from OTA updates to introduce new features, fix bugs, or enhance functionality.
    • Gardening: IoT devices used for monitoring and controlling garden systems, such as automated irrigation solutions or greenhouses, can be updated remotely without disrupting the growing environment.
    • Devices hidden inside wall boxes or cabinets: IoT devices installed in hard-to-reach locations can be easily updated without the need for physical access.
    • Outdoor monitoring: Environmental monitoring devices deployed in remote or inaccessible areas, such as weather stations or wildlife tracking systems, can be updated wirelessly without requiring on-site visits.

    #8: What are the typical use cases of OTA for enterprises?

    OTA updates are equally crucial for enterprises deploying IoT solutions across various industries:

    • Industrial IoT (IIoT) applications: In industrial settings, OTA updates can help maintain and enhance IoT devices used for process monitoring, predictive maintenance, and automation without disrupting operations.
    • Agriculture: IoT devices used in precision agriculture, such as soil moisture sensors, weather stations, and automated irrigation systems, can be updated remotely to improve efficiency and crop yield.
    • Automotive and transportation: Connected vehicles and transportation systems can benefit from OTA updates to enhance safety features, improve performance, and address security vulnerabilities.
    • Healthcare and medical devices: OTA updates can ensure that medical IoT devices, like wearables or implantable devices, remain compliant, secure, and up-to-date with the latest software and firmware versions.

    For enterprises with large-scale IoT deployments, orchestrating mass over-the-air (OTA) updates is a critical capability, enabling them to seamlessly roll out new firmware or software versions simultaneously across their entire fleet of devices.

    #9: What is OTA in Arduino?

    Most of the applications described above can be implemented using Arduino boards, popular among makers and increasingly adopted by enterprises worldwide. The Arduino Cloud seamlessly supports these boards and offers a comprehensive and secure solution for their OTA updates.

    And there’s more! The Arduino Cloud is a powerful platform that can be used to monitor and control devices across many applications, from personal hobbies at home to energy management solutions in the factory.

    Arduino Cloud OTA is designed to be both secure and robust. It uses end-to-end encryption to protect firmware updates during transmission, ensuring that only authorized devices receive updates. Additionally, the cloud-based platform provides a centralized management system, allowing users to track and monitor updates in real-time. Finally, it ensures that firmware updates are delivered efficiently and reliably, minimizing the risk of errors or failures.

    To perform an OTA firmware update for a board supported by the Arduino Cloud, such as the Arduino UNO R4 WiFi, simply follow these steps:

    1. Add your device to the Arduino Cloud.
    2. Create your Thing, configure your network credentials and develop your code.
    3. In the Cloud Editor, select OTA (over-the-air) as the programming method.
    4. Compile your code clicking on the VERIFY icon.
    5. Upload your new firmware to your device.

    The Arduino Cloud will handle the rest, securely delivering the new firmware to your device(s) over the air, without any physical intervention required.

    Note: The first programming must be done via USB cable. After that, provided that the board is connected to the Arduino Cloud, OTA can be used.

    #10: How to do OTA firmware update on ESP32?

    ESP32 is a very popular hardware architecture for IoT because it’s compact, affordable and powerful. And ESP32 boards are fully supported by Arduino Cloud, so you can follow just a few simple steps to perform OTA updates on their firmware: the process is similar to the one we saw at #9 for Arduino boards!

    1. Add your device to the Arduino Cloud as a “third-party device.”
    2. Create your Thing, configure your network credentials and develop your code.
    3. In the Cloud Editor, select OTA (over-the-air) as the programming method.
    4. Compile your code clicking on the VERIFY icon.
    5. Upload your new firmware to your device.

      That’s it! The Arduino Cloud will deliver the new firmware to your device(s) over the air, without any physical intervention required.

      Note: The first programming must be done via USB cable. After that, provided that the board is connected to the Arduino Cloud, OTA can be used.

      [youtube https://www.youtube.com/watch?v=gUky1Xd264Y?feature=oembed&w=500&h=281]

      Check out this article in the Arduino documentation if you want to learn more about the full OTA process.

      [youtube https://www.youtube.com/watch?v=pXHrN5Htz2c?feature=oembed&w=500&h=281]

      Try OTA on your devices with Arduino Cloud!

      If you’re ready to upgrade your IoT projects, explore the Arduino Cloud today. Arduino Cloud is a secure and user-friendly all-in-one IoT solution to create from anywhere, visualize your sensor data with unlimited IoT dashboards, receive alerts on your phone … and of course, deploy OTA updates

      The post Why do OTA updates matter in IoT? appeared first on Arduino Blog.

      Website: LINK

    1. How we’re making Android Enterprise signup and access to Google services betterHow we’re making Android Enterprise signup and access to Google services betterSoftware Engineering Manager

      How we’re making Android Enterprise signup and access to Google services betterHow we’re making Android Enterprise signup and access to Google services betterSoftware Engineering Manager

      Reading Time: 3 minutes

      To get the full benefit of the Google ecosystem, it’s important that you have the ability to sign up for multiple Google business products at the same time. That’s why you’ll now find a more intuitive signup process for deploying Google products for work alongside Android Enterprise.

      If you’re an IT admin signing up for Android Enterprise, you can now use your corporate email address instead of a personal Gmail account. This can reduce the risk of lost or deleted accounts and improves overall credential management, requiring fewer sign-ins and creating a more unified experience across your Google business products and services.

      As part of this tighter integration, you can also now perform certain setup tasks centrally through the Google Admin console, such as syncing users and configuring single sign-on (SSO). These selections apply to multiple Google product deployments, saving you time and ensuring consistency across your IT environment.

      And if you’d like to add additional Google products like Chrome Enterprise Upgrade for Chromebooks, Chrome Browser Cloud Management or Google Workspace to your Android Enterprise account, you no longer need separate registrations. During signup, or later in the Google Admin Console, simply select the products you want to add to automatically enable them for your workforce.

      Finally, the improved signup experience will allow you to bind multiple enterprise mobility management (EMM) instances to your organization’s account, making it easier to use testing and production environments in parallel or transition to a new EMM vendor.

      Improved employee experiences

      Google’s apps and services can help you get work done, and Android lets you do it on the go. Previously, Android Enterprise users often had limited access to these services. But now, IT admins can more easily enable a range of Google services for employees, including Google Workspace on their Android devices, so they can stay productive on the move.

      One of the most exciting aspects of tighter integration between Android Enterprise and Google’s other platforms and services is the ability to create better cross-device experiences. Tighter integration unlocks a range of enterprise features similar to Android’s Better Together initiative, but with the added security and management that you’ve come to expect from Android Enterprise and IT admin control. These features include:

      Deepening the integration between Google’s other enterprise products and Android also lays the foundation for AI-powered productivity at work. For example, Gemini for Google Workspace offers business access to Google’s most capable AI models with security and privacy controls for businesses. Users can get help from Gemini directly in the Gmail app, or through the standalone web app at gemini.google.com, with more experiences coming to mobile soon. In fact, the Gemini mobile app will soon be available across all Android Enterprise devices in the coming months, including fully-managed devices and those using an Android Work Profile.

      If you want to learn more and are new to Android Enterprise, visit our Solutions Directory to find an EMM partner to help you sign up and get started. If you’re a current Android Enterprise customer, stay tuned for updates from your EMM partner as these updates begin to roll out later this year.

      Website: LINK

    2. Mini Dexed

      Mini Dexed

      Reading Time: 3 minutes

      Mini Dexed ports the concepts of the digital synthesiser to Python and Raspberry Pi, and is the brainchild of Simon Peter (aka Probono), who describes it as a ‘Dexed FM synthesiser similar to 8x DX7 (TX816/TX802) running on a bare-metal Raspberry Pi (without a Linux kernel or operating system)’ to produce eight tones. Voices can be programmed using a DX series editor using MIDI sysex.

      Emphasising the importance of Yamaha’s DX7, composer and MusicRadar journalist OSC Steve argued: “it’s possible to categorise 1980s music into two eras; the pre-DX7 era and the post-DX7 era, such was the widespread use of this new instrument and its distinct timbral character”.

      DIYElectroMusic created a USB version of the DX7

      Bringing DX7 to life

      Probono has been experimenting with Raspberry Pi, for home automation and 3D printing as well as digital music, since its launch in 2012. He began the Mini Dexed project because he was keen to make a “real musical instrument” rather than something that felt like a computer. He is in awe of the original developers of FM synthesisers and says Mini Dexed “stands on the shoulders of giants”. To recreate their sounds he was looking for a commonly available, inexpensive microcontroller with lots of computing power and is “using Raspberry Pi more like an embedded microcontroller than a regular computer”. Quick boot times, small code size and overall simplicity are further hallmarks. The project began in 2022 during a discussion in the Circle project, when Probono asked for guidance on how to go about integrating an existing synthesiser engine. Another maker, Rene Stange produced Circle, a library for code that runs it in a bare-metal Raspberry Pi environment, while Holger Wirtz ported the Dexed synth engine for use with microcontrollers, creating a framework specifically for this scenario.

      Different instrument voices can be called up

      Future sounds

      Mini Dexed is a flexible platform for experimenting with electronic sound. Once it had been ported for microcontroller use, Probono deliberately built Mini Dexed around Raspberry Pi and commonly available, inexpensive hardware components. He says a Raspberry Pi Zero 2 version could be created for less than €50. Hardware choices and whether to use a dedicated audio DAC are down to individual makers’ preferences, while suitable connections for the audio partly depend on which Raspberry Pi you’re using. Those that can be configured to use USB Gadget Mode instead of USB Host mode (currently Raspberry Pi 3 and 4 but not yet 5) allow MiniDexed to be used as a USB MIDI device and accept audio streaming from MIDI keyboards, for example. “As someone who is interested in experimental music, I could imagine hooking up all sorts of sensors via MIDI to Mini Dexed, in order to create an immersive soundscape that changes as its surroundings change.”

      Mini Dexed has also been extended to work with external DACs (making it usable with Pico and Raspberry Pi 1 and 2, too) as well as adapted to support 16 voices by blogger Kevin, who has contributed to this fantastic synth’s development and raised its profile. Probono specifically mentions the potential of Raspberry Pi Pico which Kevin was able to implement: see magpi.cc/picodexedgit or magpi.cc/dx7usbdongle.

      Mini Dexed aims to replicate the iconic 1980s synthesiser sound

      “While the project can be built without any extra hardware, a simple display and a rotary encoder and/or some buttons make it much easier to use, and an inexpensive digital to analogue converter increases sound quality significantly.” Probono says “The real cost is the time invested into developing, building, refining, testing, discussing – and the MiniDexed community collectively has put in, and is still putting in, a lot of time and effort, which I am very grateful for.”

      “I am still trying to wrap my head around how to design sound from scratch using FM, it’s probably a learning journey for a lifetime.”

    3. A DIY weather display with dedicated outdoor sensor station

      A DIY weather display with dedicated outdoor sensor station

      Reading Time: 2 minutes

      Weather stations are popular projects in the maker community because they’re useful and usually quite affordable to construct. But most that we see are really weather information displays that gather data through the internet from stations in the region. That data is fairly accurate, but there can be minor differences due to microclimate zones. So, Wilson Malone decided to build his own system with a dedicated outdoor sensor station.

      Malone’s system consists of two units: the indoor display and the outdoor sensor station. The latter receives its power from a solar panel and battery backup, so Malone can place it anywhere that gets good sunlight within wireless range of his home. It has a sensor to detect wind speed, another sensor to detect wind direction, and a PHT (pressure, humidity, temperature) combination sensor. An Arduino UNO Rev3 board reads those sensors and then transmits the data using a 915MHz radio transceiver.

      Inside the home, the indoor display unit receives that data with a radio transceiver of its own. An Arduino UNO R4 WiFi parses that and then shows each value on a four-digit seven-segment display. The Arduino will also publish the values to a self-hosted webpage every eight seconds. Any users on the same local network can visit that page to view the current information.

      [youtube https://www.youtube.com/watch?v=Qqs4lYLHYKY?feature=oembed&w=500&h=281]

      Now Malone has a hyperlocal weather station that gives him accurate information about the weather in his exact location. 

      The post A DIY weather display with dedicated outdoor sensor station appeared first on Arduino Blog.

      Website: LINK

    4. Young people receive their data from space and Astro Pi certificates

      Young people receive their data from space and Astro Pi certificates

      Reading Time: 4 minutes

      Across Europe and beyond, teams of young people are receiving data from the International Space Station (ISS) this week. That’s because they participated in the annual European Astro Pi Challenge, the unique programme we deliver in collaboration with ESA Education to give kids the chance to write code that runs in space.

      The Astro Pi computers inside the International Space Station.
      The Astro Pi computers inside the International Space Station.

      In this round of Astro Pi, over 26,400 young people took part across its two missions — Mission Space Lab and Mission Zero — and had their programs run on the Raspberry Pi computers on board the ISS.

      Mission Space Lab teams find out the speed of the ISS

      In Mission Space Lab, we asked young people to team up and write code to collect data on the ISS and calculate the speed at which the ISS is travelling. 236 teams wrote programs that passed all our tests and achieved flight status to run in space. And not only will the Mission Space Lab teams receive their participation certificates this week — they’ll also receive the data their programs captured on the ISS.

      A picture of the Himalayas taken from space by the Astro Pi computers.
      A picture of the Himalayas taken from space by the Astro Pi computers.

      Many teams chose a feature extraction method to calculate the ISS’s speed, identifying two points on Earth from which to calculate the distance the ISS travelled over time. Using this method means using the high-quality camera on the Astro Pi computer to take some fantastic photos of Earth from the ISS’s World Observation Research Facility (WORF) window. Teams will receive these photos soon, which are unique views of Earth from space.

      A picture of feature extraction between two images.
      Feature extraction between two images

      How fast does the ISS travel? 

      The actual speed that the ISS is travelling in space while at normal altitude is 7.66km/s. Its altitude can affect the speed, so it can vary, but the ISS’s boosters fire up if it dips too low.

      To help teams with writing programs that can adapt to some of these variances, and to show them the type data they can collect, we gave them a programming tool we call Astro Pi Replay. Using this tool, teams can simulate how their program would run on the Astro Pi computers up in space.

      The International Space Station orbiting Earth.
      The International Space Station orbiting Earth

      This is the first time we asked Mission Space Lab teams to focus on a particular scientific question. So how did they do? The graph below shows some of the speeds that teams’ programs estimated. 

      A graph showing the range of speeds calculated by Mission Space Lab teams.
      The range of speeds calculated by Mission Space Lab teams

      As you can see, a variety of speeds were estimated, but the average is fairly close to the ISS’s actual speed. Teams did a great job trying to solve the question and working like real space scientists. Once they receive their data this week, they can check how accurate their speed estimate was.

      Mission Zero pixel art lights up astronauts’ daily tasks 

      In Astro Pi Mission Zero, a coding activity suitable for beginners, 16,039 teams of young people created code to make pixel art inspired by nature. Nearly half (44%) of the 24,409 participants were girls! 15,942 of the Mission Zero teams had their code run on the ISS after we checked that it followed the rules.

      Mission Zero Submissions

      Every team whose program ran on the ISS — with their pixel art showing for the astronauts to see as they worked — will receive certificates with the time, date, and location coordinates of their Mission Zero run. 

      We’ve been so impressed with this year’s pixel art creations that we’ve picked some as new examples for next year’s Mission Zero coding guide. That means young people will be able to choose one of a few pixel images to start with and recreate or remix them for their program. More info on that is coming soon, sign up to the Astro Pi newsletter to not miss it.

      Let’s get ready for September

      Thank you and congratulations to everyone who took part in the missions this year, and our special thanks to all the amazing educators who ran Astro Pi activities with young people.

      The boot shape of Italy photographed from space by the Astro Pi computers.
      The south of Italy photographed from space by the Astro Pi computers

      For us, there is much to reflect on and celebrate from this year’s challenge. We’ve had the chance to run Mission Zero with young people in person and identify a few changes to help make the activity easier. As Mission Space Lab now involves simulating programs running on the ISS with our new Astro Pi Replay tool, we’ll be exploring how to improve this as well.

      We hope to engage lots of previous and new participants in the Astro Pi Challenge when it starts up again in September. Sign up for the newsletter on astro-pi.org to be the first to hear about the new round.

      Website: LINK

    5. NASsie

      NASsie

      Reading Time: < 1 minute

      We got an email from Jeff Loeliger about a very cool project he’s been working on recently.

      “When you have several computers and lots of files around the house it is useful to have a NAS – network attached storage – device to share files, stream media with Plex, and back things up,” Jeff writes. “My current system is an old QNAP TS-251 and a very old, and unsupported, QNAP TS-110. I wanted something new and faster, which sounded like a project for the Raspberry Pi. It has a compact completely 3D-printed case with a custom pHAT interface board.”

    6. Meet the Google TV networkMeet the Google TV networkGroup Product Manager, YouTube Ads

      Meet the Google TV networkMeet the Google TV networkGroup Product Manager, YouTube Ads

      Reading Time: < 1 minute

      Connected TV continues to see a rise in popularity, and advertisers are already taking advantage of YouTube’s reach of over 150 million monthly viewers in the living room. With the recent launch of the Google TV network, we’re now giving advertisers a way to reach additional viewers on the big screen. Google TV provides targeted, in-stream video inventory across more than 20 million monthly active Google TV and other Android TV OS devices.

      Google TV powers TVs and streaming devices from top brands like Sony, Hisense, TCL, and Chromecast. Google TV makes it easy to watch movies, shows and live TV from across 10,000 apps and includes popular features like Google Assistant, smart home control, built-in channels, and personalized entertainment recommendations for viewers.

      Website: LINK

    7. Imagining students’ progression in the era of generative AI

      Imagining students’ progression in the era of generative AI

      Reading Time: 6 minutes

      Generative artificial intelligence (AI) tools are becoming more easily accessible to learners and educators, and increasingly better at generating code solutions to programming tasks, code explanations, computing lesson plans, and other learning resources. This raises many questions for educators in terms of what and how we teach students about computing and AI, and AI’s impact on assessment, plagiarism, and learning objectives.

      Brett Becker.

      We were honoured to have Professor Brett Becker (University College Dublin) join us as part of our ‘Teaching programming (with or without AI)’ seminar series. He is uniquely placed to comment on teaching computing using AI tools, having been involved in many initiatives relevant to computing education at different levels, in Ireland and beyond.

      In a computing classroom, two girls concentrate on their programming task.

      Brett’s talk focused on what educators and education systems need to do to prepare all students — not just those studying Computing — so that they are equipped with sufficient knowledge about AI to make their way from primary school to secondary and beyond, whether it be university, technical qualifications, or work.

      How do AI tools currently perform?

      Brett began his talk by illustrating the increase in performance of large language models (LLMs) in solving first-year undergraduate programming exercises: he compared the findings from two recent studies he was involved in as part of an ITiCSE Working Group. In the first study — from 2021 — the results generated by GPT-3 were similar to those of students in the top quartile. By the second study in 2023, GPT-4’s performance matched that of a top student (Figure 1).

      A graph comparing exam scores.

      Figure 1: Student scores on Exam 1 and Exam 2, represented by circles. GPT-3’s 2021 score is represented by the blue ‘x’, and GPT-4’s 2023 score on the same questions is represented by the red ‘x’.

      Brett also explained that the study found some models were capable of solving current undergraduate programming assessments almost error-free, and could solve the Irish Leaving Certificate and UK A level Computer Science exams.

      What are challenges and opportunities for education?

      This level of performance raises many questions for computing educators about what is taught and how to assess students’ learning. To address this, Brett referred to his 2023 paper, which included findings from a literature review and a survey on students’ and instructors’ attitudes towards using LLMs in computing education. This analysis has helped him identify several opportunities as well as the ethical challenges education systems face regarding generative AI. 

      The opportunities include: 

      • The generation of unique content, lesson plans, programming tasks, or feedback to help educators with workload and productivity
      • More accessible content and tools generated by AI apps to make Computing more broadly accessible to more students
      • More engaging and meaningful student learning experiences, including using generative AI to enable creativity and using conversational agents to augment students’ learning
      • The impact on assessment practices, both in terms of automating the marking of current assessments as well as reconsidering what is assessed and how

      Some of the challenges include:

      • The lack of reliability and accuracy of outputs from generative AI tools
      • The need to educate everyone about AI to create a baseline level of understanding
      • The legal and ethical implications of using AI in computing education and beyond
      • How to deal with questionable or even intentionally harmful uses of AI and mitigating the consequences of such uses

      Programming as a basic skill for all subjects

      Next, Brett talked about concrete actions that he thinks we need to take in response to these opportunities and challenges. 

      He emphasised our responsibility to keep students safe. One way to do this is to empower all students with a baseline level of knowledge about AI, at an age-appropriate level, to enable them to keep themselves safe. 

      Secondary school age learners in a computing classroom.

      He also discussed the increased relevance of programming to all subjects, not only Computing, in a similar way to how reading and mathematics transcend the boundaries of their subjects, and the need he sees to adapt subjects and curricula to that effect. 

      As an example of how rapidly curricula may need to change with increasing AI use by students, Brett looked at the Irish Computer science specification for “senior cycle” (final two years of second-level, ages 16–18). This curriculum was developed in 2018 and remains a strong computing curriculum in Brett’s opinion. However, he pointed out that it only contains a single learning outcome on AI. 

      To help educators bridge this gap, in the book Brett wrote alongside Keith Quille to accompany the curriculum, they included two chapters dedicated to AI, machine learning, and ethics and computing. Brett believes these types of additional resources may be instrumental for teaching and learning about AI as resources are more adaptable and easier to update than curricula. 

      Generative AI in computing education

      Taking the opportunity to use generative AI to reimagine new types of programming problems, Brett and colleagues have developed Promptly, a tool that allows students to practise prompting AI code generators. This tool provides a combined approach to learning about generative AI while learning programming with an AI tool. 

      Promptly is intended to help students learn how to write effective prompts. It encourages students to specify and decompose the programming problem they want to solve, read the code generated, compare it with test cases to discern why it is failing (if it is), and then update their prompt accordingly (Figure 2). 

      An example of the Promptly interface.

      Figure 2: Example of a student’s use of Promptly.

      Early undergraduate student feedback points to Promptly being a useful way to teach programming concepts and encourage metacognitive programming skills. The tool is further described in a paper, and whilst the initial evaluation was aimed at undergraduate students, Brett positioned it as a secondary school–level tool as well. 

      Brett hopes that by using generative AI tools like this, it will be possible to better equip a larger and more diverse pool of students to engage with computing.

      Re-examining the concept of programming

      Brett concluded his seminar by broadening the relevance of programming to all learners, while challenging us to expand our perspectives of what programming is. If we define programming as a way of prompting a machine to get an output, LLMs allow all of us to do so without the need for learning the syntax of traditional programming languages. Taking that view, Brett left us with a question to consider: “How do we prepare for this from an educational perspective?”

      You can watch Brett’s presentation here:

      [youtube https://www.youtube.com/watch?v=n0BZq8uRutQ?feature=oembed&w=500&h=281]

      Join our next seminar

      The focus of our ongoing seminar series is on teaching programming with or without AI. 

      For our next seminar on Tuesday 11 June at 17:00 to 18:30 GMT, we’re joined by Veronica Cucuiat (Raspberry Pi Foundation), who will talk about whether LLMs could be employed to help understand programming error messages, which can present a significant obstacle to anyone new to coding, especially young people.  

      To take part in the seminar, click the button below to sign up, and we will send you information about how to join. We hope to see you there.

      The schedule of our upcoming seminars is online. You can catch up on past seminars on our blog and on the previous seminars and recordings page.

      Website: LINK

    8. RIoT Secure joins Arduino’s SIPP as Gold Partner

      RIoT Secure joins Arduino’s SIPP as Gold Partner

      Reading Time: 2 minutes

      We are excited to announce that RIoT Secure has joined Arduino’s System Integrators Partnership Program at the Gold level. Founded in 2017 in Stockholm, Sweden, RIoT Secure is at the forefront of IoT security, especially in regards to resource-constrained microcontrollers, providing sophisticated lifecycle management solutions that enhance device functionality and security across various industries.

      RIoT Secure’s platform has been meticulously designed and developed around the Arduino MKR platform, renowned for its modular approach to connectivity. This has allowed the company to harness the flexible and powerful capabilities of the Arduino MKR series, which were integral to the successful deployment of solutions for clients as demanding as SAS ground service handling at the Stockholm Arlanda Airport – as highlighted in our case study here.

      Additionally, RIoT Secure continuously explores the full spectrum of Arduino hardware possibilities, incorporating the recently launched Arduino UNO R4 WiFi into their comprehensive device management platform – underscoring their commitment to utilizing cutting-edge technology to enhance IoT device management and security.

      As a Gold-level partner, RIoT Secure is set to expand its influence and capabilities within the IoT sector, driving innovation through advanced integration of Arduino’s robust technology suite. The collaboration not only brings enhanced scalability and efficiency to their operations but also aligns with the mission to deliver top-tier IoT solutions that are secure, reliable, and easy to manage.

      “The inclusion in Arduino’s System Integrators Partnership Program marks a significant step forward for RIoT Secure,” said co-founder Aaron Ardiri. “This partnership enables us to tap into Arduino’s vast resources, development community and support services, propelling our development of revolutionary IoT solutions.”

      Arduino’s Strategic Partnerships Advisor, Paul Kaeley, was proud to add, “RIoT Secure’s innovative use of our MKR series and dedication to advancing IoT security make them a valuable addition to our program. We look forward to the great advancements this partnership will bring to the IoT landscape.”

      Through this partnership, RIoT Secure aims to continue advancing the field of IoT, providing clients with reliable and innovative solutions that are ready to meet the technological challenges of today and tomorrow. With Arduino, they are set to redefine the possibilities of IoT integration and management, making it more accessible, secure, and efficient for everyone involved.


      The System Integrators Partnership Program by Arduino Pro is an exclusive initiative designed for professionals seeking to implement Arduino technologies in their projects. This program opens up a world of opportunities based on the robust Arduino ecosystem, allowing partners to unlock their full potential in collaboration with us.

      The post RIoT Secure joins Arduino’s SIPP as Gold Partner appeared first on Arduino Blog.

      Website: LINK

    9. sprinklR irrigation

      sprinklR irrigation

      Reading Time: 3 minutes

      Harsh environment

      Portland, Oregon-based Mark has an urban garden that needs to be irrigated each summer. Judging from the description of his irrigation system, the garden is a little larger than the 30-foot back lawns often attached to suburban UK homes. Commercially available timers provide reliable irrigation, but Mark found they don’t last: “If you forget to bring them in during the winter, they freeze and break. After a few years, the plastic valves wear out and they jam closed (bad for plants) or jam open (bad for water bills). They don’t adjust to rain or hot weather.” Pricier, more robust timers plus web connectivity to check the weather forecast work better but still fail. Mark had several Raspberry Pi boards at home, and decided to put them to good use. Having written extensively about Raspberry Pi as well as coding using R (see his blog at niemannross.com), the combination seemed obvious, although R is a less common choice of programming language. “My preferred language is R, which I can run from a Linux operating system, but not from MicroPython or C. Irrigation only happens once a day, so I don’t need speed. What I need is the most convenient way to express my logic to Raspberry Pi.” Using Raspberry Pi Zero WH as the controller “makes it easy to connect to the internet and the headers provide a convenient way to connect relays and buttons,” he explains.

      Components and code were tested over several days in a prototype design

      Bits and pieces

      Creating his irrigation system involved assembling lots of fairly standard components and a certain amount of planning. Prior knowledge of plumbing and electronics is helpful, Mark observes. The planning aspect required Mark to work out how much rainfall was likely to offset the total number of gallons of water his garden would need and how long the valves would need to be open at a time. He calculated the rate at which his house pipes could pump water to the irrigation valves (and the putative number of gallons per hour) as well as the voltage required for the relays to deliver it.

      Mark designed a robust replacement for a commercial irrigation system

      To see whether his idea would work Mark began by screwing irrigation valves, two servos and Raspberry Pi needed to power the system, as well as a Raspberry Pi Zero, on to a piece of wood. “There isn’t any water connected to the system at this point – I’m only trying to test the electronics and develop and test the code.”

      After writing and testing the code on Raspberry Pi he “ran it with the relays for days without any valves connected, then tested the plumbing in a sink before I attached it to the board”.

      Daily irrigation helps keep plants in Mark’s garden healthy

      The US Environmental Protection Agency estimates 28 million US homes have an automated watering system, and that households can reduce their water usage by roughly 7,600 gallons a year using a weather-based system to gauge requirements. Mark wanted to see whether he got realistic readings, and how well the system performed, before deciding to risk linking it up with his water meter for billing. He continues to tweak and update it and is delighted with just how well his $75 irrigation system is performing.

    10. This desk lamp automatically adjusts its brightness using AI on an Arduino UNO

      This desk lamp automatically adjusts its brightness using AI on an Arduino UNO

      Reading Time: 2 minutes

      When you hear about all of the amazing things being accomplished with artificial intelligence today, you probably assume that they require a massive amount of processing power. And while that is often true, there are machine learning models that can run on the edge — including on low-power hardware like microcontrollers. To prove that, Shovan Mondal built this AI-enhanced desk lamp.

      Mondal’s goal with this project was to demonstrate that AI (specifically machine learning) can be easy to implement on affordable and efficient hardware, such as an Arduino UNO Rev3 board. Here, the ML model adjusts the brightness of the lamp’s LED proportionally to the ambient light in the area as detected by an LDR (light-dependent resistor). The lamp body is heavy cardstock paper. 

      It would be possible to program this behavior explicitly with set thresholds or a manually created formula. But a trained ML model can do the same job without explicit instructions. The training process is simply subjecting the lamp to different lighting conditions and manually adjusting the brightness to suit them. That produces a series of data pairs consisting of the LDR and LED brightness values. 

      In CSV format, that data can be used to train a linear regression model provided with scikit-learn. That then produces a formula and values that will reproduce the data seen in the training set. The output can then set the LED brightness. 

      In this case, that formula is very simple, because it only has to account for two variables with a direct relationship. But much more complex relationships are possible, as are ML models that perform tasks more challenging than linear regression.

      The post This desk lamp automatically adjusts its brightness using AI on an Arduino UNO appeared first on Arduino Blog.

      Website: LINK

    11. Texting 911 becomes even more useful with RCSTexting 911 becomes even more useful with RCSGM

      Texting 911 becomes even more useful with RCSTexting 911 becomes even more useful with RCSGM

      Reading Time: 2 minutes

      Calling 911 in emergency situations isn’t always possible. In those moments, texting 911 may be the most helpful option. This is why, in partnership with emergency technology company RapidSOS, we’ll begin gradually rolling out the ability to text 911 with RCS (Rich Communication Services) to U.S. emergency call centers this winter, starting in areas where text-to-911 capabilities are currently not supported to close gaps in emergency communications coverage and provide new safety benefits. First available on Google Messages, emergency texting with RCS will bring critical safety communications capabilities to you when you need it most.

      A new way to reach 911 with RCS

      Today, you can already text 911 through SMS in some locations. However, texting 911 through SMS is only available for around 53% of U.S. emergency responder call centers and doesn’t always allow you to share pictures and videos. Using RCS to reach 911 brings new safety benefits and allows you to:

      • Confirm delivery of your emergency request and see if emergency responders are actively replying to your messages. This eliminates the uncertainty of waiting to see if your messages went through.
      • Send high-resolution images and videos to give first responders a clearer picture of your situation. This can be crucial to aid a faster and more effective response from emergency service providers.
      • Share your precise location and additional information automatically through Android Emergency Location Service, like your language settings and opt-in Medical Information, so emergency responders know exactly where to go and can get helpful details from you even if you’re unable to reply.

      Website: LINK

    12. DIY submersible pump controller helps retrieve well water

      DIY submersible pump controller helps retrieve well water

      Reading Time: 2 minutes

      It might surprise our urban-dwelling readers, but wells are still very common in rural areas where it is difficult or prohibitively expensive to run utilities. The CDC reports that more than 15 million households rely on groundwater and wells — and that’s just in the United States. But few people haul up old wooden buckets of water, which is electric pumps come in. Vishal Roy developed a DIY controller perfect for submersible groundwater pumps.

      Roy previously had a centrifugal pump to pull up groundwater and fill a holding tank, but that pump was failing. Because it needed replacement anyway, Roy decided to go ahead and switch to a submersible pump that would likely be more reliable. But the submersible pump he purchased came with a manual control panel, which would introduce a new chore. That motivated Roy to build this Arduino-based controller that automatically runs the submersible pump to fill the holding tank whenever the level drops below a set point.

      The holding tank has a conventional water level sensor system consisting of three exposed wires acting as capacitive sensors at different heights. This sensor design isn’t precise, but it is inexpensive and reliable, and precision isn’t important for this task, anyway.

      The pump itself has a large electric motor that requires a startup sequence that first charges up a starting capacitor. Roy was able to replicate that using the Arduino Nano, which connects the two starting circuits using a Seeed Studio relay module. When the Arduino detects the water below a threshold in the holding tank, it toggles the relays to start the pump motor. Once enough water fills the tank to reach the highest sensor, the Arduino turns the motor back off. 

      Now Roy has a reliable way to automatically keep the holding tank full of water. 

      The post DIY submersible pump controller helps retrieve well water appeared first on Arduino Blog.

      Website: LINK

    13. Track the location history of your devices in Arduino Cloud IoT dashboards

      Track the location history of your devices in Arduino Cloud IoT dashboards

      Reading Time: 4 minutes

      Asset tracking has become increasingly crucial across various industries and applications. Whether you’re a logistics company monitoring your fleet, a conservation organization tracking wildlife, or an individual passionate about outdoor adventures, the ability to track and visualize the movement of assets in real-time can be invaluable. 

      Today, we are excited to announce the release of the new Advanced Map widget in the Arduino Cloud, a powerful tool that allows you to track the movement and location of your IoT devices over time.

      What is the Advanced Map in Arduino Cloud?

      Advanced Map is a widget, currently available for Maker and Maker Plus plans in the Arduino Cloud, designed to provide users with an enhanced mapping experience. Unlike the existing Map widget, which displays the current location of devices, the Advanced Map widget takes tracking capabilities a step further by visualizing the historical positions of your devices over time.

      This powerful widget not only allows you to monitor the real-time positions of your devices but also shows their movement patterns and historical data. With this invaluable information at your fingertips, you can gain deeper insights and make more informed decisions about your assets.

      Advanced Map: Use cases and applications

      The Advanced Map widget opens up a world of possibilities for various industries and applications.

      • Asset tracking for logistics and supply chain management: Monitor the movement of goods and inventory in real-time, optimizing delivery routes and ensuring timely arrivals.
      • Fleet management for transportation companies: Track your vehicles, monitor driver behavior, and optimize fleet utilization for increased efficiency and cost savings.
      • Drone tracking: Keep a watchful eye on your drone operations, ensuring compliance with regulations and enhancing safety.
      • Wildlife tracking for conservation projects: Gain valuable insights into the movement patterns and behaviors of wildlife, contributing to effective conservation efforts.
      • Personal projects and hobbies: Whether you’re an adventurer tracking your outdoor explorations or a hobbyist monitoring your projects, the Advanced Map widget offers endless opportunities for creativity.

      Track a mobile phone

      You can track a mobile phone with the IoT Remote app installed and the “Phone as Device” feature enabled. This opens up a new set of applications, from child or elder people care, to outdoor activities tracking.

      The benefits of the Advanced Map

      The Advanced Map widget comes with a range of features and benefits:

      • Track your assets’ real-time position:  Stay up-to-date with the exact locations of your devices in real-time, enabling you to take immediate action when necessary.
      • Visualize historical position data: Gain a comprehensive understanding of your assets’ movement patterns by visualizing their historical positions on the map during a selected period of time. This feature empowers you to analyze trends, identify inefficiencies, and optimize your operations.
      • Follow in real-time the creation of the track You can visualize in real time not only the position of the device, but also the track that is being created.

      In summary, with the Advanced Map widget, you can monitor your assets more effectively, reducing the risk of loss or misplacement and ensuring optimal utilization. The data provided provides you with valuable insights, enabling data-driven decision-making and informed strategic planning.

      Why choose Arduino Cloud — in 5 points

      The Arduino Cloud is more than just a platform for IoT asset tracking in a map; it’s a comprehensive IoT solution for connected projects of all sizes and complexities:

      1. Build your IoT project quickly: With its intuitive and user-friendly interface, the Arduino Cloud makes IoT accessible to users of all skill levels, from beginners to experts.
      2. Develop from anywhere: The Arduino Cloud features an online development environment that mimics the Arduino IDE experience and helps you create from anywhere.
      3. Visualize your sensor data easily: The Arduino Cloud becomes your own control center allowing you to talk to your devices and monitor them from anywhere with beautiful customizable dashboards.
      4. Learn, play, scale: Whether you’re working on a small personal project or a large-scale enterprise solution, the Arduino Cloud can adapt to your needs, providing the flexibility and scalability required for growth.
      5. Get all the support and resources you need for your project: Join a vibrant community of IoT enthusiasts, professionals, and experts, and benefit from the large catalog of resources and tutorials, and the community support to enhance your skills and projects.

      Get started with the Advanced Map widget

      Advanced Map in the Arduino Cloud is a game-changer for asset tracking, unlocking new possibilities and empowering users to take their projects to the next level. With its real-time tracking capabilities, historical data visualization, and a suite of powerful features, this new widget opens up exciting opportunities for various industries and applications.

      To get started with the Advanced Map widget, check out our documentation. We encourage you to explore this new feature and share your experiences and feedback with us.

      Upgrade to Arduino Cloud Maker plan today and get 20% off  with code CLOUD20MAY (offer is valid until June 15th, for users who aren’t currently on any paid plan), and create a new breed of IoT applications with advanced asset tracking capabilities.

      Need more time? Get started for free and join the growing community of IoT enthusiasts and professionals who trust Arduino Cloud to bring their ideas to life.

      The post Track the location history of your devices in Arduino Cloud IoT dashboards appeared first on Arduino Blog.

      Website: LINK