Kategorie: Mobile

  • Experience AI: How research continues to shape the resources

    Experience AI: How research continues to shape the resources

    Reading Time: 5 minutes

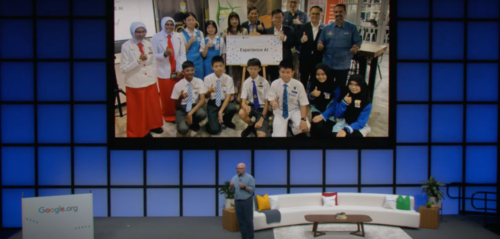
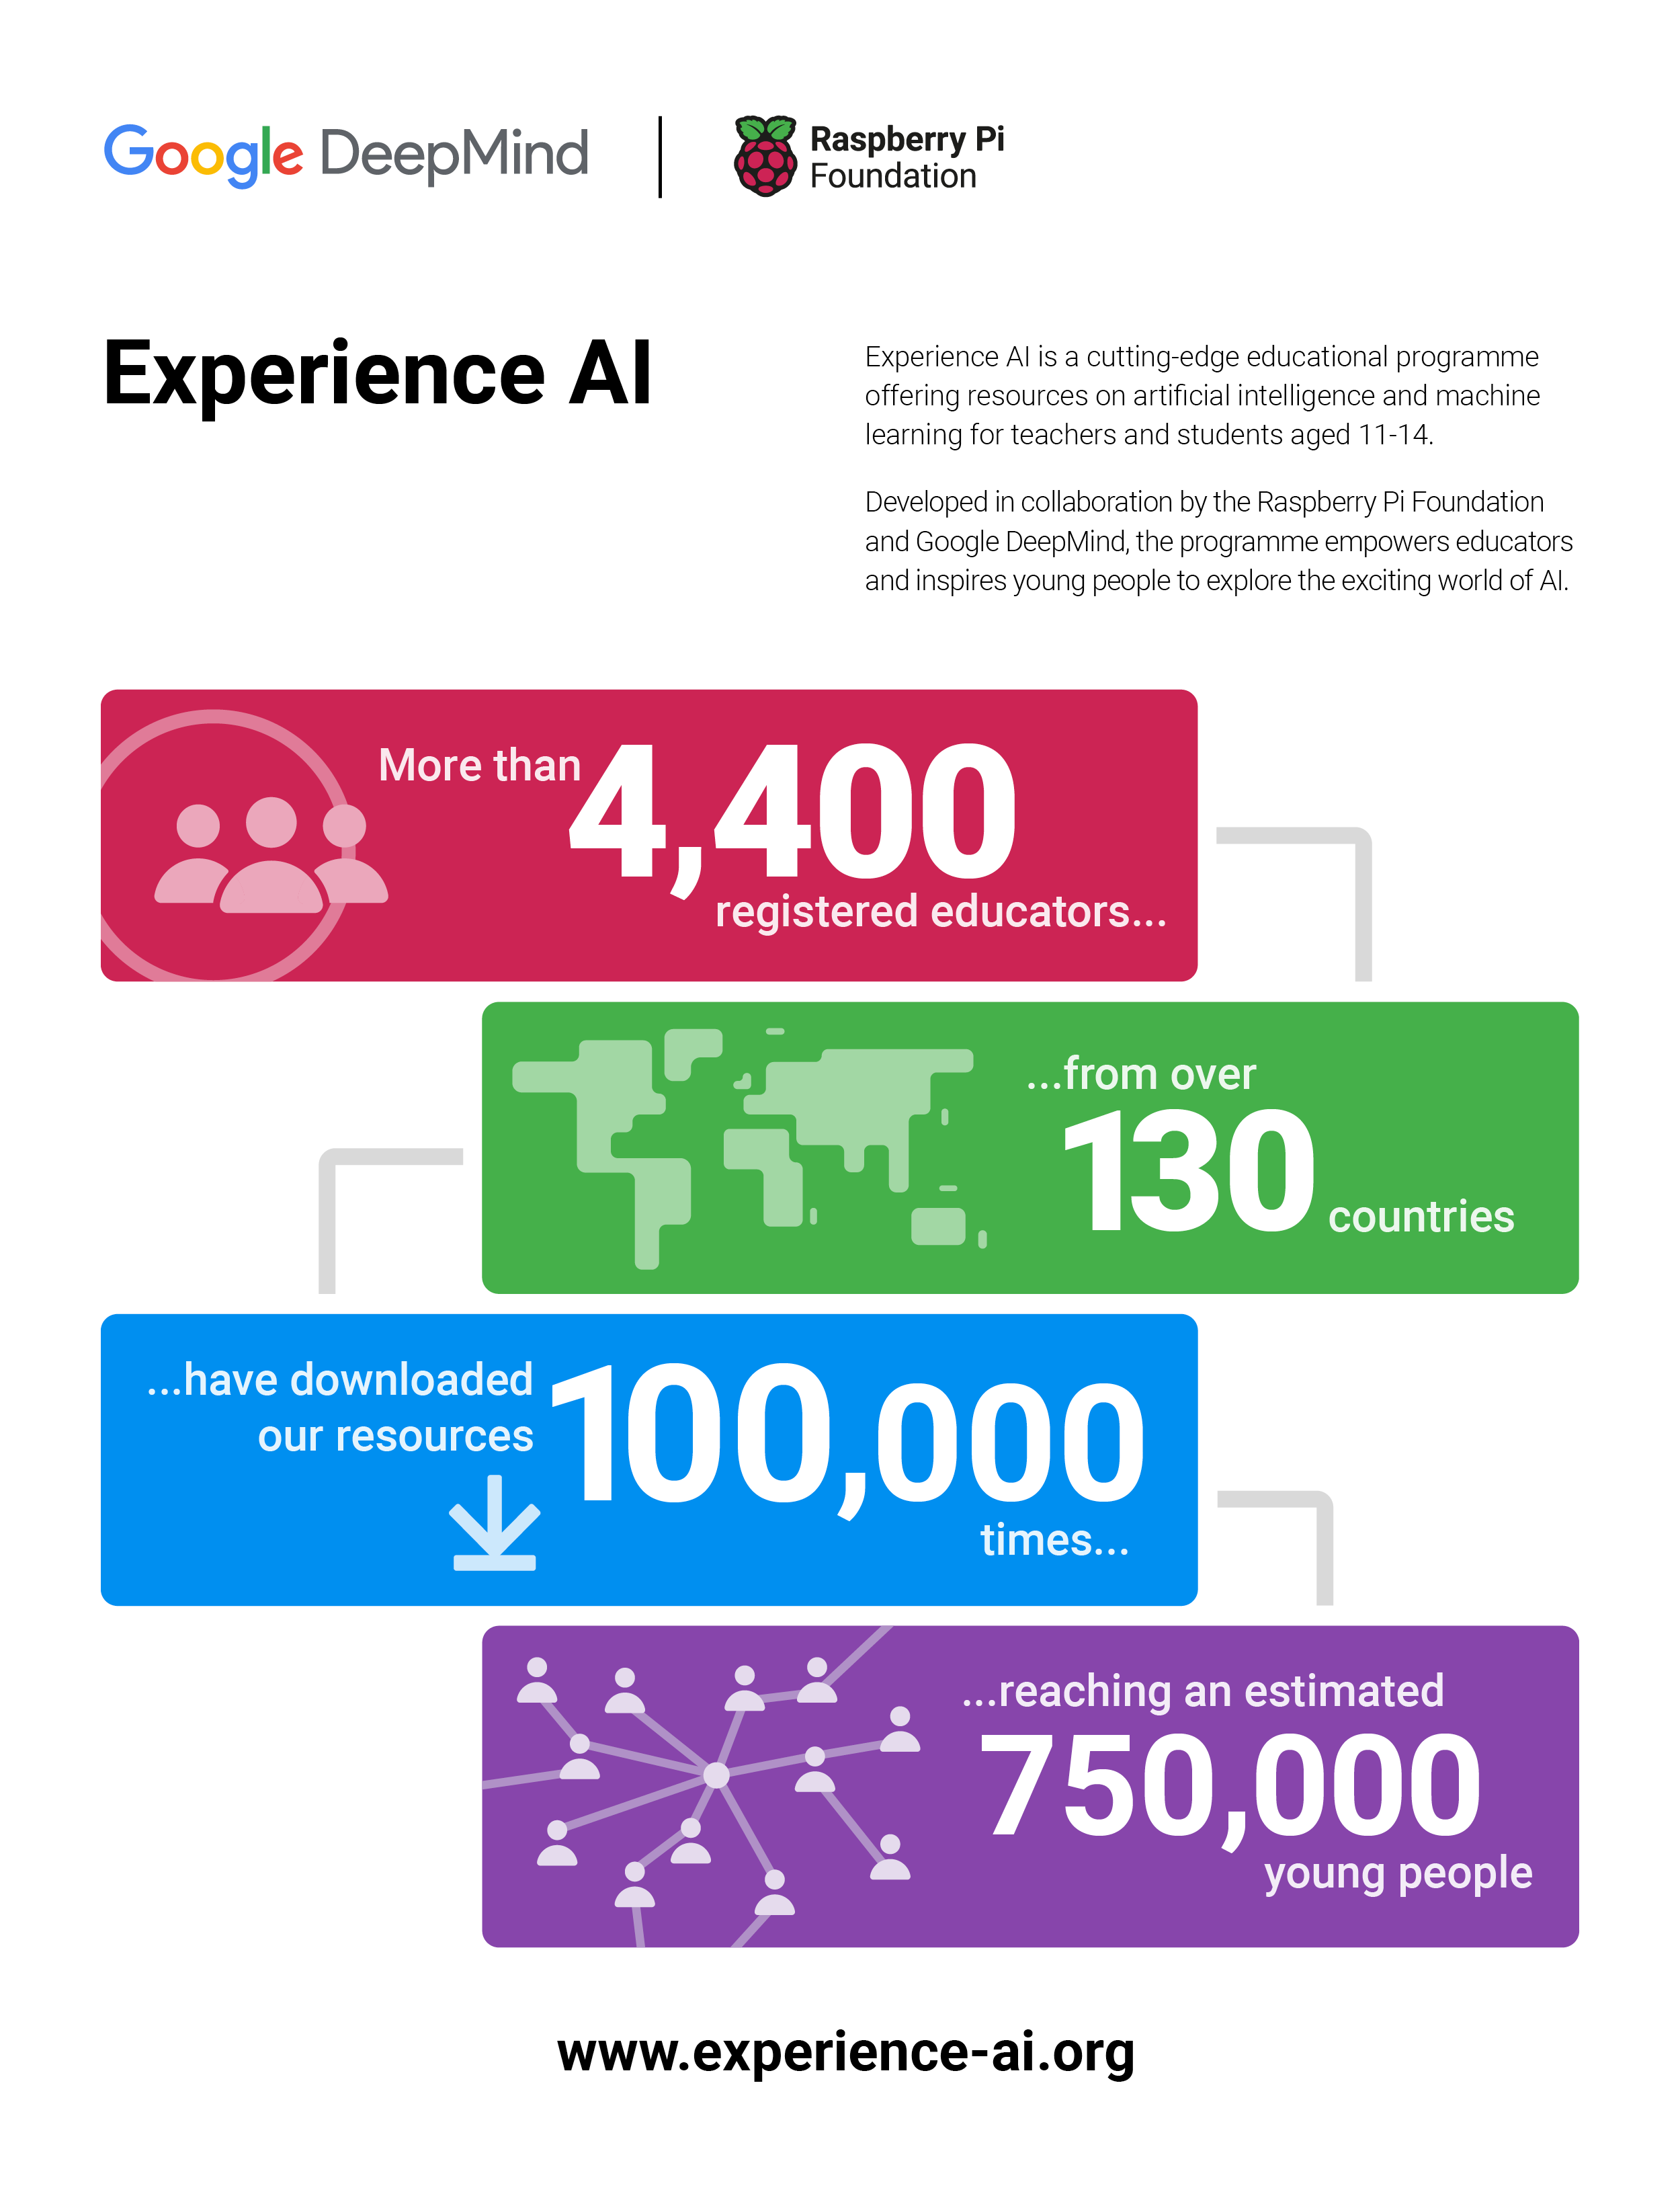
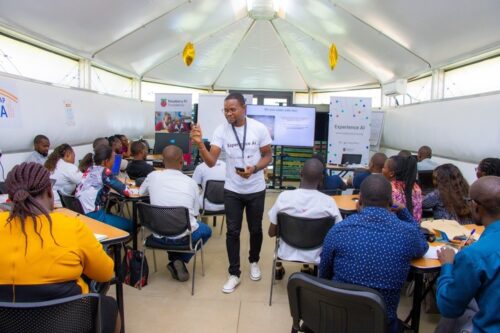
    Since we launched the Experience AI learning programme in the UK in April 2023, educators in 130 countries have downloaded Experience AI lesson resources. They estimate reaching over 630,000 young people with the lessons, helping them to understand how AI works and to build the knowledge and confidence to use AI tools responsibly. Just last week, we announced another exciting expansion of Experience AI: thanks to $10 million in funding from Google.org, we will be able to work with local partner organisations to provide research-based AI education to an estimated over 2 million young people across Europe, the Middle East and Africa.

    Trainer discussing Experience AI at a teacher training event in Kenya.
    Experience AI teacher training in Kenya

    This blog post explains how we use research to continue to shape our Experience AI resources, including the new AI safety resources we are developing. 

    The beginning of Experience AI

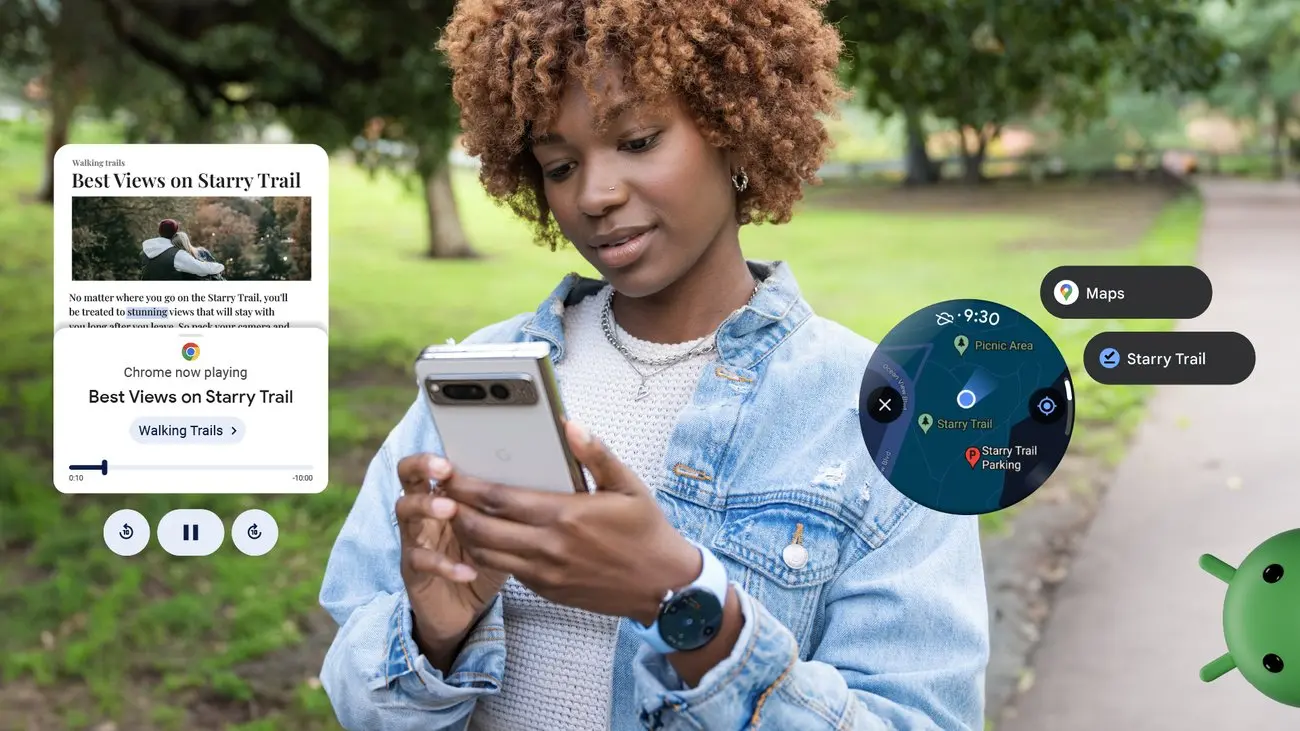
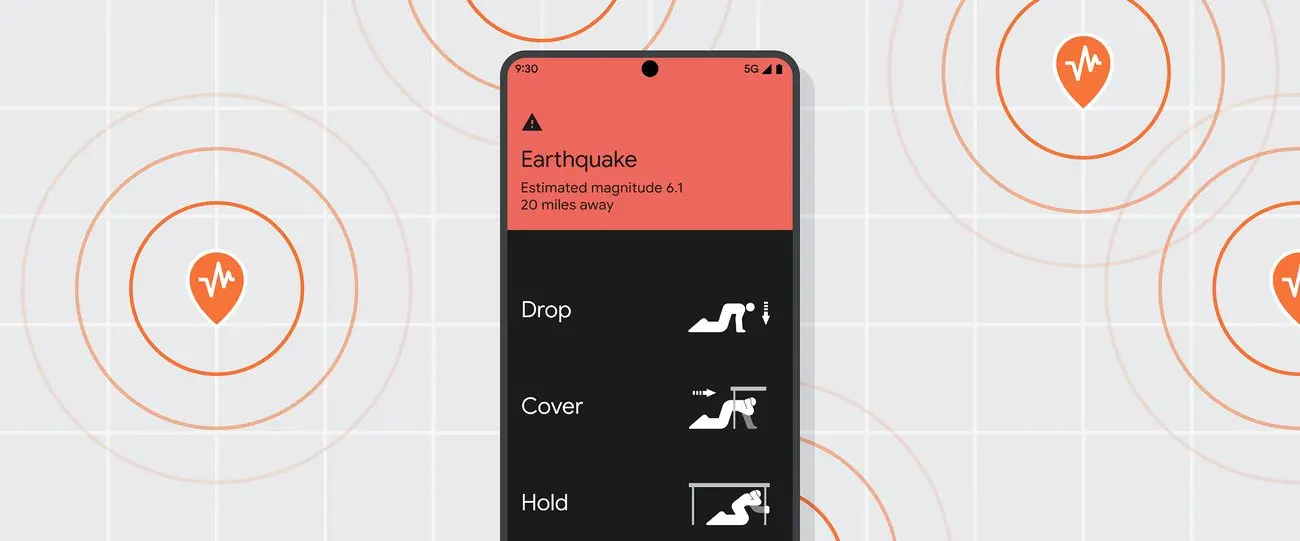
    Artificial intelligence (AI) and machine learning (ML) applications are part of our everyday lives — we use them every time we scroll through social media feeds organised by recommender systems or unlock an app with facial recognition. For young people, there is more need than ever to gain the skills and understanding to critically engage with AI technologies. 

    Someone holding a mobile phone that's open on their social media apps folder.

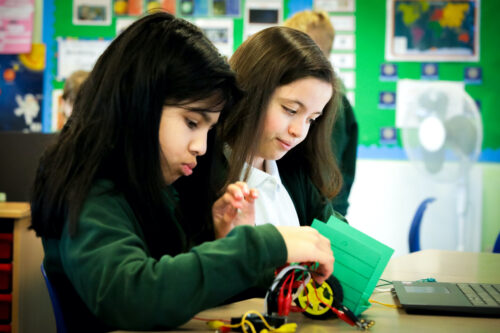
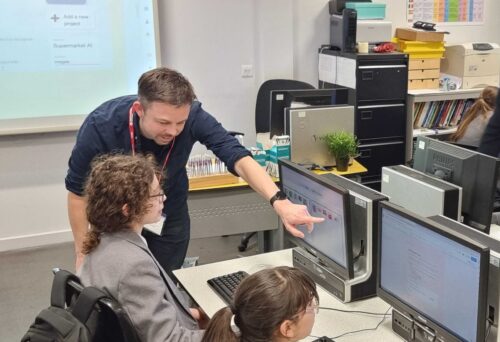
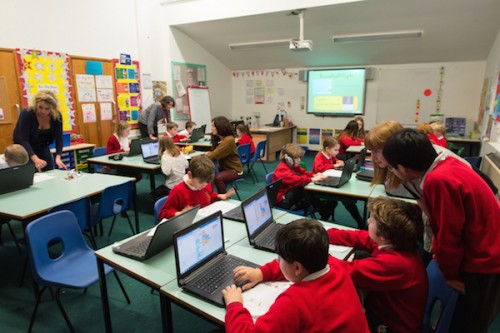
    We wanted to design free lesson resources to help teachers in a wide range of subjects confidently introduce AI and ML to students aged 11 to 14 (Key Stage 3). This led us to develop Experience AI, in collaboration with Google DeepMind, offering materials including lesson plans, slide decks, videos (both teacher- and student-facing), student activities, and assessment questions. 

    SEAME: The research-based framework behind Experience AI

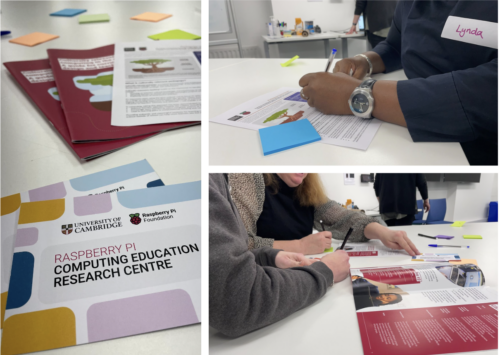
    The Experience AI resources were built on rigorous research from the Raspberry Pi Computing Education Research Centre as well as from other researchers, including those we hosted at our series of seminars on AI and data science education. The Research Centre’s work involved mapping and categorising over 500 resources used to teach AI and ML, and found that the majority were one-off activities, and that very few resources were tailored to a specific age group.

    An example activity slide in the Experience AI lessons where students learn about bias.
    An example activity in the Experience AI lessons where students learn about bias.

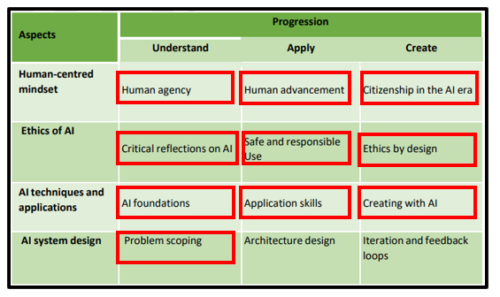
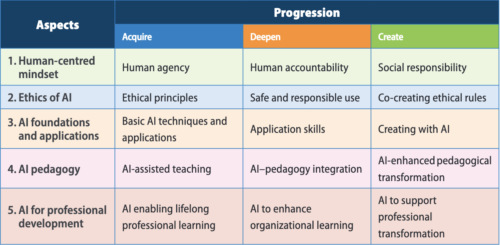
    To analyse the content that existing AI education resources covered, the Centre developed a simple framework called SEAME. The framework gives you an easy way to group concepts, knowledge, and skills related to AI and ML based on whether they focus on social and ethical aspects (SE), applications (A), models (M), or engines (E, i.e. how AI works.)

    Through Experience AI, learners also gain an understanding of the models underlying AI applications, and the processes used to train and test ML models.

    An example activity slide in the Experience AI lessons where students learn about classification.
    An example activity in the Experience AI lessons where students learn about classification.

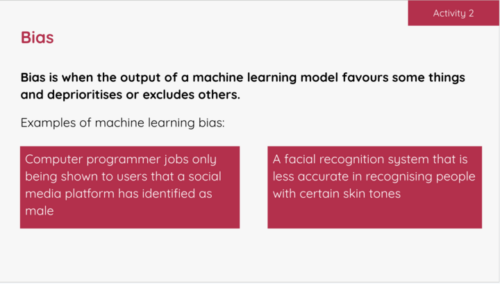
    Our Experience AI lessons cover all four levels of SEAME and focus on applications of AI that are relatable for young people. They also introduce learners to AI-related issues such as privacy or bias concerns, and the impact of AI on employment. 

    The six foundation lessons of Experience AI

    1. What is AI?: Learners explore the current context of AI and how it is used in the world around them. Looking at the differences between rule-based and data-driven approaches to programming, they consider the benefits and challenges that AI could bring to society. 
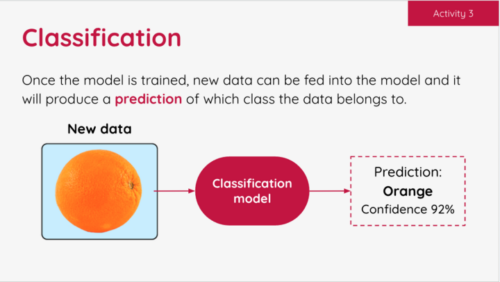
    2. How computers learn: Focusing on the role of data-driven models in AI systems, learners are introduced to ML and find out about three common approaches to creating ML models. Finally they explore classification, a specific application of ML.
    3. Bias in, bias out: Students create their own ML model to classify images of apples and tomatoes. They discover that a limited dataset is likely to lead to a flawed ML model. Then they explore how bias can appear in a dataset, resulting in biased predictions produced by a ML model. 
    4. Decision trees: Learners take their first in-depth look at a specific type of ML model: decision trees. They see how different training datasets result in the creation of different ML models, experiencing first-hand what the term ‘data-driven’ means.
    5. Solving problems with ML models: Students are introduced to the AI project lifecycle and use it to create a ML model. They apply a human-focused approach to working on their project, train a ML model, and finally test their model to find out its accuracy.
    6. Model cards and careers: Learners finish the AI project lifecycle by creating a model card to explain their ML model. To complete the unit, they explore a range of AI-related careers, hear from people working in AI research at Google DeepMind, and explore how they might apply AI and ML to their interests. 
    Experience AI banner.

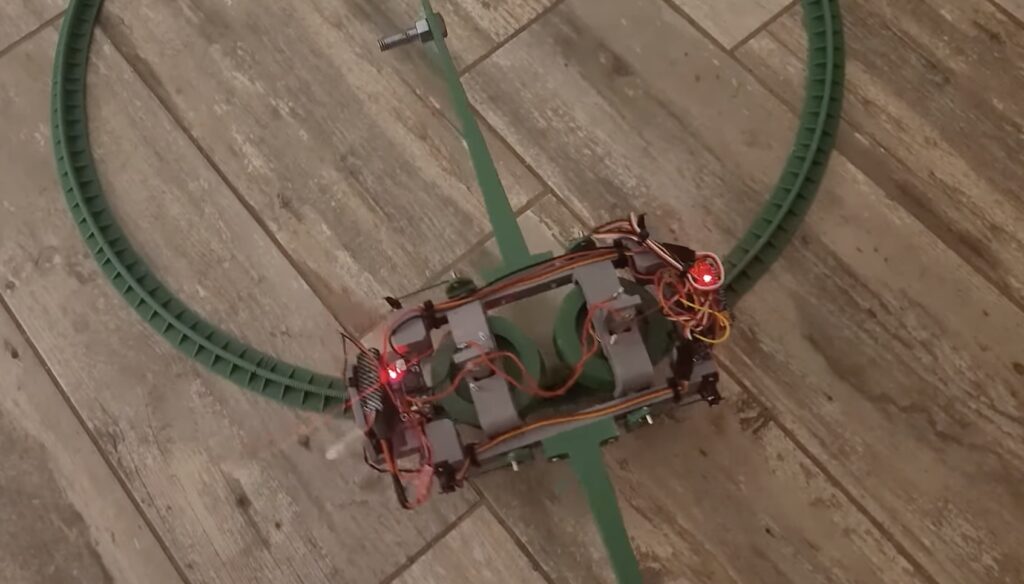
    We also offer two additional stand-alone lessons: one on large language models, how they work, and why they’re not always reliable, and the other on the application of AI in ecosystems research, which lets learners explore how AI tools can be used to support animal conservation. 

    New AI safety resources: Empowering learners to be critical users of technology

    We have also been developing a set of resources for educator-led sessions on three topics related to AI safety, funded by Google.org

    • AI and your data: With the support of this resource, young people reflect on the data they have already provided to AI applications in their daily lives, and think about how the prevalence of AI tools might change the way they protect their data.  
    • Media literacy in the age of AI: This resource highlights the ways AI tools can be used to perpetuate misinformation and how AI applications can help people combat misleading claims.
    • Using generative AI responsibly: With this resource, young people consider their responsibilities when using generative AI, and their expectations of developers who release Experience AI tools. 

    Other research principles behind our free teaching resources 

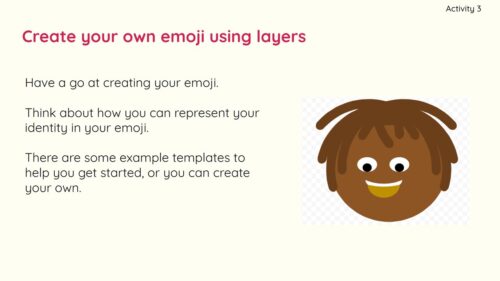
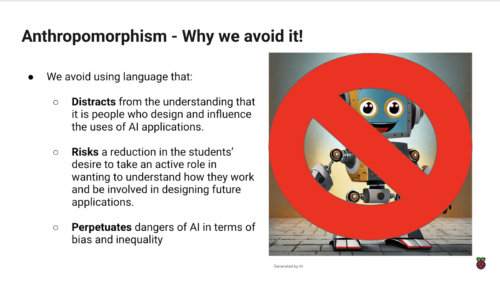
    As well as using the SEAME framework, we have incorporated a whole host of other research-based concepts in the design principles for the Experience AI resources. For example, we avoid anthropomorphism — that is, words or imagery that can lead learners to wrongly believe that AI applications have sentience or intentions like humans do — and we instead promote the understanding that it’s people who design AI applications and decide how they are used. We also teach about data-driven application design, which is a core concept in computational thinking 2.0.  

    Share your feedback

    We’d love to hear your thoughts and feedback about using the Experience AI resources. Your comments help us to improve the current materials, and to develop future resources. You can tell us what you think using this form

    And if you’d like to start using the Experience AI resources as an educator, you can download them for free at experience-ai.org.

    Website: LINK

  • Repurposing an automatic train control unit as a car speedometer

    Repurposing an automatic train control unit as a car speedometer

    Reading Time: 2 minutes

    We’re just now getting semi-autonomous self-driving capabilities in cars, which let them adhere to posted speed limits and maintain their lanes. But trains have been doing the same thing for a long time — well before machine learning and computer vision became ubiquitous. How did they do it? With ATC (automatic train control), which Philo Gray and Tris Emmy Wilson demonstrated by repurposing an ATC unit from an MBTA Red Line train as a car speedometer.

    Trains don’t need help steering, because they’re on rails. Those rails are also the secret to ATC operation. Being conductive, the rails provide a path for communicating data. That’s actually bidirectional in a way, as railway control systems use the circuit completed by the presence of a train as a switch to determine the train’s position. At the same time, it sends data to the train through the “audio frequency track circuit.” The ATC unit reads that data and controls the train speed accordingly, while also indicating the speed limit and current speed on the gauge.

    Cars don’t have the benefit of rails for data transmission, so the Gray and Wilson recreated the functionality by using an Arduino to emulate the appropriate signal for the ATC unit to read. It has to communicate two data streams to the ATC unit: the speed limit and the vehicle’s current speed. The unit has a pretty standard-looking speedometer for the latter and uses small lights at intervals to indicate the former.

    Gray and Wilson used a laptop with OpenStreetMap and the current GPS location to find the speed limit of the road their vehicle is on. It then tells the Arduino to set the corresponding speed limit light. The speedometer functionality, surprisingly, proved to be more challenging. The original plan was to use a Bluetooth OBD2 reader to pull the information directly from the car, but the adapter was very unreliable. They then tried to estimate the speed using GPS readings, but that was also unreliable and so they returned to the OB2 adapter.

    This isn’t reliable or practical by any means, but it is very cool to see the old ATC unit working inside of a car. 

    [youtube https://www.youtube.com/watch?v=KPlC6PoRjn8?feature=oembed&w=500&h=281]

    The post Repurposing an automatic train control unit as a car speedometer appeared first on Arduino Blog.

    Website: LINK

  • BrainPatch.AI: How a British neurotech startup built a working prototype fast, using Arduino Nano 33 IoT

    BrainPatch.AI: How a British neurotech startup built a working prototype fast, using Arduino Nano 33 IoT

    Reading Time: 3 minutes

    The field of neurotechnology has been advancing rapidly in recent years, opening up to safe and effective non-invasive interfaces that can deliver tiny milliamp currents to the right stimulation location on the head, neck or body. One example of the new players in this field is BrainPatch.AI, a Cambridge-based neurotech startup, which has developed an advanced brain stimulation headset that aims to give wearers a meditative and stress-free state of mind. 

    BrainPatch co-founder and CEO, Dr Nickolai Vysokov, explains: “Our innovative headphones are designed to gain indirect access to the vagus and the vestibular nerves via electrodes placed just behind the ears. The vagus nerve regulates the ‘rest and digest’ response of the nervous system, and stimulating it is known to lead to reduction of stress, improvement of heart rate variability, better communication between the mind and the body, and an improved overall state of wellbeing in general.”

    Prototyping at mind-bending speed

    Ordinarily, the time and effort required to produce a range of working prototypes would take larger companies years to accomplish, let alone a startup, which is why BrainPatch.AI chose to use a range of Arduino boards for their initial designs and testing. What began as a simple Arduino UNO-based circuit quickly evolved into an AI-enabled neuromodulator, leveraging the Arduino Nano 33 IoT’s built-in internet connectivity. Mobile devices are connected to the board via Bluetooth® Low Energy to allow precision protocol delivery and ability to adjust the protocol through Python® and integration with other devices. Altogether, the capability to leverage Arduino’s vast collection of libraries and hardware ecosystem ensured rapid progress could be made in a cost-effective manner.

    Finding like-minded partners is the key to success!

    As a leading startup in the emerging neurotechnology space, BrainPatch.AI  had the opportunity to meet with Arduino co-founder Massimo Banzi at Hardware Pioneers Max 2023 in London. The team was eager to demonstrate how effective their neuro stimulation device is, and to share how integrating Arduino hardware enabled them to move quickly – and can also be the go-to solution for many other startups and neurotechnology enthusiasts in the future. Nickolai adds, “Arduino is simply the best solution for any hardware / middleware / software startup prototyping, and we were blessed to have Arduino products and third-party libraries available when we needed them the most, to kickstart the process of transformation from ideas onto the physical objects. And now, we are ready to share our technology and our libraries with the world and other startups. If you are a co-founder of a startup, you must try our device when you get overstretched and overstressed. It’s life changing – and all thanks to Arduino.” 

    The current iteration of the company’s e-Meditation and VR enhancement products along with more information about the science behind non-invasive neuromodulation can be found here on BrainPatch’s website.

    The post BrainPatch.AI: How a British neurotech startup built a working prototype fast, using Arduino Nano 33 IoT appeared first on Arduino Blog.

    Website: LINK

  • Adapting primary Computing resources for cultural responsiveness: Bringing in learners’ identity

    Adapting primary Computing resources for cultural responsiveness: Bringing in learners’ identity

    Reading Time: 6 minutes

    In recent years, the emphasis on creating culturally responsive educational practices has gained significant traction in schools worldwide. This approach aims to tailor teaching and learning experiences to better reflect and respect the diverse cultural backgrounds of students, thereby enhancing their engagement and success in school. In one of our recent research studies, we collaborated with a small group of primary school Computing teachers to adapt existing resources to be more culturally responsive to their learners.

    Teachers work together to identify adaptations to Computing lessons.
    At a workshop for the study, teachers collaborated to identify adaptations to Computing lessons

    We used a set of ten areas of opportunity to scaffold and prompt teachers to look for ways that Computing resources could be adapted, including making changes to the content or the context of lessons, and using pedagogical techniques such as collaboration and open-ended tasks. 

    Today’s blog lays out our findings about how teachers can bring students’ identities into the classroom as an entry point for culturally responsive Computing teaching.

    Collaborating with teachers

    A group of twelve primary teachers, from schools spread across England, volunteered to participate in the study. The primary objective was for our research team to collaborate with these teachers to adapt two units of work about creating digital images and vector graphics so that they better aligned with the cultural contexts of their students. The research team facilitated an in-person, one-day workshop where the teachers could discuss their experiences and work in small groups to adapt materials that they then taught in their classrooms during the following term.

    A shared focus on identity

    As the workshop progressed, an interesting pattern emerged. Despite the diversity of schools and student populations represented by the teachers, each group independently decided to focus on the theme of identity in their adaptations. This was not a directive from the researchers, but rather a spontaneous alignment of priorities among the teachers.

    An example slide from a culturally adapted activity to create a vector graphic emoji.
    An example of an adapted Computing activity to create a vector graphic emoji.

    The focus on identity manifested in various ways. For some teachers, it involved adding diverse role models so that students could see themselves represented in computing, while for others, it meant incorporating discussions about students’ own experiences into the lessons. However, the most compelling commonality across all groups was the decision to have students create a digital picture that represented something important about themselves. This digital picture could take many forms — an emoji, a digital collage, an avatar to add to a game, or even creating fantastical animals. The goal of these activities was to provide students with a platform to express aspects of their identity that were significant to them whilst also practising the skills to manipulate vector graphics or digital images.

    Funds of identity theory

    After the teachers had returned to their classrooms and taught the adapted lessons to their students, we analysed the digital pictures created by the students using funds of identity theory. This theory explains how our personal experiences and backgrounds shape who we are and what makes us unique and individual, and argues that our identities are not static but are continuously shaped and reshaped through interactions with the world around us. 

    Keywords for the funds of identity framework, drawing on work by Esteban-Guitart and Moll (2014) and Poole (2017).
    Funds of identity framework, drawing on work by Esteban-Guitart and Moll (2014) and Poole (2017).

    In the context of our study, this theory argues that students bring their funds of identity into their Computing classrooms, including their cultural heritage, family traditions, languages, values, and personal interests. Through the image editing and vector graphics activities, students were able to create what the funds of identity theory refers to as identity artefacts. This allowed them to explore and highlight the various elements that hold importance in their lives, illuminating different facets of their identities. 

    Students’ funds of identity

    The use of the funds of identity theory provided a robust framework for understanding the digital artefacts created by the students. We analysed the teachers’ descriptions of the artefacts, paying close attention to how students represented their identities in their creations.

    1. Personal interests and values 

    One significant aspect of the analysis centered around the personal interests and values reflected in the artefacts. Some students chose to draw on their practical funds of identity and create images about hobbies that were important to them, such as drawing or playing football. Others focused on existential  funds of identity and represented values that were central to their personalities, such as cool, chatty, or quiet.

    2. Family and community connections

    Many students also chose to include references to their family and community in their artefacts. Social funds of identity were displayed when students featured family members in their images. Some students also drew on their institutional funds, adding references to their school, or geographical funds, by showing places such as the local area or a particular country that held special significance for them. These references highlighted the importance of familial and communal ties in shaping the students’ identities.

    3. Cultural representation

    Another common theme was the way students represented their cultural backgrounds. Some students chose to highlight their cultural funds of identity, creating images that included their heritage, including their national flag or traditional clothing. Other students incorporated ideological aspects of their identity that were important to them because of their faith, including Catholicism and Islam. This aspect of the artefacts demonstrated how students viewed their cultural heritage as an integral part of their identity.

    Implications for culturally responsive Computing teaching

    The findings from this study have several important implications. Firstly, the spontaneous focus on identity by the teachers suggests that identity is a powerful entry point for culturally responsive Computing teaching. Secondly, the application of the funds of identity theory to the analysis of student work demonstrates the diverse cultural resources that students bring to the classroom and highlights ways to adapt Computing lessons in ways that resonate with students’ lived experiences.

    An example of an identity artefact made by one of the students in a culturally adapted lesson on vector graphics.
    An example of an identity artefact made by one of the students in the culturally adapted lesson on vector graphics. 

    However, we also found that teachers often had to carefully support students to illuminate their funds of identity. Sometimes students found it difficult to create images about their hobbies, particularly if they were from backgrounds with fewer social and economic opportunities. We also observed that when teachers modelled an identity artefact themselves, perhaps to show an example for students to aim for, students then sometimes copied the funds of identity revealed by the teacher rather than drawing on their own funds. These points need to be taken into consideration when using identity artefact activities. 

    Finally, these findings relate to lessons about image editing and vector graphics that were taught to students aged 8- to 10-years old in England, and it remains to be explored how students in other countries or of different ages might reveal their funds of identity in the Computing classroom.

    Moving forward with cultural responsiveness

    The study demonstrated that when Computing teachers are given the opportunity to collaborate and reflect on their practice, they can develop innovative ways to make their teaching more culturally responsive. The focus on identity, as seen in the creation of identity artefacts, provided students with a platform to express themselves and connect their learning to their own lives. By understanding and valuing the funds of identity that students bring to the classroom, teachers can create a more equitable and empowering educational experience for all learners.

    Two learners do physical computing in the primary school classroom.

    We’ve written about this study in more detail in a full paper and a poster paper, which will be published at the WiPSCE conference next week. 

    We would like to thank all the researchers who worked on this project, including our collaborations with Lynda Chinaka from the University of Roehampton, and Alex Hadwen-Bennett from King’s College London. Finally, we are grateful to Cognizant for funding this academic research, and to the cohort of primary Computing teachers for their enthusiasm, energy, and creativity, and their commitment to this project.

    Website: LINK

  • Raspberry Pi PLC 38R review

    Raspberry Pi PLC 38R review

    Reading Time: 3 minutes

    While the company also produces PLCs based on Arduino and ESP32 microcontrollers, the model reviewed here is one of the Raspberry Pi-based range and therefore benefits from superior processing power – an advantage when handling multiple real-time processes – and the ability to run a full Linux operating system, the familiar Raspberry Pi OS, by default. You can connect the unit to a monitor via HDMI if needed, but in most cases operators will SSH in from another computer.

    The left side of the PLC 38R features six more relay connections, opto-isolated analogue/digital inputs,
and dip switches

    Raspberry Pi power

    The PLC 38R model is based around a standard Raspberry Pi 4 (with 2GB, 4GB, or 8GB RAM), with the optional addition of up to two extra communications boards such as 4G cellular and LoRA. Naturally, Wi-Fi and Bluetooth are built-in, thanks to Raspberry Pi 4, along with dual Ethernet ports (the board’s built-in port plus an extra one).

    Raspberry Pi 4 is secreted inside a robust plastic case with a large metal heatsink on the base. The whole unit weighs 711g and is mountable on a DIN rail. The ambient operating temperature is 0 to 50°C, with a humidity level of 10 to 90%, while the case has a shockproof resistance of 80m/s2 in the X, Y, and Z axes.

    The front of the unit features status LEDs, an extra Ethernet port, and access to Raspberry Pi 4’s power and micro-HDMI ports, plus 3.5mm AV jack

    Cutouts in the case provide access to Raspberry Pi 4’s USB and Ethernet ports on one side and – in a recess – micro-HDMI ports and the USB-C power port. You can’t power the whole unit that way, however: instead you’ll need to connect a 12–24V DC supply via two screw terminals, making sure the polarity is correct. Industrial Shields offers a suitable DIN rail power supply for €25.

    To protect the electronics and avoid data corruption during sudden voltage drops in the event of a power outage, the PLC 38R has an integrated UPS shield. When the UPS kicks in, the outputs maintain their last activation state until the unit is rebooted. A real-time clock is also included, powered by a button battery – easily replaceable by removing a plastic panel. Insulation resistance is provided to the tune of 20mΩ at 500VDC between the AC terminals and protective earth terminal. Dialectic strength is rated as 2300 VAC at 50/60Hz for one minute with a maximum leakage current of 10mA.

    Pinned to the ground

    The most important feature of any PLC is its range of I/Os. Raspberry Pi PLC 38R is absolutely loaded with them, divided into zones and connectable via removable screw terminal blocks. On the right-hand side of the unit are sets of analogue (0 to 10V) and digital/PWM outputs. Underneath, there’s a long row of I/O and power/ground pins covering standard protocols such as SPI, I2C, and RS485, plus a couple of direct GPIO pin connections.

    The top of the robust housing includes technical information; the rear of the unit can be mounted on a DIN rail

    The remainder of that side is taken up by ten sets of relay switch connections. Another six are found on the left side of the unit, along with opto-isolator protected digital/analogue inputs, configurable by two sets of four dip switches. Note that other Raspberry Pi PLC models feature varying numbers of I/Os and relays, so you can choose the one that best suits your requirements.

    The downloadable documentation is fairly detailed and features examples of how to use pre-installed Bash scripts to read various inputs, and trigger outputs and relays, so it’s fairly easy to get started.

    Verdict

    9/10

    Protected by a robust case, this PLC is packed with I/Os and relays, making it suitable for a wide variety of industrial applications.

    Specs

    Processing: Raspberry Pi 4 with 2GB, 4GB, or 8GB RAM

    I/O: 8 × analogue/digital opto-isolated inputs (5-24V), 4 × digital opto-isolated inputs, 16 × relay outputs, 6 × analogue outputs (0-10V), 6 × digital/PWM outputs, I2C, SPI, RS485, RS232/TT

  • Two NEW Arduino Plug and Make Kit projects recreate iconic vintage games

    Two NEW Arduino Plug and Make Kit projects recreate iconic vintage games

    Reading Time: 4 minutes

    The Plug and Make Kit is a toolbox you can use for infinite ideas. So what happens if you ask a mix of Arduino designers, engineers, and managers to sit down and brainstorm new projects to have fun with it? Well, at least one of them is guaranteed to come up with an adorable, old-school, slightly addictive video game. 

    That’s exactly how Luca Doglione developed Flappy LED and LED Pong, during a “Make Tank” workshop we held in our Turin, Italy office a few weeks ago!

    Meet Luca Doglione, Plug and Make Kit Star

    Doglione is an engineering manager for the Arduino software and cloud teams, and one of the key people behind our website, cloud services, and course platform. He likes games in any shape or form, from board games to competitive computer games to vintage 2D arcade games. During the workshop, he was inspired by the different types of Modulino nodes and how they can be used together.

    Flappy LED

    Using Modulino Distance, Modulino Knob, Modulino Buzzer, and Modulino Buttons, Doglione quickly came up with a simple way to interact with the LED matrix on the Arduino UNO R4 WiFi, all of which are included in the kit. 

    The goal of the game is to guide an LED dot up and down to avoid obstacles as you go – just like you would do with the bird in Flappy Bird. The longer you are able to avoid collisions and keep the LED moving, the higher the score!

    You can control the movement of the LED light in two alternative ways: turning the knob, or moving your hand up and down above the distance sensor. You choose which mode you prefer by simply pressing the corresponding button on Modulino Buttons (A for the encoder or C for the distance sensor). 

    Follow the full tutorial on Project Hub to build this quirky game yourself, and let us know how you customize or expand it. The sky’s the limit!

    LED Pong

    Doglione worked out Flappy LED so quickly that he had time to ideate a second game. He immediately thought of the classic Pong, and created his own version with Plug and Make Kit. This project is just as portable and easy to recreate as the first, and can be played by two people together. 

    LED Pong requires two Modulino Knob: since each kit includes one per type of the seven nodes currently available, it is also a great idea for a collaborative making session with a friend! 

    The knobs are used to move the paddle and bounce the ball back and forth. Missing the ball gives the other player one point – as neatly displayed on the Modulino Pixel. The first to reach five points wins! 

    The full tutorial is here on Project Hub: try it out, and you’ll quickly bounce from nostalgia to excitement over how many new ideas Plug and Make Kit will unlock!

    From reimagining old games to learning new tricks!

    After seeing his playful ideas come together so easily, Doglione says, “My favorite part of Plug and Make Kit was being able to bypass the electronics to focus on user experience and interaction. This really unleashed my creativity. Having to figure out circuits always stopped me from tackling complex hardware projects – and I have a degree in computer science! Having that little yellow base and modular Modulino nodes made it really satisfying to see my project looking neat.”

    What do you think about Doglione’s games? And what vintage games could you recreate with Arduino Plug and Make Kit? 

    Flappy LED

    LED Pong

    The post Two NEW Arduino Plug and Make Kit projects recreate iconic vintage games appeared first on Arduino Blog.

    Website: LINK

  • Experience AI at UNESCO’s Digital Learning Week

    Experience AI at UNESCO’s Digital Learning Week

    Reading Time: 5 minutes

    Last week, we were honoured to attend UNESCO’s Digital Learning Week conference to present our free Experience AI resources and how they can help teachers demystify AI for their learners.  

    A group of educators at a UNESCO conference.

    The conference drew a worldwide audience in-person and online to hear about the work educators and policy makers are doing to support teachers’ use of AI tools in their teaching and learning. Speaker after speaker reiterated that the shared goal of our work is to support learners to become critical consumers and responsible creators of AI systems.

    In this blog, we share how our conference talk demonstrated the use of Experience AI for pursuing this globally shared goal, and how the Experience AI resources align with UNESCO’s newly launched AI competency framework for students.

    Presenting the design principles behind Experience AI

    Our talk about Experience AI, our learning programme developed with Google DeepMind, focused on the research-informed approach we are taking in our resource development. Specifically, we spoke about three key design principles that we embed in the Experience AI resources:

    Firstly, using AI and machine learning to solve problems requires learners and educators to think differently to traditional computational thinking and use a data-driven approach instead, as laid out in the research around computational thinking 2.0.

    Secondly, every word we use in our teaching about AI is important to help young people form accurate mental models about how AI systems work. In particular, we focused our examples around the need to avoid anthropomorphising language when we describe AI systems. Especially given that some developers produce AI systems with the aim to make them appear human-like in their design and outputs, it’s important that young people understand that AI systems are in fact built and designed by humans.

    Thirdly we described how we used the SEAME framework we adapted from work by Jane Waite (Raspberry Pi Foundation) and Paul Curzon (Queen Mary University, London) to categorise hundreds of AI education resources and inform the design of our Experience AI resources. The framework offers a common language for educators when assessing the content of resources, and when supporting learners to understand the different aspects of AI systems. 

    By presenting our design principles, we aimed to give educators, policy makers, and attendees from non-governmental organisations practical recommendations and actionable considerations for designing learning materials on AI literacy.   

    How Experience AI aligns with UNESCO’s new AI competency framework for students

    At Digital Learning Week, UNESCO launched two AI competency frameworks:

    • A framework for students, intended to help teachers around the world with integrating AI tools in activities to engage their learners
    • A framework for teachers, “defining the knowledge, skills, and values teachers must master in the age of AI”

    AI competency framework for students

    We have had the chance to map the Experience AI resources to UNESCO’s AI framework for students at a high level, finding that the resources cover 10 of the 12 areas of the framework (see image below).

    An adaptation of a summary table from UNESCO’s new student competency framework (CC-BY-SA 3.0 IGO), highlighting the 10 areas covered by our Experience AI resources

    For instance, throughout the Experience AI resources runs a thread of promoting “citizenship in the AI era”: the social and ethical aspects of AI technologies are highlighted in all the lessons and activities. In this way, they provide students with the foundational knowledge of how AI systems work, and where they may work badly. Using the resources, educators can teach their learners core AI and machine learning concepts and make these concepts concrete through practical activities where learners create their own models and critically evaluate their outputs. Importantly, by learning with Experience AI, students not only learn to be responsible users of AI tools, but also to consider fairness, accountability, transparency, and privacy when they create AI models.  

    Teacher competency framework for AI 

    UNESCO’s AI competency framework for teachers outlines 15 competencies across 5 dimensions (see image below).  We enjoyed listening to the launch panel members talk about the strong ambitions of the framework as well as the realities of teachers’ global and local challenges. The three key messages of the panel were:

    • AI will not replace the expertise of classroom teachers
    • Supporting educators to build AI competencies is a shared responsibility
    • Individual countries’ education systems have different needs in terms of educator support

    All three messages resonate strongly with the work we’re doing at the Raspberry Pi Foundation. Supporting all educators is a fundamental part of our resource development. For example, Experience AI offers everything a teacher with no technical background needs to deliver the lessons, including lesson plans, videos, worksheets and slide decks. We also provide a free online training course on understanding AI for educators. And in our work with partner organisations around the world, we adapt and translate Experience AI resources so they are culturally relevant, and we organise locally delivered teacher professional development. 

    A summary table from UNESCO’s new teacher competency framework (CC-BY-SA 3.0 IGO)

     The teachers’ competency framework is meant as guidance for educators, policy makers, training providers, and application developers to support teachers in using AI effectively, and in helping their learners gain AI literacy skills. We will certainly consult the document as we develop our training and professional development resources for teachers further.

    Towards AI literacy for all young people

    Across this year’s UNESCO’s Digital Learning Week, we saw that the role of AI in education took centre stage across the presentations and the informal conversations among attendees. It was a privilege to present our work and see how well Experience AI was received, with attendees recognising that our design principles align with the values and principles in UNESCO’s new AI competency frameworks.

    A conference table setup with a pair of headphones resting on top of a UNESCO brochure.

    We look forward to continuing this international conversation about AI literacy and working in aligned ways to support all young people to develop a foundational understanding of AI technologies.

    Website: LINK

  • This Strandbeest-style coffee table can deliver drinks

    This Strandbeest-style coffee table can deliver drinks

    Reading Time: 2 minutes

    More than 30 years ago, Dutch artist Theo Jansen began astounding the world with his Strandbeesten walking sculptures. Even after decades, they have an almost mythical allure thanks to the incredibly fluid way in which they walk. They’re clearly constructs, but with gaits that are almost organic. Inspired by his fellow Dutchman, Giliam de Carpentier built a motorized Strandbeest-style coffee table capable of delivering drinks.

    This coffee table, dubbed “Carpentopod,” walks on six leg mechanisms that look and operate a lot like those of a Strandbeest. They convert rotary motion into complex foot movement through a series of rigid linkages.

    de Carpentier was able to develop the legs’ gait and physical geometry using software he first created way back in 2008. It automatically optimizes the design through a process very similar to natural selection, with the most successful descendants going on to reproduce and ultimately yield very effective geometry for the giving constraints. de Carpentier’s software was efficient enough to evolve dozens of generations every single second, so it produced an optimized leg design in short order.

    In this case, “optimal” mostly means “smooth.” When walking, it almost looks as stable as if it were rolling on wheels. It is, therefore, perfectly capable of carrying drinks without spilling them.

    In contrast to the classic Strandbeesten, de Carpentier wanted this coffee table to be controllable. So, it has a pair of geared brushless DC motors to drive the legs. Like a tank, it steers by turning one side’s motor faster than another. An Arduino Nano board controls those motors, which have Hall effect encoders for closed-loop feedback, according to input that it receives from a Nintendo Wii Nunchuk via a Bluetooth module. With power from a large hobby LiPo battery back, it can roam around de Carpentier’s living room at his command. 

    [youtube https://www.youtube.com/watch?v=xKDY4yWxfJM?feature=oembed&w=500&h=281]

    The post This Strandbeest-style coffee table can deliver drinks appeared first on Arduino Blog.

    Website: LINK

  • Meet Andrew Gregory: a new face in The MagPi

    Meet Andrew Gregory: a new face in The MagPi

    Reading Time: 3 minutes

    What is your history with making?

    A lot of people who get into making reckon that they used to take things apart and put them back together when they were kids. Whenever I tried doing that I got told off. Instead, whenever anything broke, it was my job to take it apart and try to work out how to fix it. That way, it wouldn’t matter if I broke it further. I fixed a broken lawnmower for my mum once and was extremely chuffed with myself!

    I never did my electronics at school – I still have a scar on my finger from defending myself from a 14-year-old psychopath with a soldering iron – but I got into it a few years ago when I made my first electric guitar effect. It’s a simple device, with only a handful of components, but it’s identical to the vintage Fuzz Face pedal used by Jimi Hendrix, right down to the new old stock transistors. Pretty much anyone can put one of those together, but mine is unique because I made it.

    Despite the scar, Andrew can now solder without teenagers attacking him

    When did you first learn about Raspberry Pi?

    Ooh, back before it was available. I was one of the first lot of customers who placed an order for this super-cheap computer back in 2012. Back then they didn’t have the supply chain they do now, so it took ages to arrive, and when it eventually did my attention had moved on, so the Raspberry Pi just sat in a drawer somewhere. I think I still have it.

    At the time I was working on a Linux magazine. We’d heard about this $25 computer and thought it would be lovely to make it famous, so we gave the Raspberry Pi its first magazine cover. Without me, this company would be nowhere!

    What is your favourite thing you’ve made with Raspberry Pi?

    My favourite Raspberry Pi project is still my first one: making an LED flash on and off. I had tried several times to learn computer programming, and never got very far. I can very clearly remember being shown how to write ‘hello world’ in Python by a colleague, beaming from ear to ear as if I was gaining the key to a magic kingdom, but I just didn’t get it. How is writing a script that prints ‘hello world’ any different from typing it in yourself on a word processor? It takes longer, it’s more keystrokes… To this day I think that teaching students to start with ‘hello world’ is counterproductive.

    But learning to flash an LED on and off is completely different. If you’ve got a physical example in front of you of what the code is doing, then it’s easy to see how you can go from there to turning a motor on and off, or controlling a robotic arm, or a drone, or an automatic plant watering system.

    We’d like to contest that it was Andrew’s Linux magazine that helped Raspberry Pi – it was other Features Ed Rob’s Linux magazine that did

    What future project plans do you have?

    After the summer we’ve had, my dream project would probably be a solar-powered laser turret to zap the slugs that have destroyed my pumpkins this year. I don’t want to put poison down for them, but I reckon an automated, AI laser might be enough to make them turn around and leave my allotment alone.

  • Press play for exclusive rewards and experiences during Zedd In The ParkPress play for exclusive rewards and experiences during Zedd In The ParkGeneral Manager

    Press play for exclusive rewards and experiences during Zedd In The ParkPress play for exclusive rewards and experiences during Zedd In The ParkGeneral Manager

    Reading Time: < 1 minute

    Check out the Google Play Playground at Zedd In The Park in Los Angeles

    If you’re attending Zedd In The Park, you’re invited to come play at The Google Play Playground which will be open September 6-7. The multi-level, 3,600-square-foot playground will elevate your festival experience (literally!) with the best view of the main stage in the park, glow-in-the-dark games, an interactive dance floor and more. Play Points members get access to a fast-track entrance, a members-only bonus level and exclusive rewards throughout the experience including custom Zedd merchandise, collectible posters and Play Points bonuses.

  • ReComputer R1000 industrial grade edge IoT controller review

    ReComputer R1000 industrial grade edge IoT controller review

    Reading Time: 2 minutes

    Out of the box it looks a bit like an unassuming full Raspberry Pi in a nice heat-sink case, albeit a fair bit chunkier. The size comes from the sheer number of features packed into the box – UPS modules, power-over-Ethernet, multiple RJ45 ports, 4G modules, LoRa capabilities, external antenna ports, SSD slot, an array of terminals, and a Compute Module 4 to power it all.

    A lot of these add-ons are optional and you can build your preferred R1000 online or get one of the pre-made packages – we specifically have the R1025 build for review, which comes with 4GB RAM and 32GB eMMC – and there are various modules for adding 4G or LoRaWAN that range in price and functionality.

    The rest of the connectors on the underside of the box

    Good to go

    It comes pre-assembled out of the box like the rest of the range, and is dead easy to disassemble and update, swap out, or add compatible hardware such as the optional extras. There’s a comprehensive guide in the Seeed Studio docs which also covers how to flash a new OS to the hardware. Raspberry Pi OS is supported as you’d expect, with extra drivers you’ll need to install when flashing from scratch, and there’s also official Ubuntu support. While a product like this will largely be used headless, there is a HDMI port in case you need to do some work at the box itself, such as turn on SSH if you forgot during the flashing process.

    The hardware comes with a little clip to mount it on its side, making it jut out from whatever surface it’s attached to, which seems a little precarious. Still, it holds strong and does let you keep all the various I/O easily accessible, with the all-important serial ports on the front.

    Full support

    Thanks to the installed CM4 it is very easy to use and customise, and it’s nice and quick as well. The build quality is really top notch too, just as we’d expected, and the docs are fairly comprehensive whether you want to use it in an industrial setting or even at home as your IoT controller with Home Assistant – and at the lower end of its price scale it’s not that uncompetitive for using at home either if you have some serious home automation requirements.

    Verdict

    10/10

    Very complete piece of hardware that you can customise for nearly  any use of IoT, from consumer to industry

    Specs

    Interfaces: 1×Gigabit Ethernet (with PoE), 1×100MB Ethernet, 3×3-pin RS485 Terminal Block, 2×USB-A 2.0 Host, 1×USB C (for flashing OS), 1x HDMI Wireless protocols: Wi-Fi, BLE, LoRA, 4G LTE, Zigbee Power: 2~24V AC/9~36V DC, idle 2.88 W, full load 5.52W, overvoltage protection 40V

  • Giving a teenage pet turtle a synthetic pizza-ordering voice

    Giving a teenage pet turtle a synthetic pizza-ordering voice

    Reading Time: 2 minutes

    If B. F. Skinner’s famous research proved anything, it is that virtually all animals are capable of some degree of training. Training is really just taking advantage of an animal’s natural inclination to adapt for survival, which is something all living organisms do. With that in mind, YouTuber Bao’s Builds constructed a box to give his teenage pet turtle a synthetic voice capable of ordering pizza.

    The turtle, Lightning, just reached its 18th birthday and Bao decided that this would be the perfect gift. Like those mats covered in buttons that really smart dogs press with their paws to talk, Bao wanted Lightning to have a device with buttons assigned to specific requests, like “feed me” or “play with me.” Turtles aren’t quite as intelligent as border collies, so Bao decided the device only needed four buttons — turtles have pretty modest wants and needs, anyway.

    Aside from the buttons themselves, which are standard arcade buttons, the key hardware components for this project are an Arduino Nano, a generic sound module, and a speaker. That sound module stores audio clips on an SD card to play whenever the Arduino makes a request. It also has a built-in amplifier, so it can feed a signal directly to the speaker. The sound clips contain realistic AI-generated voices: one for requesting food, one for requesting pets, and one for expressing love.

    The final button orders pizza, which is the favorite food of teenage turtles (mutant or otherwise). That works by playing a sound file that tells an Amazon Echo to have Alexa place an order at Dominos. 

    [youtube https://www.youtube.com/watch?v=_6mq4HIqesY?feature=oembed&w=500&h=281]

    Sadly, Lightning seems to have struggled to grasp the concept — maybe Skinner was wrong, after all. But that’s probably a good thing for limiting the Bao’s Dominos budget.

    The post Giving a teenage pet turtle a synthetic pizza-ordering voice appeared first on Arduino Blog.

    Website: LINK

  • Arduino CLI 1.0 is out!

    Arduino CLI 1.0 is out!

    Reading Time: 2 minutes

    We are excited to share some incredible news with you all! We recently released the Arduino CLI version 1.0.0, marking a significant milestone for our software. This release is a big deal because it signifies the stabilization of the software API, bringing greater reliability and predictability to our users and developers leveraging it in their projects.

    The Arduino CLI offers multiple ways to integrate and utilize its capabilities:

    • Command line interface: The most straightforward way to use Arduino CLI is through its command line interface. This allows you to manage boards, libraries, compile sketches, and upload code to your Arduino boards with ease.
    • gRPC interface: For more advanced use cases, the Arduino CLI provides a gRPC interface. This enables developers to interact with the CLI using their preferred programming language, allowing for the creation of custom applications and services that leverage the full functionality of the Arduino ecosystem. The gRPC interface is particularly useful for building complex workflows and creating custom IDEs or plug-ins.
    • Go module: You can also use Arduino CLI’s packages within your own applications written in the Go programming language. By importing the source code, you can embed the functionality of the Arduino CLI directly into your projects. This approach is beneficial for developers who want to integrate the tool seamlessly into their own software.

    You can find more information about the different ways the Arduino CLI can be integrated in your software in the official documentation.

    It’s been almost two months since the release of version 1.0.0, and we are now at version 1.0.4. In this short time, we have been working hard to address issues, fix bugs, and enhance the software. We are committed to delivering the best possible experience for our users, and each new version brings us closer to that goal.

    For a comprehensive overview of the features included in Arduino CLI version 1.0.0, please refer to the official release notes. This list details all the enhancements, improvements, and new functionalities that make this release a significant step forward for our community.

    To minimize the impact on our users, we accumulated almost all of the breaking changes for the 1.0.0 release, allowing us to clean up early design errors and other issues in one major event. From now on, our backward compatibility policy is designed to ensure stability and predictability for our community, specifically for the Arduino CLI. For more details about this policy, you can refer to the relevant documentation.

    As we continue to build upon this foundation, we are looking forward to delivering even more improvements and new features in future releases. Thank you to our amazing community for your support and feedback – we couldn’t have reached this milestone without you. Stay tuned for future updates, and thank you for being part of this journey! 

    The post Arduino CLI 1.0 is out! appeared first on Arduino Blog.

    Website: LINK

  • Experience AI expands to reach over 2 million students

    Experience AI expands to reach over 2 million students

    Reading Time: 4 minutes

    Two years ago, we announced Experience AI, a collaboration between the Raspberry Pi Foundation and Google DeepMind to inspire the next generation of AI leaders.

    Today I am excited to announce that we are expanding the programme with the aim of reaching more than 2 million students over the next 3 years, thanks to a generous grant of $10m from Google.org. 

    Why do kids need to learn about AI

    AI technologies are already changing the world and we are told that their potential impact is unprecedented in human history. But just like every other wave of technological innovation, along with all of the opportunities, the AI revolution has the potential to leave people behind, to exacerbate divisions, and to make more problems than it solves.

    Part of the answer to this dilemma lies in ensuring that all young people develop a foundational understanding of AI technologies and the role that they can play in their lives. 

    An educator points to an image on a student's computer screen.

    That’s why the conversation about AI in education is so important. A lot of the focus of that conversation is on how we harness the power of AI technologies to improve teaching and learning. Enabling young people to use AI to learn is important, but it’s not enough. 

    We need to equip young people with the knowledge, skills, and mindsets to use AI technologies to create the world they want. And that means supporting their teachers, who once again are being asked to teach a subject that they didn’t study. 

    Experience AI 

    That’s the work that we’re doing through Experience AI, an ambitious programme to provide teachers with free classroom resources and professional development, enabling them to teach their students about AI technologies and how they are changing the world. All of our resources are grounded in research that defines the concepts that make up AI literacy, they are rooted in real world examples drawing on the work of Google DeepMind, and they involve hands-on, interactive activities. 

    The Experience AI resources have already been downloaded 100,000 times across 130 countries and we estimate that 750,000 young people have taken part in an Experience AI lesson already. 

    In November 2023, we announced that we were building a global network of partners that we would work with to localise and translate the Experience AI resources, to ensure that they are culturally relevant, and organise locally delivered teacher professional development. We’ve made a fantastic start working with partners in Canada, India, Kenya, Malaysia, and Romania; and it’s been brilliant to see the enthusiasm and demand for AI literacy from teachers and students across the globe. 

    Thanks to an incredibly generous donation of $10m from Google.org – announced at Google.org’s first Impact Summit  – we will shortly be welcoming new partners in 17 countries across Europe, the Middle East, and Africa, with the aim of reaching more than 2 million students in the next three years. 

    AI Safety

    Alongside the expansion of the global network of Experience AI partners, we are also launching new resources that focus on critical issues of AI safety. 

    A laptop surrounded by various screens displaying images, videos, and a world map.

    AI and Your Data: Helping young people reflect on the data they are already providing to AI applications in their lives and how the prevalence of AI tools might change the way they protect their data.

    Media Literacy in the Age of AI: Highlighting the ways AI tools can be used to perpetuate misinformation and how AI applications can help combat misleading claims.

    Using Generative AI Responsibly: Empowering young people to reflect on their responsibilities when using Generative AI and their expectations of developers who release AI tools.

    Get involved

    In many ways, this moment in the development of AI technologies reminds me of the internet in the 1990s (yes, I am that old). We all knew that it had potential, but no-one could really imagine the full scale of what would follow. 

    We failed to rise to the educational challenge of that moment and we are still living with the consequences: a dire shortage of talent; a tech sector that doesn’t represent all communities and voices; and young people and communities who are still missing out on economic opportunities and unable to utilise technology to solve the problems that matter to them. 

    We have an opportunity to do a better job this time. If you’re interested in getting involved, we’d love to hear from you.

    Website: LINK

  • Thumby Color mini gaming device review

    Thumby Color mini gaming device review

    Reading Time: 3 minutes

    The faster dual-core RP2350 processor running at 150Mhz enables Thumby Color to run an 0.85-inch 128×128px 16-bit backlit colour TFT LCD display inside an absolutely miniscule case measuring 51.6 × 30 × 11.6mm. The case has a hole through it enabling Thumby Color to double up as a keychain fob; enabling you to play games when you’re not unlocking your door.

    Thumby Color comes with pre-loaded with six games (with more planned). These have been custom-built by Glitchbit using the Thumby Color API and showcase what you can create with the device. With names like Bust a Thumb, Solitaire and 4connect they take inspiration from classic arcade and board games.

    What surprised us was how playable these games are. We expected it to be a novelty and, while it’s not exactly a Steam Deck, we found Thumby Color games to run perfectly well.

    Get developing

    Two versions of Thumby Color are currently available. There’s the Thumby Color, on Kickstarter and a slightly larger development version with larger buttons. We have both in for testing here.

    Both have nine buttons: a four-way D-pad, A/B buttons, L/R bumpers, and a Menu button. There’s an on/off rocker switch and a USB-C connection for charging and connectivity alongside a 110mAh Rechargeable LiPo battery. The presence of a tiny rumble motor is a particularly nice touch.

    Like the original Thumby being able to play games on a 2.1cm display isn’t the main attraction (although we found it a surprisingly fun way to pass the time). The real deal is the ability to investigate the API and create games yourself by following the tutorials.

    To this end, Thumby has an online Code Editor and a starter guide. The web Code Editor is undergoing some integration with Thumby, and we found the filesystem not fully functional at the time of testing.

    The second approach is to use Thonny IDE with the MicroPython (Raspberry Pi Pico) interpreter. We prefer coding in Thonny IDE although the Code Editor has better integration and a built-in Arcade section with over 100 games from the original Thumby. All of these are compatible with Thumby Color, and it’s where you’ll find new games as they become available. Tiny Circuits tells us that Thumby Color support will be added to the Code Editor soon.

    There’s also a vibrant forum for Thumby (and other Tiny Circuits projects) that you can find at magpi.cc/tinyforum.

    We enjoyed Thumby Color tremendously, and it’s a great showcase for the extra power of Raspberry Pi’s RP2350 microcontroller.

    Verdict

    9/10

    An incredibly fun device that’s a great showcase for RP2350. Thumby Color shrinks gaming down to a keychain and enables you to code your own games. The detailed API and tutorials make Thumby special and there’s much creative fun to find here.

    Specs

    Processor: 150MHz ~ 300MHz Dual Core Raspberry Pi RP2350 processor (with FPU)

    Memory: 520KiB SRAM

    Storage: 16MiB flash

    Screen: 0.85” 128×128px 16-bit Backlit Color TFT LCD Display

    Power: 110mAh rechargeable LiPo battery, for around two hours of gameplay

    Buttons: Four-way rocker D-Pad, Two A/B face buttons, Two shoulder bumpers, Menu button

    Audio: 4kHz buzzer

    Haptics: DC 14,000RPM 0.24g weight vibration motor

    Dimensions: 51.6 × 30.0 × 11.6mm

  • 5 new Android features to help you explore, search for music and more5 new Android features to help you explore, search for music and moreDirector, Product Management

    5 new Android features to help you explore, search for music and more5 new Android features to help you explore, search for music and moreDirector, Product Management

    Reading Time: < 1 minute

    TalkBack, Android’s screen reader that is designed for people who are blind or have low vision, will now make digital images even more accessible with detailed audio descriptions powered by Gemini models on supported devices. Whether you’re looking at online product images, photos in your camera roll, pictures in text messages or images of what’s happening on social media, Android’s screen reader uses the best of Google AI to bring images to life.

    Website: LINK

  • Android Earthquake Alerts now available across the U.S.Android Earthquake Alerts now available across the U.S.Group Product Manager

    Android Earthquake Alerts now available across the U.S.Android Earthquake Alerts now available across the U.S.Group Product Manager

    Reading Time: < 1 minute

    Once the shaking is over, you can tap for tips on what to do next. You can also see earthquake information from Android Earthquake Alerts in Google Search – simply search for “Earthquake near me”.

    Collaboration for continuous improvement

    We’ve collaborated with renowned seismologists like Dr. Lucy Jones, dedicated academic researchers like Dr. Jeannette Sutton, and disaster response organizations like the Global Disaster Preparedness Center (GDPC) to inform and improve Android Earthquake Alerts. Actively engaging with experts in the field and analyzing data after detected seismic events allows us to continuously improve the Android Earthquake Alerts System.

    Stay safe with Android

    Your safety is our priority, and we are continuously working to provide you with the tools and information you need to stay prepared during emergencies. We remain dedicated to collaborating with the earthquake community, emergency managers and device manufacturers to further advance earthquake alerts and response efforts.

    Learn more about supported countries and how to enable Android Earthquake Alerts compatible devices. Keep a lookout for more information about the science and technology behind the Android Earthquake Alerts System in an upcoming paper.

    Website: LINK

  • Join the UK Bebras Challenge 2024

    Join the UK Bebras Challenge 2024

    Reading Time: 4 minutes

    The UK Bebras Challenge, the nation’s largest computing competition, is back and open for entries from schools. This year’s challenge will be open for entries from 4–15 November. Last year, over 400,000 students from across the UK took part. Read on to learn how your school can get involved.

    What is UK Bebras?

    UK Bebras is a free-to-enter annual competition that is designed to spark interest in computational thinking among students aged 6 to 19 by providing engaging and thought-provoking activities. The 45-minute challenge is accessible to everyone, offering age-appropriate interactive questions for students at different levels, including a tailored version for students with severe sight impairments. 

    The questions are designed to give every student the opportunity to showcase their potential, whether they excel in maths or computing, or not. With self-marking questions and no programming required, it’s easy for schools to participate.

    “Thank you for another fantastic Bebras event! My students have really enjoyed it. This is the first year that one of my leadership team actually did the Bebras to understand what we are preparing the children for — she was very impressed!” Reference 5487

    A class of primary school students do coding at laptops.

    “I really enjoyed doing the Bebras challenge yesterday. It was the most accessible it’s ever been for me as a braillist/screen reader user.” Reference 5372

    What does a UK Bebras question look like?

    The questions are inspired by classic computing problems but are presented in a fun, age-appropriate way. For instance, a puzzle for 6- to 8-year-olds might involve guiding a hungry tortoise along the most efficient path across a lawn, while 16- to 19-year-olds could be asked to sort members for quiz teams based on who knows who — a challenging problem relating to graph theory.

    Here’s a question we ran in 2023 for the Castors group (ages 8 to 10). Can you solve it? 

    Planting carrots

    A robotic rabbit is planting carrot seeds in these four earth mounds.

    It can respond to these commands:

    jump left to the next mound
    jump right to the next mound
    plant a carrot seed in the mound you are on

    Here is a sequence of commands for the rabbit:


    We don’t know which mound the rabbit started on, but we do know that, when it followed this sequence, it placed each of three carrot seeds on different mounds.

    Question: 

    Which picture shows how the carrot seeds could have been planted by the robot following the sequence of commands?

    Example puzzle answer

    The correct answer is:

    The image below shows the route the robot takes by following the instructions:

    After executing the first two commands

    the rabbit places the seed on the mound to the far right:

    It then executes the commands

    and lays the next seed:

    Then it jumps to the left twice and lays the last seed

    So the carrot seeds will be on the hills in the order:

    Did you get it right?

    How do I get my school involved?

    Visit the UK Bebras website for more information and to register your school. Once you’ve registered, you’ll get access to the entire UK Bebras back catalogue of questions, allowing you to create custom quizzes for your students to tackle at any time throughout the year. These quizzes are self-marking, and you can download your students’ results to keep track of their progress. Schools have found these questions perfect for enrichment activities, end-of-term quizzes, lesson starters, and even full lessons to develop computational thinking skills.

    Join for free at bebras.uk/admin.

    Website: LINK

  • Welcoming HackSpace

    Welcoming HackSpace

    Reading Time: 2 minutes

    From our perspective, this gives us a bigger and better magazine. It also opens up a new aspect of making that we haven’t traditionally given as much thought to as HackSpace. While The MagPi magazine tends to focus heavily on Raspberry Pi products – it is “the Official Raspberry Pi magazine” after all – HackSpace covers a much wider range of electronic boards and even maker projects that feature little or no electronics. In particular, HackSpace features 3D printing, and it’s fascinating to see features like Objet 3d’art make their way into The MagPi. And we love their tutorials and group tests.

    Andrew Gregory, HackSpace’s Features Editor is now working on The MagPi, and this month he wrote up an excellent Pico 2 feature. We’ve also picked up a stable of HackSpace freelance writers who will be bringing their skills to our combined publication.

    In the moment

    Still: I feel for HackSpace readers. It’s never easy when a magazine closes and we were rather hoping that HackSpace would continue alongside The MagPi forever. But magazines are often of the moment, even if they do get stored in The British Library for all time. I still miss Wireframe as well.

    Ben Everard, the outgoing HackSpace editor wrote: “For the past six and a half years, we’ve poured our heart and soul into this great magazine. We’ve had a great time both building projects and seeing the amazing projects that you have built. In some ways, this is a happy time. By bringing HackSpace into The MagPi, we’re continuing to give space for makers in print media, and securing this space for the future. This space for makers works both ways – it means there’s space for you to learn and see the great projects others are making, and it also means there’s space for you to teach and show off the great projects you’re making. HackSpace always was a place both by makers and for makers, and as part of The MagPi it will continue to be so.”

    I do hope HackSpace readers who find themselves in The MagPi’s extension will feel at home. We’re going to lengths to ensure that you are welcome, and that your magazine remains at heart – the same. It’ll make everything better in the long run. We’re easy to get in touch with via email or social media. So please let me know what you think.

  • Exercise while you game with this interactive treadmill add-on

    Exercise while you game with this interactive treadmill add-on

    Reading Time: 2 minutes

    Motion-based controls for games have been around for decades, but even with the latest generation of virtual reality headsets, gaming is still done with relatively limited movement unless one has access to an expensive VR walking/running setup. As an effort to get more physical activity in, Iacopo Guarneri has developed a motion-capturing add-on that can be worn while on a treadmill, stationary bike, or elliptical to control in-game actions.

    The wearable device itself is comprised of two components: an Arduino Nano and a six-axis MPU-6050 inertial measurement unit (IMU), which captures changes in velocity and orientation. Both of these parts are housed in a custom 3D-printed case that can be attached to the user’s back via a strap. In the sketch, the Nano continuously reads motion data from the IMU, packs it into a serialized representation, and sends it over serial to the host machine for further processing.

    Unlike how running in a video game is performed by holding the left joystick up, the accelerometer outputs a sine wave in the Z-axis while the user is bobbing up and down, which necessitated the use of a smoothing function to prevent sudden stops and starts. Turns, however, are much simpler, as the user’s left or right tilt can be directly translated into sideways motion. Once both axes have been calculated, the virtual gamepad’s inputs are updated with the new values and sent to the game.

    [youtube https://www.youtube.com/watch?v=4EYHZWyAiZI?feature=oembed&w=500&h=281]

    You can read more about Guarneri’s project here on Hackster.io.

    The post Exercise while you game with this interactive treadmill add-on appeared first on Arduino Blog.

    Website: LINK

  • This miniature monorail stays upright with the help of gyro stabilization

    This miniature monorail stays upright with the help of gyro stabilization

    Reading Time: 2 minutes

    Most monorail systems, like the kind at Disney and in Las Vegas, stay upright because the “rail” is actually a very wide beam. The car’s load tires (often literal truck or trailer tires) roll on top of that beam and guide tires clamp the sides of the beam, preventing the car from getting tippy. But what if the rail were more like a conventional train track? In the case of Hyperspace Pirate’s monorail model, active gyro stabilization is the key.

    Nobody has really produced a working full-scale gyroscope-stabilized monorail system since first conceived by Louis Brennan in 1903, because the idea simply isn’t practical at that size. Active gyroscope stabilization requires a lot of energy and is quite complex. If anything goes wrong, disaster is just around the corner. But on a small model scale, such considerations are much less relevant.

    Hyperspace Pirate took advantage of that fact to create a small model of the 20th century experimental monorail that travels along a 24? track. It uses a control moment gyroscope (CMG) to keep the car upright on the single narrow rail. A CMG like this one uses a spinning mass’s inertia to resist torque that would change the axis of rotation. If you’ve ever played with one of those gyroscope hand exercise balls, this works in a similar manner. This monorail utilizes two of them to counteract side-to-side tipping, while cancelling out the tendency of them to reduce forward-backward tilting. 

    The challenge with this design is that it requires active actuation of the individual CMG flywheels, which is a major reason why it would be impractical at a full-scale. But Hyperspace Pirate was able to solve that problem by using an Arduino Nano board to tilt the spinning flywheels using servo motors. It does so in response to any tipping, which it detects using an MPU6050 IMU (Inertial Measurement Unit) sensor. 

    [youtube https://www.youtube.com/watch?v=OpyLmIjZaxY?feature=oembed&w=500&h=281]

    With some added outrigger weights, similar to a tightrope-walker’s pole, Hyperspace Pirate was able to build a monorail that seems to work fairly well. 

    The post This miniature monorail stays upright with the help of gyro stabilization appeared first on Arduino Blog.

    Website: LINK

  • Pico 2 and RP2350 in The MagPi magazine #145

    Pico 2 and RP2350 in The MagPi magazine #145

    Reading Time: 3 minutes

    Learn from the engineering brains behind Pico 2

    Pico 2 & RP2350

    It has faster processors, more memory, greater power efficiency, and industry-leading security features and you can choose between Arm and RISC-V cores. The new Pico 2 is an incredible microcontroller board and we’ve secured interviews with the Raspberry Pi engineering team.

    A complete guide to all the new products featuring the RP2350 microcontroller

    RP2350 Products out now

    Plenty of companies are already using RP2350 in their products, and we’ve got the scoop on just about all of them. Inside this month’s mag you’ll discover breakout boards, development boards, integrated screens, tiny stamp sized boards, motion controllers, LoRa radio modules and much more.

    Learn to set up your Tindie side hustle

    Do the hustle

    HackSpace is now part of The MagPi, and in this month’s magazine Jo Hinchcliffe looks at building up a side hustle as a maker. In this feature Jo outlines a plan to set up a hustle maker business using the Tindie platform.

    A wonderful build that uses Lenticular imagery to display the time

    Lenticular Clock

    HackSpace Top Projects can now be found in The MagPi, and we love this Lenticular Clock by Moritz Sivers. Lenticular images are sliced up, so that when an array of lenses is placed over them, the image appears to move when you change the angle you look at it. This build is hard to explain so take a look at it in this month’s magazine.

    Assemble a M.A.R.S rover kit and calibrate the servo motors

    M.A.R.S Rover

    The M.A.R.S. Rover from 4tronix is one of the best robotics kits around. Based on NASA’s Curiosity rover on Mars, this six-wheeled robot features a similar rocker-bogie suspension system that enables it to crawl over rocks and navigate tough terrain. This month, Phil King shows you how to setup your M.A.R.S. Rover kit, calibrate the servo motors, and control it from a remote computer.

    Transfer film to digital video with this Raspberry Pi-upgraded Gugusse Roller

    Gugusse Roller

    The Gugusse roller uses Raspberry Pi HQ camera and Pi 4B+ to import and digitise analogue film footage. Unhappy with the quality of results from his setup, Denis-Carl Robidoux set about integrating Raspberry Pi into Gugusse Roller with vastly improved results.

    Print out AI generated poems with this camera

    Poetry Camera

    Take a photo with Poetry Camera and, rather than producing an image, it prints out a poem based on what it captured. You can adjust the poem type with a knob – ranging from sonnets and haikus to alliteration poems. This clever camera began life as an AI classifier and uses OpenAI API to create the poems. These are then printed out onto thermal paper.