Kategorie: Linux

  • This interactive screen slides smoothly from side to side

    This interactive screen slides smoothly from side to side

    Reading Time: < 1 minute

    This interactive screen slides smoothly from side to side

    Arduino TeamSeptember 29th, 2020

    When you need to grab someone’s attention at an event, an interactive screen is a good idea. MakerMan, however, went several steps beyond this, creating an installation with a bank of static screens that depict the Moscow skyline. In front of this, a single touch-enabled display moves back and forth automatically to present information on various points of interest.

    Sliding action is handled by a large stepper motor, which pulls the screen along on a carriage assembly. The motor, in turn, is controlled via an Arduino Uno and a stepper driver. All of these electronics are hidden behind a nicely painted wooden facade, letting the technology driving it fade elegantly into the background.

    [youtube https://www.youtube.com/watch?v=cp7Tq-6iAvg?feature=oembed&w=500&h=281]

    Website: LINK

  • Air Hockey Robot

    Air Hockey Robot

    Reading Time: 2 minutes

    Out of thin air

    The pair built the whole project from scratch, taking about a year. “A lot of work had to be done before even thinking about the actual implementation of the robot controlling the other side of the table,” reveals Ondřej. “It would be hard to pick the most difficult element. We had to overcome a lot of challenges, including electrical wiring of all the chosen hardware, robot movement control algorithms, computer vision, game strategy algorithms, user interface etc.”

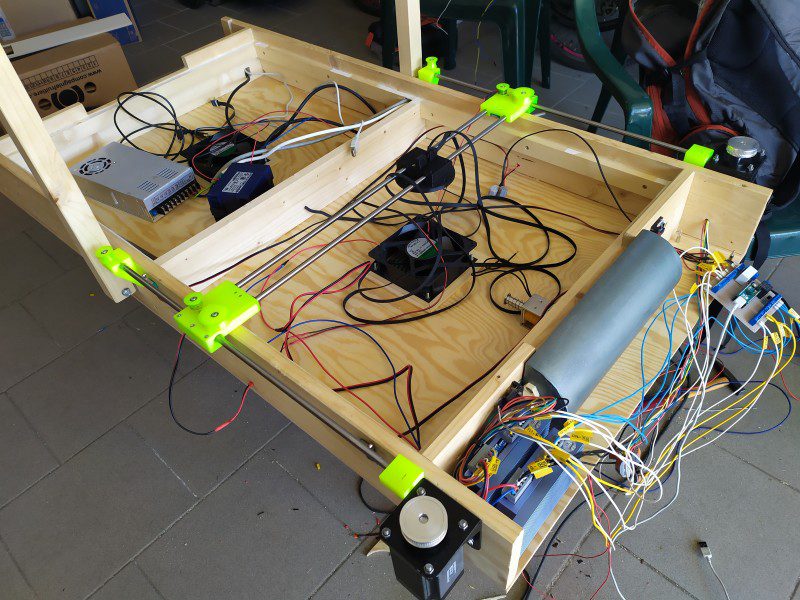
    After designing the table in Fusion 360, it was constructed from spruce and plywood with an Alubond playing surface. To ensure smooth gliding of the puck, a square mesh of 920 holes was drilled into the game board, enabling air to flow through from two fans located under the table.

    As for the mechanical aspect, the pair opted for an ‘H-bot’ design to move the robot’s paddle. Held in a 3D-printed housing, the paddle is moved around using a pulley and belt system, with two stepper motors controlled by an Arduino Micro. “[The H-bot design] is really the best solution for this problem as both steppers are stationary,” explains Dominik.

    Look and learn

    The inner workings of the table revealing the two fans and extensive wiring required

    The processing power for the robot’s optical puck recognition and AI strategy is provided by a Raspberry Pi 4. It is connected to a Camera Module V1 mounted in the overhead part of the frame, along with LED strips to ensure good lighting. With the camera capturing frames at around 80 fps, OpenCV is used to recognise the bright green puck so its position can be determined.

    For the robot’s strategy, Ondřej and Dominik originally planned to use machine learning. That proved a step too far, however, given all the other fine-tuning issues that they faced in making the project. “Using machine learning was the plan from the beginning,” says Ondřej. “But, trust me. We tried. We tried a lot to make it work. But it was literally impossible to implement, given how hard it is to train an agent in such a complex state space with even more complex action space.”

    Instead, they manually programmed four types of strategies with slightly different algorithms – you can find the code on GitHub.

    The project’s Raspberry Pi is also connected to a touchscreen with a GUI made using Kivy. Apart from the purposes of setting up the game and keeping score, this makes it possible to “set all kinds of parameters ranging from camera properties/calibration and motor speeds to the type of strategy,” explains Ondřej.

    The Air Hockey Robot was a very complicated and time-consuming project, but the result is indeed a brilliant piece of engineering and programming, where only the quick-witted can win. So, how often have they actually beaten the robot? “30-40% of the time. More at the beginning when things were not tuned out,” says Dominik. “But, it got harder and harder. Especially for the not so good players that we are.”

  • This Arduino-controlled soft robot gets around like an earthworm

    This Arduino-controlled soft robot gets around like an earthworm

    Reading Time: < 1 minute

    This Arduino-controlled soft robot gets around like an earthworm

    Arduino TeamSeptember 28th, 2020

    After studying the way a worm wiggles, Nicholas Lauer decided to create his own soft robotic version. What he came up with uses an Arduino Uno for control, inflating six 3D-printed segments sequentially to order to generate peristaltic motion for forward movement.

    The robotic worm uses a 12V mini diaphragm pump to provide inflation air, while a series of transistors and solenoid valves directly regulate the airflow into the chambers.

    The build looks pretty wild in the video below, and per Lauer’s write-up, you’re encouraged to experiment to see what kind of timing produces the most expedient motion. Code, STLs, and a detailed BOM are available on GitHub.

    [youtube https://www.youtube.com/watch?v=-dSjeaOMtiQ?feature=oembed&w=500&h=281]

    Website: LINK

  • PiBoy DMG review

    PiBoy DMG review

    Reading Time: 2 minutes

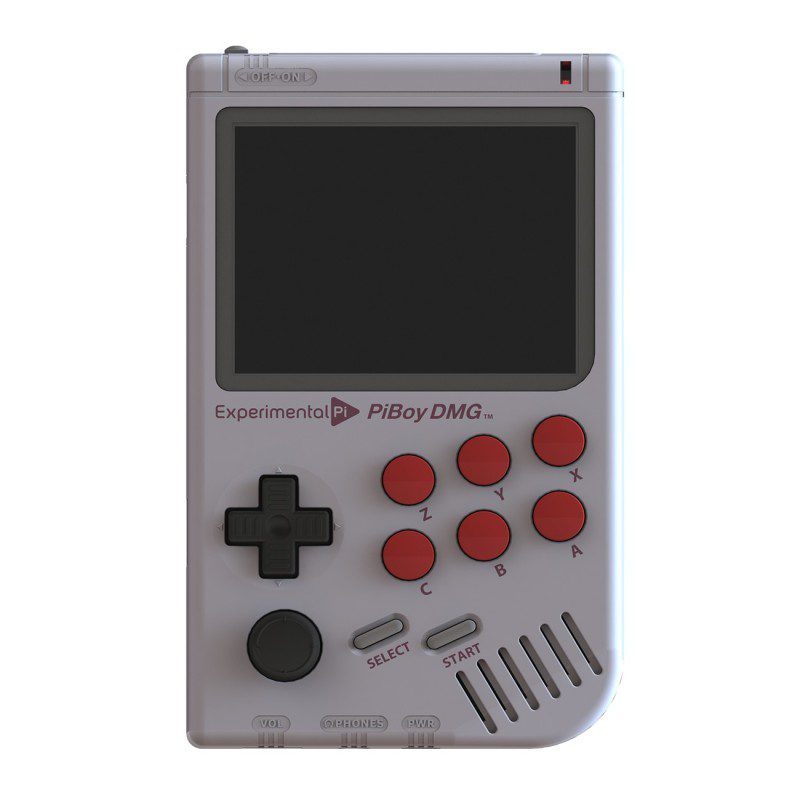
    Even on paper it has some interesting features – sure, it has a ton of buttons and a battery etc., but it also has an active cooling fan, an analogue joystick, and even a brightness control wheel for the screen – something very reminiscent of the contrast control on the original Game Boy.

    Usually, a lot of these kits can feel very cheap and rough, using standard 3D-printed parts for everything that can feel uncomfortable and flimsy and don’t really have the nicest aesthetic. The PiBoy feels more like the real deal: the main case is sturdy, the buttons are nice to use, and even the analogue stick has a little click-down thing. Unfortunately, like a lot of Game Boy form factor builds, the ‘shoulder’ buttons on the rear are a bit fiddly. With six face buttons, though, you’re probably set for playing any games up until the Mega Drive / SNES era.

    Pocket emulation

    Speaking of playing games, the software on the PiBoy is a slightly modified version of RetroPie, with specific Experimental Pi splash screens and branding to the startup. Thanks to this, you’re only really limited by your Raspberry Pi choice, with Raspberry Pi Zero, Raspberry Pi 3/3B+, and Raspberry Pi 4 supported.

    Because of this, the kind of games you’d be running on RetroPie systems run as smoothly as you’d expect. The LCD screen outputs at a fairly reduced resolution anyway, which reduces some of the load. With the fan on the rear of the PiBoy, we didn’t find it getting too hot with a Raspberry Pi 4 in it, although the whining of the fan is slightly unnerving for a handheld and sounds like a CD. Although you can play the PiBoy in any position you wish without scratching anything, thankfully.

    The various adapters and such for the PiBoy allow for all the output and input options of the installed Raspberry Pi to be accessible. As well as USB sticks which can be used for storage, and easy access to the microSD card, you can even plug in headphones and use a (regular size) HDMI cable to plug it into your TV. Use the available USB ports for some USB controllers and you have a very portable plug-and-play box.

    Amazingly, it also has a special Steam Link function. You’ll likely be connected to wireless LAN on the PiBoy and if you have a decent connection, it’s amazing to play some games in your hands in your own home.

    It’s a pretty fantastic piece of kit, and we think it earns its price tag. Just don’t rely on the shoulder buttons.

    Verdict

    10/10

    An incredible portable retro gaming build, this has just about everything you’d want from a Raspberry Pi-based Game Boy clone.

  • Raspberry Pi High Quality Camera takes photos through thousands of straws

    Raspberry Pi High Quality Camera takes photos through thousands of straws

    Reading Time: 3 minutes

    Adrian Hanft is our favourite kind of maker: weird. He’s also the guy who invented the Lego camera, 16 years ago. This time, he spent more than a year creating what he describes as “one of the strangest cameras you may ever hear about.”

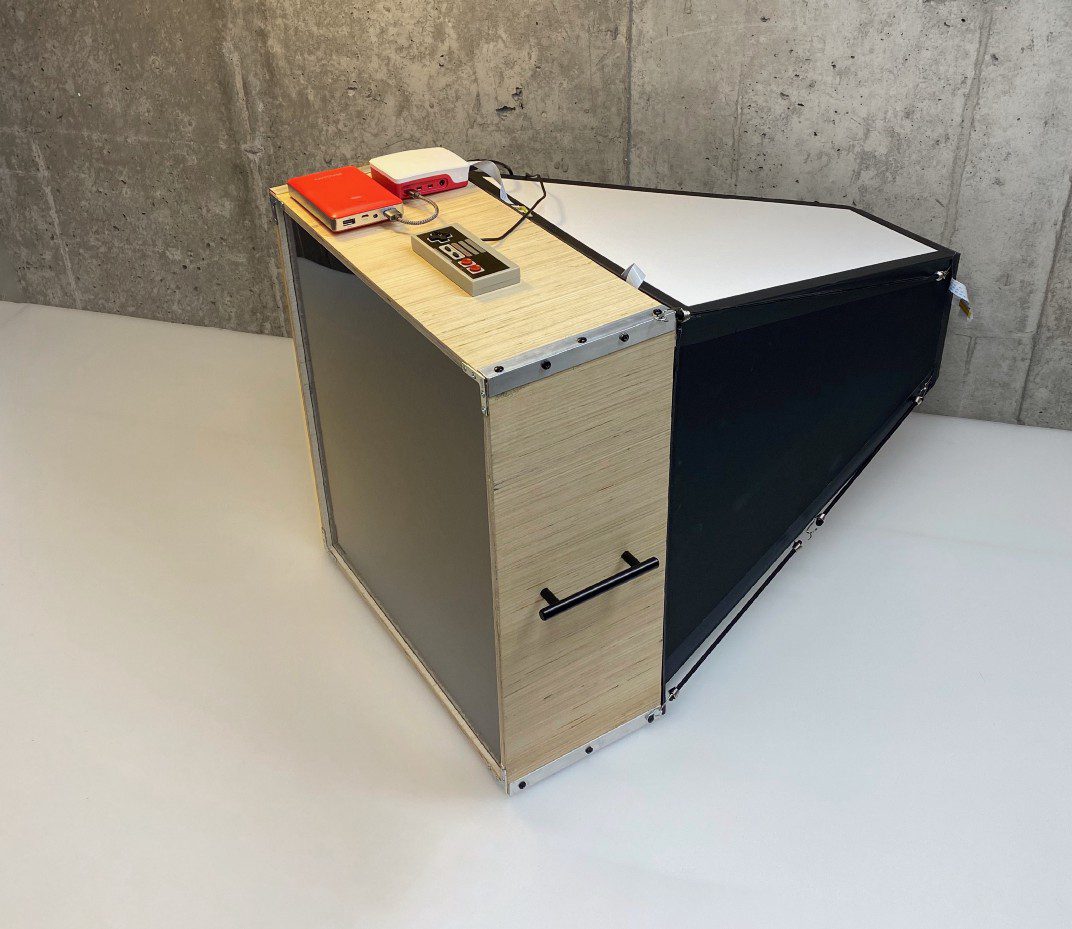
    What? Looks normal from here. Massive, but normal

    What’s with all the straws?

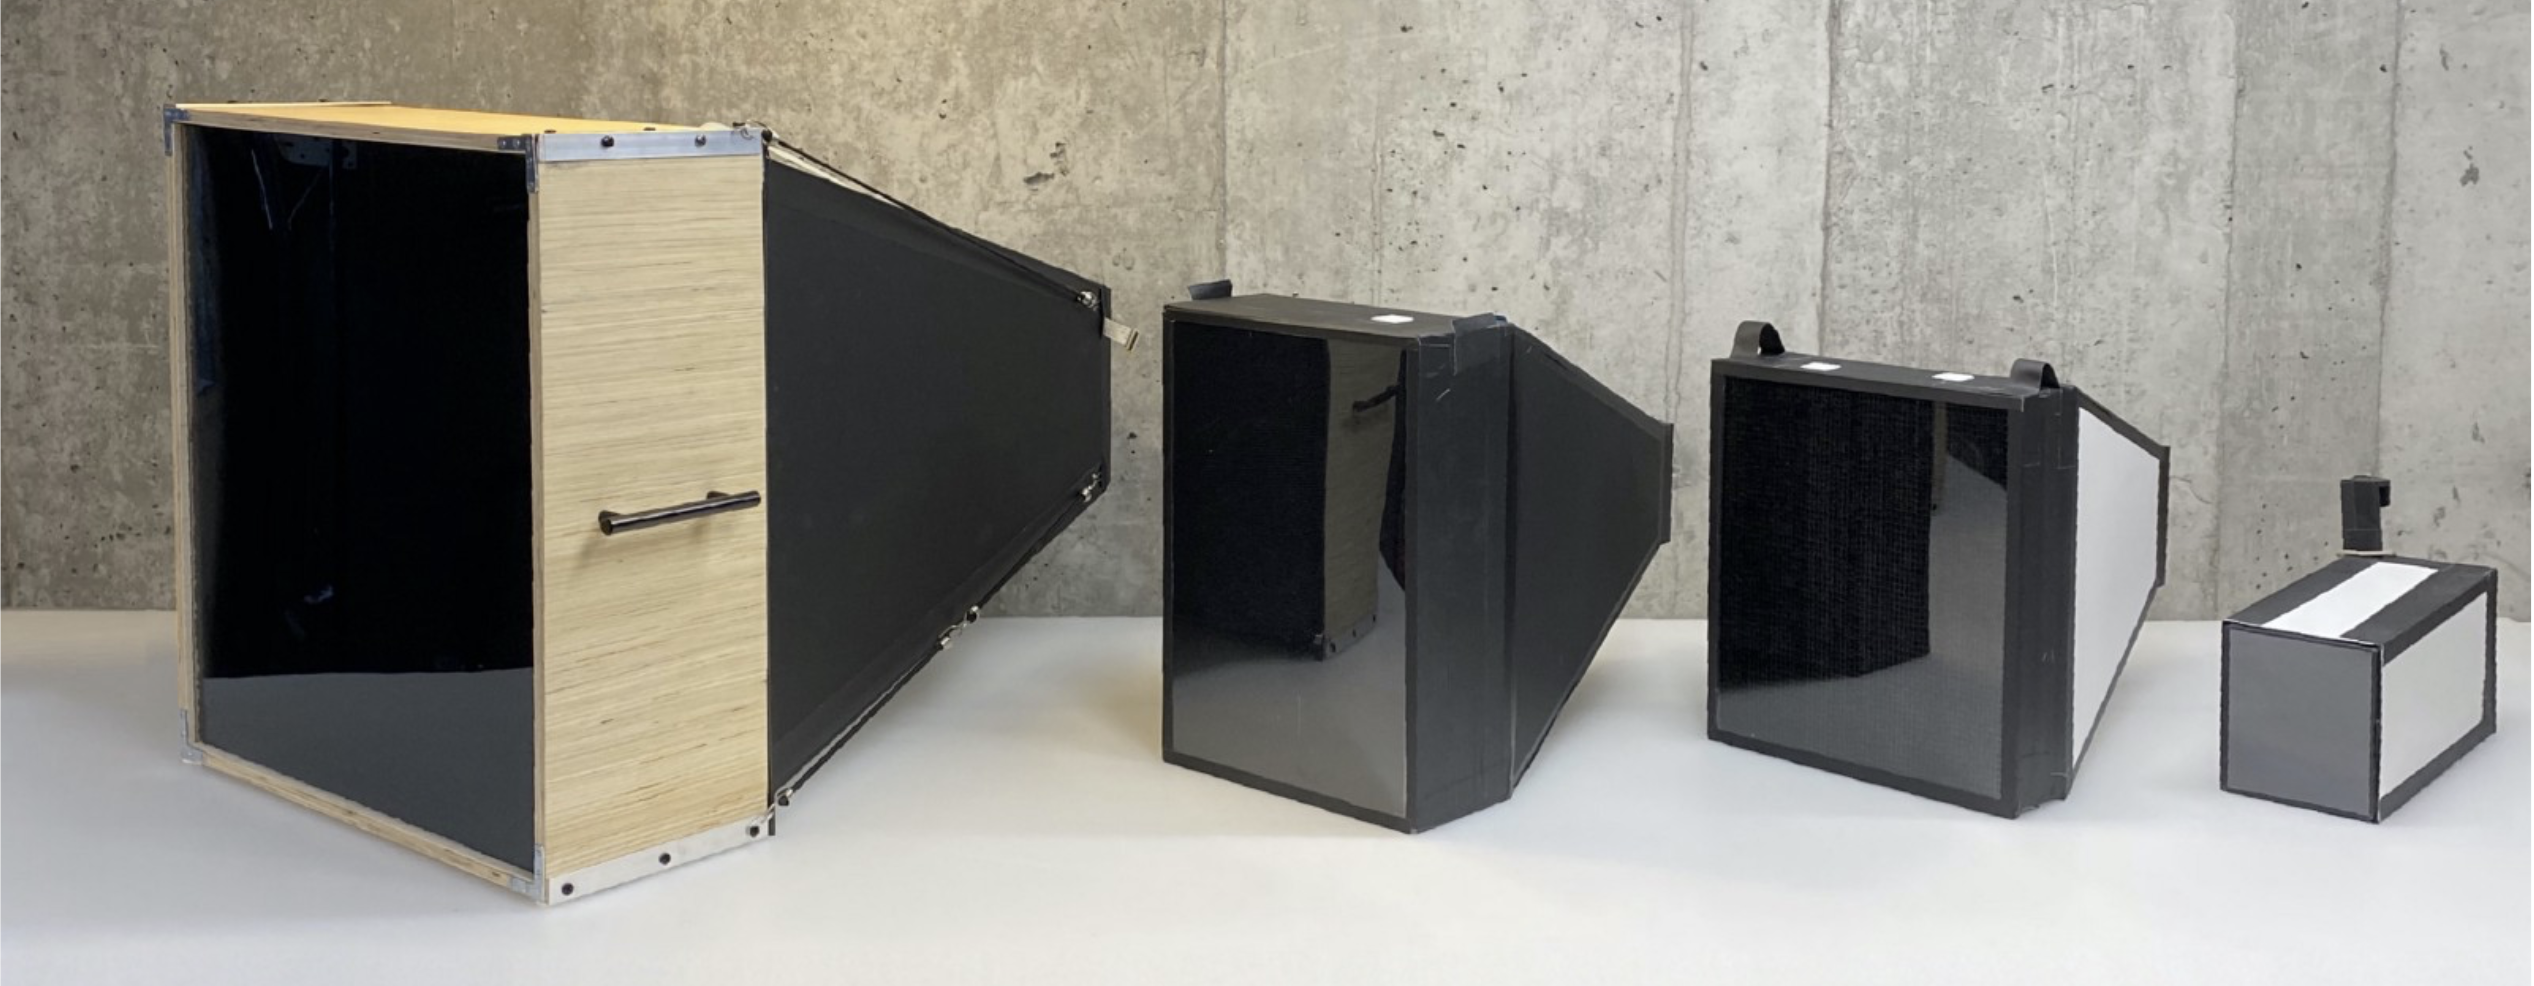
    OK, here’s why it’s weird: it takes photos with a Raspberry Pi High Quality Camera through a ‘lens’ of tiny drinking straws packed together. 23,248 straws, to be exact, are inside the wooden box-shaped bit of the machine above. The camera itself sits at the slim end of the black and white part. The Raspberry Pi, power bank, and controller all sit on top of the wooden box full of straws.

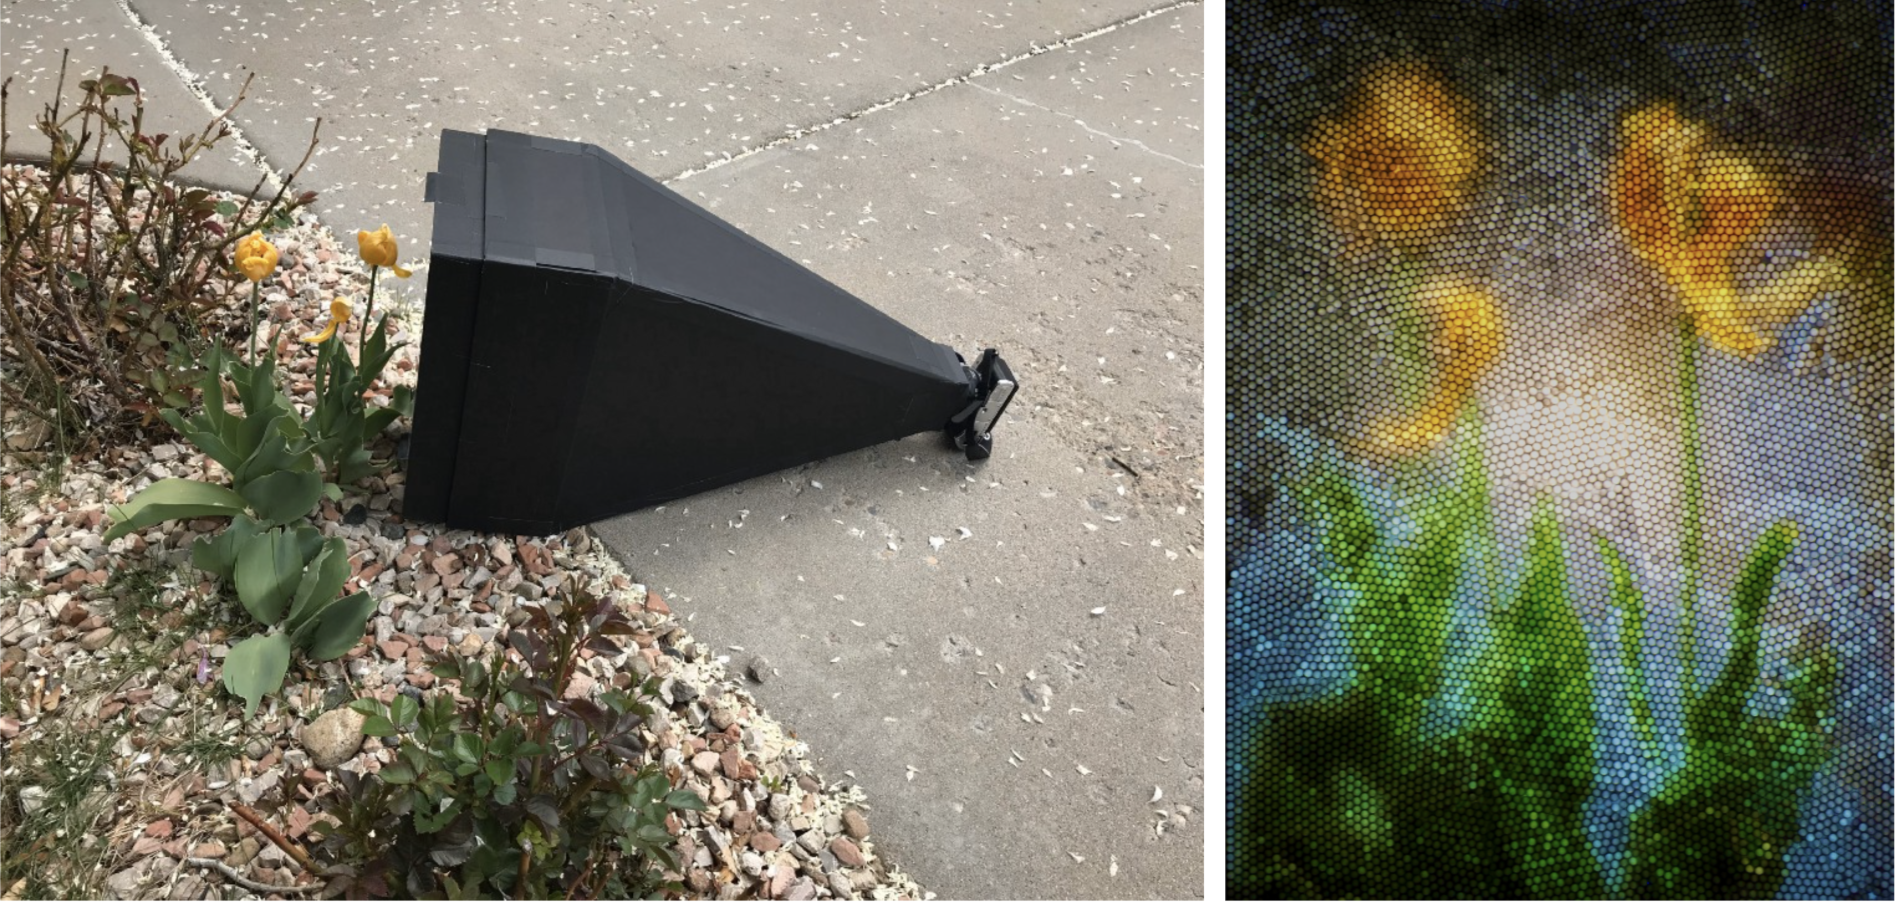
    Here’s what an image of Yoda looks like, photographed through that many straws:

    Mosaic, but make it techy

    Ground glass lenses

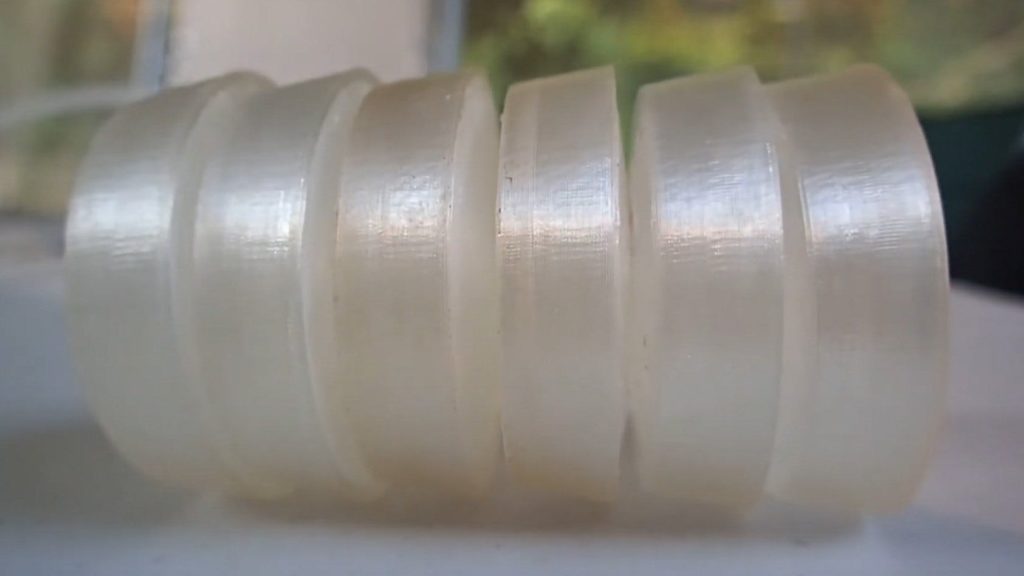
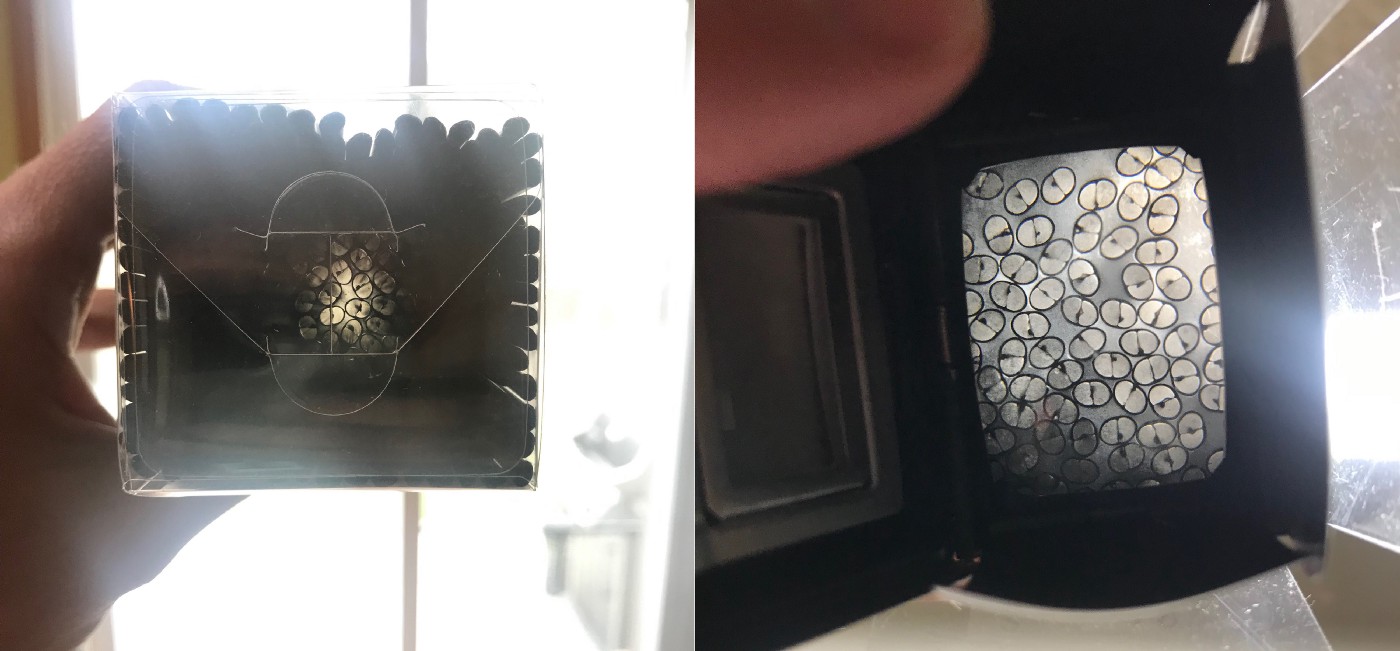
    The concept isn’t as easy as it may look. As you can see from the images below, if you hold up a load of straws, you can only see the light through a few of them. Adrian turned to older technology for a solution, taking a viewfinder from an old camera which had ground glass (which ‘collects’ light) on the surface.

    Left: looking through straws at light with the naked eye
    Right: the same straws viewed through a ground glass lens

    Even though Adrian was completely new to both Raspberry Pi and Python, it only took him a week of evenings and weekends to code the software needed to control the Raspberry Pi High Quality Camera.

    Long story short, on the left is the final camera, with all the prototypes queued up behind it

    An original Nintendo controller runs the show and connects to the Raspberry Pi with a USB adapter. The buttons are mapped to the functions of Adrian’s software.

    [youtube https://www.youtube.com/watch?v=LVWuXccv03I?start=34&feature=oembed&w=500&h=281]

    A super satisfying time-lapse of the straws being loaded

    What does the Nintendo controller do?

    In his original post, Adrian explains what all the buttons on the controller do in order to create images:

    “The Start button launches a preview of what the camera is seeing. The A button takes a picture. The Up and Down buttons increase or decrease the exposure time by 1 second. The Select button launches a gallery of photos so I can see the last photo I took. The Right and Left buttons cycle between photos in the gallery. I am saving the B button for something else in the future. Maybe I will use it for uploading to Dropbox, I haven’t decided yet.”

    Adrian made a Lego mount for the Raspberry Pi camera
    The Lego mount makes it easy to switch between cameras and lenses

    A mobile phone serves as a wireless display so he can keep an eye on what’s going on. The phone communicates with the Raspberry Pi connected to the camera via a VPN app.

    One of the prototypes in action

    Follow Adrian on Instagram to keep up with all the photography captured using the final camera, as well as the prototypes that came before it.

    Website: LINK

  • 13 Raspberry Pis slosh-test space shuttle tanks in zero gravity

    13 Raspberry Pis slosh-test space shuttle tanks in zero gravity

    Reading Time: 3 minutes

    High-school student Eleanor Sigrest successfully crowdfunded her way onto a zero-G flight to test her latest Raspberry Pi-powered project. NASA Goddard engineers peer reviewed Eleanor’s experimental design, which detects unwanted movement (or ‘slosh’) in spacecraft fluid tanks.

    The Raspberry Pi-packed setup

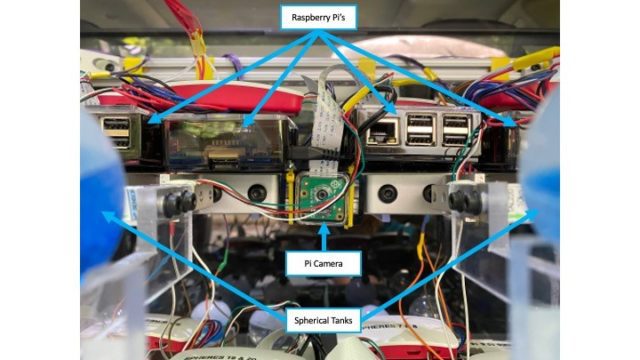
    The apparatus features an accelerometer to precisely determine the moment of zero gravity, along with 13 Raspberry Pis and 12 Raspberry Pi cameras to capture the slosh movement.

    What’s wrong with slosh?

    The Broadcom Foundation shared a pretty interesting minute-by-minute report on Eleanor’s first hyperbolic flight and how she got everything working. But, in a nutshell…

    The full apparatus onboard the zero gravity flight

    You don’t want the fluid in your space shuttle tanks sloshing around too much. It’s a mission-ending problem. Slosh occurs on take-off and also in microgravity during manoeuvres, so Eleanor devised this novel approach to managing it in place of the costly, heavy subsystems currently used on board space craft.

    Eleanor wanted to prove that the fluid inside tanks treated with superhydrophobic and superhydrophilic coatings settled quicker than in uncoated tanks. And she was right: settling times were reduced by 73% in some cases.

    Eleanor at work

    A continuation of this experiment is due to go up on Blue Origin’s New Shepard rocket – and yes, a patent is already pending.

    Curiosity, courage & compromise

    At just 13 years old, Eleanor won the Samueli Prize at the 2016 Broadcom MASTERS for her mastery of STEM principles and team leadership during a rigorous week-long competition. High praise came from Paula Golden, President of Broadcom Foundation, who said: “Eleanor is the epitome of a young woman scientist and engineer. She combines insatiable curiosity with courage: two traits that are essential for a leader in these fields.”

    Eleanor aged 13 with her award-winning project ‘Rockets & Nozzles & Thrust… Oh My’

    That week-long experience also included a Raspberry Pi Challenge, and Eleanor explained: “During the Raspberry Pi Challenge, I learned that sometimes the simplest solutions are the best. I also learned it’s important to try everyone’s ideas because you never know which one might work the best. Sometimes it’s a compromise of different ideas, or a compromise between complicated and simple. The most important thing is to consider them all.”

    Get this girl to Mars already.

    Website: LINK

  • 3D printing, laser cutting, and PCB design with Raspberry Pi

    3D printing, laser cutting, and PCB design with Raspberry Pi

    Reading Time: 6 minutes

    Tim Richardson has been involved with the Raspberry Pi community from almost the start. He is part of the Pi Wars organising team and a course designer/builder, as well as writing the CamJam EduKit worksheets, CamJam organiser, and now a PCB designer.

    After seeing his first 3D printer at a Raspberry Jam back in 2014, Tim Richardson bought one. They were just starting to become affordable, albeit £600 for a ‘budget’ one back then! They are much more affordable now, as little as £150–£200 for a decent one. He has some advice for those new to or thinking about getting one.

    See also

    3D printing and making in The MagPi magazine 97

    Use a 3D printer with Raspberry Pi

    50 Raspberry Pi tips & tools

    OctoPrint

    Tim suggests that one of the best upgrades you can do is to add a Raspberry Pi computer running OctoPrint. It’s free and open-source and has been continuously developed by Gina Häußge since 2012. OctoPrint is used to control and monitor your printer, even remotely, and uses a Raspberry Pi Camera Module for creating a time-lapse video of your prints..

    OctoPrint runs on almost any Raspberry Pi computer, but you will get the best UI response from a Raspberry Pi 3 or newer.

    OctoPrint supports most consumer printers on the market, so it is likely to work with yours. Installation is a breeze! Just download OctoPi, an OS image with OctoPrint pre-installed, write it to a microSD card, boot up, connect your printer, and that’s it!

    Once you have set up OctoPrint for your printer, you can start moving the print head around (essential for bed levelling) and see the temperature of your print bed (if it is heated) and the extruder.

    During printing you can watch the temperatures, see the G-code as it is executed, and watch the progress of the print on your phone or computer.

    Tinkercad

    Tim uses Tinkercad for most of his designs; it’s simple and easy to use. He has a few tips which may help you design objects in this online tool from Autodesk.

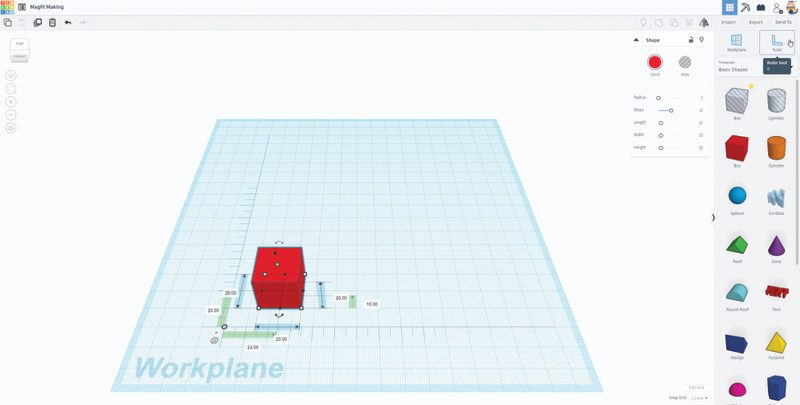
    On starting a new design, add the ruler to the workplane. Every selected shape will show dimensions which can be edited with exact sizes. This even works for rotation.

    When designing a mount or case for something, Tim first models the item itself, simplified but accurately measured. He places solid blocks where ports or buttons need to be accessed. He then enlarges the model by 1 mm in each direction. After that, he changes the shape to be a ‘hole’ and uses it to remove material from simple blocks.

    Use the ruler tool to enable precise sizing of objects in the workplane

    Laser cutting with Raspberry Pi

    Laser cutters are the mainstay of almost all makerspaces. Tim is fortunate enough to have a large one of his own that he uses for building Pi Wars courses, but for most people the smaller cutters are more than enough, and cost around £300. Tim has a few bits of advice if you are using one for the first time.

    Laser cutters can be used for plastic, wood, and other materials. Some plastics just melt or burn, while some wood is hard to cut and you may end up breaking Rule Zero (don’t be on fire). Only buy materials designated as laser safe.

    Before cutting expensive materials, always do a test cut in cardboard first. While the thickness will usually not be right, you will be able to line up all the holes to ensure that everything fits. There is nothing more frustrating than carefully designing something only to find that it won’t fit together, or you cannot bolt your Raspberry Pi computer in place because you have forgotten about the space the cables take!

    Inkscape is a free and great tool to start with, which of course runs on Raspberry Pi. However, for some cutters the SVG files have to be exported to a different format. Dominic Morrow, from Smoke and Mirrors, recommends using Lightburn. It is commercial software, but updated regularly. It is able to connect directly to many laser cutters and control them, all in one tool. Inkscape does have some specific plug-ins which are very useful, though – especially the ‘living hinge’ tool for cutting ‘bendable’ wood and plastic.

    PCB design with Raspberry Pi

    Before Raspberry Pi, Tim knew nothing about electronics. Since Raspberry Pi, though, he has brought out three CamJam EduKits to help others learn. Tim says, “It helped that I knew nothing when writing the worksheets as I had to explain things in a way that noobs would understand.”

    He thought PCBs were something he could never do, but reading an article in HackSpace magazine gave him an idea. For Tim, the height of a Raspberry Pi Zero with micro-HAT (μHAT) was higher than he wanted; how about mounting a Raspberry Pi Zero and μHAT on the same plane?

    Designing PCBs might not be as hard as you think

    He found a μHAT template for KiCad (an open-source tool for designing PCBs) which has a single header and holes in place. With a second header, surely it was a simple case of ‘joining the dots’? Not quite – it’s advisable to connect all ground pins together. Tim had to move tracks to give space for ‘vias’ (channels that go between layers of the PCB).

    Once confident the connections were correct, it was time for manufacture. Tim searched for PCB makers, but for a simple board he didn’t want to pay much. PCBWay had an easy-to-use interface and instructions on preparing KiCad designs for manufacture.

    PCB design tips

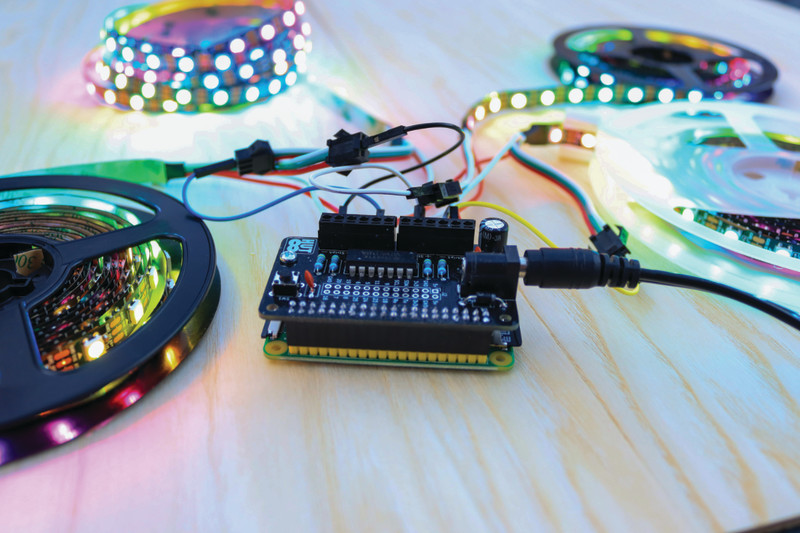
    While waiting for the first PCB to be manufactured, Tim started designing the second. He wanted to control WS2812 LEDs (aka NeoPixels) with Raspberry Pi.

    When designing a PCB, you first have to find components that do what you want. For WS2812 LEDs, the 3.3 V from the

    GPIO pins must be increased to 5 V. The 74HCT125 chip has four ‘level shifters’ for that.
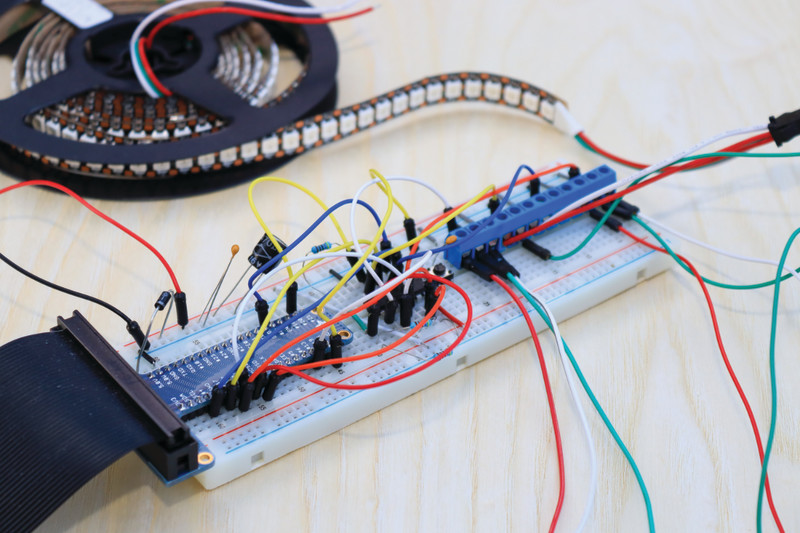
    The next task is to breadboard the circuit, and write code to control the electronics – open‑source software can help with this.

    Before designing the PCB, you have to design the schematic diagram: how each component connects to other components. It doesn’t have to be pretty, but it has to have all the right connections.

    Often, specific GPIO pins have to be used. Other pins seem to be logical on the breadboard, but when routing the tracks on the PCB you may find it is not quite as simple! “Be ready to change the design multiple times to make routing of tracks easier,” Tim advises. If you have to make any changes during the PCB design, always go back and rework the breadboard.
    Eventually Tim got a PCB that looked like it would work. He showed the design to some friends – an invaluable part of designing a PCB. For Tim, they suggested he should break out unused pins and add a button for turning Raspberry Pi off.

    After a redesign, Tim asked a PCB expert to check it. They came back with lots of advice.
    Firstly, protect the Raspberry Pi computer from powering the LEDs. It cannot supply much current, so a Schottky diode between the PCB’s power input and Raspberry Pi will stop that.
    There were ‘unsightly gaps’ on the PCB; the ground plain did not flow into spaces where tracks were too close. They also advised capacitors to help smooth power supply fluctuations, as well as button ‘bounce’ for the off button.

    Always breadboard your circuits

    Tim says, “Designing PCBs takes multiple iterations, especially if it is your first. Even experts don’t get it right the first time.”

    He ordered this second PCB from PCBWay and, with the express service, had the new boards within a week! However, as often happens, things were not perfect. Tim had placed the silk screen (printing) over components on the bottom of the board. A simple cosmetic mistake, fortunately.

    “I soldered the first PCB and… it didn’t work,” he recalls. “Raspberry Pi Zero did not boot.”He tested the supply and then, with a multimeter, worked through the PCB. The barrel jack had power, but the ground was the wrong leg! The ‘footprint’ Tim used was not the same as the physical jack.

    Fortunately, the fix was simple: soldering a wire between the ground and mounting pins was all that was needed. The rest worked perfectly!

  • Automate 35mm film scanning with Arduino and Python

    Automate 35mm film scanning with Arduino and Python

    Reading Time: < 1 minute

    Automate 35mm film scanning with Arduino and Python

    Arduino TeamSeptember 24th, 2020

    While taking photos today is normally a digital affair, there is a wealth of visual information stored on film negatives. Digitization is possible, but it tends to be rather time-intensive, so photographer/hacker Seckin Sinan Isik decided to automate the process.

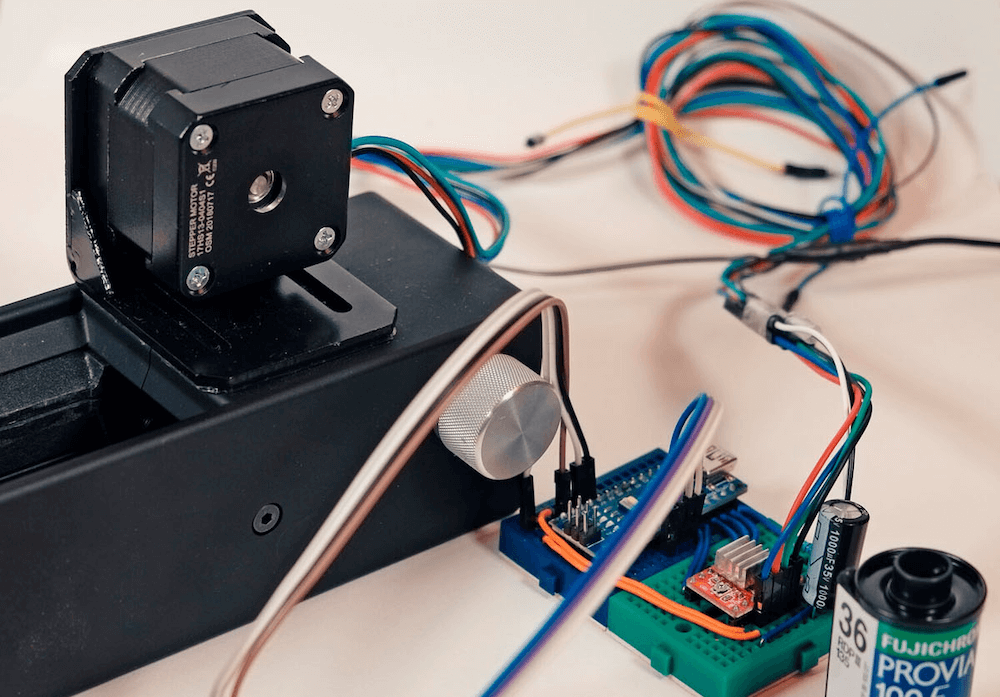
    His setup uses a film carrier augmented with a stepper motor and belt drive to advance the 35mm film under a tripod-mounted digital camera. This is controlled by an Arduino Nano, with the camera’s view shown via a video capture device on a nearby computer.

    In one mode, the user can adjust the film position semi-manually using pushbuttons, then scan the negative. The whole process can also be automated, with a Python computer vision routine.

    More details on the project can ben found in Isik’s PetaPixel article here.

    [youtube https://www.youtube.com/watch?v=Sualv0ElD-4?feature=oembed&w=500&h=281]

    [youtube https://www.youtube.com/watch?v=SoEzrso6tJk?feature=oembed&w=500&h=281]

    Website: LINK

  • Learning Greek with an arcade-style vocabulary reviewer

    Learning Greek with an arcade-style vocabulary reviewer

    Reading Time: 2 minutes

    Learning Greek with an arcade-style vocabulary reviewer

    Arduino TeamSeptember 24th, 2020

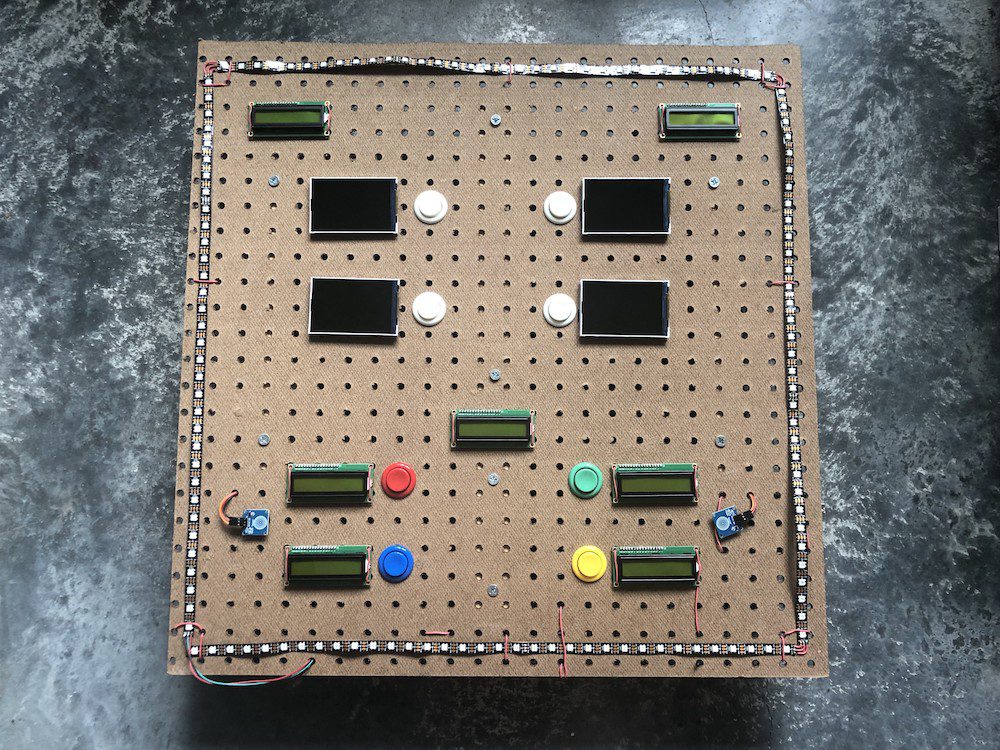
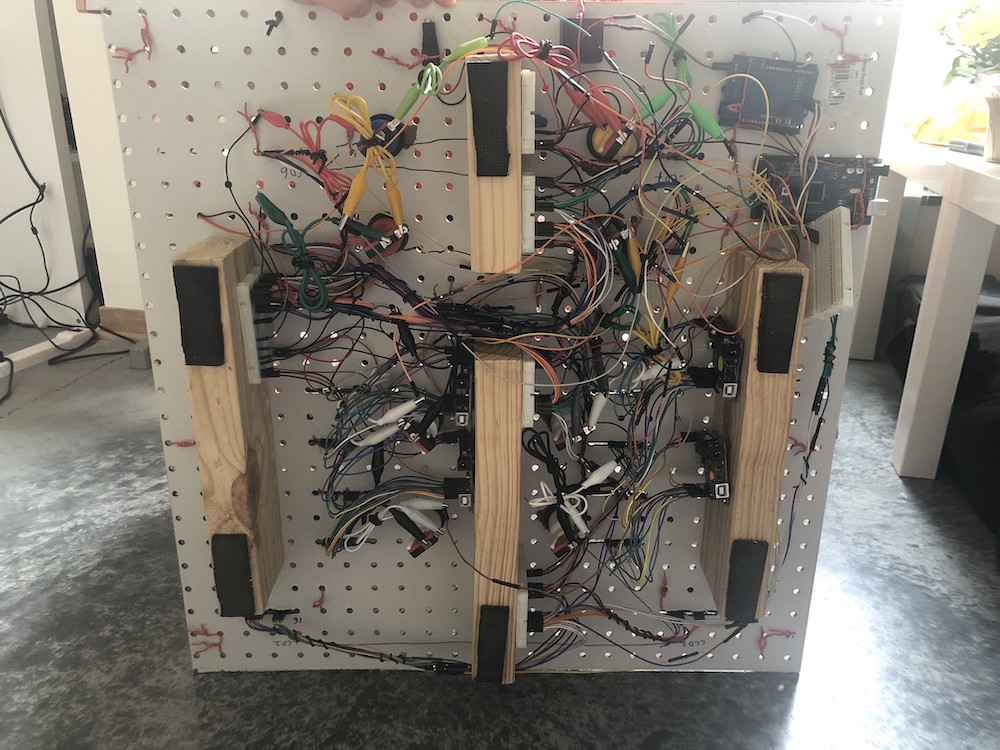
    Learning a new language is always a challenge, but can also be extremely rewarding. To help with this task — specifically learning Greek — Angeliki Beyko created an arcade-style review machine. Her device cleverly uses a sheet of pegboard to hold the electronics, including seven LCD screens to indicate category, level, and the actual Greek word being reviewed.

    Possible answers are shown as pictures on four TFT displays, driven by four separate Arduino Uno boards that pull up pictures stored on SD cards. An Arduino Mega provides overall control for the interactive panel.

    While ambitious, and a definite learning process, there’s currently some memory limitations and an issue with the screens not working when actually mounted. So as of now, it’s something of a work-in-progress, but Beyko is planning to complete the build with version two. More details are available in the project write-up and code can be found on GitHub.

    Website: LINK

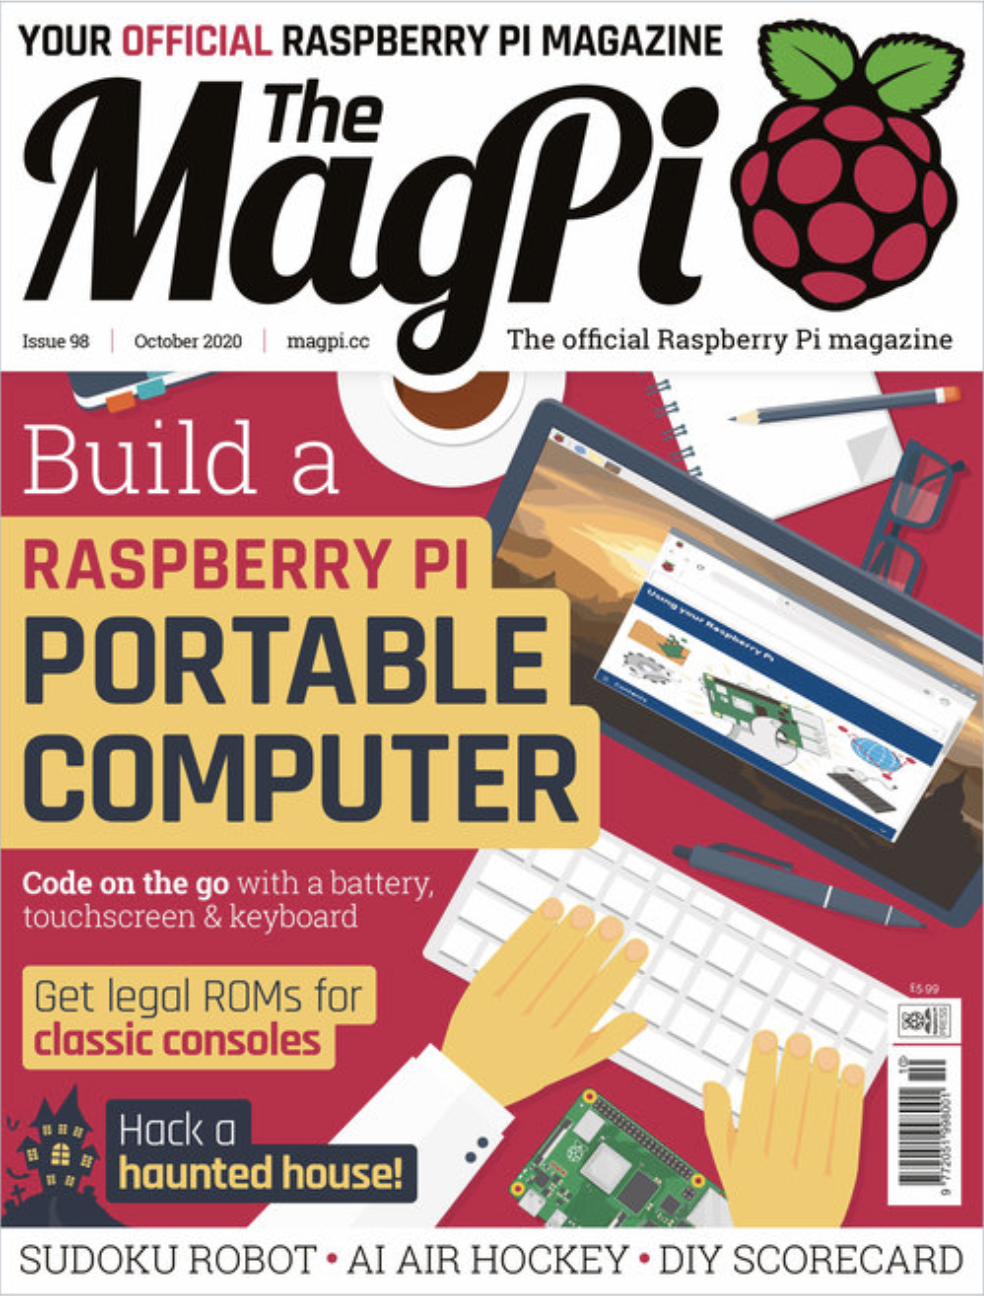
  • Build a portable computer in The MagPi magazine #98

    Build a portable computer in The MagPi magazine #98

    Reading Time: 2 minutes

    Haunted House Hacks

    It’s the most wonderful time of the year. (Or the second most wonderful, depending on which The MagPi team member you talk to.) Get ready for Halloween and bonfire night with Rob’s collection of terror-ific projects. Haunt your house and make it a Halloween to remember.

    Haunted House

    Play classic games legally with Raspberry Pi

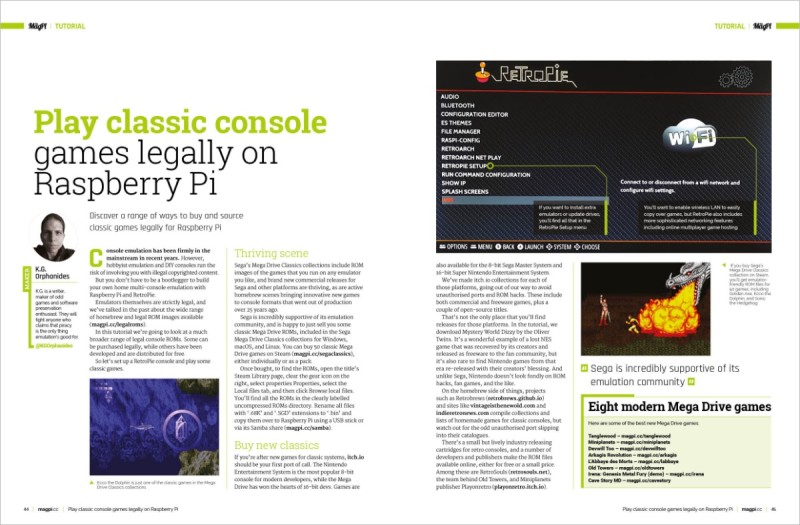
    Playing retro games and building retro consoles is a fun project, and we’re constantly on the lookout for better ways to play games. KG Orphanides is our retro expert and this month KG looks into ways to legally play classic Sega games, alongside new games for retro machines.

    Play classic console games legally on Raspberry Pi

    DIY Score Counter

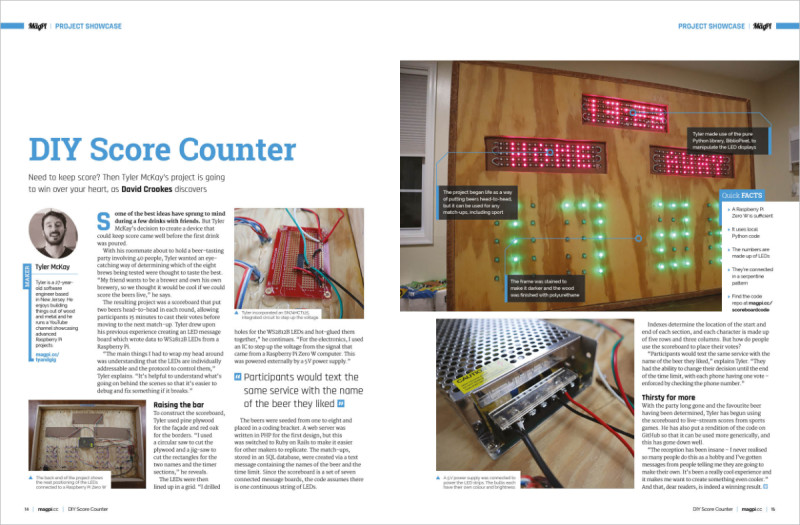
    We’re endlessly impressed by how Raspberry Pi makers build incredible things with the world’s best computer. DIY Score Counter is a scoreboard that can be used to keep score in any kind of game. Built by the maker to rate beers in a head-to-head contest, the project can be used for any sport.

    DIY Score Counter

    CubeSat

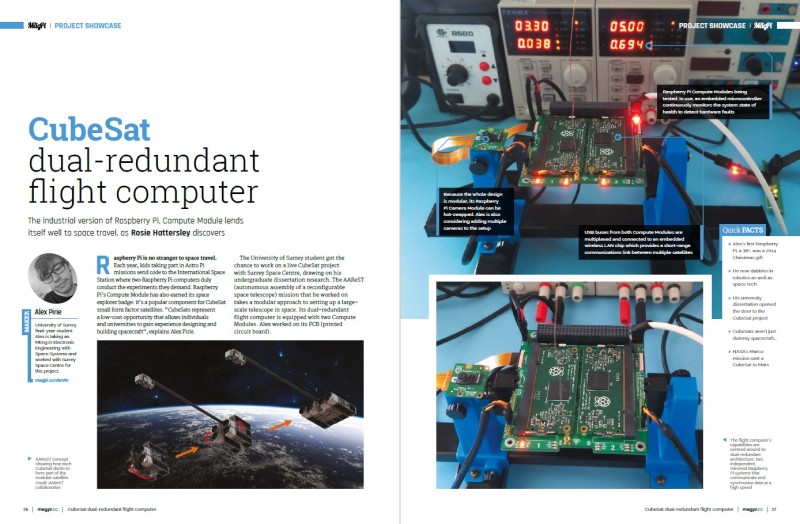
    Raspberry Pi Compute Module is the amazing industrial computer behind a technical revolution. The CubeSat project builds a dual-redundant computer for space exploration using two Compute Modules.

    CubeSat

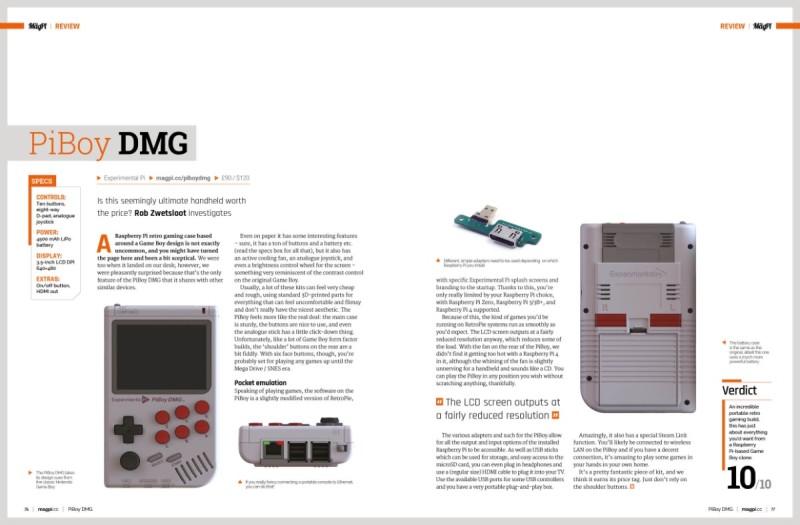
    PiBoy DMG review

    We’ve tested many fine gaming kits here at The MagPi. And this PiBoy DMG has Rob excited with its combination of analogue and digital controls, screen adjustment, high-quality finish, and excellent design. The perfect retro gaming kit? Certainly the highest rated so far.

    PiBoy DMG review

  • 17000ft | The MagPi 98

    17000ft | The MagPi 98

    Reading Time: 5 minutes

    How do you get internet over three miles up the Himalayas? That’s what the 17000 ft Foundation and Sujata Sahu had to figure out. Rob Zwetsloot reports in the latest issue of the MagPi magazine, out now.

    Living in more urban areas of the UK, it can be easy to take for granted decent internet and mobile phone signal. In more remote areas of the country, internet can be a bit spotty but it’s nothing compared with living up in a mountain.

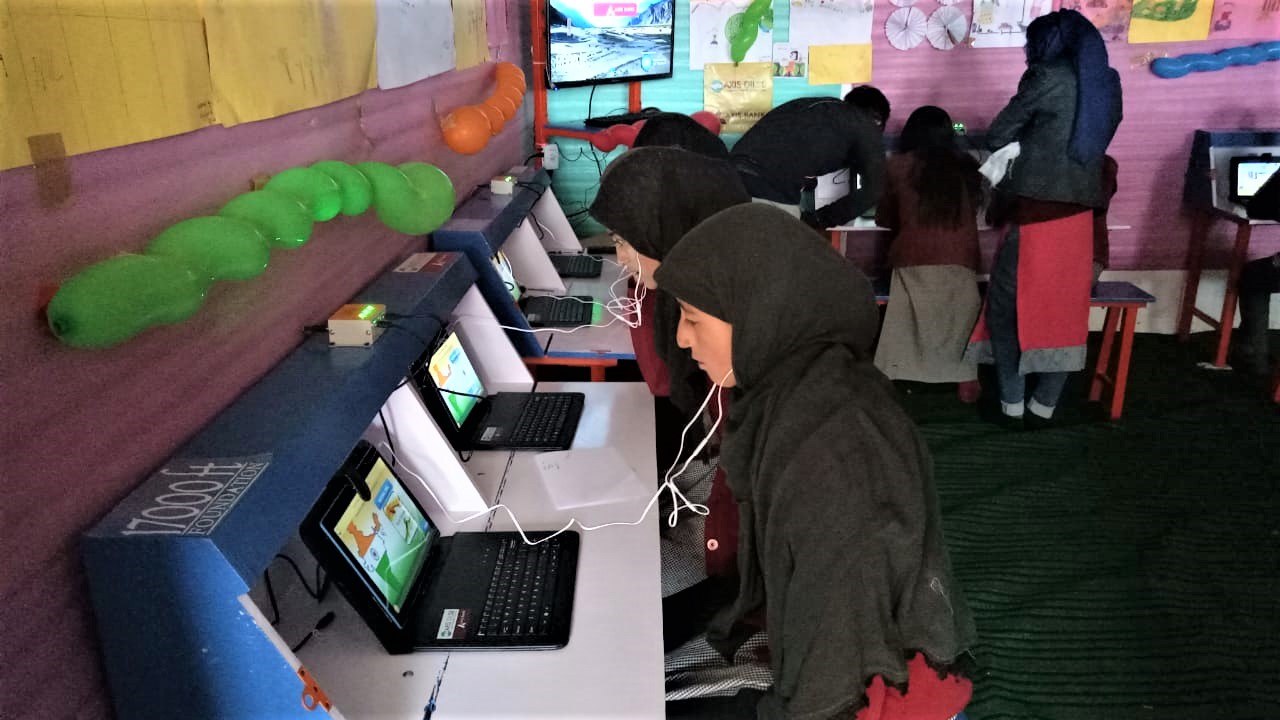
    Tablet computers are provided that connect to a Raspberry Pi-powered network

    “17000 ft Foundation is a not-for-profit organisation in India, set up to improve the lives of people settled in very remote mountainous hamlets, in areas that are inaccessible and isolated due to reasons of harsh mountainous terrain,” explains its founder, Sujata Sahu. “17000 ft has its roots in high-altitude Ladakh, a region in the desolate cold desert of the Himalayan mountain region of India. Situated in altitudes upwards of 9300 ft and with temperatures dropping to -50°C in inhabited areas, this area is home to indigenous tribal communities settled across hundreds of tiny, scattered hamlets. These villages are remote, isolated, and suffer from bare minimum infrastructure and a centuries-old civilisation unwilling but driven to migrate to faraway cities in search of a better life. Ladakh has a population of just under 300,000 people living across 60,000 km2 of harsh mountain terrain, whose sustenance and growth depends on the infrastructure, resources, and support provided by the government.”

    A huge number of students have already benefited from the program

    The local governments have built schools. However, they don’t have enough resources or qualified teachers to be truly effective, resulting in a problem with students dropping out or having to be sent off to cities. 17000 ft’s mission is to transform the education in these communities.

    High-altitude Raspberry Pi

    “The Foundation today works in over 200 remote government schools to upgrade school infrastructure, build the capacity of teachers, provide better resources for learning, thereby improving the quality of education for its children,” says Sujata. “17000 ft Foundation has designed and implemented a unique solar-powered offline digital learning solution called the DigiLab, using Raspberry Pi, which brings the power of digital learning to areas which are truly off-grid and have neither electricity nor mobile connectivity, helping children to learn better, while also enabling the local administration to monitor performance remotely.”

    Each school is provided with solar power, Raspberry Pi computers to act as a local internet for the school, and tablets to connect to it. It serves as a ‘last mile connectivity’ from a remote school in the cloud, with an app on a teacher’s phone that will download data when it can and then update the installed Raspberry Pi in their school.

    Remote success

    “The solution has now been implemented in 120 remote schools of Ladakh and is being considered to be implemented at scale to cover the entire region,” adds Sujata. “It has now run successfully across three winters of Ladakh, withstanding even the harshest of -50°C temperatures with no failure. In the first year of its implementation alone, 5000 students were enrolled, with over 93% being active. The system has now delivered over 60,000 hours of learning to students in remote villages and improved learning outcomes.”

    Not all children stay in the villages year round

    It’s already helping to change education in the area during the winter. Many villages (and schools) can shut down for up to six months, and families who can’t move away are usually left without a functioning school. 17000 ft has changed this.

    “In the winter of 2018 and 2019, for the first time in a few decades, parents and community members from many of these hamlets decided to take advantage of their DigiLabs and opened them up for their children to learn despite the harsh winters and lack of teachers,” Sujata explains. “Parents pooled in to provide basic heating facilities (a Bukhari – a wood- or dung-based stove with a long pipe chimney) to bring in some warmth and scheduled classes for the senior children, allowing them to learn at their own pace, with student data continuing to be recorded in Raspberry Pi and available for the teachers to assess when they got back. The DigiLab Program, which has been made possible due to the presence of the Raspberry Pi Server, has solved a major problem that the Ladakhis have been facing for years!”

    Some of the village schools go unused in the winter

    How can people help?

    Sujata says, “17000 ft Foundation is a non-profit organisation and is dependent on donations and support from individuals and companies alike. This solution was developed by the organisation in a limited budget and was implemented successfully across over a hundred hamlets. Raspberry Pi has been a boon for this project, with its low cost and its computing capabilities which helped create this solution for such a remote area. However, the potential of Raspberry Pi is as yet untapped and the solution still needs upgrades to be able to scale to cover more schools and deliver enhanced functionality within the school. 17000 ft is very eager to help take this to other similar regions and cover more schools in Ladakh that still remain ignored. What we really need is funds and technical support to be able to reach the good of this solution to more children who are still out of the reach of Ed Tech and learning. We welcome contributions of any size to help us in this project.”

    For donations from outside India, write to sujata.sahu@17000ft.org. Indian citizens can donate through 17000ft.org/donate.

    The MagPi magazine is out now, available in print from the Raspberry Pi Press onlinestore, your local newsagents, and the Raspberry Pi Store, Cambridge.

    You can also download the PDF directly from the MagPi magazine website.

    Subscribers to the MagPi for 12 months get a free Adafruit Circuit Playground, or can choose from one of our other subscription offers, including this amazing limited-time offer of three issues and a book for only £10!

    Website: LINK

  • Making a random sound diffuser with Arduino

    Making a random sound diffuser with Arduino

    Reading Time: < 1 minute

    Making a random sound diffuser with Arduino

    Arduino TeamSeptember 23rd, 2020

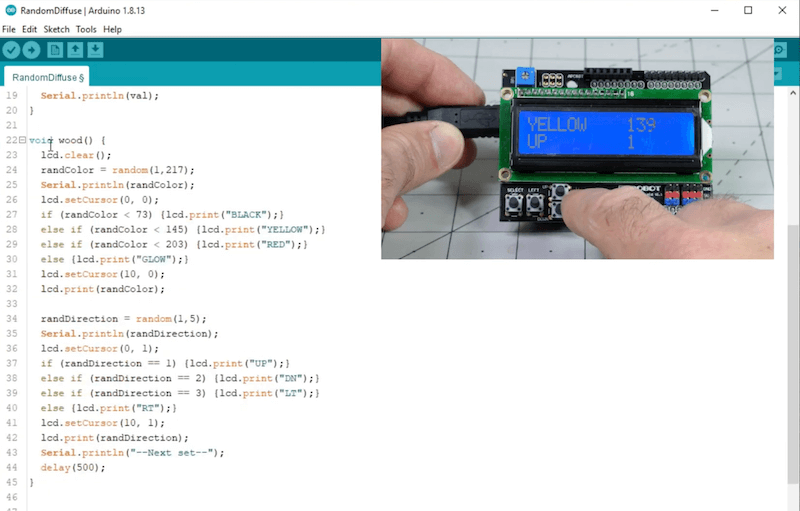
    Humans are generally quite bad at coming up with random patterns, so when Jeremy Cook wanted to make a sound diffuser with angled blocks of wood, he created a “pseudorandomness console” using an Arduino Uno and an LCD shield.

    This helped him with the placement of its 216 angled segments, which are colored in one of four ways, and can face up, down, left, and right to theoretically scatter sound in every direction.

    [youtube https://www.youtube.com/watch?v=Liob_8zWv8k?feature=oembed&w=500&h=281]

    Code for this unique randomization is available on GitHub, with a quick explanation in the video above. You can see the final assembly at around the 4:38 mark, showing a process of applying glue, pressing a button to generate a value, and then placing triangles accordingly.

    Website: LINK

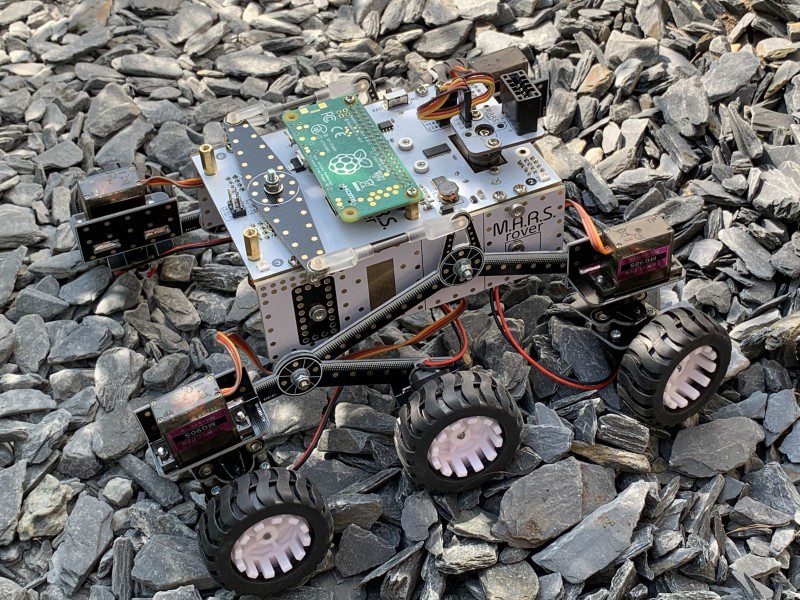
  • Win one of three M.A.R.S. Rover robot kits!

    Win one of three M.A.R.S. Rover robot kits!

    Reading Time: < 1 minute

    Sponsored! Add AI to your project & pi3g will supply the kit

    about 22 hours ago.

    Sponsored! Tell us what you’d like to make! Then pi3g will send five makers an AIY Voice Kit v2, AIY Vision Kit, or Coral USB Accelerator. Plus! Your project can appear in The MagPi

  • Embedding computational thinking skills in our learning resources

    Embedding computational thinking skills in our learning resources

    Reading Time: 3 minutes

    Learning computing is fun, creative, and exploratory. It also involves understanding some powerful ideas about how computers work and gaining key skills for solving problems using computers. These ideas and skills are collected under the umbrella term ‘computational thinking’.

    When we create our online learning projects for young people, we think as much about how to get across these powerful computational thinking concepts as we do about making the projects fun and engaging. To help us do this, we have put together a computational thinking framework, which you can read right now.

    What is computational thinking? A brief summary

    Computational thinking is a set of ideas and skills that people can use to design systems that can be run on a computer. In our view, computational thinking comprises:

    • Decomposition
    • Algorithms
    • Patterns and generalisations
    • Abstraction
    • Evaluation
    • Data

    All of these aspects are underpinned by logical thinking, the foundation of computational thinking.

    What does computational thinking look like in practice?

    In principle, the processes a computer performs can also be carried out by people. (To demonstrate this, computing educators have created a lot of ‘unplugged’ activities in which learners enact processes like computers do.) However, when we implement processes so that they can be run on a computer, we benefit from the huge processing power that computers can marshall to do certain types of activities.

    A group of young people and educators smiling while engaging with a computer

    Computers need instructions that are designed in very particular ways. Computational thinking includes the set of skills we use to design instructions computers can carry out. This skill set represents the ways we can logically approach problem solving; as computers can only solve problems using logical processes, to write programs that run on a computer, we need to use logical thinking approaches. For example, writing a computer program often requires the task the program revolves around to be broken down into smaller tasks that a computer can work through sequentially or in parallel. This approach, called decomposition, can also help people to think more clearly about computing problems: breaking down a problem into its constituent parts helps us understand the problem better.

    Male teacher and male students at a computer

    Understanding computational thinking supports people to take advantage of the way computers work to solve problems. Computers can run processes repeatedly and at amazing speeds. They can perform repetitive tasks that take a long time, or they can monitor states until conditions are met before performing a task. While computers sometimes appear to make decisions, they can only select from a range of pre-defined options. Designing systems that involve repetition and selection is another way of using computational thinking in practice.

    Our computational thinking framework

    Our team has been thinking about our approach to computational thinking for some time, and we have just published the framework we have developed to help us with this. It sets out the key areas of computational thinking, and then breaks these down into themes and learning objectives, which we build into our online projects and learning resources.

    To develop this computational thinking framework, we worked with a group of academics and educators to make sure it is robust and useful for teaching and learning. The framework was also influenced by work from organisations such as Computing At School (CAS) in the UK, and the Computer Science Teachers’ Association (CSTA) in the USA.

    We’ve been using the computational thinking framework to help us make sure we are building opportunities to learn about computational thinking into our learning resources. This framework is a first iteration, which we will review and revise based on experience and feedback.

    We’re always keen to hear feedback from you in the community about how we shape our learning resources, so do let us know what you think about them and the framework in the comments.

    Website: LINK

  • Convert an old cassette player into a synthesizer

    Convert an old cassette player into a synthesizer

    Reading Time: < 1 minute

    Convert an old cassette player into a synthesizer

    Arduino TeamSeptember 22nd, 2020

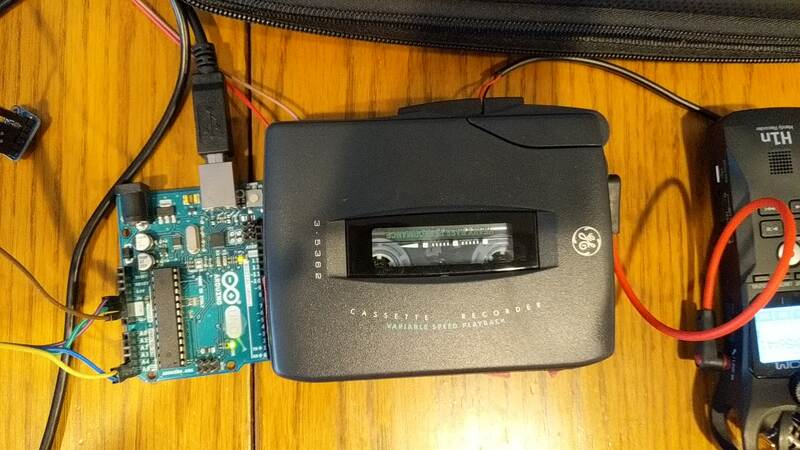
    Cassettes (if you remember those) are normally used to play back music and other audio, but what about using an old Walkman-style tape player as the instrument itself? That’s exactly what this project by Zack Scholl allows you to do, varying the playback speed to modify pitch output.

    It’s a very simple setup, requiring one to hook up wires that enable an Arduino Uno and MCP4725 DAC to adjust the speed using a voltage input. A drone sound is recorded on the tape, which may also involve some hacking depending on your equipment.

    [youtube https://www.youtube.com/watch?v=LdBik_Zlwy0?feature=oembed&w=500&h=281]

    The Walkman then emits this recorded sound, which the Arduino — here using a keyboard and computer browser-based MIDI interface — modulates by increasing or decreasing the playback speed.

    Website: LINK

  • Raspberry Pi powered e-paper display takes months to show a movie

    Raspberry Pi powered e-paper display takes months to show a movie

    Reading Time: 2 minutes

    We loved the filmic flair of Tom Whitwell‘s super slow e-paper display, which takes months to play a film in full.

    Living art

    His creation plays films at about two minutes of screen time per 24 hours, taking a little under three months for a 110-minute film. Psycho played in a corner of his dining room for two months. The infamous shower scene lasted a day and a half.

    Tom enjoys the opportunity for close study of iconic filmmaking, but you might like this project for the living artwork angle. How cool would this be playing your favourite film onto a plain wall somewhere you can see it throughout the day?

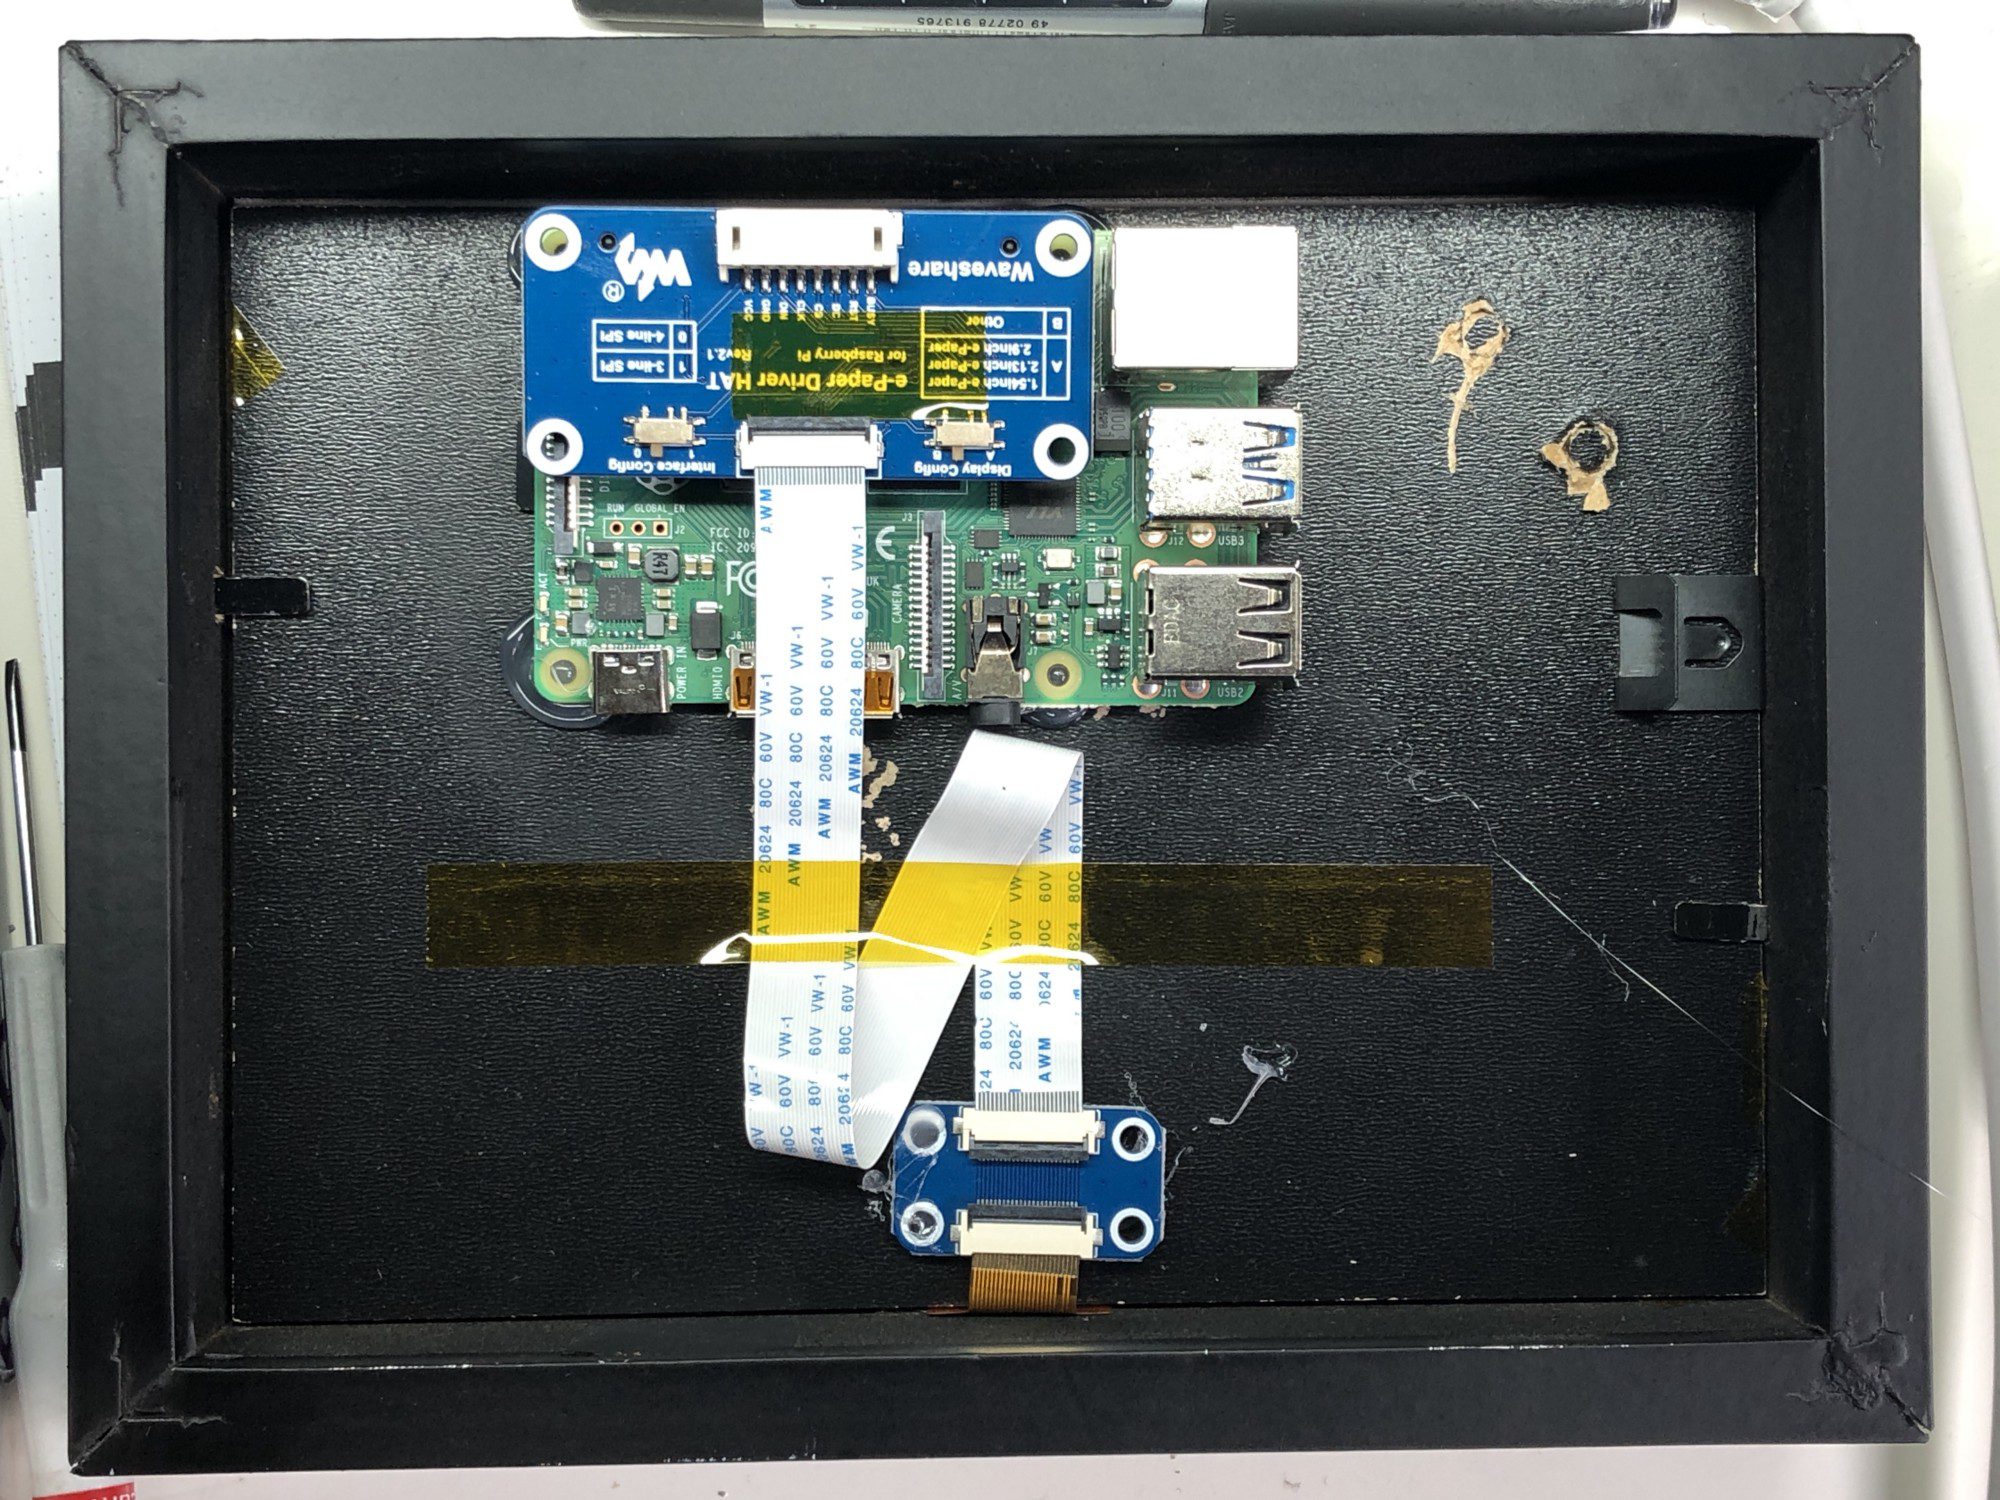
    The Raspberry Pi wearing its e-Paper HAT

    Four simple steps

    Luckily, this is a relatively simple project – no hardcore coding, no soldering required – with just four steps to follow if you’d like to recreate it:

    1. Get the Raspberry Pi working in headless mode without a monitor, so you can upload files and run code
    2. Connect to an e-paper display via an e-paper HAT (see above image; Tom is using this one) and install the driver code on the Raspberry Pi
    3. Use Tom’s code to extract frames from a movie file, resize and dither those frames, display them on the screen, and keep track of progress through the film
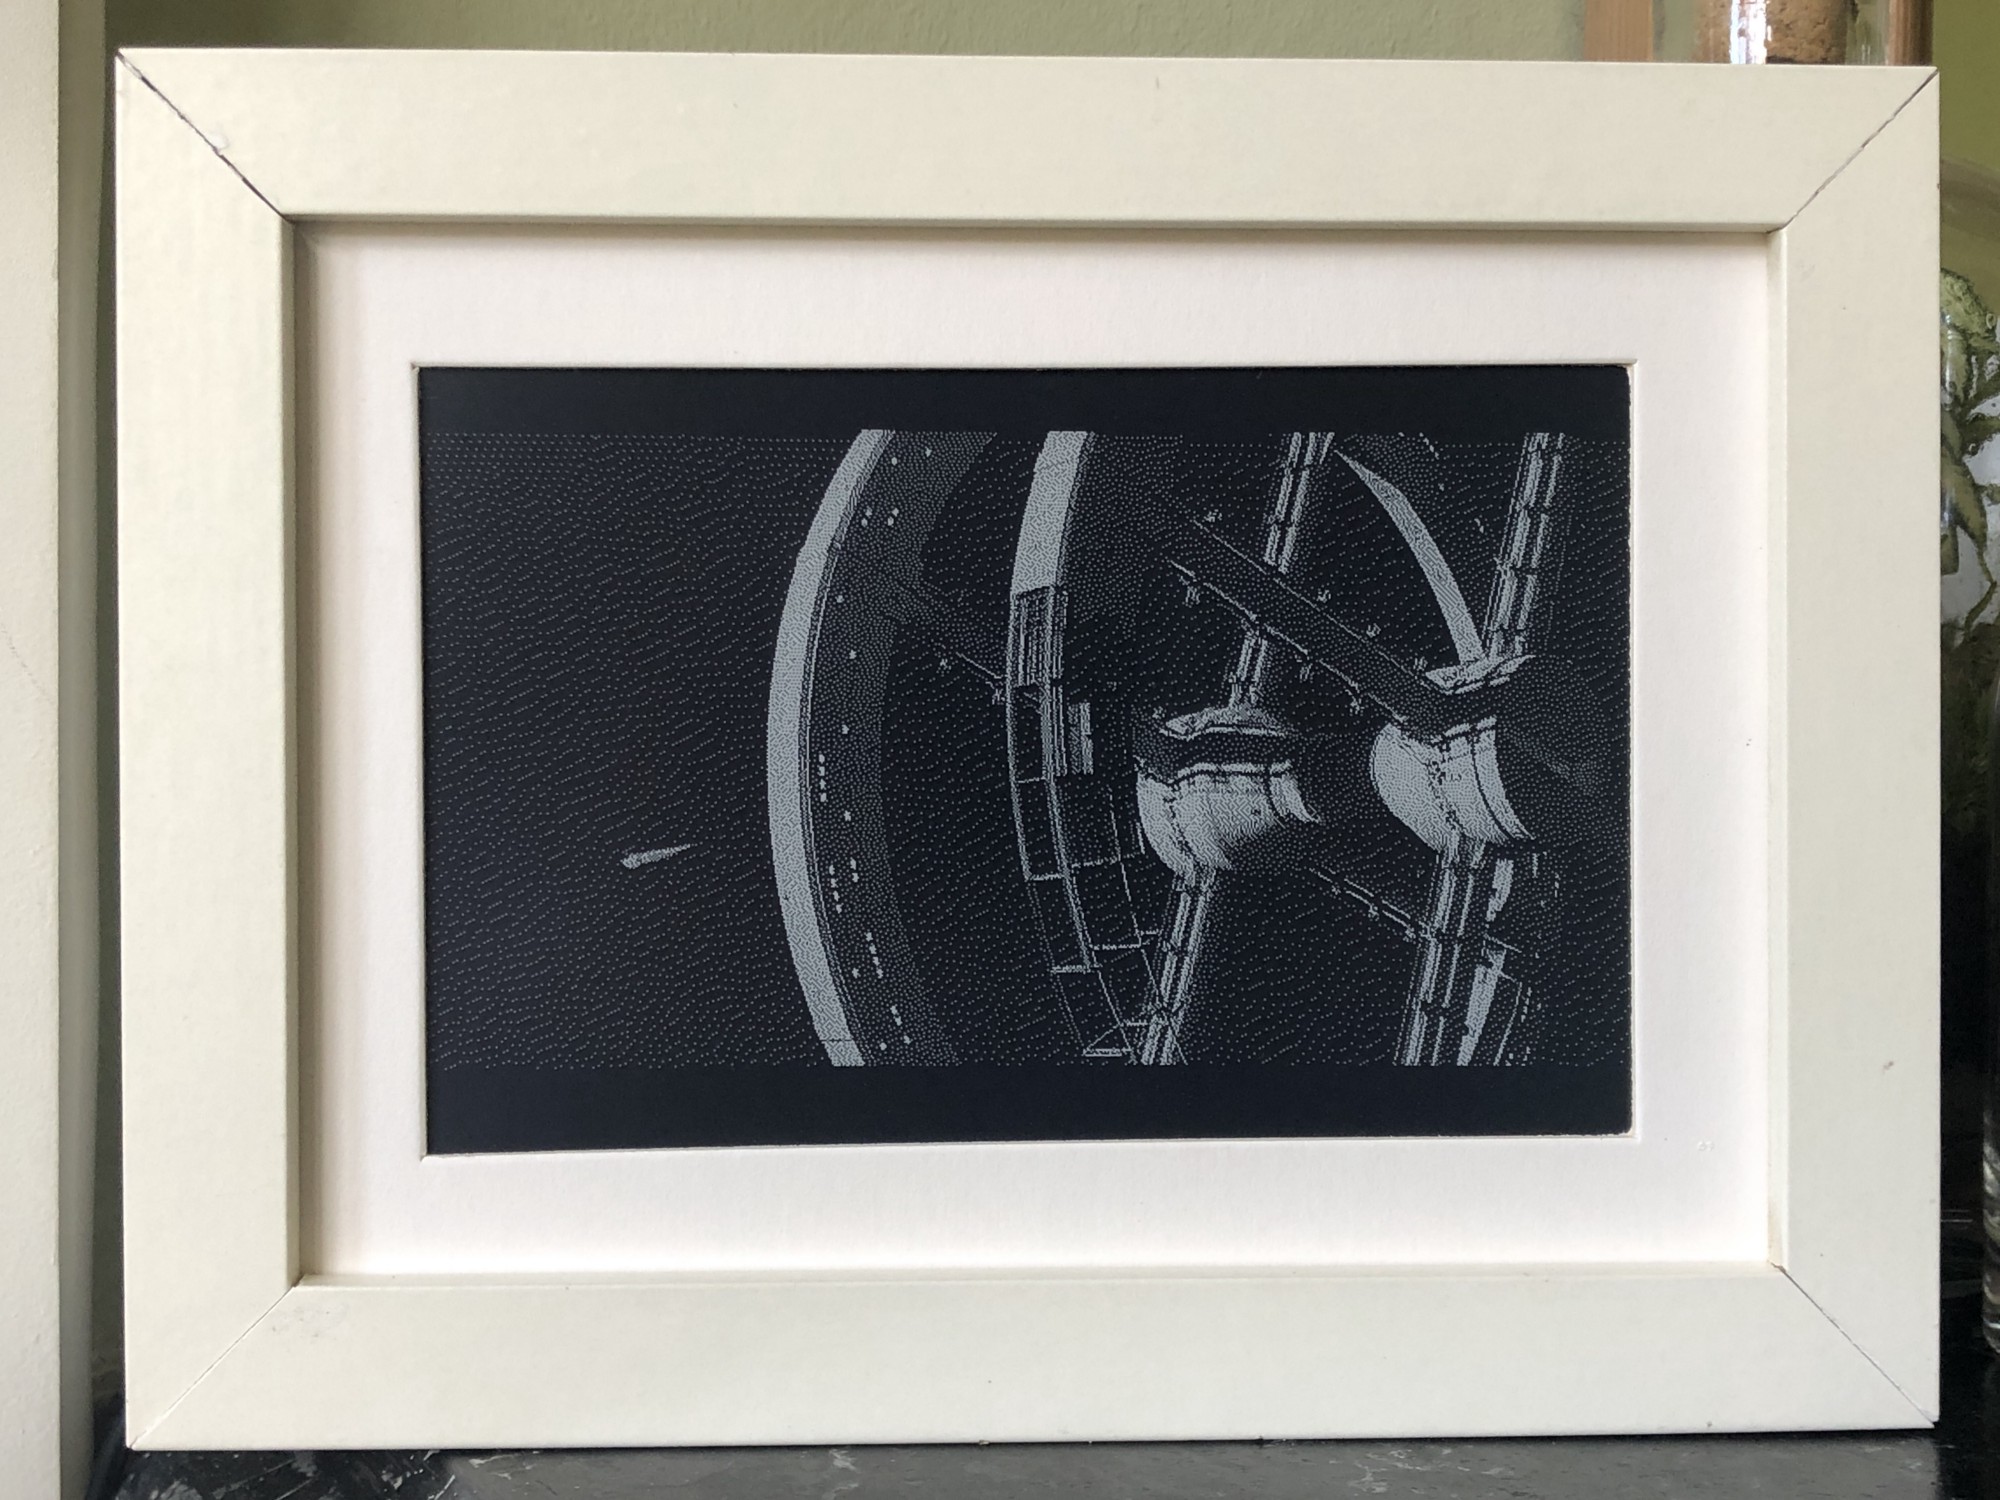
    4. Find some kind of frame to keep it all together (Tom went with a trusty IKEA number)
    Living artwork: the Psycho shower scene playing alongside still artwork in Tom’s home

    Affordably arty

    The entire build cost £120 in total. Tom chose a 2GB Raspberry Pi 4 and a NOOBS 64gb SD Card, which he bought from Pimoroni, one of our approved resellers. NOOBS included almost all the libraries he needed for this project, which made life a lot easier.

    His original post is a dream of a comprehensive walkthrough, including all the aforementioned code.

    2001: A Space Odyssey would take months to play on Tom’s creation

    Head to the comments section with your vote for the creepiest film to watch in ultra slow motion. I came over all peculiar imaging Jaws playing on my living room wall for months. Big bloody mouth opening slooooowly (pales), big bloody teeth clamping down slooooowly (heart palpitations). Yeah, not going to try that. Sorry Tom.

    Website: LINK

  • RadioGlobe

    RadioGlobe

    Reading Time: 3 minutes

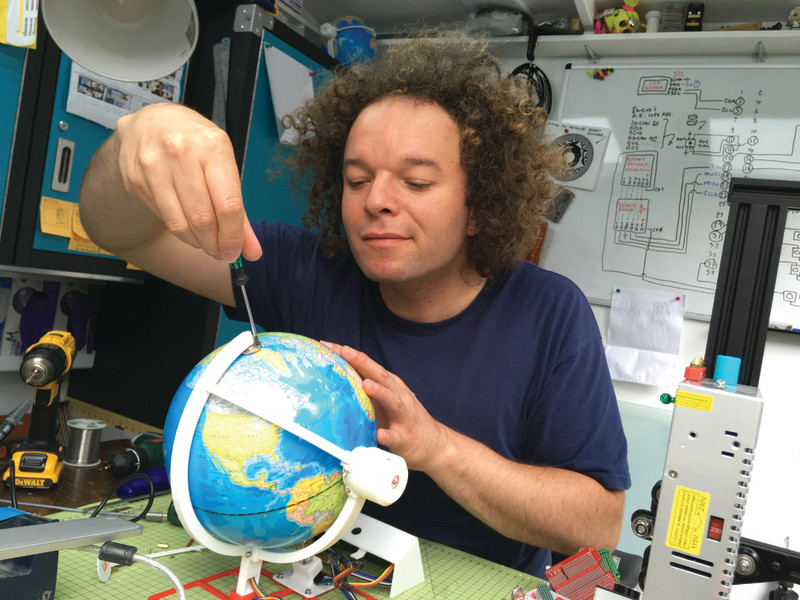
    “It’s a globe which you spin to search web radio stations,” creator Jude Pullen summarises. “It’s really simple to use (even my four-year-old son gets it!), but the tech inside is pretty clever to make it work. It has a very special component called a rotary encoder, which has the ability to know the position of a rotating axis (in this case the longitude and latitude) to an accuracy of 0.3 degrees. It means we can navigate to all the major cities in the world and listen to their local stations.”

    Bringing radio to life

    The idea for the project arose through a combination of concepts that were on Jude’s mind at once. “I think I’d been reading books about space travel, and the emergence of communications while working on a Channel 4 show called David Jason’s Great British Inventions,” he says. “My job was to build a replica of the Bell telephone (using some scrap wood, piping, wires, tracing paper, and vinegar!), and it kinda blew my mind to consider the advent of this technology in the world. This led me to explore a lot of technology we take for granted, like radio. I was discussing this with a friend who then mentioned a website called RadioGarden which allows you to look up all radio stations on Google Earth. It’s a clever mash-up of two powerful technologies, and I guess my ‘build’ on this was to make it physical.”

    Just a few of the tools and items you need to build such a device

    Proof is in the concept

    The world is a big place – Jude tells us there are 44,000 radio stations around the world, and not all of them have great broadcast quality. For what he’s managed to achieve, he seems pretty happy, though.

    “There is a phrase in design called ‘proof of concept’ or in code it’s sometimes called ‘minimum viable product’,” he notes. “RadioGlobe is that in terms of its physical design (3D-printed) and code (V1.0 on GitHub). It works really well in that most of the 2000-odd radio stations do play, but yes there are bugs – in that some radio station links are in countries where broadcast is not perfect, so this can ‘trip up’ the code, and it stops playing.”
    Jude has some updates in the works for the RadioGlobe, some of which sound fairly obvious and genuinely useful, such as a recall function for favourites in case you stumble upon a K-pop station you really like, as well as a Shazam button to identify the latest Austrian hit.

    “This is possible because the project is open source, and the code can be contributed to be total strangers from around the world,” Jude explains. “I love the poetic-loop of this! And this has very much been the best of my experience in working with exciting companies like DesignSpark and Raspberry Pi who have championed new ideas that literally might come from anyone, anywhere in the world. Perhaps we’ll have RadioUniverse one day! I joke, but of course RadioGlobe would have seemed crazy 100 years ago too.”
    Self-proclaimed ‘prototyping expert’ and ‘technologist’ with an impressive resume of work designing concepts for Dyson, Sugru, Lego, DesignSpark, and even TV.

  • These geodesic RGB LED spheres are absolutely stunning

    These geodesic RGB LED spheres are absolutely stunning

    Reading Time: < 1 minute

    These geodesic RGB LED spheres are absolutely stunning

    Arduino TeamSeptember 21st, 2020

    While this project took him over 100 hours to complete, creator Whity claims that his glowing geodesic domes were worth the effort. As seen below, each dome is able to light up its triangular faces, using via WS2812B programmable LEDs embedded inside. The effect is mesmerizing on video, and has to be even more so in person.

    Each device is controlled by an Arduino Nano, along with a MPU-6050 inertial measurement unit. A series of 18650 rechargeable batteries provide power for the numerous lights involved. Magnets hold the two halves of the spheres together for easy access, and the triangles were 3D-printed with hinges to make assembly easier. 

    [youtube https://www.youtube.com/watch?v=rSOMBKVU9OY?feature=oembed&w=500&h=281]

    Additional details are available here if you’d like to attempt this challenging build yourself!
    Website: LINK

  • Raspberry Pi turns retro radio into interactive storyteller

    Raspberry Pi turns retro radio into interactive storyteller

    Reading Time: 3 minutes

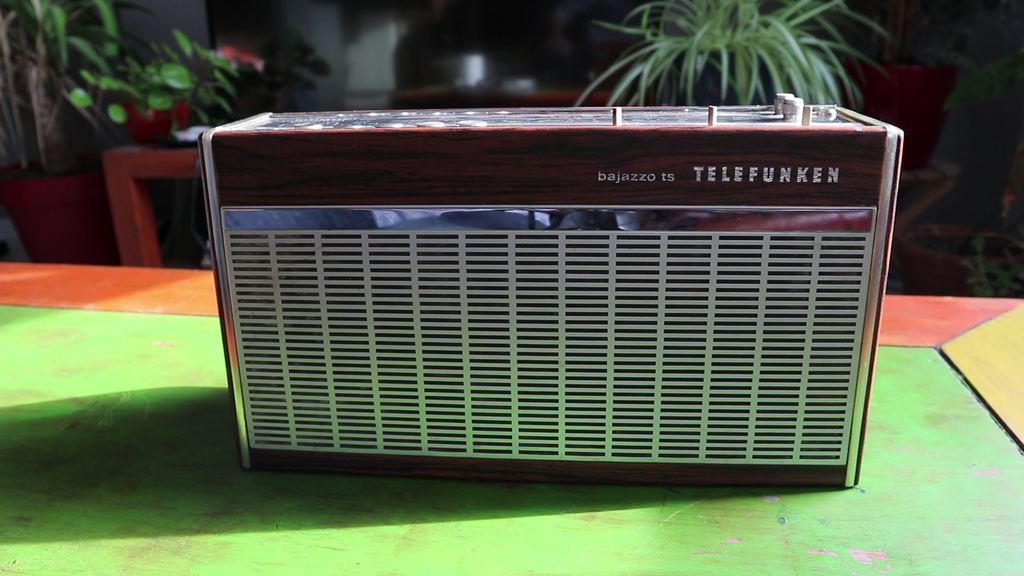
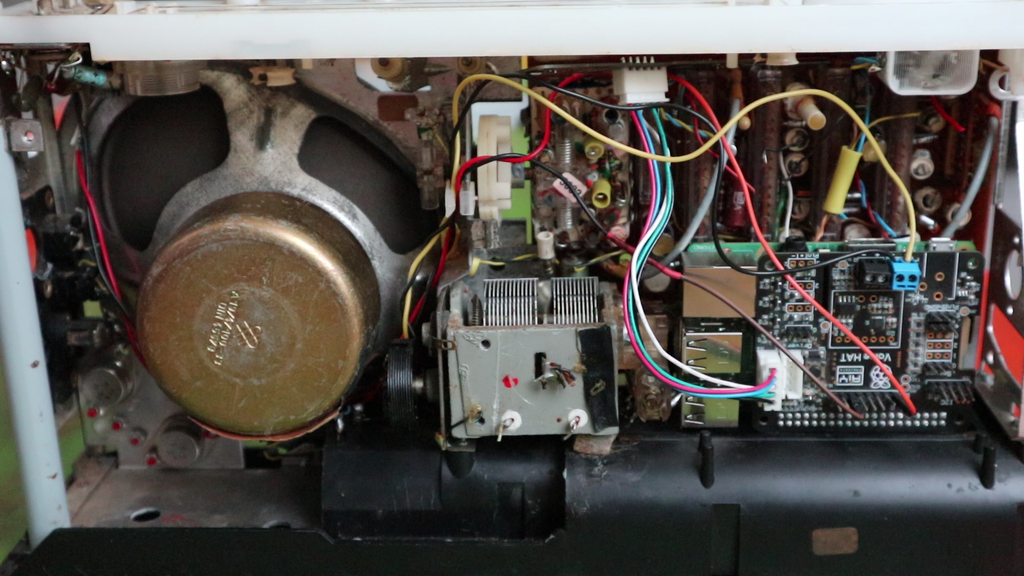
    8 Bits and a Byte created this voice-controllable, interactive, storytelling device, hidden inside a 1960s radio for extra aesthetic wonderfulness.

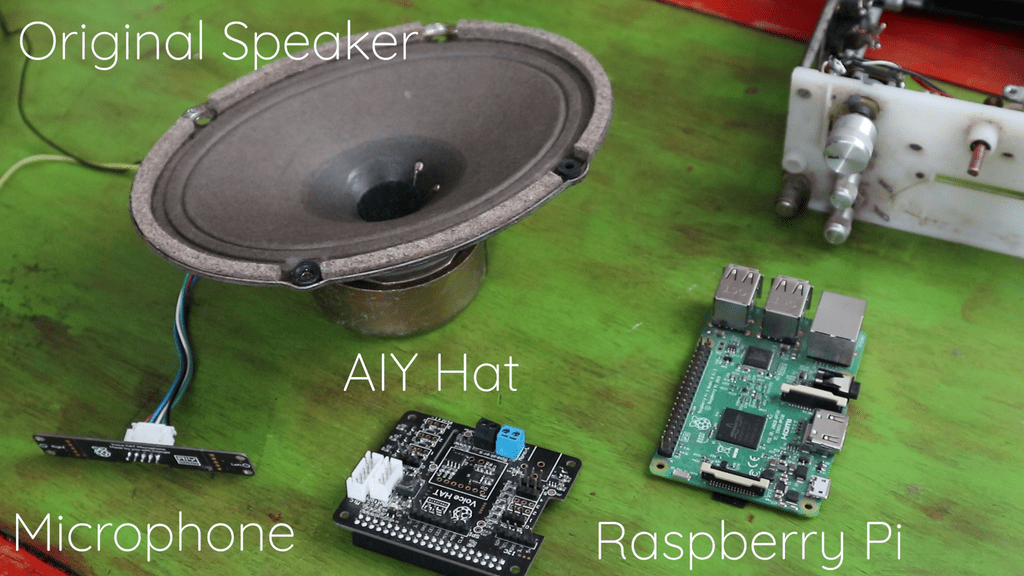
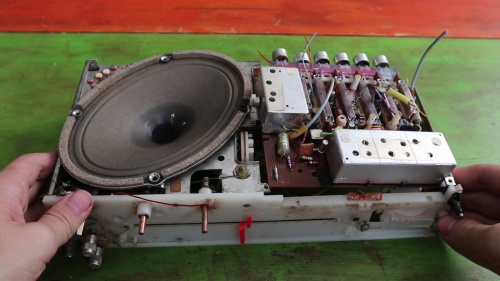
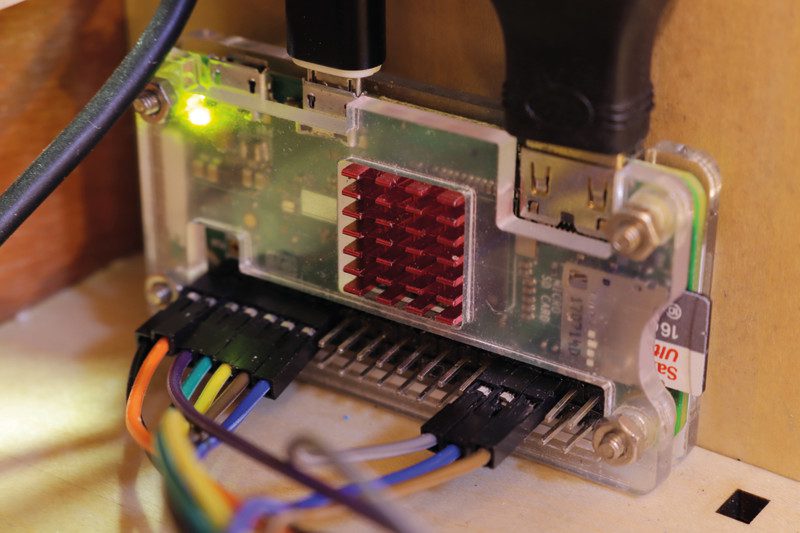
    A Raspberry Pi 3B works with an AIY HAT, a microphone, and the device’s original speaker to run chatbot and speech-to-text artificial intelligence.

    This creature is a Bajazzo TS made by Telefunken some time during the 1960s in West Germany, and this detail inspired the espionage-themed story that 8 Bits and a Byte retrofitted it to tell. Users are intelligence agents whose task is to find the evil Dr Donogood.

    The device works like one of those ‘choose your own adventure’ books, asking you a series of questions and offering you several options. The story unfolds according to the options you choose, and leads you to a choice of endings.

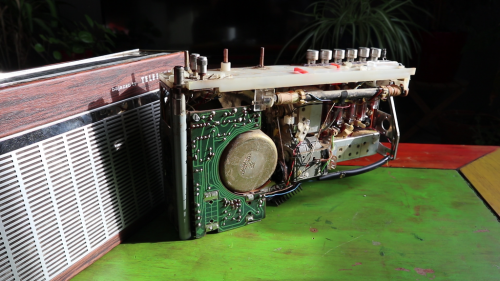
    In with the new (Raspberry Pi tucked in the lower right corner)

    What’s the story?

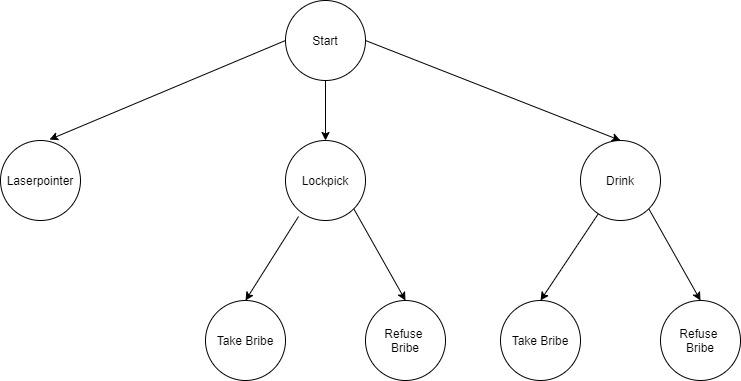
    8 Bits and a Byte designed a decision tree to provide a tight story frame, so users can’t go off on question-asking tangents.

    When you see the ‘choose your own adventure’ frame set out like this, you can see how easy it is to create something that feels interactive, but really only needs to understand the difference between a few phrases: ‘laser pointer’; ‘lockpick’; ‘drink’; take bribe’, and ‘refuse bribe’.

    How does it interact with the user?

    [youtube https://www.youtube.com/watch?v=smQBHZZrqBM?start=362&feature=oembed&w=500&h=281]

    Skip to 03mins 30secs to see the storytelling in action

    Google Dialogflow is a free natural language understanding platform that makes it easy to design a conversational user interface, which is long-speak for ‘chatbot’.

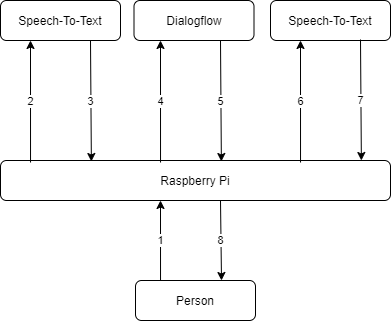
    There are a few steps between the user talking to the radio, and the radio figuring out how to respond. The speech-to-text and chatbot software need to work in tandem. For this project, the data flow runs like so:

    1: The microphone detects that someone is speaking and records the audio.

    2-3: Google AI (the Speech-To-Text box) processes the audio and extracts the words the user spoke as text.

    4-5: The chatbot (Google Dialogflow) receives this text and matches it with the correct response, which is sent back to the Raspberry Pi.

    6-7: Some more artificial intelligence uses this text to generate artificial speech.

    8: This audio is played to the user via the speaker.

    Website: LINK

  • Retro TV MakeCode Arcade Machine

    Retro TV MakeCode Arcade Machine

    Reading Time: 3 minutes

    “I wanted to make a physical arcade machine with an Adafruit Metro M4,” he recalls. “However, [Microsoft MakeCode] does not have a firmware for this exact board… I didn’t know how to do soldering back then, so I didn’t pick ItsyBitsy or Feather M4.” Adafruit projects are almost unheard of in Taiwan, where Alan lives.

    Based in Taiwan, Alan is a former book translator and currently a junior editor in a local programming book publisher. He makes stuff like the Retro TV MakeCode Arcade Machine as a hobby.

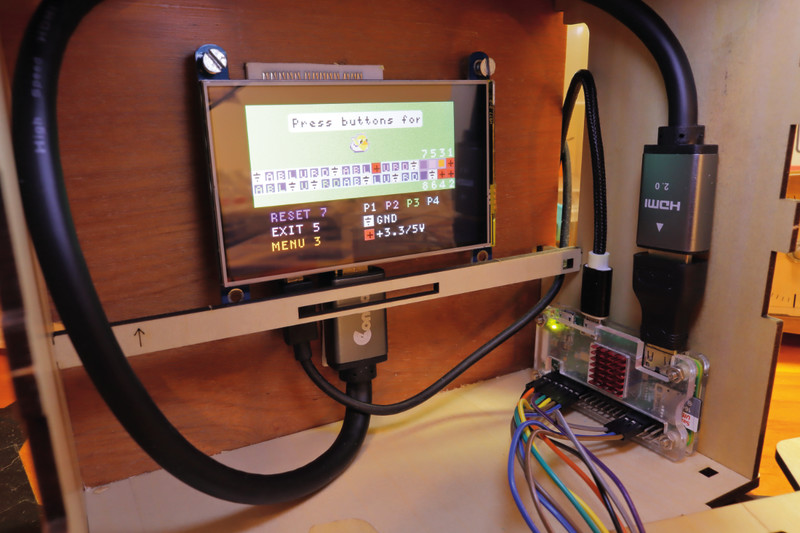
    “Later I found out there’s a firmware for Raspberry Pi Zero, which I happened to have one [of]. Compared to microcontrollers, the firmware for Raspberry Pi Zero is surprisingly easy to install.” Add in a small HDMI LCD screen, some cables, and a button module for game controls, and Alan was nearly there.

    Hidden inside the case, a Raspberry Pi Zero powers the project

    Tiny controls

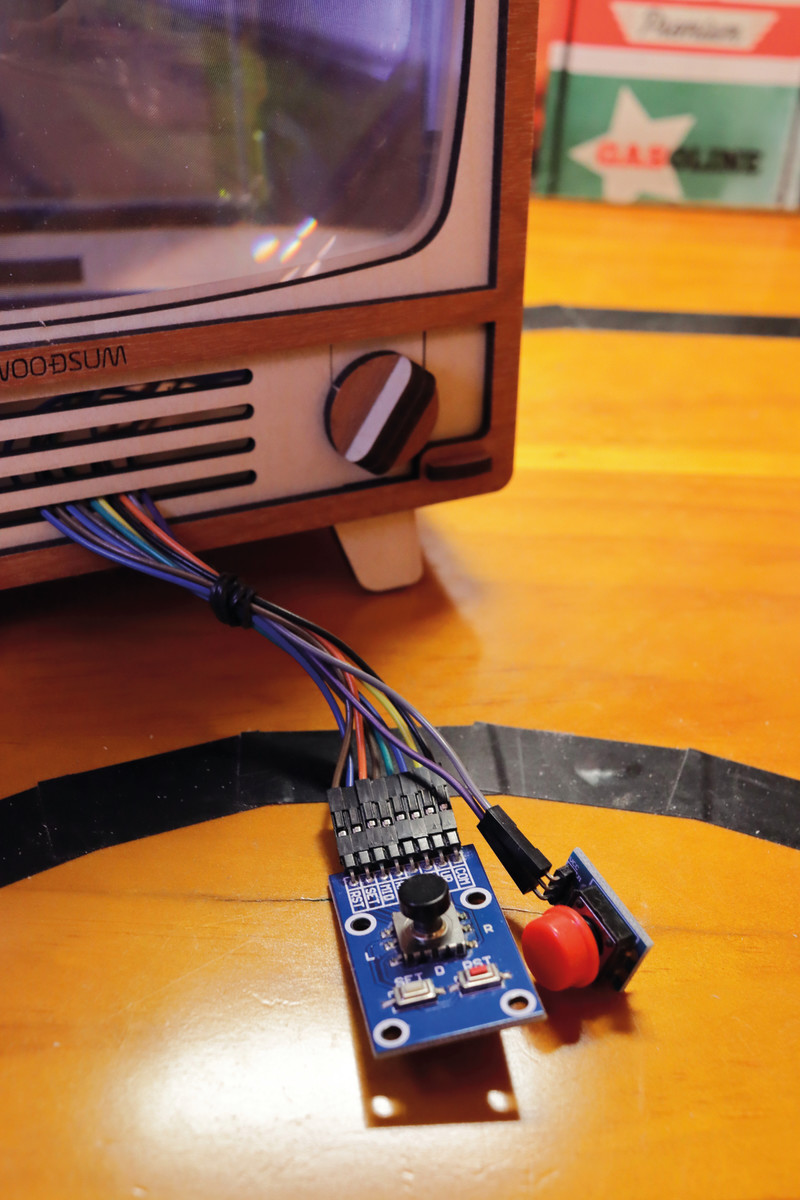
    Not too complicated to put together, Alan explains that once the MakeCode Arcade firmware is loaded, Raspberry Pi Zero will boot to the Arcade system. “Quick and easy. Buttons need to be connected to Raspberry Pi Zero.” For this, he connected a button module with a tiny joystick, adding an extra push-button. “I wish I knew how to make stuff with 3D printing or laser cutting, otherwise I would make my own arcade controller too.”

    It proved a very quick make for Alan. He says most of the time spent was in trying to fit the Raspberry Pi Zero and LCD into the tiny vintage-TV-style wooden housing, and the only coding required involved modifying the config.txt file in the Raspberry Pi firmware to make the LCD screen work.

    A 4-inch LCD is connected via HDMI, but enlarged by the magnifying plate

    Screen magnifier

    The physical appearance of the mini machine was important in order to really capture that crucial retro feel, so Alan chose to house the inner workings inside a WOODSUM 3D Puzzle Smartphone TV. Originally designed for use with smartphones, this case magnifies the screen for watching videos and so on.

    Alan immediately recognised the possibilities, as he shares: “Since small HDMI LCDs for Raspberry Pi [computers] are more or less the same size as smartphone screens, in theory I can use them in the TV box as well, right?”

    What’s more, the effect achieved using this particular case added to the vintage feel. “The magnifying plate of the TV box would enlarge and slightly distort the LCD. It would look a bit like an old cathode-ray tube TV,” explains Alan.

    Now, you may be wondering how easy it is to play games on such a tiny screen, but Alan says he’s found it pretty simple. “MakeCode Arcade is designed for devices with 160×120 TFT displays, which are smaller than my 800×480 LCD. And the magnifying plate makes it look like four times bigger.”

    All in all, Alan has found his make very reliable so far, although he says some games downloaded from the MakeCode Arcade website may crash it: “It’s software compatibility issues I guess; I can avoid them if I am writing and testing my own games.” And, surely a lot of the fun is in writing and testing your own games – why not give it a go?

    The button module is quite tiny, but Alan says it’s fine for playing games

  • Code a GUI live with Digital Making at Home

    Code a GUI live with Digital Making at Home

    Reading Time: < 1 minute

    [youtube https://www.youtube.com/watch?v=gXKclDB9ajs?feature=oembed&w=500&h=281]

    This week, we’re introducing young people around the world to coding GUIs, or graphical user interfaces. Let them tune in this Wednesday at 5.30pm BST / 12.30pm EDT / 10.00pm IST for a fun live stream code-along session with Christina and special guest Martin! They’ll learn about GUIs, can ask us questions, and get to code a painting app.

    For beginner coders, we have our Thursday live stream at 3.30pm PDT / 5.30pm CDT / 6.30pm EDT, thanks to support from Infosys Foundation USA! Christina will share more fun Scratch coding for beginners.

    Now that school is back in session for many young people, we’ve wrapped up our weekly code-along videos. You and your children can continue coding with us during the live stream, whether you join us live or watch the recorded session on-demand. Thanks to everyone who watched our more than 90 videos and 45 hours of digital making content these past month!

    Website: LINK

  • A MKR ZERO-based volume controller for your PC

    A MKR ZERO-based volume controller for your PC

    Reading Time: < 1 minute

    A MKR ZERO-based volume controller for your PC

    Arduino TeamSeptember 18th, 2020

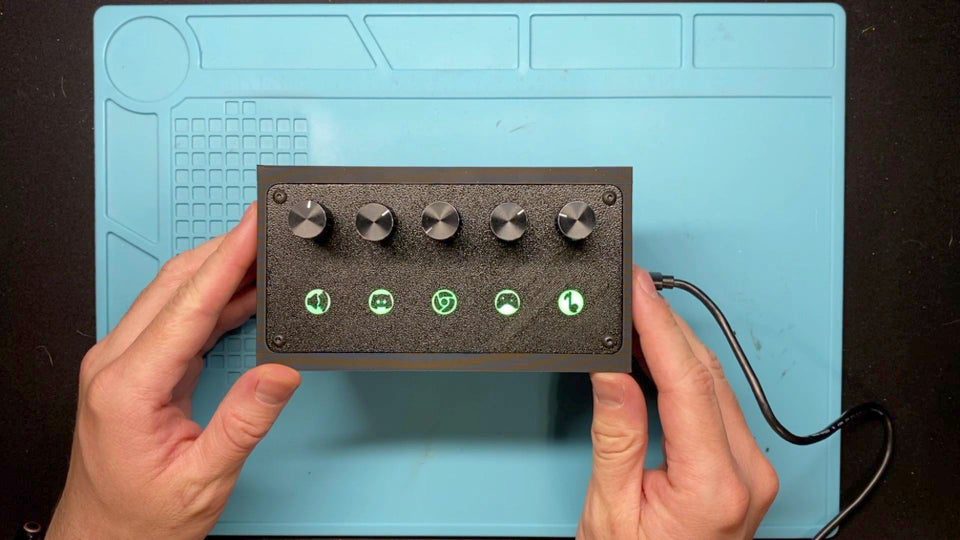
    While some keyboards provide media keys or even knobs to adjust your overall computer sound up and down, often what you really want is the ability to tune program volumes separately. To make this extremely easy, SNR Tech Bytes has come up with a beautifully-designed controller, which runs on the MKR ZERO.

    The device features five encoders to individually tune the master volume, Discord, Chrome, gaming, and Spotify, with the help of software on the PC itself. Encoder button mutes each channel as needed, using NeoPixels below to indicate each status.

    The build is based on the deej volume mixer, and more specifics on this version are available on GitHub.

    [youtube https://www.youtube.com/watch?v=pkEw7x2GMIA?feature=oembed&w=500&h=281]

    Website: LINK