Autor: Maria Richter

  • “Tinkering is an equity issue” | Hello World #14

    “Tinkering is an equity issue” | Hello World #14

    Reading Time: 8 minutes

    In the brand-new issue of Hello World magazine, Shuchi Grover tells us about the limits of constructionism, the value of formative assessment, and why programming can be a source of both joy and angst.

    How much open-ended exploration should there be in computing lessons?

    This is a question at the heart of computer science education and one which Shuchi Grover is delicately diplomatic about in the preface to her new book, Computer Science in K-12: An A-to-Z Handbook on Teaching Programming. The book’s chapters are written by 40 teachers and researchers in computing pedagogy, and Grover openly acknowledges the varying views around discovery-based learning among her diverse range of international authors.

    “I wonder if I want to wade there,” she laughs. “The act of creating a program is in itself an act of creation. So there is hands-on learning quite naturally in the computer science classroom, and mistakes are made quite naturally. There are some things that are so great about computer science education. It lends itself so easily to being hands-on and to celebrating mistakes; debugging is par for the course, and that’s not the way it is in other subjects. The kids can actually develop some very nice mindsets that they can take to other classrooms.”

    Shuchi Grover showing children something on a laptop screen

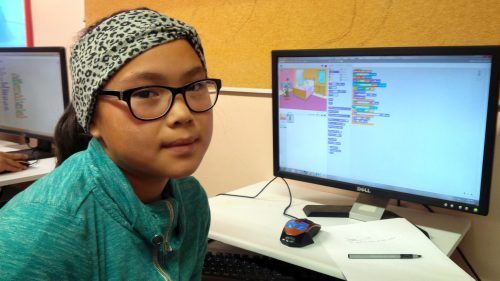
    Grover is a software engineer by training, turned researcher in computer science education. She holds a PhD in learning sciences and technology design from Stanford University, where she remains a visiting scholar. She explains how the beginning of her research career coincided with the advent of the block-based programming language Scratch, now widely used as an introductory programming language for children.

    “Almost two decades ago, I went to Harvard to study for a master’s called technology innovation and education, and it was around that time that I volunteered for robotics workshops at the MIT Media Lab and MIT Museum. Those were pretty transformative for me: I started after-school clubs and facilitated robotics and digital storytelling clubs. In the early 2000s, I was an educational technology consultant, working with teachers on integrating technology. Then Scratch came out, and I started working with teachers on integrating Scratch into languages, arts, and science, all the things that we are doing today.”

    A girl with her Scratch project
    Student Joyce codes in Scratch at her Code Club in Nunavut

    Do her formative experiences at MIT, the birthplace of constructionist theory of student-centred, discovery-based learning, lead her to lean one way or another in the tinkering versus direct instruction debate? “The learning in informal spaces is, of course, very interest-driven. There is no measurement. Children are invited to a space to spend some time after school and do whatever they feel like. There would be kids who would be chatting away while a couple of them designed a robot, and then they would hand over the robot to some others and say, ‘OK, now you go ahead and program it,’ and there were some kids who would just like to hang about.

    “When it comes to formal education, there needs to be more accountability, you want to do right by every child. You have to be more intentional. I do feel that while tinkering and constructionism was a great way to introduce interest-driven projects for informal learning, and there’s a lot to learn from there and bring to the formal learning context, I don’t think it can only be tinkering.”

    “There needs to be more accountability to do right by every child.”

    “Everybody knows that engagement is very important for learning — and this is something that we are learning more about: it’s not just interest, it’s also culture, communities, and backgrounds — but all of this is to say that there is a personal element to the learning process and so engagement is necessary, but it’s not a sufficient condition. You have to go beyond engagement, to also make sure that they are also engaging with the concepts. You want at some point for students to engage with the concept in a way that reveals what their misconceptions might be, and then they end up learning and understanding these things more deeply.

    “You want a robust foundation — after all, our goal for teaching children anything at school is to build a foundation on which they build their college education and career and anything beyond that. If we take programming as a skill, you want them to have a good understanding of it, and so the personal connections are important, but so is the scaffolding.

    “How much scaffolding needs to be done varies from context to context. Even in the same classroom, children may need different levels of scaffolding. It’s a sweet spot; within a classroom a teacher has to juggle so much. And therein lies the challenge of teaching: 30 kids at a time, and every child is different and every child is unique.

    “It’s an equity issue. Some children don’t have the prior experience that sets them up to tinker constructively. After all, tinkering is meant to be purposeful exploration. And so it becomes an issue of who are you privileging with the pedagogy.”

    She points out that each chapter in her book that comes from a more constructionist viewpoint clearly speaks of the need for scaffolding. And conversely, the chapters that take a more structured approach to computing education include elements of student engagement and children creating their own programs. “Frameworks such as Use-Modify-Create and PRIMM just push that open-ended creation a little farther down, making sure that the initial experiences have more guide rails.”

    Approaches to assessment

    Grover is a senior research scientist at Looking Glass Ventures, which in 2018 received a National Science Foundation grant to create Edfinity, a tool to enable affordable access to high-quality assessments for schools and universities.

    In her book, she argues that asking students to write programs as a means of formative assessment has several pitfalls. It is time-consuming for both students and teachers, scoring is subjective, and it’s difficult to get a picture of how much understanding a student has of their code. Did they get their program to work through trial and error? Did they lift code from another student?

    “Formative assessments that give quick feedback are much better. They focus on aspects of the conceptual learning that you want children to have. Multiple-choice questions on code force both the teachers and the children to experience code reading and code comprehension, which are just so important. Just giving children a snippet of code and saying: ‘What does this do? What will be the value of the variable? How many times will this be executed?’ — it goes down to the idea of code tracing and program comprehension.

    “Research has also shown that anything you do in a classroom, the children take as a signal. Going back to the constructionist thing, when you foreground personal interest, there’s a different kind of environment in the classroom, where they’re able to have a voice, they have agency. That’s one of the good things about constructionism.

    “Formative assessment signals to the student what it is that you’re valuing in the learning process. They don’t always understand what it is that they’re expected to learn in programming. Is the goal creating a program that runs? Or is it something else? And so when you administer these little check-ins, they bring more alignment between a teacher’s goals for the learners and the learners’ understanding of those goals. That alignment is important and it can get lost.”

    Grover will present her latest research into assessment at our research seminar series next Tuesday 6 October — sign up to attend and join the discussion.

    The joy and angst of programming

    The title of Grover’s book, which could be thought to imply that computer science education consists solely of teaching students to program, may cause some raised eyebrows.

    What about building robots or devices that interact with the world, computing topics like binary, or the societal impacts of technology? “I completely agree with the statement and the belief that computer science is not just about programming. I myself have been a proponent of this. But in this book I wanted to focus on programming for a couple of reasons. Programming is a central part of the computer science curriculum, at least here in the US, and it is also the part that teachers struggle with the most.

    “I want to show where children struggle and how to help them.”

    “As topics go, programming carries a lot of joy and angst. There is joy in computing, joy when you get it. But when a teacher is encountering this topic for the first time there is a lot of angst, because they themselves may not be understanding things, and they don’t know what it is that the children are not understanding. And there is this entire body of research on novice programming. There are the concepts, the practices, the pedagogies, and the issues of assessment. So I wanted to give the teachers all of that: everything we know about children and programming, the topics to be learnt, where they struggle, how to help them.”

    Computer Science in K-12: An A-to-Z Handbook on Teaching Programming (reviewed in this issue of Hello World) is edited by Shuchi Grover and available now.

    Hear more from Shuchi Grover, and subscribe to Hello World

    We will host Grover at our next research seminar, Tuesday 6 October at 17:00–18:30 BST, where she will present her work on formative assessment.

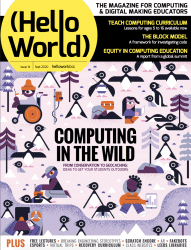
    Hello World is our magazine about all things computing education. It is free to download in PDF format, or you can subscribe and we will send you each new issue straight to your home.

    In issue 14 of Hello World, we have gathered some inspiring stories to help your learners connect with nature. From counting penguins in Antarctica to orienteering with a GPS twist, great things can happen when young people get creative with technology outdoors. You’ll find all this and more in the new issue!

    Educators based in the UK can subscribe to receive print copies for free!

    Website: LINK

  • Raspberry Pi High Quality Camera takes photos through thousands of straws

    Raspberry Pi High Quality Camera takes photos through thousands of straws

    Reading Time: 3 minutes

    Adrian Hanft is our favourite kind of maker: weird. He’s also the guy who invented the Lego camera, 16 years ago. This time, he spent more than a year creating what he describes as “one of the strangest cameras you may ever hear about.”

    What? Looks normal from here. Massive, but normal

    What’s with all the straws?

    OK, here’s why it’s weird: it takes photos with a Raspberry Pi High Quality Camera through a ‘lens’ of tiny drinking straws packed together. 23,248 straws, to be exact, are inside the wooden box-shaped bit of the machine above. The camera itself sits at the slim end of the black and white part. The Raspberry Pi, power bank, and controller all sit on top of the wooden box full of straws.

    Here’s what an image of Yoda looks like, photographed through that many straws:

    Mosaic, but make it techy

    Ground glass lenses

    The concept isn’t as easy as it may look. As you can see from the images below, if you hold up a load of straws, you can only see the light through a few of them. Adrian turned to older technology for a solution, taking a viewfinder from an old camera which had ground glass (which ‘collects’ light) on the surface.

    Left: looking through straws at light with the naked eye
    Right: the same straws viewed through a ground glass lens

    Even though Adrian was completely new to both Raspberry Pi and Python, it only took him a week of evenings and weekends to code the software needed to control the Raspberry Pi High Quality Camera.

    Long story short, on the left is the final camera, with all the prototypes queued up behind it

    An original Nintendo controller runs the show and connects to the Raspberry Pi with a USB adapter. The buttons are mapped to the functions of Adrian’s software.

    [youtube https://www.youtube.com/watch?v=LVWuXccv03I?start=34&feature=oembed&w=500&h=281]

    A super satisfying time-lapse of the straws being loaded

    What does the Nintendo controller do?

    In his original post, Adrian explains what all the buttons on the controller do in order to create images:

    “The Start button launches a preview of what the camera is seeing. The A button takes a picture. The Up and Down buttons increase or decrease the exposure time by 1 second. The Select button launches a gallery of photos so I can see the last photo I took. The Right and Left buttons cycle between photos in the gallery. I am saving the B button for something else in the future. Maybe I will use it for uploading to Dropbox, I haven’t decided yet.”

    Adrian made a Lego mount for the Raspberry Pi camera
    The Lego mount makes it easy to switch between cameras and lenses

    A mobile phone serves as a wireless display so he can keep an eye on what’s going on. The phone communicates with the Raspberry Pi connected to the camera via a VPN app.

    One of the prototypes in action

    Follow Adrian on Instagram to keep up with all the photography captured using the final camera, as well as the prototypes that came before it.

    Website: LINK

  • 13 Raspberry Pis slosh-test space shuttle tanks in zero gravity

    13 Raspberry Pis slosh-test space shuttle tanks in zero gravity

    Reading Time: 3 minutes

    High-school student Eleanor Sigrest successfully crowdfunded her way onto a zero-G flight to test her latest Raspberry Pi-powered project. NASA Goddard engineers peer reviewed Eleanor’s experimental design, which detects unwanted movement (or ‘slosh’) in spacecraft fluid tanks.

    The Raspberry Pi-packed setup

    The apparatus features an accelerometer to precisely determine the moment of zero gravity, along with 13 Raspberry Pis and 12 Raspberry Pi cameras to capture the slosh movement.

    What’s wrong with slosh?

    The Broadcom Foundation shared a pretty interesting minute-by-minute report on Eleanor’s first hyperbolic flight and how she got everything working. But, in a nutshell…

    The full apparatus onboard the zero gravity flight

    You don’t want the fluid in your space shuttle tanks sloshing around too much. It’s a mission-ending problem. Slosh occurs on take-off and also in microgravity during manoeuvres, so Eleanor devised this novel approach to managing it in place of the costly, heavy subsystems currently used on board space craft.

    Eleanor wanted to prove that the fluid inside tanks treated with superhydrophobic and superhydrophilic coatings settled quicker than in uncoated tanks. And she was right: settling times were reduced by 73% in some cases.

    Eleanor at work

    A continuation of this experiment is due to go up on Blue Origin’s New Shepard rocket – and yes, a patent is already pending.

    Curiosity, courage & compromise

    At just 13 years old, Eleanor won the Samueli Prize at the 2016 Broadcom MASTERS for her mastery of STEM principles and team leadership during a rigorous week-long competition. High praise came from Paula Golden, President of Broadcom Foundation, who said: “Eleanor is the epitome of a young woman scientist and engineer. She combines insatiable curiosity with courage: two traits that are essential for a leader in these fields.”

    Eleanor aged 13 with her award-winning project ‘Rockets & Nozzles & Thrust… Oh My’

    That week-long experience also included a Raspberry Pi Challenge, and Eleanor explained: “During the Raspberry Pi Challenge, I learned that sometimes the simplest solutions are the best. I also learned it’s important to try everyone’s ideas because you never know which one might work the best. Sometimes it’s a compromise of different ideas, or a compromise between complicated and simple. The most important thing is to consider them all.”

    Get this girl to Mars already.

    Website: LINK

  • 17000ft | The MagPi 98

    17000ft | The MagPi 98

    Reading Time: 5 minutes

    How do you get internet over three miles up the Himalayas? That’s what the 17000 ft Foundation and Sujata Sahu had to figure out. Rob Zwetsloot reports in the latest issue of the MagPi magazine, out now.

    Living in more urban areas of the UK, it can be easy to take for granted decent internet and mobile phone signal. In more remote areas of the country, internet can be a bit spotty but it’s nothing compared with living up in a mountain.

    Tablet computers are provided that connect to a Raspberry Pi-powered network

    “17000 ft Foundation is a not-for-profit organisation in India, set up to improve the lives of people settled in very remote mountainous hamlets, in areas that are inaccessible and isolated due to reasons of harsh mountainous terrain,” explains its founder, Sujata Sahu. “17000 ft has its roots in high-altitude Ladakh, a region in the desolate cold desert of the Himalayan mountain region of India. Situated in altitudes upwards of 9300 ft and with temperatures dropping to -50°C in inhabited areas, this area is home to indigenous tribal communities settled across hundreds of tiny, scattered hamlets. These villages are remote, isolated, and suffer from bare minimum infrastructure and a centuries-old civilisation unwilling but driven to migrate to faraway cities in search of a better life. Ladakh has a population of just under 300,000 people living across 60,000 km2 of harsh mountain terrain, whose sustenance and growth depends on the infrastructure, resources, and support provided by the government.”

    A huge number of students have already benefited from the program

    The local governments have built schools. However, they don’t have enough resources or qualified teachers to be truly effective, resulting in a problem with students dropping out or having to be sent off to cities. 17000 ft’s mission is to transform the education in these communities.

    High-altitude Raspberry Pi

    “The Foundation today works in over 200 remote government schools to upgrade school infrastructure, build the capacity of teachers, provide better resources for learning, thereby improving the quality of education for its children,” says Sujata. “17000 ft Foundation has designed and implemented a unique solar-powered offline digital learning solution called the DigiLab, using Raspberry Pi, which brings the power of digital learning to areas which are truly off-grid and have neither electricity nor mobile connectivity, helping children to learn better, while also enabling the local administration to monitor performance remotely.”

    Each school is provided with solar power, Raspberry Pi computers to act as a local internet for the school, and tablets to connect to it. It serves as a ‘last mile connectivity’ from a remote school in the cloud, with an app on a teacher’s phone that will download data when it can and then update the installed Raspberry Pi in their school.

    Remote success

    “The solution has now been implemented in 120 remote schools of Ladakh and is being considered to be implemented at scale to cover the entire region,” adds Sujata. “It has now run successfully across three winters of Ladakh, withstanding even the harshest of -50°C temperatures with no failure. In the first year of its implementation alone, 5000 students were enrolled, with over 93% being active. The system has now delivered over 60,000 hours of learning to students in remote villages and improved learning outcomes.”

    Not all children stay in the villages year round

    It’s already helping to change education in the area during the winter. Many villages (and schools) can shut down for up to six months, and families who can’t move away are usually left without a functioning school. 17000 ft has changed this.

    “In the winter of 2018 and 2019, for the first time in a few decades, parents and community members from many of these hamlets decided to take advantage of their DigiLabs and opened them up for their children to learn despite the harsh winters and lack of teachers,” Sujata explains. “Parents pooled in to provide basic heating facilities (a Bukhari – a wood- or dung-based stove with a long pipe chimney) to bring in some warmth and scheduled classes for the senior children, allowing them to learn at their own pace, with student data continuing to be recorded in Raspberry Pi and available for the teachers to assess when they got back. The DigiLab Program, which has been made possible due to the presence of the Raspberry Pi Server, has solved a major problem that the Ladakhis have been facing for years!”

    Some of the village schools go unused in the winter

    How can people help?

    Sujata says, “17000 ft Foundation is a non-profit organisation and is dependent on donations and support from individuals and companies alike. This solution was developed by the organisation in a limited budget and was implemented successfully across over a hundred hamlets. Raspberry Pi has been a boon for this project, with its low cost and its computing capabilities which helped create this solution for such a remote area. However, the potential of Raspberry Pi is as yet untapped and the solution still needs upgrades to be able to scale to cover more schools and deliver enhanced functionality within the school. 17000 ft is very eager to help take this to other similar regions and cover more schools in Ladakh that still remain ignored. What we really need is funds and technical support to be able to reach the good of this solution to more children who are still out of the reach of Ed Tech and learning. We welcome contributions of any size to help us in this project.”

    For donations from outside India, write to sujata.sahu@17000ft.org. Indian citizens can donate through 17000ft.org/donate.

    The MagPi magazine is out now, available in print from the Raspberry Pi Press onlinestore, your local newsagents, and the Raspberry Pi Store, Cambridge.

    You can also download the PDF directly from the MagPi magazine website.

    Subscribers to the MagPi for 12 months get a free Adafruit Circuit Playground, or can choose from one of our other subscription offers, including this amazing limited-time offer of three issues and a book for only £10!

    Website: LINK

  • Embedding computational thinking skills in our learning resources

    Embedding computational thinking skills in our learning resources

    Reading Time: 3 minutes

    Learning computing is fun, creative, and exploratory. It also involves understanding some powerful ideas about how computers work and gaining key skills for solving problems using computers. These ideas and skills are collected under the umbrella term ‘computational thinking’.

    When we create our online learning projects for young people, we think as much about how to get across these powerful computational thinking concepts as we do about making the projects fun and engaging. To help us do this, we have put together a computational thinking framework, which you can read right now.

    What is computational thinking? A brief summary

    Computational thinking is a set of ideas and skills that people can use to design systems that can be run on a computer. In our view, computational thinking comprises:

    • Decomposition
    • Algorithms
    • Patterns and generalisations
    • Abstraction
    • Evaluation
    • Data

    All of these aspects are underpinned by logical thinking, the foundation of computational thinking.

    What does computational thinking look like in practice?

    In principle, the processes a computer performs can also be carried out by people. (To demonstrate this, computing educators have created a lot of ‘unplugged’ activities in which learners enact processes like computers do.) However, when we implement processes so that they can be run on a computer, we benefit from the huge processing power that computers can marshall to do certain types of activities.

    A group of young people and educators smiling while engaging with a computer

    Computers need instructions that are designed in very particular ways. Computational thinking includes the set of skills we use to design instructions computers can carry out. This skill set represents the ways we can logically approach problem solving; as computers can only solve problems using logical processes, to write programs that run on a computer, we need to use logical thinking approaches. For example, writing a computer program often requires the task the program revolves around to be broken down into smaller tasks that a computer can work through sequentially or in parallel. This approach, called decomposition, can also help people to think more clearly about computing problems: breaking down a problem into its constituent parts helps us understand the problem better.

    Male teacher and male students at a computer

    Understanding computational thinking supports people to take advantage of the way computers work to solve problems. Computers can run processes repeatedly and at amazing speeds. They can perform repetitive tasks that take a long time, or they can monitor states until conditions are met before performing a task. While computers sometimes appear to make decisions, they can only select from a range of pre-defined options. Designing systems that involve repetition and selection is another way of using computational thinking in practice.

    Our computational thinking framework

    Our team has been thinking about our approach to computational thinking for some time, and we have just published the framework we have developed to help us with this. It sets out the key areas of computational thinking, and then breaks these down into themes and learning objectives, which we build into our online projects and learning resources.

    To develop this computational thinking framework, we worked with a group of academics and educators to make sure it is robust and useful for teaching and learning. The framework was also influenced by work from organisations such as Computing At School (CAS) in the UK, and the Computer Science Teachers’ Association (CSTA) in the USA.

    We’ve been using the computational thinking framework to help us make sure we are building opportunities to learn about computational thinking into our learning resources. This framework is a first iteration, which we will review and revise based on experience and feedback.

    We’re always keen to hear feedback from you in the community about how we shape our learning resources, so do let us know what you think about them and the framework in the comments.

    Website: LINK

  • Raspberry Pi powered e-paper display takes months to show a movie

    Raspberry Pi powered e-paper display takes months to show a movie

    Reading Time: 2 minutes

    We loved the filmic flair of Tom Whitwell‘s super slow e-paper display, which takes months to play a film in full.

    Living art

    His creation plays films at about two minutes of screen time per 24 hours, taking a little under three months for a 110-minute film. Psycho played in a corner of his dining room for two months. The infamous shower scene lasted a day and a half.

    Tom enjoys the opportunity for close study of iconic filmmaking, but you might like this project for the living artwork angle. How cool would this be playing your favourite film onto a plain wall somewhere you can see it throughout the day?

    The Raspberry Pi wearing its e-Paper HAT

    Four simple steps

    Luckily, this is a relatively simple project – no hardcore coding, no soldering required – with just four steps to follow if you’d like to recreate it:

    1. Get the Raspberry Pi working in headless mode without a monitor, so you can upload files and run code
    2. Connect to an e-paper display via an e-paper HAT (see above image; Tom is using this one) and install the driver code on the Raspberry Pi
    3. Use Tom’s code to extract frames from a movie file, resize and dither those frames, display them on the screen, and keep track of progress through the film
    4. Find some kind of frame to keep it all together (Tom went with a trusty IKEA number)
    Living artwork: the Psycho shower scene playing alongside still artwork in Tom’s home

    Affordably arty

    The entire build cost £120 in total. Tom chose a 2GB Raspberry Pi 4 and a NOOBS 64gb SD Card, which he bought from Pimoroni, one of our approved resellers. NOOBS included almost all the libraries he needed for this project, which made life a lot easier.

    His original post is a dream of a comprehensive walkthrough, including all the aforementioned code.

    2001: A Space Odyssey would take months to play on Tom’s creation

    Head to the comments section with your vote for the creepiest film to watch in ultra slow motion. I came over all peculiar imaging Jaws playing on my living room wall for months. Big bloody mouth opening slooooowly (pales), big bloody teeth clamping down slooooowly (heart palpitations). Yeah, not going to try that. Sorry Tom.

    Website: LINK

  • Raspberry Pi turns retro radio into interactive storyteller

    Raspberry Pi turns retro radio into interactive storyteller

    Reading Time: 3 minutes

    8 Bits and a Byte created this voice-controllable, interactive, storytelling device, hidden inside a 1960s radio for extra aesthetic wonderfulness.

    A Raspberry Pi 3B works with an AIY HAT, a microphone, and the device’s original speaker to run chatbot and speech-to-text artificial intelligence.

    This creature is a Bajazzo TS made by Telefunken some time during the 1960s in West Germany, and this detail inspired the espionage-themed story that 8 Bits and a Byte retrofitted it to tell. Users are intelligence agents whose task is to find the evil Dr Donogood.

    The device works like one of those ‘choose your own adventure’ books, asking you a series of questions and offering you several options. The story unfolds according to the options you choose, and leads you to a choice of endings.

    In with the new (Raspberry Pi tucked in the lower right corner)

    What’s the story?

    8 Bits and a Byte designed a decision tree to provide a tight story frame, so users can’t go off on question-asking tangents.

    When you see the ‘choose your own adventure’ frame set out like this, you can see how easy it is to create something that feels interactive, but really only needs to understand the difference between a few phrases: ‘laser pointer’; ‘lockpick’; ‘drink’; take bribe’, and ‘refuse bribe’.

    How does it interact with the user?

    [youtube https://www.youtube.com/watch?v=smQBHZZrqBM?start=362&feature=oembed&w=500&h=281]

    Skip to 03mins 30secs to see the storytelling in action

    Google Dialogflow is a free natural language understanding platform that makes it easy to design a conversational user interface, which is long-speak for ‘chatbot’.

    There are a few steps between the user talking to the radio, and the radio figuring out how to respond. The speech-to-text and chatbot software need to work in tandem. For this project, the data flow runs like so:

    1: The microphone detects that someone is speaking and records the audio.

    2-3: Google AI (the Speech-To-Text box) processes the audio and extracts the words the user spoke as text.

    4-5: The chatbot (Google Dialogflow) receives this text and matches it with the correct response, which is sent back to the Raspberry Pi.

    6-7: Some more artificial intelligence uses this text to generate artificial speech.

    8: This audio is played to the user via the speaker.

    Website: LINK

  • Code a GUI live with Digital Making at Home

    Code a GUI live with Digital Making at Home

    Reading Time: < 1 minute

    [youtube https://www.youtube.com/watch?v=gXKclDB9ajs?feature=oembed&w=500&h=281]

    This week, we’re introducing young people around the world to coding GUIs, or graphical user interfaces. Let them tune in this Wednesday at 5.30pm BST / 12.30pm EDT / 10.00pm IST for a fun live stream code-along session with Christina and special guest Martin! They’ll learn about GUIs, can ask us questions, and get to code a painting app.

    For beginner coders, we have our Thursday live stream at 3.30pm PDT / 5.30pm CDT / 6.30pm EDT, thanks to support from Infosys Foundation USA! Christina will share more fun Scratch coding for beginners.

    Now that school is back in session for many young people, we’ve wrapped up our weekly code-along videos. You and your children can continue coding with us during the live stream, whether you join us live or watch the recorded session on-demand. Thanks to everyone who watched our more than 90 videos and 45 hours of digital making content these past month!

    Website: LINK

  • Build an arcade cabinet | Hackspace 35

    Build an arcade cabinet | Hackspace 35

    Reading Time: 5 minutes

    Games consoles might be fast and have great graphics, but they’re no match for the entertainment value of a proper arcade machine. In this month’s issue of Hackspace magazine, you’re invited to relive your misspent youth with this huge build project.

    There’s something special about the comforting solidity of a coin-eating video game monolith, and nothing screams retro fun like a full-sized arcade cabinet sitting in the corner of the room. Classic arcade machines can be a serious investment. Costing thousands of pounds and weighing about the same as a giant panda, they’re out of reach for all but the serious collector. Thankfully, you can recreate that retro experience using modern components for a fraction of the price and weight.

    An arcade cabinet is much easier to make than you might expect. It’s essentially a fancy cupboard that holds a monitor, speakers, a computer, a keyboard, and some buttons. You can make your own cabinet using not much more than a couple of sheets of MDF, some clear plastic, and a few cans of spray paint.

    If you want a really authentic-looking cabinet, you can find plenty of plans and patterns online. However, most classic cabinets are a bit bigger than you might remember, occupying almost a square metre of floor space. If you scale that down to approximately 60 cm2, you can make an authentic-looking home arcade cabinet that won’t take over the entire room, and can be cut from just two pieces of 8 × 4 (2440 mm × 1220 mm) MDF. You can download our plans, but these are rough plans designed for you to tweak into your own creation. A sheet of 18 mm MDF is ideal for making the body of the cabinet, and 12 mm MDF works well to fill in the front and back panels. You can use thinner sheets of wood to make a lighter cabinet, but you might find it less sturdy and more difficult to screw into.

    The sides of the machine should be cut from 18 mm MDF, and will be 6 feet high. The sides need to be as close to identical as possible, so mark out the pattern for the side on one piece of 18 mm MDF, and screw the boards together to hold them while you cut. You can avoid marking the sides by placing the screws through the waste areas of the MDF. Keep these offcuts to make internal supports or brackets. You can cut the rest of the pieces of MDF using the project plans as a guide. 

    Why not add a coin machine for extra authenticity

    Attach the side pieces to the base, so that the sides hang lower than the base by an inch or two. If you’re more accomplished at woodworking and want to make the strongest cabinet possible, you can use a router to joint and glue the pieces of wood together. This will make the cabinet very slightly narrower and will affect some measurements, but if you follow the old adage to measure twice and cut once, you should be fine. If you don’t want to do this, you can use large angle brackets and screws to hold everything together. The cabinet will still be strong, and you’ll have the added advantage that you can disassemble it in the future if necessary.

    Keep attaching the 18 mm MDF pieces, starting with the top piece and the rear brace. Once you have these pieces attached, the cabinet should be sturdy enough to start adding the thinner panels. Insetting the panels by about an inch gives the cabinet that retro look, and also hides any design crimes you might have committed while cutting out the side panels.

    The absolute sizing of the cabinet isn’t critical unless you’re trying to make an exact copy of an old machine, so don’t feel too constrained by measuring things down to the millimetre. As long as the cabinet is wide enough to accept your monitor, everything else is moveable and can be adjusted to suit your needs.

    Make it shiny

    You can move onto decoration once the cabinet woodwork is fitted together. This is mostly down to personal preference, although it’s wise to think about which parts of the case will be touched more often, and whether your colour choices will cause any problems with screen reflection. Matt black is a popular choice for arcade cabinets because it’s non-reflective and any surface imperfections are less noticeable with a matt paint finish.

    Aluminium checker plate is a good way of protecting your cabinet from damage, and it can be cut and shaped easily.

    Wallpaper or posters make a great choice for decorating the outside of the cabinet, and they are quick to apply. Just be sure to paste all the way up to the edge, and protect any areas that will be handled regularly with aluminium checker plate or plastic sheet. The edges of MDF sheets can be finished with iron-on worktop edging, or with the chrome detailing tape used on cars. You can buy detailing tape in 12 mm and 18 mm widths, which makes it great for finishing edges. The adhesive tape provided with the chrome edging isn’t always very good, so it’s worth investing in some high-strength, double-sided clear vinyl foam tape.

    You’ve made your cabinet, but it’s empty at the moment. You’re going to add a Raspberry Pi, monitor, speakers, and a panel for buttons and joysticks. To find out how, you can read the full article in HackSpace magazine 35.  

    Get HackSpace magazine 35 Out Now!

    Each month, HackSpace magazine brings you the best projects, tips, tricks and tutorials from the makersphere. You can get it from the Raspberry Pi Press online store, The Raspberry Pi store in Cambridge, or your local newsagents.

    Each issue is free to download from the HackSpace magazine website.

    If you subscribe for 12 months, you get an Adafruit Circuit Playground Express , or can choose from one of our other subscription offers, including this amazing limited-time offer of three issues and a book for only £10!

    Website: LINK

  • How is computing taught in schools around the world?

    How is computing taught in schools around the world?

    Reading Time: 6 minutes

    Around the world, formal education systems are bringing computing knowledge to learners. But what exactly is set down in different countries’ computing curricula, and what are classroom educators teaching? This was the topic of the first in the autumn series of our Raspberry Pi research seminars on Tuesday 8 September.

    A glowing globe floating above an open hand in the dark

    We heard from an international team (Monica McGill , USA; Rebecca Vivian, Australia; Elizabeth Cole, Scotland) who represented a group of researchers also based in England, Malta, Ireland, and Italy. As a researcher working at the Raspberry Pi Foundation, I myself was part of this research group. The group developed METRECC, a comprehensive and validated survey tool that can be used to benchmark and measure developments of the teaching and learning of computing in formal education systems around the world. Monica, Rebecca, and Elizabeth presented how the research group developed and validated the METRECC tool, and shared some findings from their pilot study.

    What’s in a curriculum? Developing a survey tool

    Those of us who work or have worked in school education use the word ‘curriculum’ frequently, although it’s an example of education terminology that means different things in different contexts, and to different people. Following Porter and Smithson (2001)1, we can distinguish between the intended curriculum and the enacted curriculum:

    • Intended curriculum: Policy tools as curriculum standards, frameworks, or guidelines that outline the curriculum teachers are expected to deliver.
    • Enacted curriculum: Actual curricular content in which students engage in the classroom, and adopted pedagogical approaches; for computer science (CS) curricula, this also includes students’ use of technology, physical computing devices, and tools in CS lessons.

    To compare the intended and enacted computing curriculum in as many countries as possible, at particular points in time, the research group Monica, Rebecca, Elizabeth, and I were part of developed the METRECC survey tool.

    A classroom of students in North America

    METRECC stands for MEasuring TeacheREnacted Computing Curriculum. The METRECC survey has 11 categories of questions and is designed to be completed by computing teachers within 35–40 minutes. Following best practice in research, which calls for standardised research instruments, the research group ensured that the survey produces valid, reliable results (meaning that it works as intended) before using it to gather data.

    Using METRECC in a pilot study

    In their pilot study, the research group gathered data from 7 countries. The intended curriculum for each country was determined by examining standards and policies in place for each country/state under consideration. Teachers’ answers in the METRECC survey provided the countries’ enacted curricula. (The complete dataset from the pilot study is publicly available at csedresearch.org, a very useful site for CS education researchers where many surveys are shared.)

    Two girls coding at a computer under supervision of a female teacher

    The researchers then mapped the intended to the enacted curricula to find out whether teachers were actually teaching the topics that were prescribed for them. Overall, the results of the mapping showed that there was a good match between intended and enacted curricula. Examples of mismatches include lower numbers of primary school teachers reporting that they taught visual or symbolic programming, even though the topic did appear on their curriculum.

    A table listing computer science topics
    This table shows computer science topic the METRECC tool asks teachers about, and what percentage of respondents in the pilot study stated that they teach these to their students.

    Another aspect of the METRECC survey allows to measure teachers’ confidence, self-efficacy, and self-esteem. The results of the pilot study showed a relationship between years of experience and CS self-esteem; in particular, after four years of teaching, teachers started to report high self-esteem in relation to computer science. Moreover, primary teachers reported significantly lower self-esteem than secondary teachers did, and female teachers reported lower self-esteem than male teachers did.

    Adapting the survey’s language

    The METRECC survey has also been used in South Asia, namely Bangladesh, Nepal, Pakistan, and Sri Lanka (where computing is taught under ICT). Amongst other things, what the researchers learned from that study was that some of the survey questions needed to be adapted to be relevant to these countries. For example, while in the UK we use the word ‘gifted’ to mean ‘high-attaining’, in the South Asian countries involved in the study, to be ‘gifted’ means having special needs.

    Two girls coding at a computer under supervision of a female teacher

    The study highlighted how important it is to ensure that surveys intended for an international audience use terminology and references that are pertinent to many countries, or that the survey language is adapted in order to make sense in each context it is delivered. 

    Let’s keep this monitoring of computing education moving forward!

    The seminar presentation was well received, and because we now hold our seminars for 90 minutes instead of an hour, we had more time for questions and answers.

    My three main take-aways from the seminar were:

    1. International collaboration is key

    It is very valuable to be able to form international working groups of researchers collaborating on a common project; we have so much to learn from each other. Our Raspberry Pi research seminars attract educators and researchers from many different parts of the world, and we can truly push the field’s understanding forward when we listen to experiences and lessons of people from diverse contexts and cultures.

    2. Making research data publicly available

    Increasingly, it is expected that research datasets are made available in publicly accessible repositories. While this is becoming the norm in healthcare and scientific, it’s not yet as prevalent in computing education research. It was great to be able to publicly share the dataset from the METRECC pilot study, and we encourage other researchers in this field to do the same. 

    3. Extending the global scope of this research

    Finally, this work is only just beginning. Over the last decade, there has been an increasing move towards teaching aspects of computer science in school in many countries around the world, and being able to measure change and progress is important. Only a handful of countries were involved in the pilot study, and it would be great to see this research extend to more countries, with larger numbers of teachers involved, so that we can really understand the global picture of formal computing education. Budding research students, take heed!

    Next up in our seminar series

    If you missed the seminar, you can find the presentation slides and a recording of the researchers’ talk on our seminars page.

    In our next seminar on Tuesday 6 October at 17:00–18:30 BST / 12:00–13:30 EDT / 9:00–10:30 PT / 18:00–19:30 CEST, we’ll welcome Shuchi Grover, a prominent researcher in the area of computational thinking and formative assessment. The title of Shuchi’s seminar is Assessments to improve student learning in introductory CS classrooms. To join, simply sign up with your name and email address.

    Once you’ve signed up, we’ll email you the seminar meeting link and instructions for joining. If you attended this past seminar, the link remains the same.


    1. Andrew C. Porter and John L. Smithson. 2001. Defining, Developing and Using Curriculum Indicators. CPRE Research Reports, 12-2001. (2001)

    Website: LINK

  • Raspberry Pi enables world’s smallest iMac

    Raspberry Pi enables world’s smallest iMac

    Reading Time: 3 minutes

    This project goes a step further than most custom-made Raspberry Pi cases: YouTuber Michael Pick hacked a Raspberry Pi 4 and stuffed it inside this Apple lookalike to create the world’s smallest ‘iMac’.

    Michael designed and 3D printed this miniature ‘iMac’ with what he calls a “gently modified” Raspberry Pi 4 at the heart. Everything you see is hand-painted and -finished to achieve an authentic, sleek Apple look.

    This is “gentle modification” we just mentioned

    Even after all that power tool sparking, this miniature device is capable of playing Minecraft at 1000 frames per second. Michael was set on making the finished project as thin as possible, so he had to slice off a couple of his Raspberry Pi’s USB ports and the Ethernet socket to make everything fit inside the tiny, custom-made case. This hacked setup leaves you with Bluetooth and wireless internet connections, which, as Michael explains in the build video, “if you’re a Mac user, that’s all you’re ever going to need.”

    [youtube https://www.youtube.com/watch?v=wRsn2f6dxCk?feature=oembed&w=500&h=281]

    We love watching 3D printer footage set to relaxed elevator music

    This teeny yet impactful project has even been featured on forbes.com, and that’s where we learned how the tightly packed tech manages to work in such a restricted space:

    “A wireless dongle is plugged into one of the remaining USB ports to ensure it’s capable of connecting to a wireless keyboard and mouse, and a low-profile ribbon cable is used to connect the display to the Raspberry Pi. Careful crimping of cables and adapters ensures the mini iMac can be powered from a USB-C extension cable that feeds in under the screen, while the device also includes a single USB 2 port.”

    Barry Collins | forbes.com

    The maker also told forbes.com that this build was inspired by an iRaspbian software article from tech writer Barry Collins. iRaspbian puts a Mac-like interface — including Dock, Launcher and even the default macOS wallpaper — on top of a Linux distro. We guess Michael just wanted the case to match the content, hey?

    Check out Michael’s YouTube channel for more inexplicably cool builds, such as a one billion volt Thor hammer.

    Website: LINK

  • Global sunrise/sunset Raspberry Pi art installation

    Global sunrise/sunset Raspberry Pi art installation

    Reading Time: 3 minutes

    24h Sunrise/Sunset is a digital art installation that displays a live sunset and sunrise happening somewhere in the world with the use of CCTV.

    Artist Dries Depoorter wanted to prove that “CCTV cameras can show something beautiful”, and turned to Raspberry Pi to power this global project.

    Harnessing CCTV

    The arresting visuals are beamed to viewers using two Raspberry Pi 3B+ computers and an Arduino Nano Every that stream internet protocol (IP) cameras with the use of command line media player OMXPlayer.

    Dual Raspberry Pi power

    The two Raspberry Pis communicate with each other using the MQTT protocol — a standard messaging protocol for the Internet of Things (IoT) that’s ideal for connecting remote devices with a small code footprint and minimal network bandwidth.

    One of the Raspberry Pis checks at which location in the world a sunrise or sunset is happening and streams the closest CCTV camera.

    The insides of the sleek display screen…

    Beam me out, Scotty

    The big screens are connected with the I2C protocol to the Arduino, and the Arduino is connected serial with the second Raspberry Pi. Dries also made a custom printed circuit board (PCB) so the build looks cleaner.

    All that hardware is powered by an industrial power supply, just because Dries liked the style of it.

    Software

    Everything is written in Python 3, and Dries harnessed the Python 3 libraries BeautifulSoup, Sun, Geopy, and Pytz to calculate sunrise and sunset times at specific locations. Google Firebase databases in the cloud help with admin by way of saving timestamps and the IP addresses of the cameras.

    Hardware

    And, lastly, Dries requested a shoutout for his favourite local Raspberry Pi shop Gotron in Ghent.

    If you’d like to check out more of Dries’ work, you can find him online here or on Instagram.

    Website: LINK

  • How young people can run their computer programs in space with Astro Pi

    How young people can run their computer programs in space with Astro Pi

    Reading Time: 4 minutes

    Do you know young people who dream of sending something to space? You can help them make that dream a reality!

    We’re calling on educators, club leaders, and parents to inspire young people to develop their digital skills by participating in this year’s European Astro Pi Challenge.

    [youtube https://www.youtube.com/watch?v=OYGgcevyqWg?feature=oembed&w=500&h=281]

    The European Astro Pi Challenge, which we run in collaboration with the European Space Agency, gives young people in 26 countries* the opportunity to write their own computer programs and run them on two special Raspberry Pi units — called Astro Pis! — on board the International Space Station (ISS).

    This year’s Astro Pi ambassador is ESA astronaut Thomas Pesquet. Thomas will accompany our Astro Pis on the ISS and oversee young people’s programs while they run.

    And the young people need your support to take part in the Astro Pi Challenge!

    A group of young people and educators smiling while engaging with a computer

    Astro Pi is back big-time!

    The Astro Pi Challenge is back and better than ever, with a brand-new website, a cool new look, and the chance for more young people to get involved.

    Logo of the European Astro Pi Challenge

    During the last challenge, a record 6558 Astro Pi programs from over 17,000 young people ran on the ISS, and we want even more young people to take part in our new 2020/21 challenge.

    British ESA astronaut Tim Peake was the ambassador of the first Astro Pi Challenge in 2015.

    So whether your children or learners are complete beginners to programming or have experience of Python coding, we’d love for them to take part!

    You and your young people have two Astro Pi missions to choose from: Mission Zero and Mission Space Lab.

    Mission Zero — for beginners and younger programmers

    In Mission Zero, young people write a simple program to take a humidity reading onboard the ISS and communicate it to the astronauts with a personalised message, which will be displayed for 30 seconds.

    Logo of Mission Zero, part of the European Astro Pi Challenge

    Mission Zero is designed for beginners and younger participants up to 14 years old. Young people can complete Mission Zero online in about an hour following a step-by-step guide. Taking part doesn’t require any previous coding experience or specific hardware.

    All Mission Zero participants who follow the simple challenge rules are guaranteed to have their programs run aboard the ISS in 2021.

    All you need to do is support the young people to submit their programs!

    Mission Zero is a perfect activity for beginners to digital making and Python programming, whether they’re young people at home or in coding clubs, or groups of students or club participants.

    We have made some exciting changes to this year’s Mission Zero challenge:

    1. Participants will be measuring humidity on the ISS instead of temperature
    2. For the first time, young people can enter individually, as well as in teams of up to 4 people

    You have until 19 March 2021 to support your young people to submit their Mission Zero programs!

    Mission Space Lab — for young people with programming experience

    In Mission Space Lab, teams of young people design and program a scientific experiment to run for 3 hours onboard the ISS.

    Logo of Mission Space Lab, part of the European Astro Pi Challenge

    Mission Space Lab is aimed at more experienced or older participants up to 19 years old, and it takes place in 4 phases over the course of 8 months.

    Your role in Mission Space Lab is to mentor a team of participants while they design and write a program for a scientific experiment that increases our understanding of either life on Earth or life in space.

    The best experiments will be deployed to the ISS, and teams will have the opportunity to analyse their experimental data and report on their results.

    You have until 23 October 2020 to register your team and their experiment idea.

    [youtube https://www.youtube.com/watch?v=vCFF_e1rSTI?feature=oembed&w=500&h=281]

    To see the kind of experiments young people have run on the ISS, check out our blog post congratulating the Mission Space Lab 2019/20 winners!

    Get started with Astro Pi today!

    To find out more about taking part in the European Astro Pi Challenge 2020/21, head over to our new and improved astro-pi.org website.

    screenshot of Astro Pi home page

    There, you’ll find everything you need to get started on sending young people’s computer program to space!


    * ESA Member States in 2020: Austria, Belgium, Czech Republic, Denmark, Estonia, Finland, France, Germany, Greece, Hungary, Ireland, Italy, Luxembourg, the Netherlands, Norway, Poland, Portugal, Romania, Spain, Sweden, Switzerland, Latvia, and the United Kingdom. Other participating states: Canada, Latvia, Slovenia, Malta.

    Website: LINK

  • Coding for concentration with Digital Making at Home

    Coding for concentration with Digital Making at Home

    Reading Time: < 1 minute

    [youtube https://www.youtube.com/watch?v=M1GEG1v-YGQ?feature=oembed&w=500&h=281]

    September is wellness month at Digital Making at Home. Your young makers can code along with our educators every week to create projects that focus on their well-being. This week’s brand-new projects are all about helping young people concentrate better.

    Through Digital Making at Home, we invite parents and kids all over the world to code and make along with us and our new projects, videos, and live streams every week.

    This week’s live stream will take place on Wednesday at 5.30pm BST / 12.30pm EDT / 10.00pm IST at rpf.io/home. Let your kids join in so they can progress to the next stage of learning to code with Scratch!

    If you’re in the USA, your young people can join Christina on Thursday at 3.30pm PDT / 5.30pm CDT / 6.30pm EDT for an additional US-time live stream! Christina will show newcomers how to begin coding Scratch projects. Thanks to our partners Infosys Foundation USA for making this new live stream possible.

    Website: LINK

  • What the blink is my IP address?

    What the blink is my IP address?

    Reading Time: 3 minutes

    Picture the scene: you have a Raspberry Pi configured to run on your network, you power it up headless (without a monitor), and now you need to know which IP address it was assigned.

    [youtube https://www.youtube.com/watch?v=XbJ5vT8FvXU?feature=oembed&w=500&h=281]

    Matthias came up with this solution, which makes your Raspberry Pi blink its IP address, because he used a Raspberry Pi Zero W headless for most of his projects and got bored with having to look it up with his DHCP server or hunt for it by pinging different IP addresses.

    How does it work?

    A script runs when you start your Raspberry Pi and indicates which IP address is assigned to it by blinking it out on the device’s LED. The script comprises about 100 lines of Python, and you can get it on GitHub.

    A screen running Python
    Easy peasy GitHub breezy

    The power/status LED on the edge of the Raspberry Pi blinks numbers in a Roman numeral-like scheme. You can tell which number it’s blinking based on the length of the blink and the gaps between each blink, rather than, for example, having to count nine blinks for a number nine.

    Blinking in Roman numerals

    Short, fast blinks represent the numbers one to four, depending on how many short, fast blinks you see. A gap between short, fast blinks means the LED is about to blink the next digit of the IP address, and a longer blink represents the number five. So reading the combination of short and long blinks will give you your device’s IP address.

    You can see this in action at this exact point in the video. You’ll see the LED blink fast once, then leave a gap, blink fast once again, then leave a gap, then blink fast twice. That means the device’s IP address ends in 112.

    What are octets?

    Luckily, you usually only need to know the last three numbers of the IP address (the last octet), as the previous octets will almost always be the same for all other computers on the LAN.

    The script blinks out the last octet ten times, to give you plenty of chances to read it. Then it returns the LED to its default functionality.

    Which LED on which Raspberry Pi?

    On a Raspberry Pi Zero W, the script uses the green status/power LED, and on other Raspberry Pis it uses the green LED next to the red power LED.

    The green LED blinking the IP address (the red power LED is slightly hidden by Matthias’ thumb)

    Once you get the hang of the Morse code-like blinking style, this is a really nice quick solution to find your device’s IP address and get on with your project.

    Website: LINK

  • Turn a watermelon into a RetroPie games console

    Turn a watermelon into a RetroPie games console

    Reading Time: 3 minutes

    OK Cedrick, we don’t need to know why, but we have to know how you turned a watermelon into a games console.

    This has got to be a world first. What started out as a regular RetroPie project has blown up reddit due to the unusual choice of casing for the games console: nearly 50,000 redditors upvoted this build within a week of Cedrick sharing it.

    See, we’re not kidding

    What’s inside?

    • Raspberry Pi 3
    • Jingo Dot power bank (that yellow thing you can see below)
    • Speakers
    • Buttons
    • Small 1.8″ screen

    [youtube https://www.youtube.com/watch?v=dqgjozNR3W8?feature=oembed&w=500&h=281]

    Cedrick’s giggling really makes this video

    Retropie

    While this build looks epic, it isn’t too tricky to make. First, Cedrick flashed the RetroPie image onto an SD card, then he wired up a Raspberry Pi’s GPIO pins to the red console buttons, speakers, and the screen.

    Cedrick achieved audio output by adding just a few lines of code to the config file, and he downloaded libraries for screen configuration and button input. That’s it! That’s all you need to get a games console up and running.

    Cedrick just hanging on the train with his WaterBoy

    Now for the messy bit

    Cedrick had to gut an entire watermelon before he could start getting all the hardware in place. He power-drilled holes for the buttons to stick through, and a Stanley knife provided the precision he needed to get the right-sized gap for the screen.

    A gutted watermelon with gaps cut to fit games console buttons and a screen

    Rather than drill even more holes for the speakers, Cedrick stuck them in place inside the watermelon using toothpicks. He did try hot glue first but… yeah. Turns out fruit guts are impervious to glue.

    Moisture was going to be a huge problem, so to protect all the hardware from the watermelon’s sticky insides, Cedrick lined it with plastic clingfilm.

    Infinite lives

    And here’s how you can help: Cedrick is open to any tips as to how to preserve the perishable element of his project: the watermelon. Resin? Vaseline? Time machine? How can he keep the watermelon fresh?

    Share your ideas on reddit or YouTube, and remember to subscribe to see more of Cedrick’s maverick making in the wild.

    Website: LINK

  • It’s a brand-new NODE Mini Server!

    It’s a brand-new NODE Mini Server!

    Reading Time: 3 minutes

    NODE has long been working to create open-source resources to help more people harness the decentralised internet, and their easily 3D-printed designs are perfect to optimise your Raspberry Pi.

    NODE wanted to take advantage of the faster processor and up to 8GB RAM on Raspberry Pi 4 when it came out last year. Now that our tiny computer is more than capable of being used as as a general Linux desktop system, the NODE Mini Server version 3 has been born.

    [youtube https://www.youtube.com/watch?v=vgjVps6etYA?feature=oembed&w=500&h=281]

    As for previous versions of NODE’s Mini Server, one of their main goals for this new iteration was to package Raspberry Pi in a way which makes it a little easier to use as a regular mini server or computer. In other words, it’s put inside a neat little box with all the ports accessible on one side.

    Black is incredibly slimming

    Slimmer and simpler

    The latest design is simplified compared to previous versions. Everything lives in a 92mm × 92mm enclosure that isn’t much thicker than Raspberry Pi itself.

    The slimmed-down new case comprises a single 3D-printed piece and a top cover made from a custom-designed printed circuit board (PCB) that has four brass-threaded inserts soldered into the corners, giving you a simple way to screw everything together.

    The custom PCB cover

    What are the new features?

    Another goal for version 3 NODE’s Mini Server was to include as much modularity as possible. That’s why this new mini server requires no modifications to the Raspberry Pi itself, thanks to a range of custom-designed adapter boards. How to take advantage of all these new features is explained at this point in NODE’s YouTube video.

    Ooh, shiny and new and new and shiny

    Just like for previous versions, all the files and a list of the components you need to create your own Mini Server are available for free on the NODE website.

    Leave comments on NODE’s YouTube video if you’d like to create and sell your own Mini Server kits or pre-made servers. NODE is totally open to showcasing any add-ons or extras you come up with yourself.

    Looking ahead, making the Mini Server stackable and improving fan circulation is next on NODE’s agenda.

    Website: LINK

  • Give your voice assistant a retro Raspberry Pi makeover

    Give your voice assistant a retro Raspberry Pi makeover

    Reading Time: 2 minutes

    Do you feel weird asking the weather or seeking advice from a faceless device? Would you feel better about talking to a classic 1978 2-XL educational robot from Mego Corporation? Matt over at element14 Community, where tons of interesting stuff happens, has got your back.

    [youtube https://www.youtube.com/watch?v=01OHLAjIXJE?feature=oembed&w=500&h=281]

    Watch Matt explain how the 2-XL toy robot worked before he started tinkering with it. This robot works with Google Assistant on a Raspberry Pi, and answers to a custom wake word.

    Kit list

    Our recent blog about repurposing a Furby as a voice assistant device would have excited Noughties kids, but this one is mostly for our beautiful 1970s- and 1980s-born fanbase.

    Time travel

    2-XL, Wikipedia tells us, is considered the first “smart toy”, marketed way back in 1978, and exhibiting “rudimentary intelligence, memory, gameplay, and responsiveness”. 2-XL had a personality that kept kids’ attention, telling jokes and offering verbal support as they learned.

    Teardown

    Delve under the robot’s armour to see how the toy was built, understand the basic working mechanism, and watch Matt attempt to diagnose why his 2-XL is not working.

    Setting up Google Assistant

    The Matrix Creator daughter board mentioned in the kit list is an ideal platform for developing your own AI assistant. It’s the daughter board’s 8-microphone array that makes it so brilliant for this task. Learn how to set up Google Assistant on the Matrix board in this video.

    What if you don’t want to wake your retrofit voice assistant in the same way as all the other less dedicated users, the ones who didn’t spend hours of love and care refurbishing an old device? Instead of having your homemade voice assistant answer to “OK Google” or “Alexa”, you can train it to recognise a phrase of your choice. In this tutorial, Matt shows you how to set up a custom wake word with your voice assistant, using word detection software called Snowboy.

    Keep an eye on element14 on YouTube for the next instalment of this excellent retrofit project.

    Website: LINK

  • Nandu’s lockdown Raspberry Pi robot project

    Nandu’s lockdown Raspberry Pi robot project

    Reading Time: 2 minutes

    Nandu Vadakkath was inspired by a line-following robot built (literally) entirely from salvage materials that could wait patiently and purchase beer for its maker in Tamil Nadu, India. So he set about making his own, but with the goal of making it capable of slightly more sophisticated tasks.

    [youtube https://www.youtube.com/watch?v=Y5zBCSHnulc?feature=oembed&w=500&h=281]

    “Robot, can you play a song?”

    Hardware

    [youtube https://www.youtube.com/watch?v=7HJzhZYlHhU?feature=oembed&w=500&h=281]

    Robot comes when called, and recognises you as its special human

    Software

    Nandu had ambitious plans for his robot: navigation, speech and listening, recognition, and much more were on the list of things he wanted it to do. And in order to make it do everything he wanted, he incorporated a lot of software, including:

    [youtube https://www.youtube.com/watch?v=KTHh8QU70nc?feature=oembed&w=500&h=281]

    Robot shares Nandu’s astrological chart
    • Python 3
    • virtualenv, a tool for creating isolating virtual Python environments
    • the OpenCV open source computer vision library
    • the spaCy open source natural language processing library
    • the TensorFlow open source machine learning platform
    • Haar cascade algorithms for object detection
    • A ResNet neural network with the COCO dataset for object detection
    • DeepSpeech, an open source speech-to-text engine
    • eSpeak NG, an open source speech synthesiser
    • The MySQL database service

    So how did Nandu go about trying to make the robot do some of the things on his wishlist?

    Context and intents engine

    The engine uses spaCy to analyse sentences, classify all the elements it identifies, and store all this information in a MySQL database. When the robot encounters a sentence with a series of possible corresponding actions, it weighs them to see what the most likely context is, based on sentences it has previously encountered.

    Getting to know you

    The robot has been trained to follow Nandu around but it can get to know other people too. When it meets a new person, it takes a series of photos and processes them in the background, so it learns to remember them.

    Nandu's home made robot
    There she blows!

    Speech

    Nandu didn’t like the thought of a basic robotic voice, so he searched high and low until he came across the MBROLA UK English voice. Have a listen in the videos above!

    Object and people detection

    The robot has an excellent group photo function: it looks for a person, calculates the distance between the top of their head and the top of the frame, then tilts the camera until this distance is about 60 pixels. This is a lot more effort than some human photographers put into getting all of everyone’s heads into the frame.

    Nandu has created a YouTube channel for his robot companion, so be sure to keep up with its progress!

    Website: LINK

  • Explore well-being in September with Digital Making at Home

    Explore well-being in September with Digital Making at Home

    Reading Time: < 1 minute

    [youtube https://www.youtube.com/watch?v=5Eh1KN_lElg?feature=oembed&w=500&h=281]

    September is wellness month at Digital Making at Home. Your young makers can code along with our educators every week to create projects which focus on their well-being. This week’s brand new projects are all about embracing the things that make you feel calm. Go check them out!

    Through Digital Making at Home, we invite parents and kids all over the world to code and make along with us and our new projects, videos, and live streams every week.

    This week’s live stream will take place on Wednesday at 5.30pm BST / 12.30pm EDT / 10.00pm IST at rpf.io/home. Let your kids join in so they can progress to the next stage of learning to code with Scratch!

    Website: LINK

  • Recreate Q*bert’s cube-hopping action | Wireframe #42

    Recreate Q*bert’s cube-hopping action | Wireframe #42

    Reading Time: 4 minutes

    Code the mechanics of an eighties arcade hit in Python and Pygame Zero. Mark Vanstone shows you how

    Players must change the colour of every cube to complete the level.

    Late in 1982, a funny little orange character with a big nose landed in arcades. The titular Q*bert’s task was to jump around a network of cubes arranged in a pyramid formation, changing the colours of each as they went. Once the cubes were all the same colour, it was on to the next level; to make things more interesting, there were enemies like Coily the snake, and objects which helped Q*bert: some froze enemies in their tracks, while floating discs provided a lift back to the top of the stage.

    Q*bert was designed by Warren Davis and Jeff Lee at the American company Gottlieb, and soon became such a smash hit that, the following year, it was already being ported to most of the home computer platforms available at the time. New versions and remakes continued to appear for years afterwards, with a mobile phone version appearing in 2003. Q*bert was by far Gottlieb’s most popular game, and after several changes in company ownership, the firm is now part of Sony’s catalogue – Q*bert’s main character even made its way into the 2015 film, Pixels.

    Q*bert uses isometric-style graphics to draw a pseudo-3D display – something we can easily replicate in Pygame Zero by using a single cube graphic with which we make a pyramid of Actor objects. Starting with seven cubes on the bottom row, we can create a simple double loop to create the pile of cubes. Our Q*bert character will be another Actor object which we’ll position at the top of the pile to start. The game screen can then be displayed in the draw() function by looping through our 28 cube Actors and then drawing Q*bert.

    Our homage to Q*bert. Try not to fall into the terrifying void.

    We need to detect player input, and for this we use the built-in keyboard object and check the cursor keys in our update() function. We need to make Q*bert move from cube to cube so we can move the Actor 32 pixels on the x-axis and 48 pixels on the y-axis. If we do this in steps of 2 for x and 3 for y, we will have Q*bert on the next cube in 16 steps. We can also change his image to point in the right direction depending on the key pressed in our jump() function. If we use this linear movement in our move() function, we’ll see the Actor go in a straight line to the next block. To add a bit of bounce to Q*bert’s movement, we add or subtract (depending on the direction) the values in the bounce[] list. This will make a bit more of a curved movement to the animation.

    Now that we have our long-nosed friend jumping around, we need to check where he’s landing. We can loop through the cube positions and check whether Q*bert is over each one. If he is, then we change the image of the cube to one with a yellow top. If we don’t detect a cube under Q*bert, then the critter’s jumped off the pyramid, and the game’s over. We can then do a quick loop through all the cube Actors, and if they’ve all been changed, then the player has completed the level. So those are the basic mechanics of jumping around on a pyramid of cubes. We just need some snakes and other baddies to annoy Q*bert – but we’ll leave those for you to add. Good luck!

    Here’s Mark’s code for a Q*bert-style, cube-hopping platform game. To get it running on your system, you’ll need to install Pygame Zero. And to download the full code and assets, head here.

    Get your copy of Wireframe issue 42

    You can read more features like this one in Wireframe issue 42, available directly from Raspberry Pi Press — we deliver worldwide.

    And if you’d like a handy digital version of the magazine, you can also download issue 42 for free in PDF format.

    Make sure to follow Wireframe on Twitter and Facebook for updates and exclusive offers and giveaways. Subscribe on the Wireframe website to save up to 49% compared to newsstand pricing!

    Website: LINK

  • Raspberry Pi retro player

    Raspberry Pi retro player

    Reading Time: 2 minutes

    We found this project at TeCoEd and we loved the combination of an OLED display housed inside a retro Argus slide viewer. It uses a Raspberry Pi 3 with Python and OpenCV to pull out single frames from a video and write them to the display in real time.​

    TeCoEd names this creation the Raspberry Pi Retro Player, or RPRP, or – rather neatly – RP squared. The Argus viewer, he tells us, was a charity-shop find that cost just 50p.  It sat collecting dust for a few years until he came across an OLED setup guide on hackster.io, which inspired the birth of the RPRP.

    [youtube https://www.youtube.com/watch?v=sOkLrHYF0rQ?feature=oembed&w=500&h=281]

    Timelapse of the build and walk-through of the code

    At the heart of the project is a Raspberry Pi 3 which is running a Python program that uses the OpenCV computer vision library.  The code takes a video clip and breaks it down into individual frames. Then it resizes each frame and converts it to black and white, before writing it to the OLED display. The viewer sees the video play in pleasingly retro monochrome on the slide viewer.

    Tiny but cute, like us!

    TeCoEd ran into some frustrating problems with the OLED display, which, he discovered, uses the SH1106 driver, rather than the standard SH1306 driver that the Adafruit CircuitPython library expects. Many OLED displays use the SH1306 driver, but it turns out that cheaper displays like the one in this project use the SH1106. He has made a video to spare other makers this particular throw-it-all-in-the-bin moment.

    [youtube https://www.youtube.com/watch?v=LdOKXUDw2NY?feature=oembed&w=500&h=281]

    Tutorial for using the SH1106 driver for cheap OLED displays

    If you’d like to try this build for yourself, here’s all the code and setup advice on GitHub.

    Wiring diagram

    TeCoEd is, as ever, our favourite kind of maker – the sharing kind! He has collated everything you’ll need to get to grips with OpenCV, connecting the SH1106 OLED screen over I2C, and more. He’s even told us where we can buy the OLED board.

    Website: LINK