

For part I of this guide to tools every maker should have, see here.
Warning
Some of these tools use mains electricity and heated parts. Always follow connection instructions and never leave heated elements unattended.
Cutting, trimming and coverings
26. Card trimmer
A card trimmer will enable you to cut crisp straight lines in paper or thin card. It’s much quicker than a ruler and craft knife. Small ones are good for trimming photos, and a good-quality trimmer will last for years.
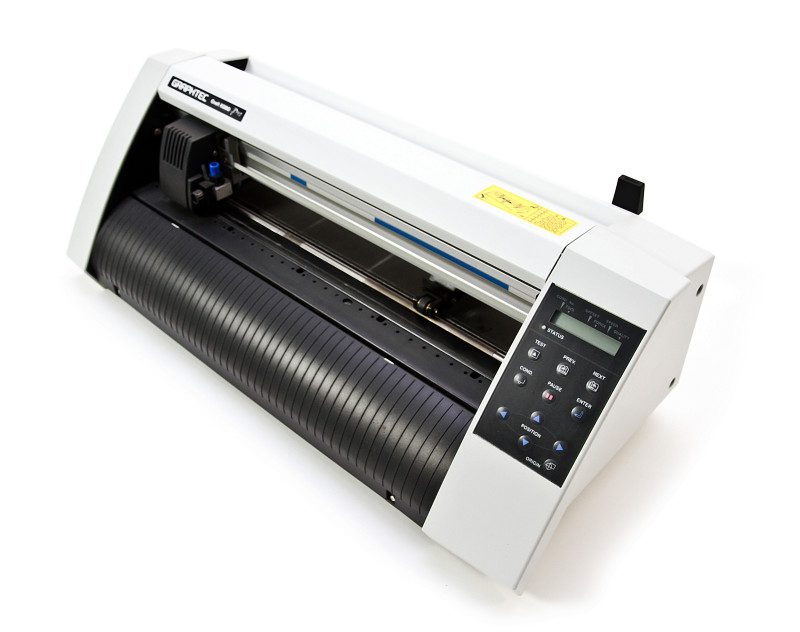
27. Robotic craft cutter
A robotic craft cutter is very much like a plotter, but has a knife instead of a pen. They can cut very intricate designs out of paper and fairly thick card. They can be a bit temperamental and often need a sticky carrier sheet to work well.

28. Laser cutter or engraver
Laser cutters and engravers fire a laser at a material to either cut through it or to leave a mark or indent on the surface, depending on the intensity of the laser. Very effective for cutting irregular wooden shapes.
29. Laminator
Lamination is the process of coating a material with a plastic film. This protects the material from moisture and other damage. It also makes the material thicker. Plastic laminate comes in various thicknesses and surface finishes.

30. Conductive paint
Generally coloured black and supplied in a tube, conductive paint can be used to draw electrical circuits on paper or card, or to improve poor connections between components and even to create touch-sensitive areas on materials. Dries in a few minutes.

31. Acrylic and thermoplastic sheet
Acrylic plastic sheeting is very tough and can be cut using a saw or CNC router, whereas thermoplastic sheets are malleable when heated with a heat gun. Once cool again, thermoplastic retains its new shape.
32. Polymorphic plastic
This material is usually supplied as granules or beads. You can heat them up in boiling water and they will clump together in a mass. While still warm, you can mould the plastic before it sets hard in ten minutes or so.

33. Aluminium foil
Available from convenience stores and supermarkets, aluminium foil can be used as a conductor in a circuit, as shielding to reduce electromagnetic interference, and also to reflect light and heat either away from or towards an area.
Tools for connecting electronics
34. GPIO ruler/chart
GPIO (general-purpose input/output) pins are the interface between your Raspberry Pi and electronic components. Until you learn which pin is which, you’ll need a guide. There are several GPIO rulers and guides available to make life easier.

35. Header connector
For some projects, you may want to connect a HAT or pHAT to your Raspberry Pi, but not place it right on top of the board. In this case, a female-to-male 40-way ribbon connector enables you to extend the reach of the GPIO pins.
36. Jumper wires
Jumper wires connect Raspberry Pi GPIO pins to electronic components. Use them with a breadboard to prototype your circuit, or solder them directly to components. Be sure to get a variety of different colours to make your project easier to understand.

Tools for soldering
37. Desoldering kit
This equipment enables you to clean melted solder from components on a printed circuit board, allowing their removal or replacement.

38. Soldering station
A handy stand to place a soldering iron while it is still plugged in and hot. The sponge should be wet to clean the end of the iron.
39. Soldering iron
An absolute necessity for soldering or desoldering components onto printed circuit boards. For detailed work, an iron with a pointed end is best.
40. Third hand tool
Usually has a solid, heavy base with jointed arms with clips or holders at the end, and a magnifying glass for working on small components.
41. Multimeter
You need to be able to measure current, resistance, and voltage in your circuits. Digital multimeters can cost as little as £10.

42. Gorilla Glue
Similar to superglue, but supplied with a brush to apply it, Gorilla Glue sticks most materials and very good for 3D-printed parts. Usually takes around half an hour to dry.

43. Nuts, bolts & screws
Having a good range of sizes and shapes of nuts, bolts, and screws is absolutely necessary for making anything that you are not going to glue. Keep a jar full of spares.

44. Sticky tape
For temporarily holding things in place or insulating wires. You can also use tape for wrapping handles of tools. Also good for removing cat fur from jumpers.

45. Blu Tack
Usually used for keeping posters on walls, but can also be used for holding components in place while soldering. It also rubs out pencil marks if you don’t have an eraser.
46. Power bank/batteries
Most maker projects need power, so it is a good idea to have a range of battery holders. Power banks for recharging phones can also be used for 5V supplies.

47. 3D creation software
You may want to visualise your build before starting, and there are many 3D software packages to help you for free, like Blender; or with free trial versions, such as SketchUp.

48. Fritzing
When you have completed your project, you may want to document how you did it. Fritzing is a great program for laying out circuit diagrams.

49. Paper clips
Can be used to connect components, clean out small nooks and crannies, or hold materials in place. Apparently, you can pick locks with them too!
50. Documentation
One of the most important tools you will use for just about any maker project is reference material. Your Raspberry Pi may have come with some tips and hints about making, and many kits have worksheets and Frequently Asked Questions sections with them.
Also, make best use of the online resources that detail other people’s experiences: like Stack Overflow for information about any technical subject; blogs such as modmypi.com, recantha.co.uk, and blog.pimoroni.com; and of course the Raspberry Pi site and magazines. If you’re stuck getting something to work, it’s likely someone else has had the same problem!
